
Turning a single succulent leaf or a piece of stem into a whole new plant is a pretty magical process, and it's surprisingly easy. You just take a cutting, give it a little time to heal over, and then set it on some soil. Before you know it, tiny roots will appear, and you've got a new plant on your hands—for free.
Why Propagating Succulents Is So Rewarding
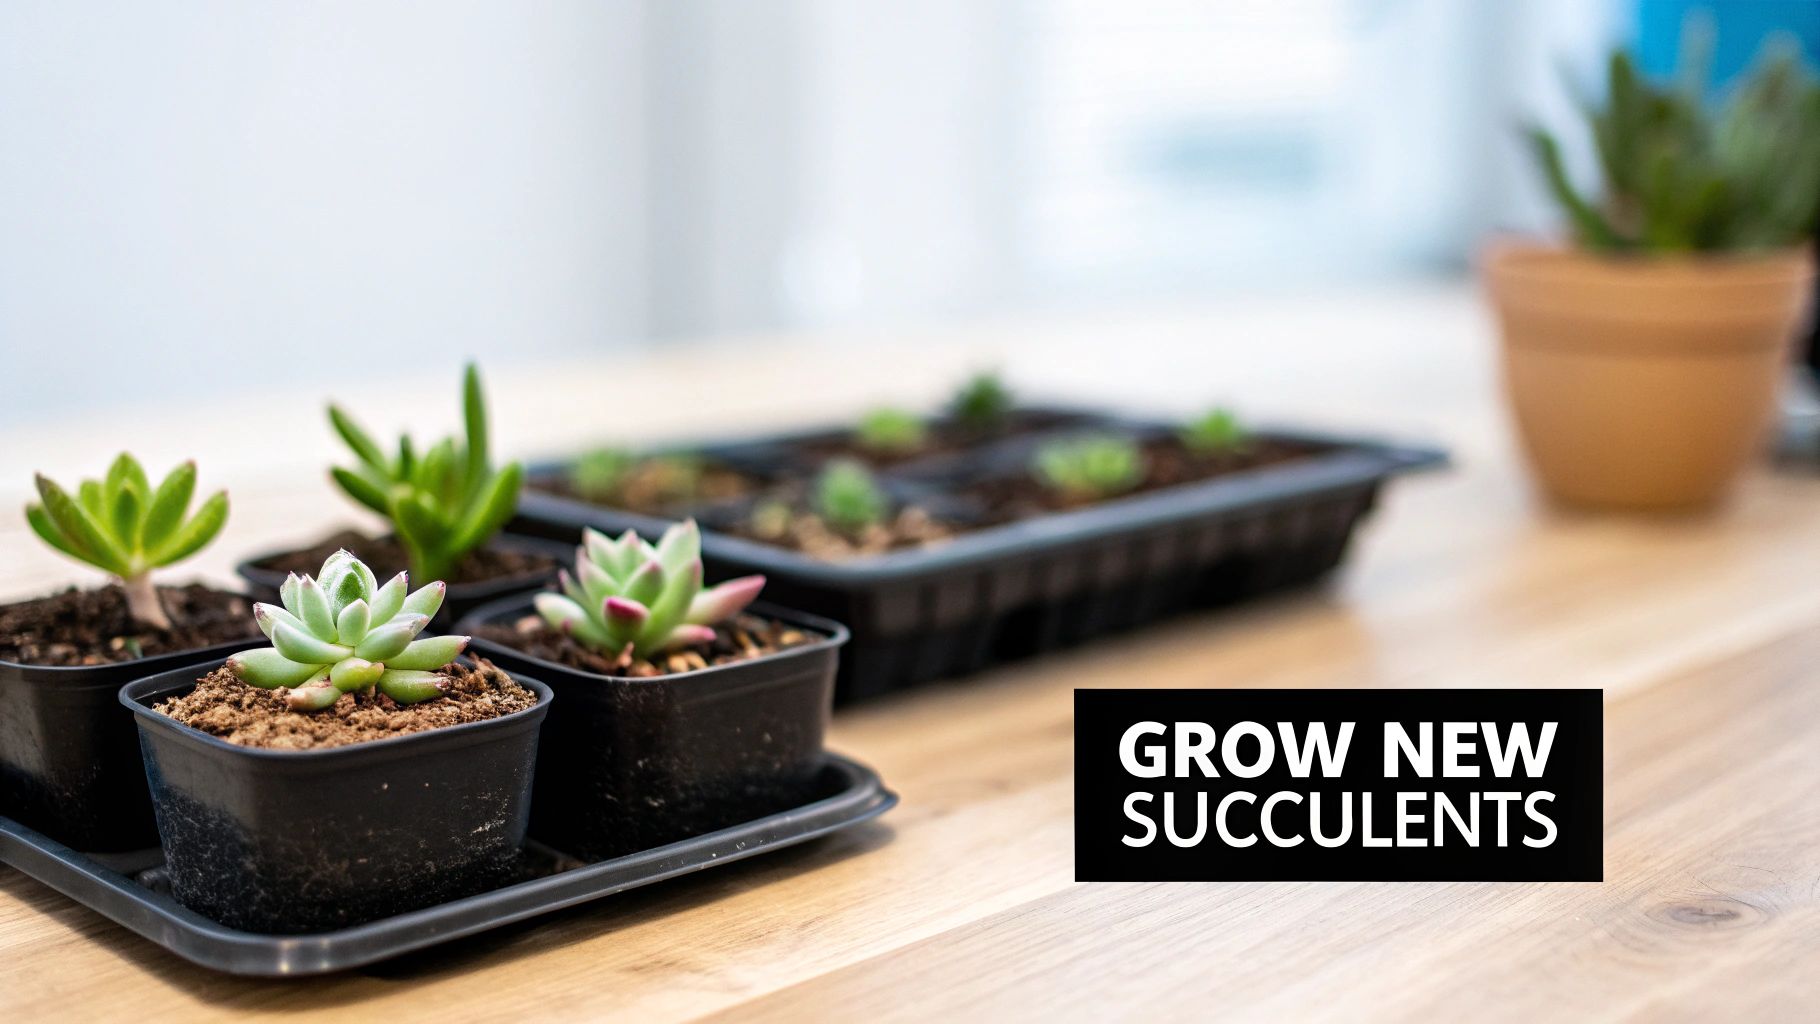
Welcome to the wonderfully addictive world of succulent propagation. There's a special kind of satisfaction that comes from watching a brand-new plant emerge from just a leaf. It’s a favorite technique for succulent lovers everywhere because it's not only incredibly effective but also a fantastic way to expand your collection without spending any money.
The popularity of this method is no surprise. The succulent market has exploded, now valued at over $5.2 billion globally, and a big reason for that growth is how easily they multiply from cuttings. For commercial growers working with species like Echeveria or Sedum, they can get roots in just 2-4 weeks with a stunning 90-95% success rate. For those of us at home, a first attempt with basic care can still yield around 65% success, which is pretty great.
The Magic of Creating New Life
There’s a unique thrill in spotting the first delicate, pink roots emerging from the base of a leaf. It’s a powerful little reminder of nature's resilience. This simple process turns you from just a plant owner into a plant creator.
The rewards go beyond personal satisfaction, too. The new succulents you grow can be used to beautify your outdoor spaces, offering tons of potential for creative island landscaping ideas and container gardens.
At its core, planting succulents from cuttings is about abundance. One healthy plant can become the source of dozens of new ones, allowing you to fill your home, expand your garden, or share living gifts with friends and family without spending a dime.
From choosing the perfect cutting to seeing those first roots take hold, this guide will give you the confidence to get started. You'll quickly discover the joy of building your own little succulent nursery and learn the subtle differences between the various types of succulents and cacti as you watch them grow.
Getting Your Propagation Toolkit Ready
Before you even think about snipping that first leaf or stem, it’s a good idea to get all your gear in one place. A little prep work now saves you from scrambling later and seriously ups your chances of success. You don't need a high-tech lab setup; most of what you'll need is probably already in your garden shed or a kitchen drawer.
Think of it this way: you're setting up a clean, safe nursery for your future plant babies. A clean cut prevents disease, and the right soil mix gives those new roots a place to grow without getting waterlogged and rotting away.
The Must-Haves for Cutting and Planting
Everything starts with a clean cut. Using dull or dirty scissors can crush the plant's tissue and introduce nasty bacteria, which is one of the top reasons cuttings fail to take. This is non-negotiable: always sterilize your tools. A quick wipe with some rubbing alcohol is all it takes.
Here’s a quick rundown of what to grab:
- A Sharp Cutting Tool: A clean pair of scissors, some pruning snips, or even a craft knife will do the trick. The goal is a sharp, clean cut that doesn't tear the plant.
- Shallow Trays or Pots: Your cuttings don't have deep roots yet, so they don’t need a deep pot. A shallow tray or small containers with good drainage are perfect. Getting the pot right is a big deal, and we have a whole guide on picking the best pots for cactus and succulents if you want to dive deeper.
- Well-Draining Soil: This might be the most important part. Regular potting soil is a death sentence for most succulent cuttings because it holds way too much water. You absolutely need a specialized cactus or succulent mix.
Nice-to-Have Tools That Give You an Edge
While the list above covers the basics, a few other items can really boost your success rate, especially if you're working with a finicky variety or just want to speed things up. Think of these as your propagation power-ups.
Rooting hormone is like a vitamin shot for your cuttings. It's a powder that contains natural plant hormones that basically tell the cutting, "Hey, it's time to grow some roots!" While many common succulents will root just fine on their own, a little dab on the callused end can really encourage faster, stronger root growth.
A small, soft brush is also handy for gently clearing away soil from delicate new growth without breaking it. I also like to keep a spray bottle nearby for misting—it's the perfect way to give leaf propagations just enough moisture once they've started rooting, without soaking the soil. Having these things ready means you're prepared for whatever your new cuttings throw at you.
The Art of Taking Healthy Succulent Cuttings
This is where the real magic happens. Your success in propagating succulents hinges entirely on starting with healthy, vibrant plant material. You've got two main paths to choose from: taking cuttings from leaves or snipping off a piece of the stem. Each technique works best for different types of succulents and needs its own special touch.
Choosing the right piece to snip isn't about luck; it's about careful observation. Zero in on a parent plant that looks strong, hydrated, and is in an active growth phase. Steer clear of any leaves or stems that look shriveled, discolored, or damaged. Those pieces just don't have the energy reserves needed to sprout a whole new plant. Think of it this way: you're asking a tiny piece of a plant to do something incredible, so you have to give it the best possible head start.
Mastering the Leaf Twist
For those beautiful rosette-forming succulents like Echeveria and Sedum, propagating from a single leaf is your best bet. The technique itself is straightforward, but it does require a bit of finesse.
Gently hold a healthy, plump leaf near the base of the plant. Instead of just yanking it off, give it a gentle side-to-side wiggle. What you're listening for is a clean "pop" right where the leaf meets the stem. This clean break is everything—it ensures you've captured the tiny cluster of cells at the very base that will actually generate new roots and leaves. If the leaf tears or a piece gets left behind on the stem, it's probably not going to grow.
Making the Cut with Stem Cuttings
When you're working with succulents that have obvious stems—think trailing Sedum, leggy Aeoniums, or even some types of cacti—a stem cutting is the more practical and effective route. This approach usually gets you a bigger plant, faster.
Using your clean, sharp scissors or knife, snip off a piece of stem that’s at least two to three inches long and has a few leaves still attached. Aim to make your cut just below a leaf node (that little bump where a leaf grows out of the stem), as this area is a hotbed for new root growth. Once you have your cutting, carefully pluck off the bottom one or two leaves to expose about an inch of bare stem. This is the part that will go into the soil and sprout new roots.
This simple diagram shows just how few tools you really need to get started with either method.
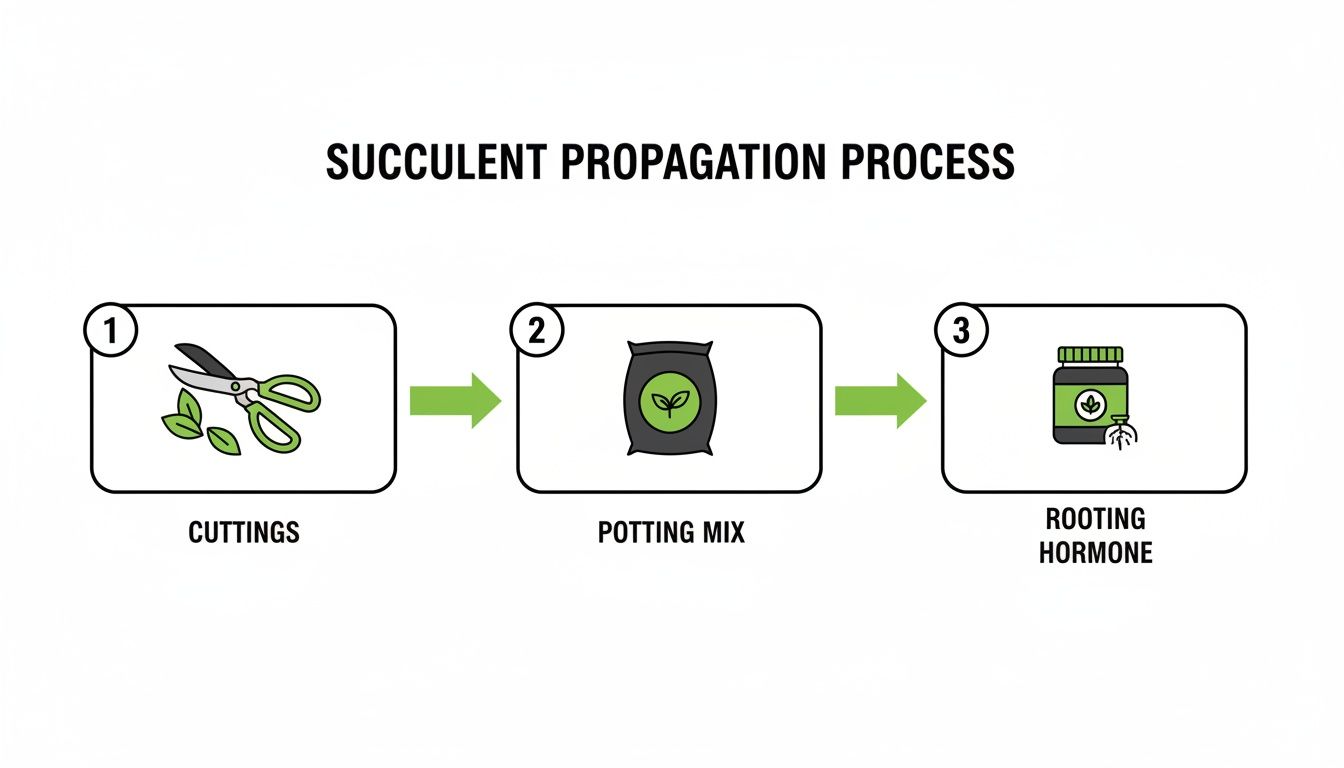
The visual progression from taking the cutting to planting it highlights the beautiful simplicity of the process.
The popularity of this DIY method is no secret. Many gardeners prefer using cuttings because of their impressive survival rate, which can be as high as 85%, even after being shipped. For those who want to tilt the odds even further in their favor, a little rooting hormone can push success rates to a staggering 98%, often kickstarting new growth in as little as 21 days.
Choosing Between Leaf and Stem Cuttings
Use this quick comparison to decide the best propagation method for your specific succulent.
| Method | Best For These Succulents | Success Rate | Time to New Plant |
|---|---|---|---|
| Leaf Cutting | Rosette-formers (Echeveria, Sedum, Graptopetalum) and succulents with fleshy leaves. | Variable; depends heavily on a clean break. | Slower (months). |
| Stem Cutting | Branching or vining succulents (Aeonium, Crassula, trailing Sedum). | Generally higher and more reliable. | Faster (weeks). |
Ultimately, the best method comes down to the structure of your parent plant. If it has distinct stems, go with a stem cutting for a quicker result. If it's a tight rosette, the leaf twist is your go-to move.
Timing is everything, no matter which method you pick. Always try to take your cuttings during the plant's active growing season—usually spring and summer. This is when the plant is bursting with energy and ready to grow. While most succulents follow these general rules, some, like Aloe, have their own quirks. You can dive into the specific steps in our guide on how to grow Aloe Vera from a cutting.
Don't Skip This Step: Letting Your Cuttings Heal (Callusing)
If there's one secret to successfully propagating succulents that new growers often miss, it's the art of doing absolutely nothing. Seriously. Before that fresh leaf or stem cutting even thinks about touching soil, you have to let it heal. This drying process is called callusing, and it’s non-negotiable if you want to avoid rot.
Think of the cut end of your succulent as an open wound. Sticking that moist, fresh cut directly into damp soil is like sending an open invitation to every fungus and bacteria in the neighborhood. Rot is the number one killer of new cuttings, and this is the fastest way to make it happen.
By letting the cutting rest in a dry, well-ventilated spot for a few days, you allow that raw tissue to form a protective seal—a callus. This hardened layer is a barrier, effectively shutting the door on infection once you finally plant it.
So, How Long Does This Take?
The time it takes to form a good callus depends entirely on the cutting. A small, thin leaf from a Sedum might be ready in just two or three days. But a thick, chunky stem cutting from something like an Aeonium needs more time to seal up properly.
A good rule of thumb is to give it at least five to seven days. For really beefy cuttings, like a piece of cactus, you might even need a week or more. You’ll know it’s ready when the cut end is completely dry to the touch, looking a bit shrunken and hard. No stickiness, no moisture.
Patience is your best friend here. Your cuttings have plenty of stored water to survive this healing phase. It is always better to wait a few extra days than to plant too soon and watch your new plant turn to mush.
To get them callused, just lay your cuttings on a clean, dry surface—a paper towel on a tray works perfectly. Find a spot with bright, indirect light, but keep them out of direct sun, which can scorch them. A shady corner of a windowsill or a spot on the kitchen counter is all you need.
From Callus to Soil: Planting Your Cuttings
Once you see that nice, solid callus, it's go-time. The planting technique is a little different for leaves versus stems, but both methods are designed to give those new roots the best possible start.
For leaf cuttings, it couldn't be easier. You don't actually "plant" them in the traditional sense.
- Lay Them on Top: Just place the callused leaves right on the surface of your dry, well-draining succulent mix.
- Make Contact: Ensure the callused end (the part that was attached to the mother plant) is touching the soil. This is where all the magic happens and the new roots will sprout from.
For stem cuttings, you need to give them a little stability.
- A Gentle Nudge: Take your callused stem and gently push the end about an inch into the soil. You only need to go deep enough for it to stand up on its own.
- Don't Bury It: Resist the temptation to plant the stem too deep. Burying a large portion of the stem, even after it's callused, can encourage it to rot from below the soil line.
After you've tucked your cuttings into their new home, your main job is to wait. The next phase is all about giving them the right light and, eventually, just the right amount of water to coax out those first tiny roots.
Nurturing New Roots with Light and Water
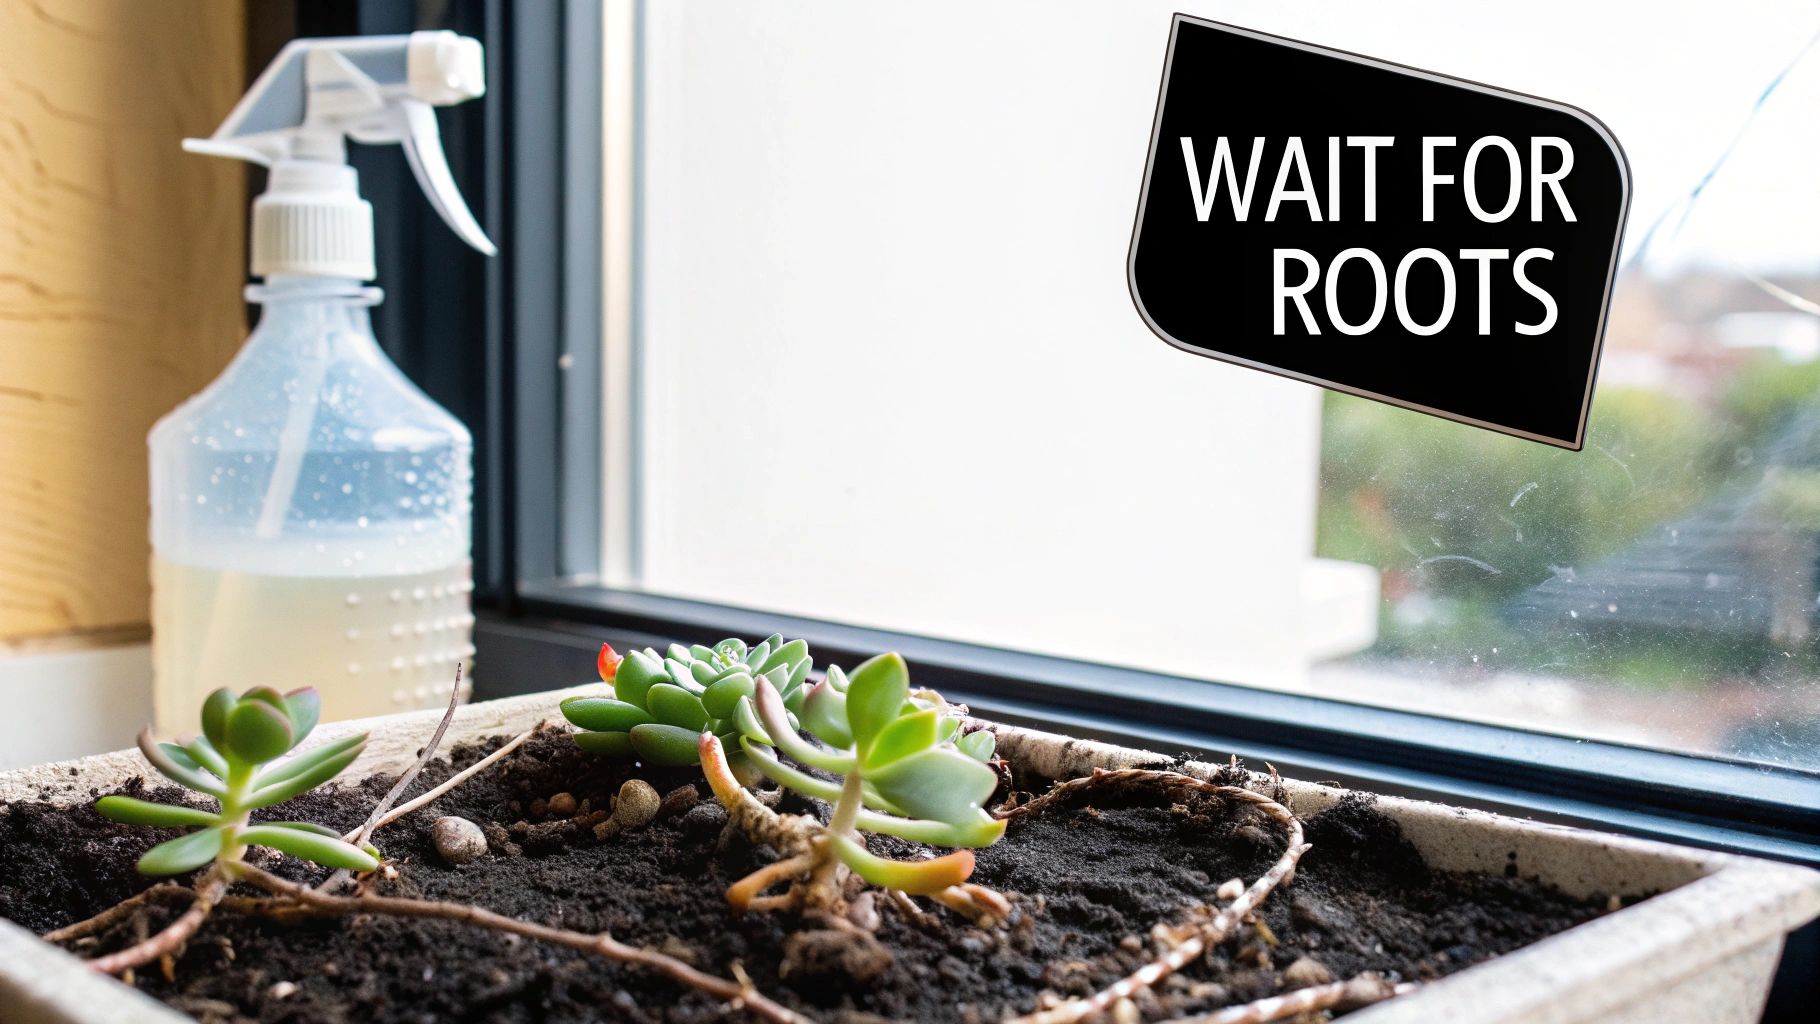
Your cuttings are all tucked in, but this is where the real patience comes into play. The big goal now is to coax those new roots to grow without letting rot set in. That means you have to fight every instinct you have to water them immediately.
I have one simple rule I live by for this stage: wait for roots, then water. Think about it—a cutting without roots has no way to drink up water from the soil. Adding moisture right now just creates a damp, stagnant home perfect for the fungus and bacteria that will turn your cutting into black mush.
Honestly, this is the number one mistake I see people make. They treat a fresh cutting like a mature plant, but its needs are completely different at this vulnerable stage.
The Gentle Introduction to Watering
When you finally spot those first tiny pink or white roots appearing, you can start a very conservative watering schedule. How you do this really depends on whether you're working with leaves or stems.
- For Leaf Cuttings: These are extremely fragile. The best way forward is to lightly mist the soil right around the leaves every few days. You’re just trying to give those brand-new roots a tiny bit of moisture to seek out, not soak the parent leaf itself.
- For Stem Cuttings: You can be a bit more direct here. Once you're sure there are roots (I'll tell you how to check in a bit), give the soil a light drink, aiming for the base of the stem. After that, let the soil dry out completely before you even think about watering again.
The incredible success rate is what makes this so rewarding. Propagating from cuttings has an impressive 92% viability rate, which blows the average 60% success rate for seeds out of the water. In fact, data shows that 85% of home gardeners start between five and ten new plants this way every year, often gifting the extras to friends. This kind of easy success is why collecting succulents has exploded. You can actually see these trends in the succulent plant market data.
My go-to tool for this is a small squeeze bottle with a long, thin tip. It gives me total control, letting me get water right to the new roots without drenching the whole pot and risking rot.
Finding the Sweet Spot for Sunlight
Light is the energy source for all this new growth, but too much sun will cook your cuttings before they have a chance. Direct, harsh sunlight is the enemy here.
You're looking for a spot that gets several hours of bright, indirect sunlight every day. A north-facing windowsill is often perfect, or even a spot a few feet back from a sunny south-facing window. A good rule of thumb is if the light is bright enough to comfortably read a book by, you're in the right zone.
You’ll know you’ve nailed the lighting when your cuttings look healthy and vibrant. If they start stretching out and looking pale, they need more light. If they get brown or black crispy spots, they're getting scorched and need less.
So, how do you know if a stem cutting has rooted without yanking it out? After about two or three weeks, give the stem a very gentle wiggle. If you feel a little bit of resistance, that's it! You've got roots. If it pops right out, no worries—just stick it back in the soil and give it another week or two before you check again.
Troubleshooting Common Propagation Problems
Even with the best intentions, nature sometimes has other plans. Don't worry if your first few attempts at propagation hit a snag! These little challenges are part of the learning curve, and figuring them out is what will make you a propagation expert.
Most of the questions I get are about cuttings that are either rotting or just sitting there doing absolutely nothing. The answer nearly always comes down to getting three things right: patience, water, and timing. Master those, and you can solve almost any propagation mystery.
Why Are My Cuttings Rotting or Shriveling?
This is, without a doubt, the number one problem people run into. It’s almost always a moisture issue. If your cutting turns black, feels soft, and gets mushy, you've got rot. This typically happens for one of two reasons: you watered it too soon after planting, or you didn't let the cut end callus over properly before it touched the soil.
On the other hand, if you have a leaf cutting that just withers into a dry, crispy little thing, it probably didn't have enough oomph to get started. That's why it's so important to pick healthy, plump leaves from a well-hydrated plant. They have the stored energy needed to sprout new roots and a baby plant.
A rotted cutting is a goner. There's no saving it. The best thing to do is toss it out, get rid of the soil it was in to be safe, and start over with a fresh cutting. This keeps any fungus from spreading to your other projects.
How Long Does It Take for Succulent Cuttings to Root?
This is where that patience I mentioned comes in. There's no single, set-in-stone timeline, but you should start seeing some progress within a few weeks. The exact timing really depends on the plant and its environment.
Here’s a rough idea of what to expect:
- Stem Cuttings: These are usually the sprinters. You can often spot the first tiny roots in just 2 to 4 weeks.
- Leaf Cuttings: These take a bit longer because they have a bigger job—they need to grow roots and a whole new plantlet. Expect to wait anywhere from 3 to 6 weeks to see new growth.
Keep in mind, factors like the species, temperature, and light make a huge difference. Cuttings in a warm, bright spot will always root faster than those in a cool, dark corner.
Can I Propagate Large Cactus Cuttings?
You bet! Taking a cutting from something big like a Peruvian Apple cactus might feel intimidating, but the principles are exactly the same—just scaled up. The process is identical, but the callusing time is a whole different ballgame.
The most critical part is giving that big cutting enough time to heal. A thick cactus arm has a lot of moisture inside, and the cut surface needs to dry out completely to prevent rot. This callusing period can take several weeks, sometimes even a month or more for a really hefty piece.
Once it’s fully healed and feels dry to the touch, plant it just an inch or two deep in a very coarse, gritty cactus mix. And here’s the key: wait. Let it sit in the dry soil for several more weeks before you even think about watering it. This encourages the cutting to push out new roots in search of moisture.
Ready to grow your collection? Find the perfect parent plants at The Cactus Outlet and get your propagation adventure started! You can explore our amazing selection here.