Before you even think about taking a cutting from your aloe vera, it pays to get your toolkit ready. Having the right setup from the start is half the battle won. We're talking about a few simple but crucial items: a terracotta pot, a sharp, clean knife, and the right kind of gritty, fast-draining soil mix. Getting these lined up first makes the whole process feel less like a frantic scramble and more like a rewarding project.
Gathering Your Aloe Propagation Essentials
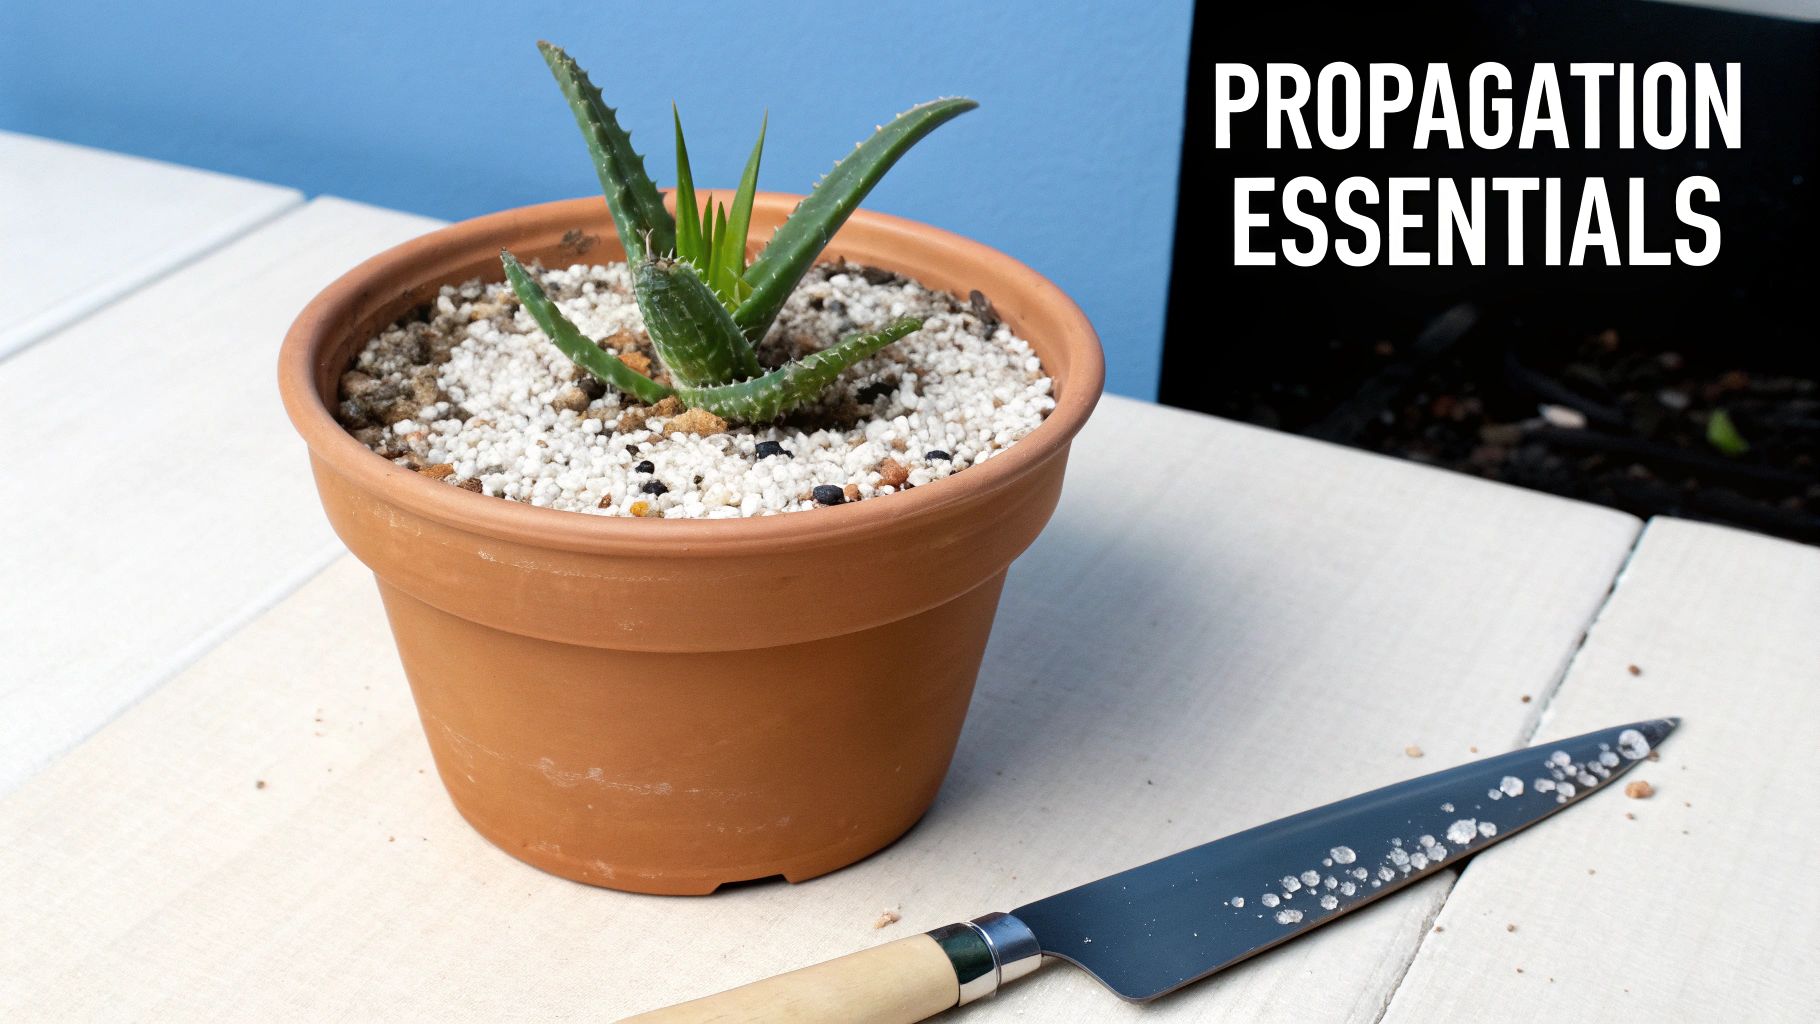
This isn't just about ticking off a supply list; it’s about understanding why each of these tools is so important. When you choose the right materials, you’re dramatically boosting your odds of turning a single cutting into a healthy, thriving new plant. Think of this prep work as your first line of defense against common problems, especially the dreaded root rot.
The name of the game is mimicking the dry, airy environment that aloe plants love. Every single item you choose, from the pot to the soil, should work toward that goal.
Choosing the Right Pot and Soil
Believe it or not, the pot you pick can make or break your new aloe plant. I always recommend a classic terracotta pot. Why? The clay is porous, which means moisture can evaporate right through the sides of the pot. This is a huge advantage because it helps the soil dry out evenly and prevents that soggy, water-logged situation at the bottom that is the number one killer of succulents.
Just as critical is what you put in the pot. Standard, all-purpose potting soil is a no-go; it holds onto way too much water for an aloe cutting to survive. You need a mix that lets water drain through freely. I often mix my own, and it's pretty simple:
- One part standard potting soil
- One part perlite or pumice (this keeps things light and airy)
- One part coarse sand (for excellent drainage)
This trio creates the perfect foundation for new roots to grow without sitting in a puddle. If you'd rather not play mad scientist, a high-quality commercial mix designed for succulents is a great shortcut. You can get a better sense of what goes into a good blend by reading up on cactus and succulent soil mix.
The Importance of a Clean Cut
When you're ready to make the cut, the tool you grab makes all the difference. Using a dull or dirty knife is a recipe for disaster. It can crush the delicate plant tissue and introduce nasty bacteria, stopping your propagation effort in its tracks.
Pro Tip: Always reach for a sharp, sterilized knife or a clean pair of pruning shears. I give my blade a quick wipe with rubbing alcohol before and after every cut. It’s a small, easy step that prevents disease and helps the wound heal cleanly and quickly.
A clean cut is the foundation for success, and it’s especially important if you're attempting to propagate from a single leaf—a topic that gets a lot of debate among gardeners. While many say it can't be done, I've seen it work under the right conditions. The secret is almost always allowing that clean-cut end to properly dry and form a callus for a few days before you even think about planting it. This simple "curing" step minimizes stress on the cutting and gives it the best possible start.
Choosing and Preparing Your Aloe Cutting
Everything hinges on the piece you start with. If you want to successfully grow aloe vera from a cutting, picking a healthy, strong one is the most important thing you'll do. It's like giving your new plant a genetic head start; a great beginning makes a thriving plant far more likely.
Take a good look at the mother plant. You're searching for a leaf that looks plump, has a vibrant green color, and just seems full of energy. Steer clear of any leaves with yellowing ends, mushy spots, or any other blemishes. A healthy leaf should feel firm and solid, which tells you it’s loaded with the water and nutrients it needs to grow roots.
Here’s a tip from my own experience: always go for one of the outer leaves at the base of the plant. These are the most mature ones, and they’ve had more time to store up the energy required to power through the rooting process.
Spotting the Best Starts
You've got two main choices for a cutting: a full-grown leaf or one of the little offsets, which most people call "pups." Both will get the job done, but they're suited for slightly different situations.
- Mature Leaf Cuttings: This is your go-to method if you want to make a new plant but the parent hasn't shot out any pups yet. Pick a leaf that’s at least four to five inches long.
- Aloe Pups (Offsets): Pups are the easiest and most surefire way to propagate aloe. A pup is basically a mini clone of the mother plant growing right at its base. The trick is to wait until it’s a few inches tall and has a few of its own leaves before you separate it.
While pups are pretty much foolproof, don't be afraid to try propagating from a leaf. The technique is simple, and it's a fantastic skill for any succulent lover to have. In fact, large-scale growers often rely on cuttings and other vegetative methods. Growing from seed is much less common because the plant is often male-sterile and reproduces slowly. For a deeper look, you can read up on these aloe reproduction methods.
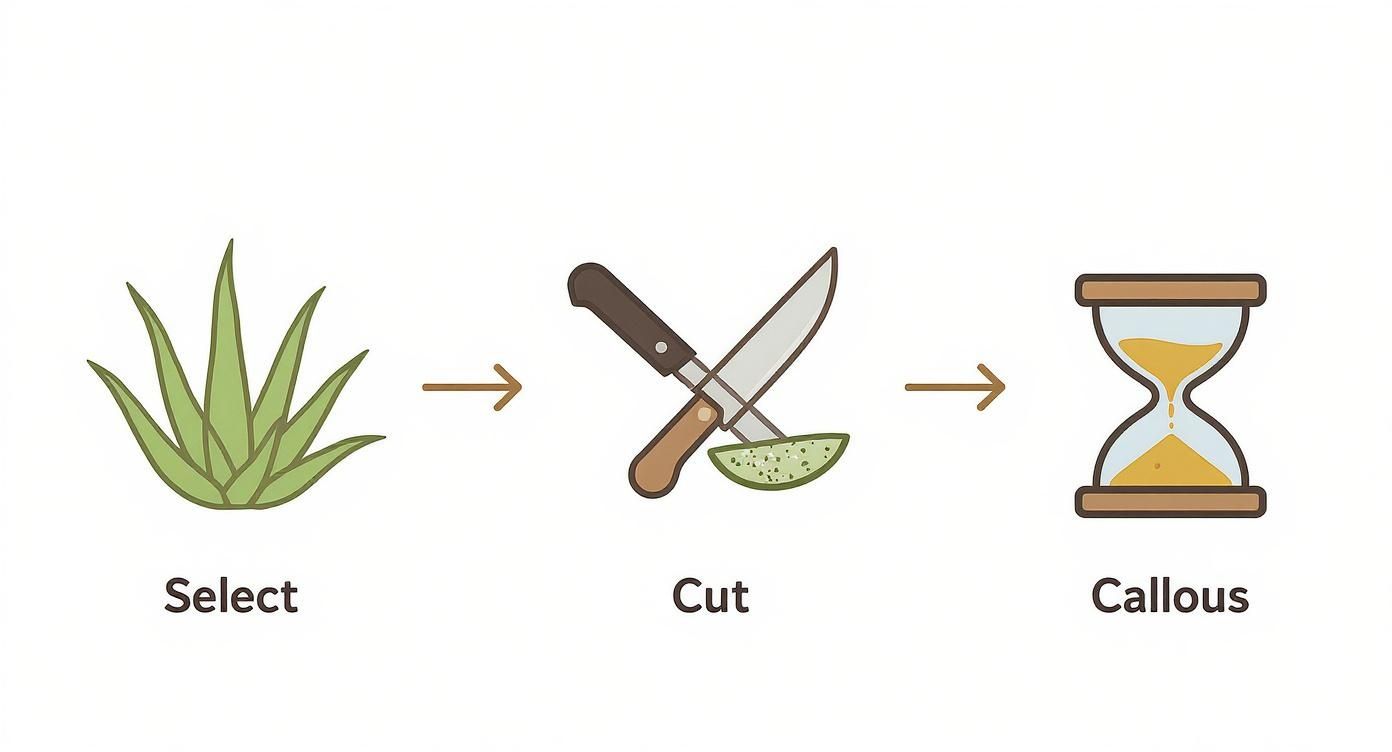
The Cut and the Crucial Waiting Game
Once you’ve picked your leaf, grab a clean, sharp knife. Make a swift, clean cut at the very base, getting as close to the main stem as you can. If you're removing a pup, use the knife to carefully sever it from the parent, doing your best to keep its own little root system attached.
Now comes the part that tests everyone's patience, but it's absolutely vital. You have to let the cut end dry out and form a callus. This isn't optional—it's the make-or-break step.
Letting the cutting callus over is your single best defense against rot. A fresh, wet cutting stuck directly into soil is an open invitation for fungus and bacteria, which is the #1 reason aloe propagation fails. This simple waiting period creates a protective scab over the wound.
Just lay the cutting in a dry spot away from direct sun, somewhere with good airflow. Leave it be for anywhere from three days to a full week. You'll know it's ready when the cut end feels dry and has formed a firm, slightly shrunken seal. As soon as you see that callus, you're ready to move on to planting.
Rooting Your Aloe Cutting in Soil
You’ve got your calloused cutting ready to go, which means the most exciting part is about to begin. This is where a little patience goes a long way, and you get to watch your new aloe plant truly take shape. We're going to focus on rooting directly in soil, as it’s the method that best mimics an aloe's natural habitat and gives you the highest chance of success.
You might find guides online suggesting you root succulents in water, but for an aloe, that's a gamble I wouldn't take. Aloes are incredibly prone to rot, and sitting them in water is often a fast track to a mushy, dead plant. Sticking with a well-draining succulent mix is by far the safest and most reliable way to grow aloe vera from a cutting.
The process up to this point is pretty straightforward: pick a healthy leaf, make a clean cut, and let it callus over.
With those initial steps done, it’s time to get it planted.
Planting Your Aloe Cutting
Take the pot you prepared with your gritty, fast-draining soil. Make a small hole right in the center, just deep enough to hold the cutting upright. You’re aiming to plant it about one to two inches deep. Any deeper, and you risk the base rotting before it has a chance to sprout any roots.
Once you’ve settled the cutting into its new home, gently press the soil around the base to give it some support. It might feel a bit wobbly, but that’s perfectly fine as long as it isn’t flopping over. Resist the urge to pack the soil down hard—good airflow is your friend here.
Now, for the part that feels completely wrong but is absolutely critical: do not water it.
This is the golden rule of rooting aloe cuttings. A freshly planted cutting has no roots, so it can't absorb any water. Watering now just creates a damp, stagnant environment that is the perfect recipe for rot. It needs time in dry soil.
This dry spell, which should last about one to two weeks, is essential. It puts just enough stress on the cutting to encourage it to send out new roots in search of moisture. This is the trigger that kicks off the whole rooting process.
Choosing the right rooting method is key. While we strongly advocate for soil, here's a quick look at how it compares to water rooting.
Aloe Vera Cutting Rooting Methods
| Method | Pros | Cons | Best For |
|---|---|---|---|
| Soil Rooting | Mimics natural environment, low risk of rot, strong root development. | Slower to see progress, requires well-draining soil. | Highly Recommended: Aloe vera and most succulents. |
| Water Rooting | Can see roots as they form, feels more proactive. | Extremely high risk of rot for aloes, roots can be weak and struggle to adapt to soil. | Not Recommended: Generally ill-advised for aloes. Better for vining plants like pothos. |
As you can see, sticking with soil is the clear winner for giving your aloe cutting the best possible start.
The Waiting Game and Checking for Roots
Find a good spot for your newly potted cutting. It needs plenty of bright, indirect sunlight. A spot near a window that doesn’t get blasted by the intense afternoon sun is perfect. Too much direct light will just scorch the cutting before it has a chance to establish itself.
After the initial two-week dry period, you can give it its first drink. Don't go crazy and drench it; just a little water to moisten the top layer of soil is all it needs. From now on, you’ll use the "soak and dry" method—water thoroughly, but only after the soil has completely dried out.
So, how do you know if your efforts are paying off? After about four to six weeks, you can perform a gentle "tug test."
- Carefully give the cutting a very slight wiggle.
- If you feel resistance, congratulations! That’s the feeling of new roots anchoring the plant into the soil.
- If it pops right out, don’t worry. Just place it back, make sure it's stable, and give it another couple of weeks before you check again.
Patience is everything during this stage, but the reward is a brand-new, thriving aloe plant. For a deeper dive into what comes next, our guide on potting succulent cuttings has some great tips. Just remember, when it comes to a new aloe cutting, less is definitely more.
Your New Aloe Plant's First Few Months
After a few weeks of patience, you've given the pup a gentle tug and felt that satisfying resistance. Success! Your new aloe has officially put down roots. While the hardest part is behind you, this next phase is all about nurturing your new plant as it gets established.
Think of it as moving from the nursery to its first real home. The focus now shifts from simply encouraging roots to providing gentle, consistent care that helps it build strength for the long haul.
Getting the Watering Right
The first proper watering is a big moment for your little plant. You've let it sit dry for a couple of weeks to root, and now it’s time to introduce a healthy watering routine. The key is to remember where aloes come from—arid environments—and adopt the "soak and dry" method.
It's a straightforward but crucial technique. When you water, give it a good, thorough soak until you see water flowing out of the pot's drainage holes. Then comes the most important part: let the soil dry out completely before you even think about watering it again.
For a young, newly-rooted aloe, this often means watering every two to three weeks. But don't just mark your calendar! Humidity, light exposure, and the type of pot you're using will all change how quickly the soil dries. The most reliable tool you have is your finger. Just poke it about two inches into the soil; if you feel even a hint of moisture, hold off for a few more days.
It’s so easy to kill a new plant with kindness—in this case, too much water. An aloe is far better equipped to handle a bit of drought than it is to sit in a swampy pot. Overwatering is a fast track to root rot, which will quickly undo all your patient propagation work.
Learning to read the soil's moisture level is the best skill you can develop. It removes all the guesswork and gives your plant exactly what it needs, right when it needs it.
Finding the Sweet Spot for Sunlight
Light is the other side of the coin. A young aloe with a brand-new, delicate root system is pretty sensitive. Blasting it with intense, direct sun can easily scorch its leaves, turning them an unhappy reddish-brown color.
What you're looking for is plenty of bright, indirect light. Imagine a spot near an east-facing window that gets that soft morning sun, or maybe a few feet away from a more intense south-facing window. A good rule of thumb is a place bright enough to cast a gentle shadow.
Here’s a quick visual checklist to see if you've found the right spot:
- Too much sun: Leaves look bleached, yellow, or even take on a stressed, orange-brown tint.
- Not enough sun: The plant will start to stretch and look "leggy" as it reaches desperately for more light.
- Just right: The leaves will be a lush, vibrant green, and the overall growth pattern will be tight and compact.
Don't be discouraged if you don't see explosive growth right away. For the first few months, your aloe is pouring all its energy into building a strong, healthy root system underground. This is the foundation for its future health. You might not see much happening up top, but trust that important work is being done below the surface.
For a deeper dive into ongoing maintenance, our complete guide on how to care for aloe vera plants is packed with more great info. With this simple balance of good light and smart watering, your tiny pup will be well on its way to becoming a magnificent succulent.
Troubleshooting Common Propagation Issues
https://www.youtube.com/embed/Q38gz5duOsk
Even when you follow all the steps perfectly, plants can have a mind of their own. Sometimes your aloe cutting just won't cooperate. Don't get discouraged! Most of the time, the issue is something simple and completely fixable. The trick is knowing what to look for so you can get things back on track.
The single most common—and most disheartening—problem you'll run into is rot. If you see the base of your cutting turning brown or black, or it feels soft and squishy to the touch, you've got rot. This is almost always a sign of too much moisture getting in before the plant had a chance to form roots.
Dealing with a Mushy Base
A mushy base is a classic sign of one of two things: you either watered too soon, or you didn't let the cutting callus over long enough before planting. That open wound at the bottom just soaked up water like a sponge, creating the perfect environment for bacteria and fungus to set in.
So, is it a lost cause? Not necessarily, but you have to act fast.
- First, gently pull the cutting out of the soil right away.
- Next, take a good look at the damage. With a clean, sharp knife, carefully slice away all the rotted, discolored parts. You need to keep cutting until you only see healthy, firm, green tissue.
- Now, you have to repeat the callousing step. Let this new, clean cut dry out in the open air for several days until it forms a tough, dry seal.
Once a solid new callus has formed, you can try potting it again. This time, use fresh, bone-dry succulent mix and be extra cautious. Wait even longer than you did the first time before you even think about giving it a tiny bit of water.
Why Is My Cutting Not Rooting?
It's been weeks, maybe even over a month. You give the cutting a gentle wiggle, and it's still completely loose in the pot. A cutting that refuses to root is frustrating, but it’s usually an issue with the environment, not a sign that the cutting itself is a dud. If you want to successfully grow aloe vera from a cutting, getting these conditions right is everything.
First, think about temperature. Aloes are desert plants, and they need warmth to get the rooting process started. If your cutting is sitting in a cold, drafty corner, it’s just going to stay dormant. Try moving it to a warmer spot, somewhere consistently between 70-80°F (21-27°C). This alone can work wonders. If your house is cool, a seedling heat mat provides that gentle, consistent bottom heat they love.
Key Insight: If you're past the six-week mark and still have no roots, the culprit is almost always a lack of warmth or light. The cutting has all the energy it needs stored up, but it's waiting for the right environmental cues to start growing.
Light is the next thing to check. While you want to avoid harsh, direct sun that can scorch the cutting, a spot that’s too dim won't work either. The plant needs energy from photosynthesis to fuel root development. Make sure it's getting several hours of bright, indirect light every day.
Finally, don't forget about airflow. Stagnant, humid air can slow everything down. Moving the pot to a place with better air circulation can help the soil dry out properly between waterings and stimulate the cutting. Often, a simple little tweak to its environment is all it takes to finally see those roots appear.
Common Questions About Propagating Aloe
When you first start propagating aloe, a few questions always seem to pop up. Let's walk through some of the most common ones I hear from fellow plant lovers so you can get started with confidence.
How Long Does It Take for an Aloe Cutting to Root?
This is where a little patience really pays off. Generally, you can expect to see the first signs of roots developing in about four to six weeks.
Keep in mind, this isn't set in stone. The timeline can shift based on things like how warm your house is, the amount of light the cutting gets, and how healthy the parent plant was. The best way to check is to give the cutting a very gentle tug after a month or so. If you feel resistance, you've got roots!
Can You Root an Aloe Leaf in Water?
I get this question a lot, and while you technically can, I strongly advise against it. Aloes are desert plants, and they absolutely hate sitting in water. Their tissues are built to store water, not soak in it, which makes them incredibly prone to rot.
More often than not, an aloe cutting placed in water will just turn into a mushy mess before it ever has a chance to grow roots. Stick with a gritty, well-draining soil mix—it’s what they’re used to and gives you the best shot at success.
Another thing to consider is that "water roots" are different from "soil roots." They're much more delicate and often go into shock when you eventually move the plant to soil, which can set your new aloe way back or even kill it.
Why Did My Aloe Cutting Turn Yellow?
Seeing your cutting turn yellow can be alarming, but it's usually a clear signal of stress. The two main culprits are almost always too much water or too much sun.
A fresh cutting has no roots to drink up water, so if the soil is damp, rot can set in quickly, showing up as yellow, mushy tissue. Likewise, putting a vulnerable new cutting in direct, harsh sunlight will scorch it. To avoid this, keep the soil completely dry for the first week or two and place it somewhere with bright, but indirect, light.
Ready to grow your succulent family? The Cactus Outlet has a fantastic selection of healthy, mature aloe plants that are perfect for taking cuttings from. Find your next project at https://www.cactusoutlet.com.