
If you want to keep a cactus happy, you really only need to get three things right: plenty of light, water that's infrequent but deep, and soil that drains in a flash. That’s the core of it. Get these basics down, and you're essentially giving your cactus a little piece of its desert home, which is all it needs to thrive.
Starting Your Cactus Care Journey
Welcome to the world of cacti! Let's get one thing straight right away: these tough little plants don't thrive on neglect, they thrive on the right kind of attention. This guide is all about helping you understand what your cactus actually needs, connecting its fascinating survival tactics to simple things you can do at home.
Think of it less like following a rigid set of rules and more like learning to speak your plant's language. Once you understand why a cactus needs what it needs, taking care of it becomes second nature.
Here's a quick look at the fundamentals. Mastering these will set you up for success from the very beginning.
Cactus Care Fundamentals at a Glance
| Care Pillar | Optimal Condition | Why It Matters for a Cactus |
|---|---|---|
| Light | 6+ hours of bright, direct sunlight per day. A south-facing window is ideal. | Cacti are solar-powered. This much light fuels their growth, keeps them compact, and encourages them to flower. |
| Water | Deeply, but only when the soil is 100% dry. This could be every 2-6 weeks depending on the season. | They are designed to store water for long periods. Overwatering is the #1 killer, leading to deadly root rot. |
| Soil | A gritty, fast-draining mix. Think sand, perlite, and pumice, not rich potting soil. | Their roots need to breathe and can't stand being wet. Proper soil lets water rush through, preventing rot. |
This table covers the essentials. Get these right, and you're well on your way to becoming a cactus pro.
The Three Pillars of Cactus Success
At its heart, keeping a cactus alive and well is all about imitation. You're trying to mimic the harsh, sun-blasted, and arid environment they evolved in. These plants are true survivalists, and your job is to give them a taste of that desert magic right in your living room.
We'll build everything on these three foundational ideas:
- Sunlight is Food: A cactus uses sunlight like a solar panel, converting it into the energy it needs to live. Giving it a spot with bright, direct sun isn't just a suggestion—it's absolutely essential for its health, growth, and ability to bloom.
- Water is a Rare Commodity: Out in the desert, rain is a big deal, not a daily drip. Cacti are built like living canteens, storing water to last them through long dry spells. This is why their roots are so prone to rotting if they sit in wet soil for too long.
- Soil is Just a Foothold: The soil in their native habitat is usually sandy and rocky, letting water drain away almost instantly. This is crucial because it keeps their sensitive roots from getting waterlogged, which is their biggest enemy.
By focusing on getting these three elements right—light, water, and soil—you solve over 90% of potential problems before they even start. It’s the simple secret to a flourishing collection.
Why Cacti Are More Popular Than Ever
If you've caught the cactus bug, you're in good company. The appeal of these low-maintenance, sculptural plants has exploded. In fact, the global market for cactus plants was valued at around $3.86 billion in 2021 and is expected to nearly double by 2025. This boom shows just how much people are coming to appreciate tough, beautiful houseplants. You can read more about the growing demand for cacti from Cognitive Market Research.
This guide is designed to give you the confidence to join in, sidestep the common mistakes, and start your cactus journey on the right foot. Let’s get into the details.
Getting Light and Temperature Just Right
Sunlight is the fuel your cactus runs on. But just saying "give it bright light" is pretty useless advice, right? Let's break down what that actually means for your plant and how to get it right. Honestly, mastering light and temperature is probably the biggest piece of the cactus care puzzle. It’s what separates a thriving cactus from one that's just... surviving.
Think of your cactus as a little green solar panel. Its whole job is to soak up sunlight and turn it into energy for growing, fighting off pests, and eventually, putting out those amazing flowers. Just like a real solar panel can't charge anything in the shade, your cactus can't store up energy without enough direct sun. The whole system just grinds to a halt.
For the majority of desert cacti, your target is a solid six hours of direct sun every day. In most homes, the sweet spot is going to be a south-facing window that isn't blocked by trees or buildings. This is where you'll get the strongest, most consistent light. An east-facing window is a decent plan B, giving you bright but less intense morning sun. A west-facing window can also work, but keep an eye out—that afternoon sun can be scorching hot for some species.
Learning to Read Your Cactus
Your cactus is always telling you how it feels about its spot; you just have to learn the language. Catching the early warning signs means you can move it before any real damage is done.
Is it getting enough light? Here’s how you know it isn’t:
- Stretching (Etiolation): This is the classic sign. Your cactus will look thin, pale, and stretched out as it literally reaches for more light. Unfortunately, that lanky growth is permanent.
- Fading Color: A cactus that should be a rich, deep green starts looking washed out or yellowish. If you have a variegated one, you might notice its cool patterns disappearing as it reverts to plain green.
- Stalled Growth: It's the middle of summer, and your plant isn't doing a thing. No new growth, and definitely no flowers.
What about too much light? Look for these clues:
- Sunburn: You’ll see stark white, yellowish, or even rusty-looking patches on the side getting blasted by the sun. This is fried tissue, and it won't heal.
- Stress Colors: Some cacti get a reddish or purplish blush when the light is super intense. While it can look kind of cool, it's the plant's way of saying it's under a bit of stress.
Why Temperature Matters More Than You Think
Light is only half the story. Temperature is the silent partner that controls your cactus’s internal clock. Cacti don't want a perfectly stable, 72-degree home year-round. They need those temperature swings between day and night, and especially between summer and winter, to really thrive. It's written in their DNA.
During spring and summer, when they're actively growing, most cacti are perfectly content with normal indoor temperatures between 65-85°F (18-29°C). The warmth helps kick their growth into high gear. But the real secret to getting them to flower comes later.
If you want flowers, you have to give your cactus a cool, dry winter rest. This isn't just a friendly tip—it's a non-negotiable biological trigger. Dropping the temperature is the signal that tells the plant, "Okay, time to rest and get your flower buds ready for spring."
To make this happen, find a spot for your cactus that stays between 45-55°F (7-13°C) over the winter. An unheated garage with a window, a chilly basement, or an enclosed porch are often perfect. At the same time, you'll basically stop watering it. This cool, dry period perfectly mimics a desert winter and is the number one thing you can do to get a spectacular show of blooms once things warm up again.
Mastering the Art of Watering
If there's one thing that trips up new cactus owners, it's watering. We're so conditioned to care for thirsty houseplants that our instincts often lead us down the wrong path. The secret is to stop thinking about a rigid schedule—like watering every Sunday—and start paying attention to what your plant is actually telling you. This shift in mindset is the key to happy, healthy cacti.
The best approach is what we call the “soak and dry” method. Picture a sudden, torrential downpour in the desert. It soaks the sandy soil completely, and then the intense sun bakes everything dry for weeks. That’s the exact cycle your cactus is built for, and it’s what we need to mimic at home. Following this method is your number one defense against root rot, the silent killer of so many cacti.
Understanding the Soak and Dry Method
Soaking doesn't mean letting your plant sit in a puddle. It means giving it a good, long drink until water runs freely from the drainage hole at the bottom of the pot. This ensures the entire root system gets a chance to hydrate, which encourages the roots to grow deep and strong.
After that thorough soak comes the most critical part: the "dry" period. The soil has to dry out 100%, all the way from the top to the bottom of the pot, before you even consider watering again. Depending on your home's environment, this could take anywhere from two to four weeks, and often much longer during the winter.
Resisting the urge to water a cactus that looks dry is the hardest lesson for a new plant parent to learn. Just remember: a cactus is far more likely to die from too much love (water) than from a little neglect. When in doubt, wait another week.
How to Know When It’s Time to Water
Forget the calendar. The best indicators are the soil and the plant itself. Learning to read their signals is the most valuable skill you can develop.
Physical Soil Check: This is your most dependable tool.
- The Finger Test: Stick your finger at least an inch or two into the soil. If you feel even a hint of moisture, hold off on watering.
- The Chopstick Method: A simple wooden chopstick or skewer works like a giant dipstick for your plant. Push it all the way to the bottom of the pot, leave it for a minute, then pull it out. If it comes out clean and dry, it's watering time. If damp soil is clinging to it, give it more time.
- Lifting the Pot: Get used to the weight of your potted cactus right after you've given it a deep watering. When it feels noticeably lighter, you know the soil has dried out.
This visual guide shows the life cycle of a typical cactus, which has a direct impact on its need for water.
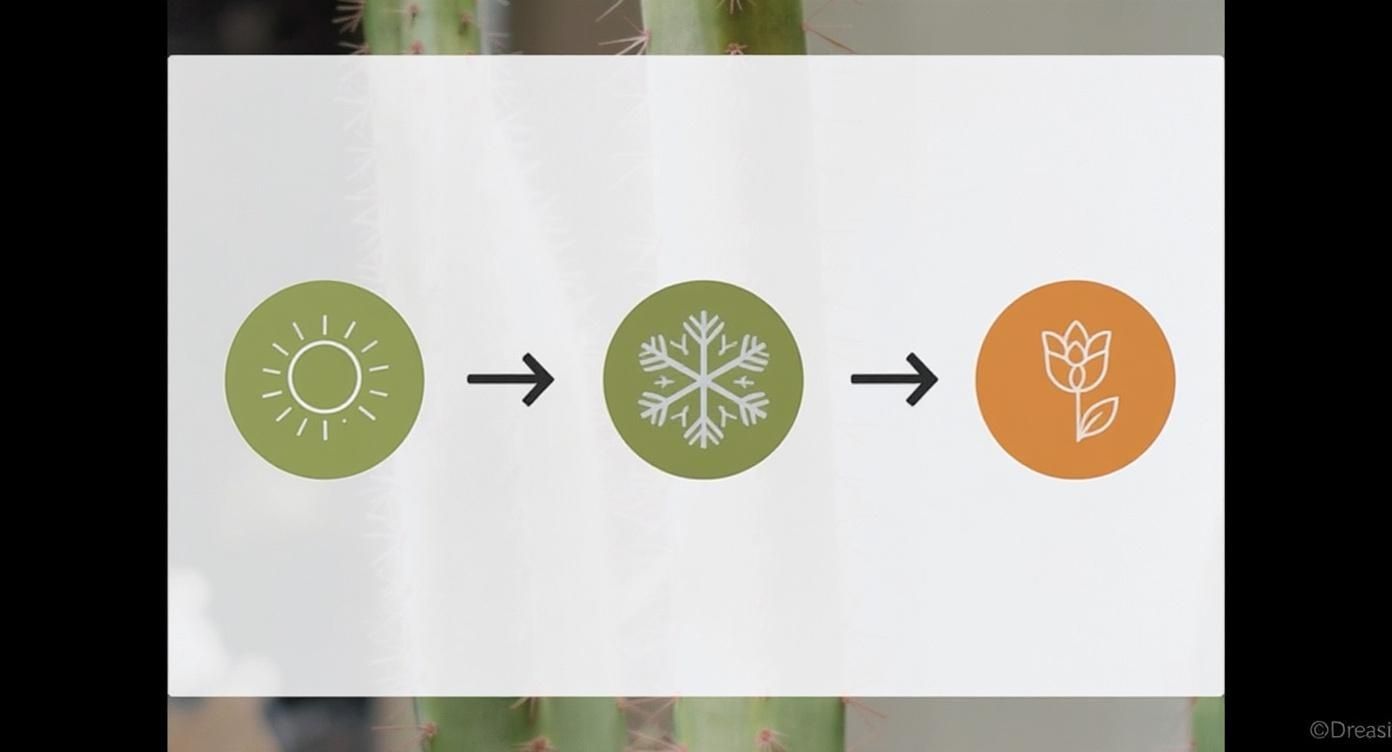
As the infographic shows, cacti are thirstiest during their active growing season but need much less water during their winter rest period—a crucial phase for encouraging blooms.
Reading Your Plant’s Visual Cues
Your cactus will also give you some pretty clear feedback. A healthy, happy cactus looks and feels firm and plump.
- A Thirsty Cactus: The plant might start to look a little wrinkled or shrunken. This is a sign it’s tapping into its internal water stores and is ready for a drink.
- An Overwatered Cactus: This is a much bigger problem. The base of the cactus might turn yellow, feel soft and squishy, and the whole plant may even start to lean. These are the classic signs of root rot, and it can be fatal if not caught early.
Of course, other factors like pot size, material (terracotta dries out much faster than plastic), and the humidity in your home all play a part. For a deeper look into these nuances, you can explore this detailed guide to watering cactus plants. In the end, nothing beats learning to simply observe your plant and respond to its needs.
Building the Ideal Soil and Potting Foundation
A cactus’s health starts from the ground up—or more accurately, from the roots down. That’s why getting the soil and pot right is the most crucial step in good cactus care. The single biggest mistake I see beginners make is grabbing a bag of standard, all-purpose potting soil. That stuff is designed to act like a sponge, holding onto moisture for dear life, which is a death sentence for a desert plant.
To keep a cactus happy, you need to replicate the gritty, rocky, well-draining environment of its native home. This means using a soil mix that lets water rush right through, preventing the roots from ever sitting in a puddle and succumbing to rot. Think of it less as "soil" and more as a loose, airy anchor for its root system.
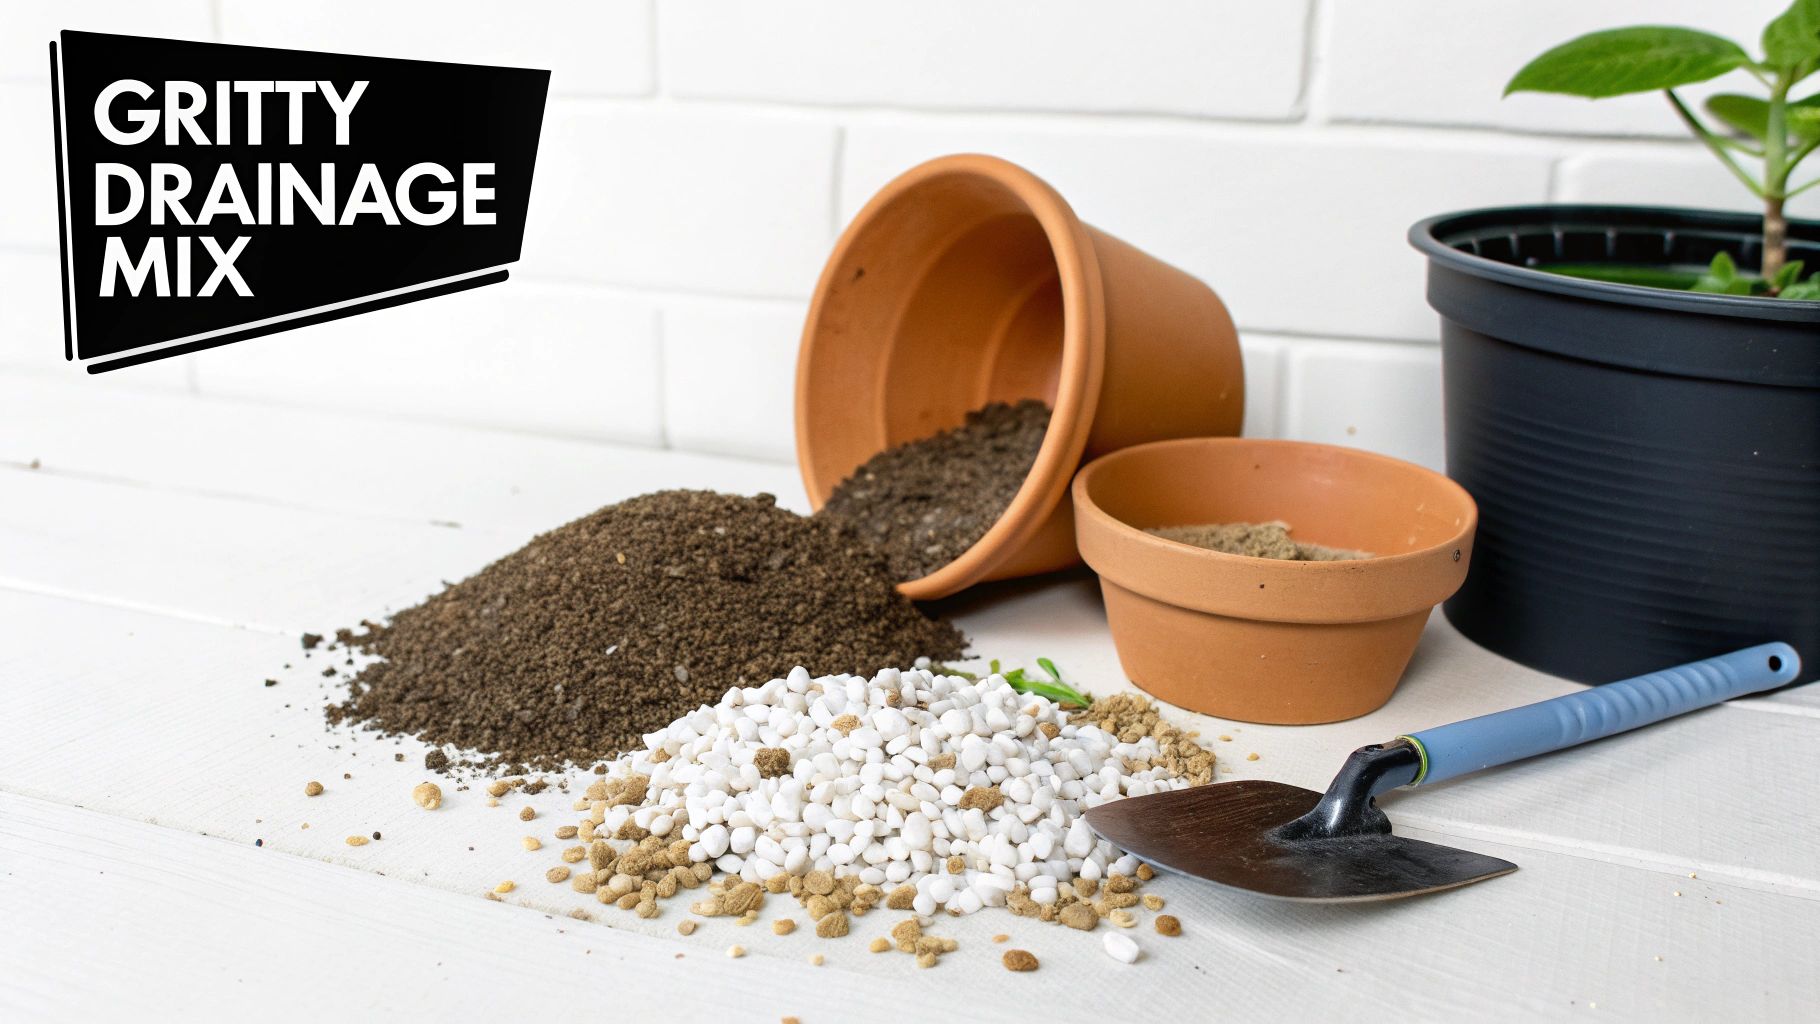
Crafting the Perfect Cactus Soil Mix
You’ve got two paths here: buy a pre-made mix or whip up your own. While commercial cactus and succulent soils are a decent starting point, I find most of them still hold a bit too much moisture for my liking. Adding extra grit is almost always a good idea. For the best results and total control, a simple DIY mix is the way to go.
The magic formula is a blend of roughly 50% organic material (like basic potting soil) and 50% inorganic, or gritty, material. This gives your cactus just enough nutrition from the organic side while the inorganic stuff guarantees the fast drainage it craves.
The perfect cactus soil should feel gritty and fall apart easily in your hands, not rich and dense like garden soil. When you water it, you should see water flowing out of the drainage hole almost immediately. That’s the tell-tale sign of a healthy, fast-draining foundation.
So, what goes into this custom mix? Let's break down the key ingredients.
Comparing DIY Cactus Soil Components
Understand the role each ingredient plays in your homemade mix to create the perfect foundation for healthy cactus roots.
| Soil Component | Its Primary Function | Typical Ratio in Mix |
|---|---|---|
| Potting Soil/Coco Coir | Provides a nutrient base and organic matter. | One part of the total mix. |
| Pumice | Creates large air pockets and prevents compaction. | One part of the total mix. |
| Perlite | Adds lightness and aeration to the soil. | Used interchangeably with pumice. |
| Coarse Sand | Ensures excellent drainage and adds gritty texture. | One part of the total mix. |
A fantastic and dead-simple recipe to start with is one part potting soil, one part coarse sand, and one part pumice or perlite. Just make sure you’re using horticultural sand, not fine playground or beach sand, which can turn to concrete when wet. Mix it all up, and you’ve created a substrate your cactus will absolutely love.
Choosing the Right Pot
The container you pick is just as vital as the soil you put in it. When it comes to cactus pots, two things are non-negotiable: the material and the drainage.
- Material Matters: Terracotta (or unglazed clay) pots are the undisputed champion for cacti. Why? They’re porous. This allows moisture to evaporate right through the sides of the pot, helping the soil dry out significantly faster than it would in a plastic or glazed ceramic home.
- Drainage is Crucial: This is the golden rule. The pot must have a drainage hole at the bottom. No exceptions. Without an escape route, water will pool and drown the roots, leading to rot—no matter how perfect your soil is.
When you're upgrading your plant's home, resist the urge to go too big. Choose a new pot that is only about 1-2 inches wider in diameter than the old one. A pot that's too spacious holds onto excess soil that stays wet for too long, dramatically increasing the risk of overwatering.
A Quick Guide to Repotting
Every cactus owner needs to know how to repot, a task you'll likely tackle every 2-4 years or whenever the plant looks cramped and root-bound. While the spines can make it look intimidating, the right tools and a little confidence make it a straightforward process.
We cover everything you need to know in our complete prickle-free guide on how to repot cacti, from handling the plant safely to the best aftercare. The ideal time for this job is in the spring, just as your cactus is waking up and entering its active growing season.
Taking Your Cactus Care to the Next Level
Once you've gotten the hang of the essentials—light, water, and soil—you can start thinking beyond just keeping your cacti alive. This is where the real fun begins. Advanced care is all about encouraging your plants to not just survive, but to truly thrive, putting on new growth, showing off stunning blooms, and even helping you create new plants from your collection.
A question I get all the time from growers ready for the next step is about feeding. It's best to think of fertilizer less like daily food (that's what sunlight is for) and more like a seasonal vitamin shot. Cacti are light feeders, so going overboard with fertilizer can cause more problems than it solves, often leading to weak, lanky growth that just doesn't look right.
The trick is to only feed them when they're actively growing, which for most cacti is from spring through the summer. Once they go into their winter rest, you'll want to stop completely.
Feeding for Strong, Healthy Growth
When you're picking out a fertilizer, grab one that's low in nitrogen but has a good amount of phosphorus and potassium. You can't go wrong with a formula made specifically for cacti and succulents. As a golden rule, I always suggest diluting it to half or even a quarter of the strength recommended on the bottle.
Here’s a simple feeding routine that works wonders:
- When to Feed: Give them a dose of your diluted fertilizer once every 4-8 weeks throughout the spring and summer.
- When to Stop: Cut off all feeding by late summer or early fall. This signals to the plant that it's time to get ready for its winter nap.
- How to Apply: This is important—always water your cactus well before you add any fertilizer. Pouring fertilizer onto dry soil is a surefire way to scorch the roots.
Creating New Plants with Propagation
Honestly, one of the most rewarding parts of this hobby is propagation. It's the magic of creating brand new plants from the ones you already have. It’s an amazing, cost-effective way to grow your collection or share your passion with friends and family. The two easiest ways to do this are by taking cuttings or separating offsets.
Propagation really shows you how tough these plants are. A single piece of a healthy cactus can grow into a whole new plant, a perfect little clone of its parent. It’s a simple process that gives you a much deeper connection to your plants' life cycle.
Taking cuttings works great for most of the branching or column-shaped cacti. For a full step-by-step guide, check out our article on how to propagate cactus from cuttings. Many other types of cacti will produce little "pups," or offsets, which are baby cacti that sprout around the base of the main plant. You can gently twist these off and pot them up on their own.
No matter which method you use, the most critical step is letting the cut end callous. This just means you let the cutting or offset sit in a dry, shady spot for a few days—or even a few weeks for bigger pieces—until the wound dries up and forms a seal. Skipping this step is the most common mistake people make, and it almost always leads to the cutting rotting as soon as you put it in soil.
It's no surprise that more people are getting into these techniques. The global market for cactus products was valued at around $1.12 billion in 2024 and is expected to keep growing. It shows a real shift from just owning plants to actively cultivating and multiplying them. As your green thumb develops, you might even want to explore different plant cultivation techniques for other kinds of plants to broaden your gardening skills.
Troubleshooting Common Problems and Pests
Even the most dedicated cactus owner runs into trouble now and then. One day you'll spot a weird patch, notice the base feels a bit soft, or find a tiny, unwelcome guest hitching a ride. Don't panic! These moments aren't failures; they're how you learn to become a better, more tuned-in plant parent. Think of this as your field guide for figuring out what’s wrong and how to fix it.
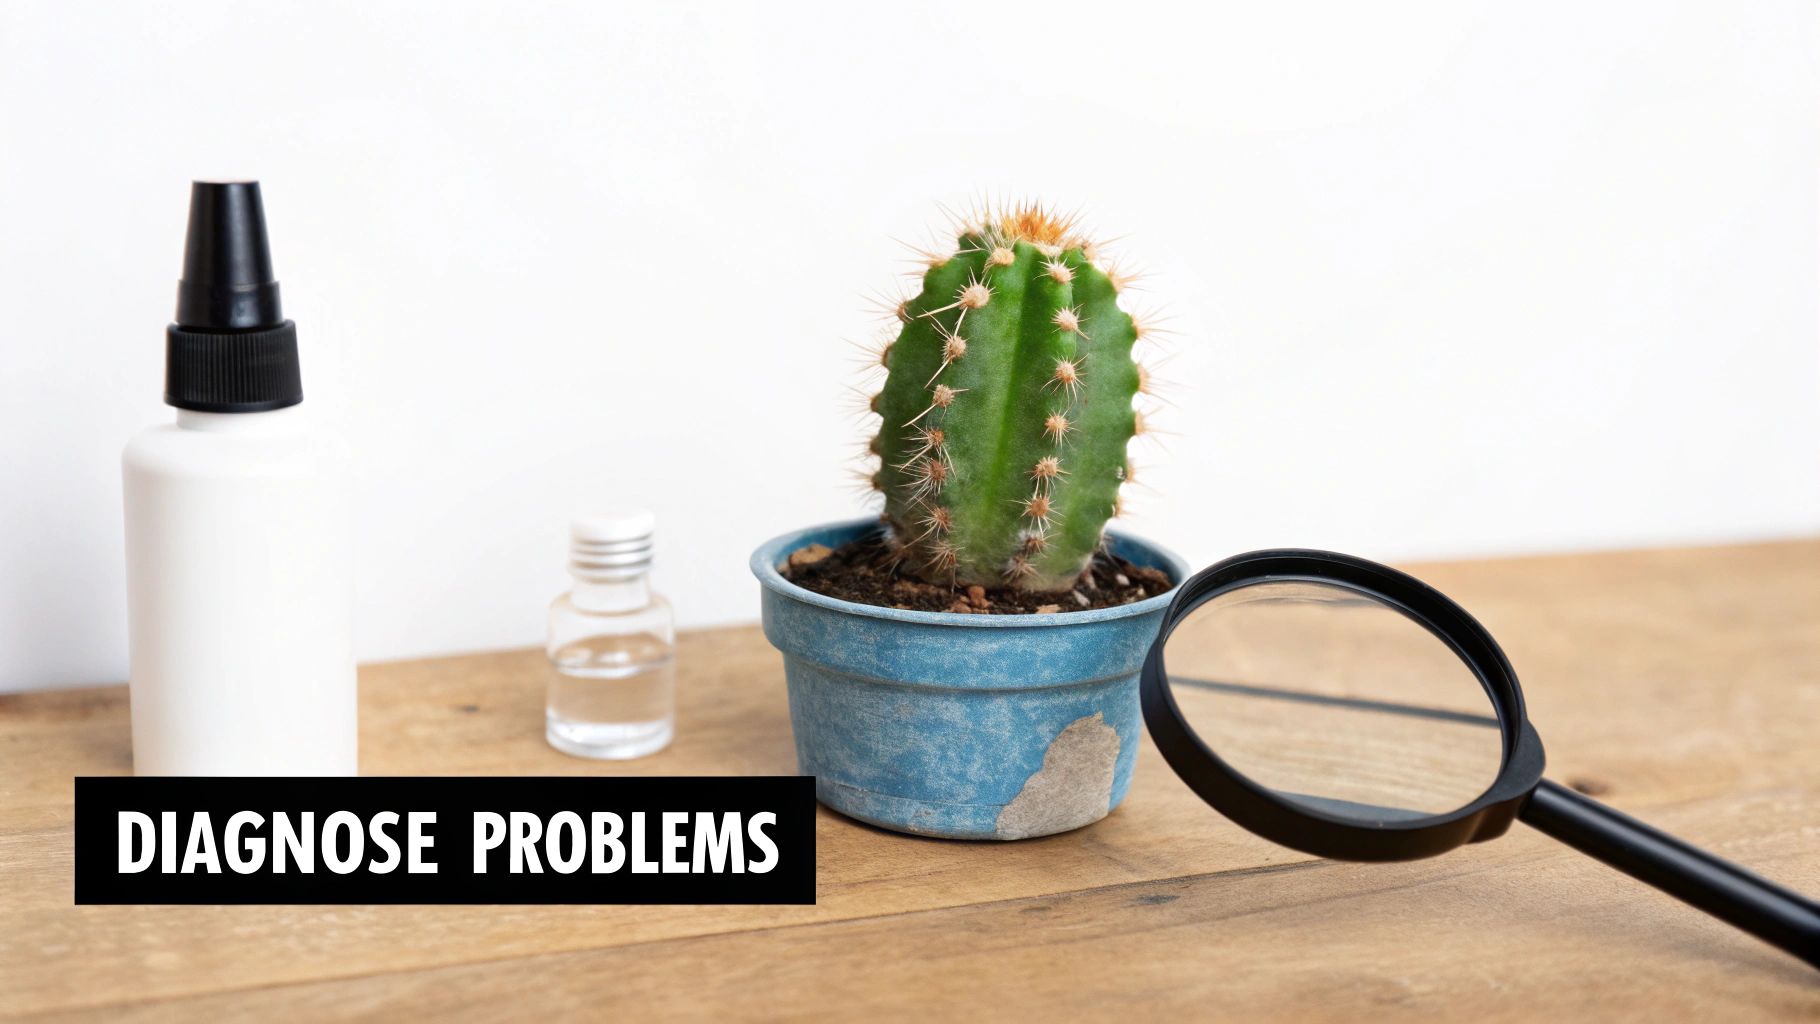
Most issues boil down to one of two things: stress from the wrong environment (like too much water or not enough light) or an attack from common houseplant pests. The key to getting your plant back on track is learning to spot the difference and acting fast. It all starts with a little careful observation.
Identifying and Eliminating Common Pests
Cacti are tough, but they're not invincible, especially when kept indoors. Pests can show up and multiply quickly if you're not paying attention, so catching them early is everything. Here are the usual suspects to keep an eye out for.
- Mealybugs: These are hands-down the most common pest you'll see. They look like tiny bits of white, fuzzy cotton, and they love to hide in the little nooks and crannies of your cactus. They feed on sap, which will eventually stunt the plant's growth and cause yellowing.
- Spider Mites: These guys are so tiny they're almost impossible to see with the naked eye. Your first clue will likely be the super-fine, delicate webbing they spin between the cactus spines or along its ribs. Like mealybugs, they suck the life out of the plant, leaving behind tiny yellow or brown speckles.
- Scale Insects: At first glance, you might mistake scale for a natural bump on your cactus. They look like small, brown, armored discs stuck to the surface. These insects latch on and feed, weakening the plant and often secreting a sticky residue called honeydew.
Getting rid of these pests is usually pretty straightforward. If you've only spotted a few, just dip a cotton swab in 70% isopropyl rubbing alcohol and dab them off one by one. This works wonders for mealybugs and scale.
For a bigger invasion, it's time to bring out the insecticidal soap or neem oil spray. Before you go all out, test the spray on a small, hidden part of the cactus to make sure it doesn't cause a bad reaction. If it's all clear, spray the entire plant, making sure to get into all the hidden spots. Repeat the treatment once a week until you're sure every last pest is gone.
Diagnosing Common Cactus Ailments
Pests aside, most problems are your cactus's way of telling you something is off in its environment. Learning to read these signals is the key to good care.
By far, the biggest mistake people make is overwatering, which quickly leads to root rot. If your cactus feels soft and squishy or is turning yellow from the bottom up, you're almost certainly looking at rot.
Here’s a quick cheat sheet to help you diagnose what your cactus is trying to tell you:
| Visual Symptom | Likely Cause | Actionable Solution |
|---|---|---|
| Pale & Stretched | Not getting enough light (etiolation). | Move it to a much brighter spot, like a south-facing window. |
| Yellow & Mushy Base | Overwatering and root rot. | Stop watering now. Take it out of the pot, cut off any black, mushy roots, and repot it in fresh, dry soil. |
| White or Brown Scars | Sunburn from too much harsh, direct sun. | Move the plant to a spot with less intense afternoon sun, or hang a sheer curtain to filter the light. |
| Wrinkled & Shriveling | Thirsty and underwatered. | Give the plant a deep, thorough watering until it drains from the bottom. It should plump back up in a day or two. |
When you tackle these problems calmly and methodically, you'll be able to bring your plant back to health. Every issue you solve gives you a deeper understanding of what these incredible plants truly need to thrive.
Answering Your Top Cactus Questions
Alright, let's wrap this up by hitting some of the most common questions I get asked. These are the little things that often trip people up, but once you know the answer, you'll feel much more confident in your cactus care game.
Why Is My Cactus Turning Yellow or Brown at the Base?
This is the number one sign of overwatering, hands down. If the base of your cactus is turning yellow or brown and feels soft or mushy, you're looking at the early stages of root rot.
The first thing to do is stop watering immediately. Gently pull the plant out of its pot and take a look at the roots. If they're brown and slimy, you'll need to trim away the rot and repot it in fresh, bone-dry cactus mix. If the damage is severe, your best move is to salvage the healthy top part by taking a cutting and starting over.
When Should I Repot My Cactus?
You don't need to do it often, which is great news. A good timeline is every 2-4 years. You'll know it's time when you see roots peeking out of the drainage hole or if the plant starts looking wobbly and top-heavy for its pot.
Always aim to repot at the start of the growing season in early spring. And here’s a pro tip: only go up one pot size. A new pot that's just 1-2 inches wider is perfect. Any bigger, and you risk having too much soil that stays wet for too long, leading right back to root rot.
A pot without a drainage hole is a cactus death sentence. It’s that simple. Without a way for water to escape, root rot is practically guaranteed.
If you've found a beautiful decorative pot without a hole, don't despair! Just use it as a "cachepot." Keep your cactus in its regular plastic nursery pot (with drainage!) and just slip it inside the decorative one. When it's time to water, you can just lift the inner pot out.
Why Won't My Cactus Flower?
Ah, the million-dollar question! It's frustrating when a healthy cactus just won't bloom. The secret almost always comes down to giving it a proper winter rest. Most desert cacti need a cool, dry dormancy period to trigger bud formation.
Starting in late fall, you need to make two big changes:
- Cut back on watering dramatically. We're talking maybe once a month, just enough to keep it from shriveling.
- Move it to a cooler spot. An ideal temperature is between 45-55°F (7-13°C). It still needs bright light, but the chill is crucial.
If you skip this winter chill-out period, or if the cactus isn't getting enough sun year-round, it simply won't have the energy or the signal it needs to produce those beautiful flowers.
Ready to put your new knowledge to the test? Explore our wide selection of healthy, beautiful cacti at The Cactus Outlet and find the perfect plant to start your journey! Find your next spiky friend at https://www.cactusoutlet.com.