
Welcome to the rewarding world of creating new cacti from your favorite plants. Propagating a cactus from a cutting is a surprisingly straightforward process, and once you get the hang of it, you'll be hooked.
It all boils down to a few key steps: take a clean cut from a healthy parent plant, let the wound dry and "callus" over for a week or two, and then plant it in the right kind of soil. This method essentially clones the parent, so you get an exact copy, which is a fantastic and free way to expand your collection.
Why Propagating Cactus Cuttings Is So Rewarding
Creating new cacti from your most treasured plants is simpler than you might think and incredibly satisfying. Not only does it allow you to multiply your collection at no cost, but it’s also the perfect way to share your favorite specimens with friends and family. This guide will walk you through the entire process, giving you the confidence to get started.
The journey from a single cutting to a thriving, rooted plant is a wonderful lesson in patience and plant science.
The core principles are easy to master and highly effective. In fact, with the right technique, the rooting success rate can easily exceed 90%. The most crucial part? Allowing the cutting to properly callus before you even think about planting it. You can discover more insights about the cactus market on cognitivemarketresearch.com.
Propagating a cactus is a bit like making a photocopy of your favorite plant. You get an exact genetic duplicate, ensuring that the unique colors, shapes, and growth habits of the parent are perfectly preserved in the new one.
This technique works for a huge variety of cacti. The same fundamental steps apply whether you're working with a towering columnar cactus or a small, flat pad. While the process is similar to what you'd do with other succulents, cacti have their own unique needs that we’ll cover in detail.
To see how these steps compare, check out our guide on propagating succulents from cuttings.
For those who like a quick overview, here's a simple breakdown of the propagation journey from start to finish.
Cactus Propagation At a Glance
| Stage | Key Action | Estimated Timeline |
|---|---|---|
| Taking the Cutting | Make a clean cut from a healthy parent plant. | 5 minutes |
| Callusing | Let the cut end dry in a shady spot until a hard callus forms. | 1-2 weeks |
| Planting | Place the callused cutting in well-draining cactus mix. | 10 minutes |
| Rooting | Wait for roots to form before watering. | 4-6 weeks |
| Aftercare | Introduce to more light and begin regular watering. | Ongoing |
Following these key stages will set you up for success and help you turn one cactus into many.
How to Take the Perfect Cactus Cutting
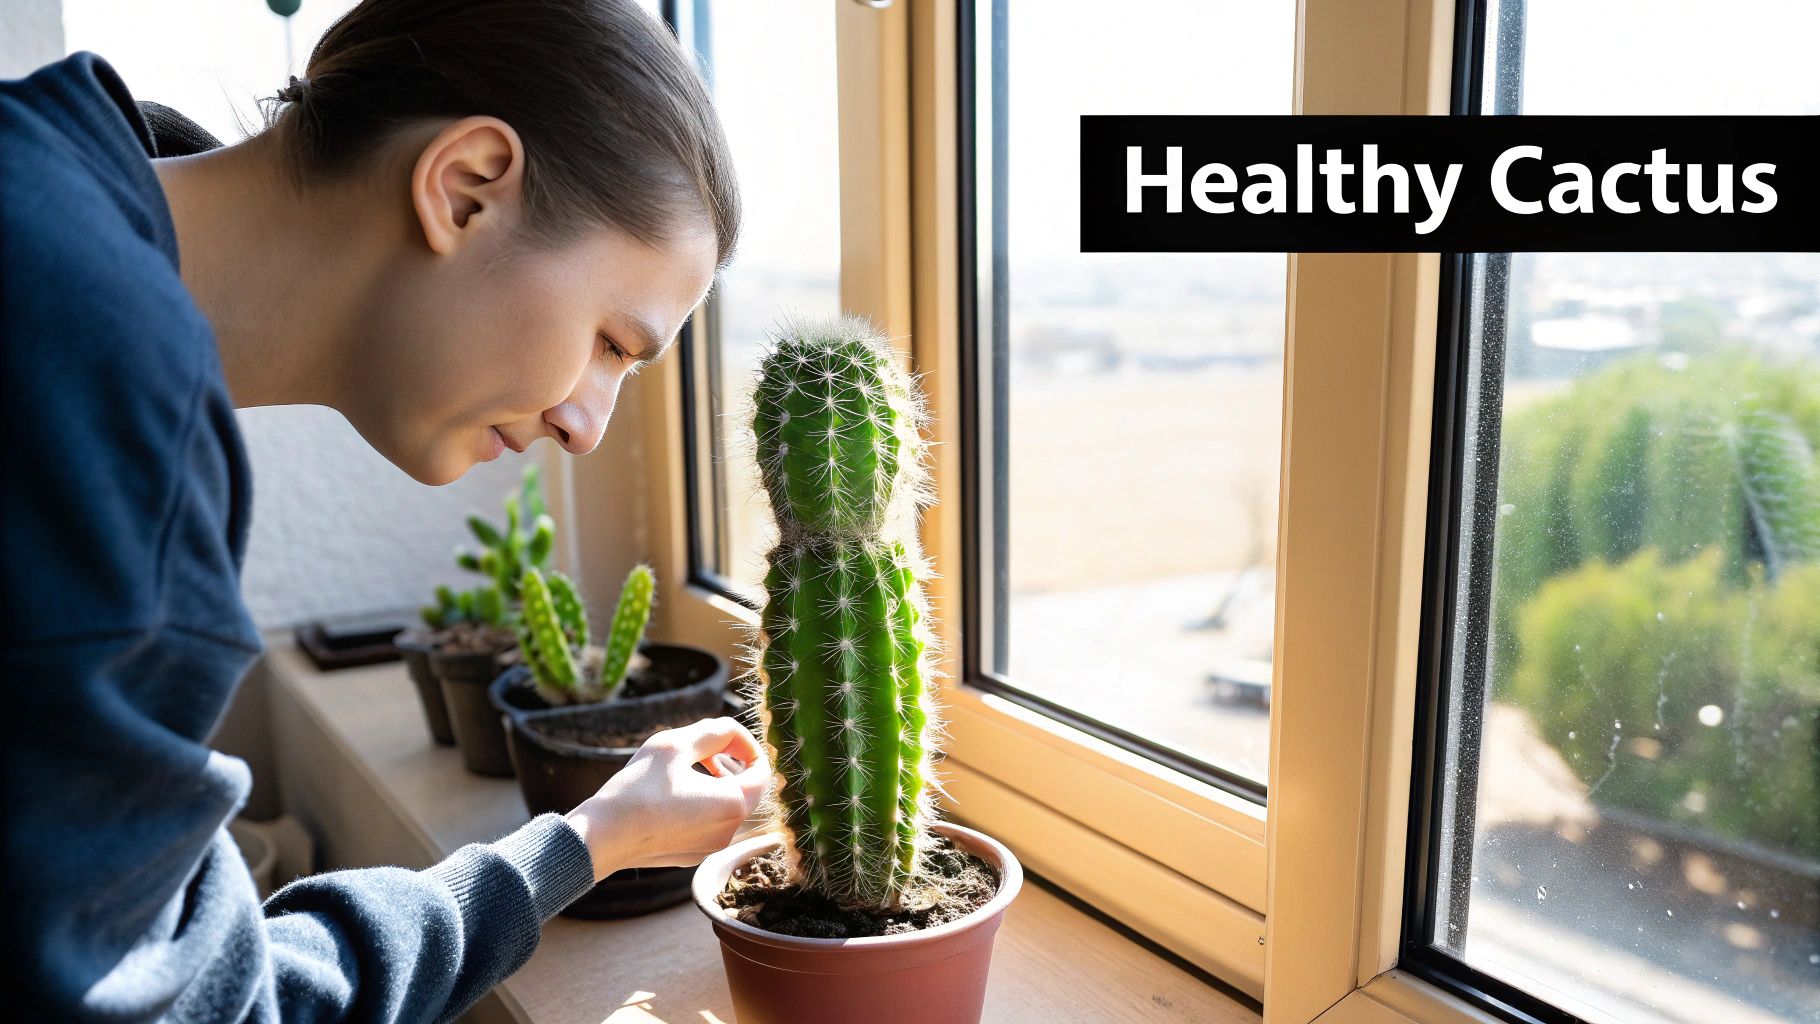
The secret to successfully cloning a cactus starts with choosing the right piece from a healthy, thriving parent plant. You’re looking for a mature, vigorous stem or pad that's packed with enough stored energy to push out new roots.
Scout for a section that's at least a few months old. It should feel firm, not squishy, and have a deep, uniform color. Steer clear of any parts that look pale, shriveled, or show signs of disease like soft spots or weird discoloration. A healthy cutting gives you a massive head start.
Making a Clean and Precise Cut
Once you’ve picked your spot, the next step is crucial: making a clean cut. It's tempting to just grab your garden shears, but they often crush the cactus's delicate tissues. This not only slows down healing but practically invites infection and rot.
For a much better result, always use a sterilized, sharp knife or a serrated blade. For columnar cacti, like a Peruvian Apple Cactus, a simple, straight cut across the stem works perfectly. If you're working with a pad-type cactus like a Prickly Pear (Opuntia), slice cleanly right through the joint connecting the pad to the main plant.
Think of it as minor surgery for your plant. Wiping your blade down with rubbing alcohol beforehand is a non-negotiable step. It kills off bacteria that could otherwise turn your cutting into a mushy mess.
Safety First: Don't Get Poked
Never, ever underestimate the spines—even on the cacti that look soft and fuzzy. Those tiny, hair-like spines, known as glochids, can be way more irritating and difficult to remove than the big, obvious ones. Always protect your hands.
A little prep goes a long way. Here’s what I always have on hand:
- Thick leather or rubber gloves are a must for fending off the larger spines.
- Kitchen tongs or a folded-up newspaper give you a secure way to hold the cactus without getting stuck.
Handling the cutting with care protects you and the plant, preventing any bruising that could hinder its growth. With your gloves on and a clean knife at the ready, you're all set to take a cutting that has every chance of becoming a brand-new plant.
Why Callusing Your Cutting Is Non-Negotiable
After you've made a clean cut, the next part is arguably the most important, and all it really asks of you is patience. This step is called callusing. It’s the natural process where the fresh, wet wound at the base of your cactus cutting dries out, hardens, and seals itself off.
Think of it like a scab. This callus forms a tough barrier that protects the vulnerable, fleshy interior from all sorts of nasty bacteria and fungi that live in potting soil. If you skip this, you’re essentially sticking an open wound into the dirt. It’s the number one reason new cuttings rot and fail.
Getting this right is the foundation of successful propagation, as you can see here.
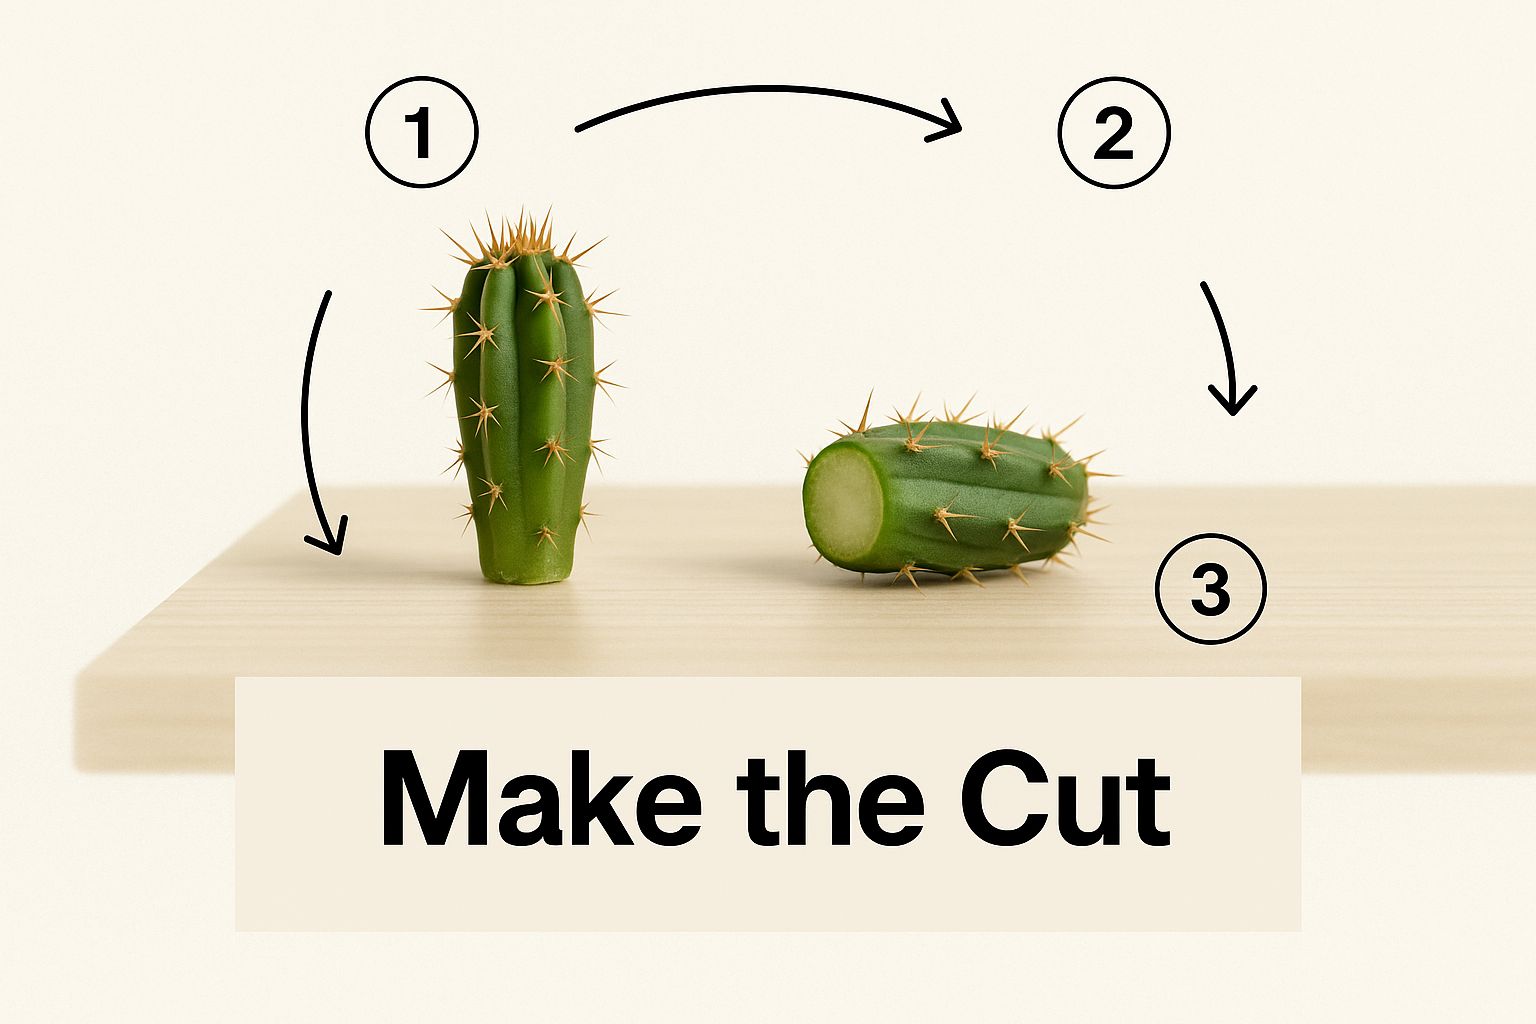
As the graphic shows, it’s a simple concept: cut, then wait. That waiting period is what makes all the difference.
Creating the Ideal Healing Environment
To get a solid callus, you need to put your cutting in the right spot. Find a place with plenty of air circulation and bright, indirect light. Direct sun is a big no-no—it'll just stress and scorch the cutting while it's trying to heal. A shady corner of a covered patio or a spot near a well-lit window indoors is perfect.
Just lay the cutting on its side on something clean and dry, like a piece of cardboard or a kitchen tray. This keeps the cut end exposed to the air and prevents any moisture from getting trapped against it.
I can't stress this enough: don't rush this part. It’s a classic rookie mistake. A good callus is your insurance policy against rot and easily boosts your success rate from a 50/50 shot to well over 90%.
So, how long do you wait? It really depends on the thickness of the cutting and the humidity in your area.
- Small cuttings, like a single prickly pear pad, might only need 3-7 days.
- Larger, thicker cuttings, such as a chunky arm from a columnar cactus, could take several weeks or even a month to be ready.
You’ll know the callus has formed when the cut end is completely dry to the touch. It should feel firm, almost like plastic, and might even look a little indented or concave. There should be absolutely no softness or moisture left. Once it's fully healed over, you're ready for planting.
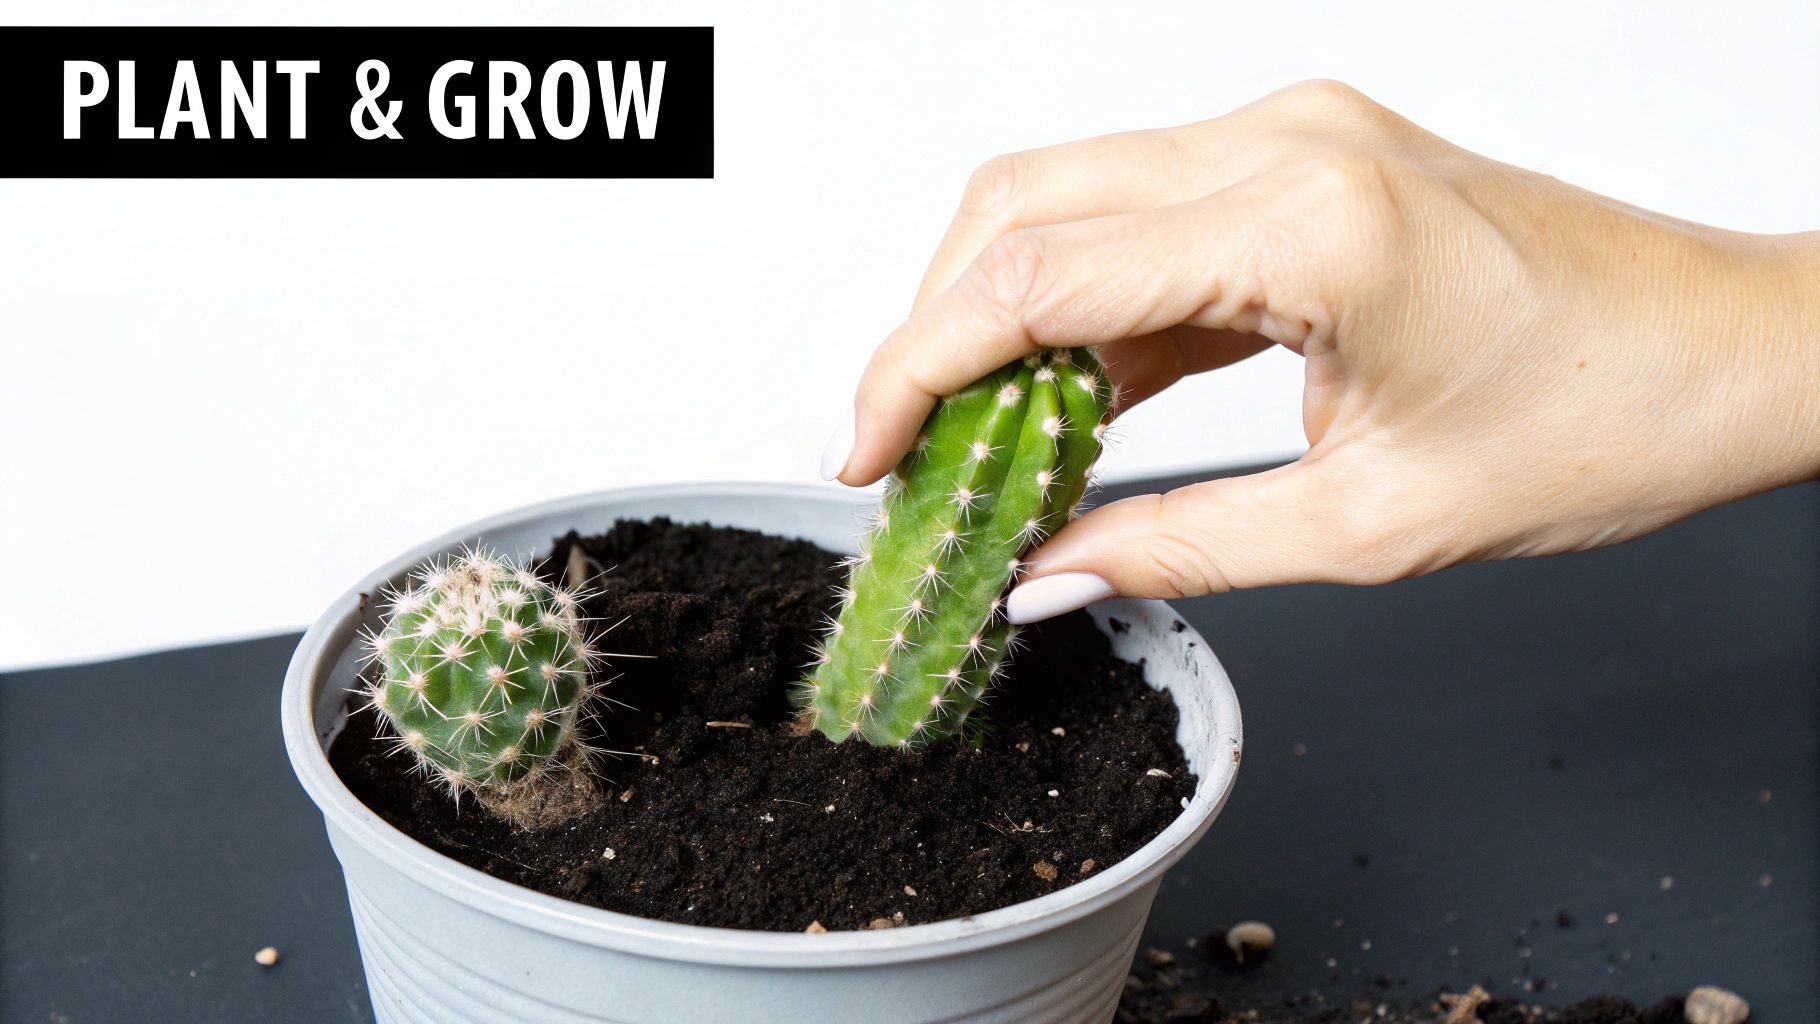
Planting Your Cutting to Encourage Strong Roots
With a perfectly callused cutting in hand, you’re ready for the fun part—planting. This is where your new cactus officially begins its journey. Getting the pot and soil right from the start is the secret to helping those first roots emerge.
First, grab a container that's just a little bit bigger than the cutting itself. A snug fit is actually better because it means there won't be a ton of excess soil holding onto moisture, which is a big risk for rot. And this is the most important part: the pot must have drainage holes. For cacti, this is absolutely non-negotiable. They just can't handle sitting in a puddle of water.
Choosing the Right Soil Mix
Regular old potting soil from the bag is a no-go. It’s far too heavy and stays wet for way too long, which is a death sentence for a cactus cutting. What you need is a gritty, fast-draining mix that lets air circulate freely around the base of your future plant. Keeping things on the drier side is what actually nudges the cutting to send out new roots in search of a drink.
You can always buy a pre-made cactus mix, but honestly, making your own is easy and often works even better. A simple 50/50 blend of potting soil and some kind of inorganic material is a fantastic starting point. For a deeper dive into the best ingredients, check out our guide to creating the perfect cactus and succulent soil.
A few of my favorite combinations include:
- Perlite: It’s super lightweight, affordable, and amazing for aeration.
- Pumice: A bit weightier than perlite, which helps anchor the pot and it doesn't float to the surface when you water.
- Coarse Sand: Make sure it’s horticultural sand, not the fine stuff from a beach, to really open up the soil structure.
The real goal here is to create a soil mix that dries out fast and completely between waterings. Think of it as giving your cutting a breathable foundation to get established without having to fight off rot.
Once your pot and soil are ready, gently place the callused end of the cutting about one to two inches deep into the mix. You only need to go deep enough for it to stand up on its own. If you have a taller cutting that’s a bit wobbly, you can prop it up with a few small rocks or pebbles around the base for extra support.
The All-Important First Watering
Whatever you do, resist the temptation to water your cutting right after you plant it. I know it feels wrong, but this is the most common mistake people make, and it can quickly rot the base before it ever has a chance to root.
Instead, just let the cutting sit there in the dry soil for at least one to two weeks. This dry spell is what really motivates the cutting to push out new roots looking for moisture. After that initial wait, you can finally give it its first, very light watering. The key is to let the soil dry out completely every time. This patient approach is what separates a successful propagation from a mushy failure.
Caring for Your New Cactus and Spotting Trouble
Once your cutting is in its new pot, the waiting game begins. This is where your patience and attention to detail will really pay off, turning that simple stem into a brand-new, self-sufficient plant. Your two biggest jobs now are giving it the right amount of light and water and knowing what to do if things start looking a little strange.
For the first few weeks, keep your cutting out of harsh, direct sunlight. It has no roots yet to pull in water, so it can easily get sunburned. Find a spot with plenty of bright, indirect light—an east-facing window that gets gentle morning sun is perfect, or a spot a few feet away from a sunny south-facing window works great too. Once you see new growth emerging, that’s your sign that roots have formed, and you can slowly start introducing it to more direct light.
Solving Common Propagation Problems
Even the most experienced growers run into issues now and then. Don't worry if your cutting doesn't look perfect right away; most problems are easy to fix if you catch them early.
Here’s a look at what you might see and how to handle it:
- Mushy Base: If the bottom of your cutting feels soft or squishy, that’s almost always rot. It usually means the callus wasn't quite dry enough before planting or it got too much moisture. Carefully lift it out of the soil, slice off the rotted part, and let the fresh cut callus over again before you replant.
- Shriveled Appearance: A bit of wrinkling is totally normal. The cutting is using its own stored water to push out new roots. But if it looks severely dehydrated, it might be getting too much sun or could use a very slight increase in humidity.
- No Signs of Rooting: Patience is everything! Some cacti can take a few weeks, while others might take several months to root. Just make sure the soil is kept warm and the cutting is secure. If you're getting impatient, a little bottom heat from a propagation mat can really speed things up.
The number one mistake I see people make is overwatering. Cuttings have zero roots, making them incredibly susceptible to rot. When you're unsure if it's time to water, just wait another week. It's almost always the safer bet.
Propagating cacti isn't just a fun hobby; it's big business. The commercial cactus market is expected to jump from $3.86 billion to $7.01 billion by 2025. Nurseries use these exact vegetative propagation techniques to keep up with the incredible demand, which shows just how reliable this method is. If you're curious about this trend, you can dig into the full cactus market research.
Getting the watering right is probably the most critical skill you can learn. For a much deeper dive, take a look at our complete guide on how to properly water cactus plants. It will help you give your new cuttings the best possible start.
Common Questions About Propagating Cacti
Even with the best instructions, you’re bound to have a few questions pop up, especially when you’re trying this for the first time. Getting these little details right can be the difference between a rotted stump and a thriving new plant, so let’s clear up some of the most common uncertainties.
Think of this as the troubleshooting guide you’ll be glad you read before making that first cut.
What’s the Best Time of Year to Take Cuttings?
Hands down, the best time to propagate cacti is during their active growing season in the spring and summer. This is when the plant is full of energy, and the warm weather gives the cutting a massive head start on both callusing over and pushing out new roots.
You can try it in the fall or winter, but you'll be playing on hard mode. The process will be painfully slow due to the cooler temps and lower light, and you run a much higher risk of the cutting rotting in cold, damp soil.
My advice? Always work with your plant's natural rhythm. Propagating in spring is like giving your cutting a running start—you’re setting it up for the easiest path to success.
Should I Bother with Rooting Hormone?
Honestly, most of the time you don't need it. The vast majority of common cacti are so eager to grow that they’ll root just fine on their own. I’ve successfully propagated dozens of cuttings without ever touching the stuff.
That said, it can give things a little nudge, particularly if you're working with a more stubborn or slow-growing species. If you want to give it a shot, just dip the dry, callused end of the cutting in the powder right before you stick it in the soil. Just remember that a clean cut and a proper callus are far more important for success than any hormone powder.
How Can I Tell if My Cutting Has Actually Rooted?
This is where a little patience goes a long way. Rooting isn’t an overnight process; it can take anywhere from a few weeks to several months. The last thing you want to do is keep pulling it out of the soil to check.
Fortunately, there are a couple of gentle ways to see what’s happening underground:
- Look for New Growth: This is the tell-tale sign. If you see fresh growth sprouting from the top of the cutting, you can be sure it has established a healthy root system.
- The "Gentle Wiggle" Test: After a few weeks, give the cutting a very light tug. If you feel resistance, that’s a good sign that roots have formed and are anchoring it in place. Just don't get carried away and do this too often or too forcefully, or you’ll tear those fragile new roots right off.
Does This Method Work for All Cacti?
This cutting technique is perfect for most cacti that grow in distinct segments, pads, or stems. It's the go-to method for popular types like:
- Opuntia (like the Prickly Pear)
- Columnar cacti such as Cereus
- Branching varieties like many Euphorbia
Where this method falls short is with globular cacti—the ones that grow as a single round ball, like certain Mammillaria species. For those, you'll want to propagate them from seed or by gently separating the little "pups" (offsets) that cluster around the base of the mother plant.


