
Planting cactus cuttings is one of the most satisfying ways to make more of your favorite plants. It's really just a matter of taking a piece from a healthy "mother" plant, letting it heal over, and then potting it up to grow new roots. This works so well because cacti are built for this—they've evolved to regrow from broken pieces as a core survival tactic in the wild.
Why Propagating Cactus Cuttings is So Effective
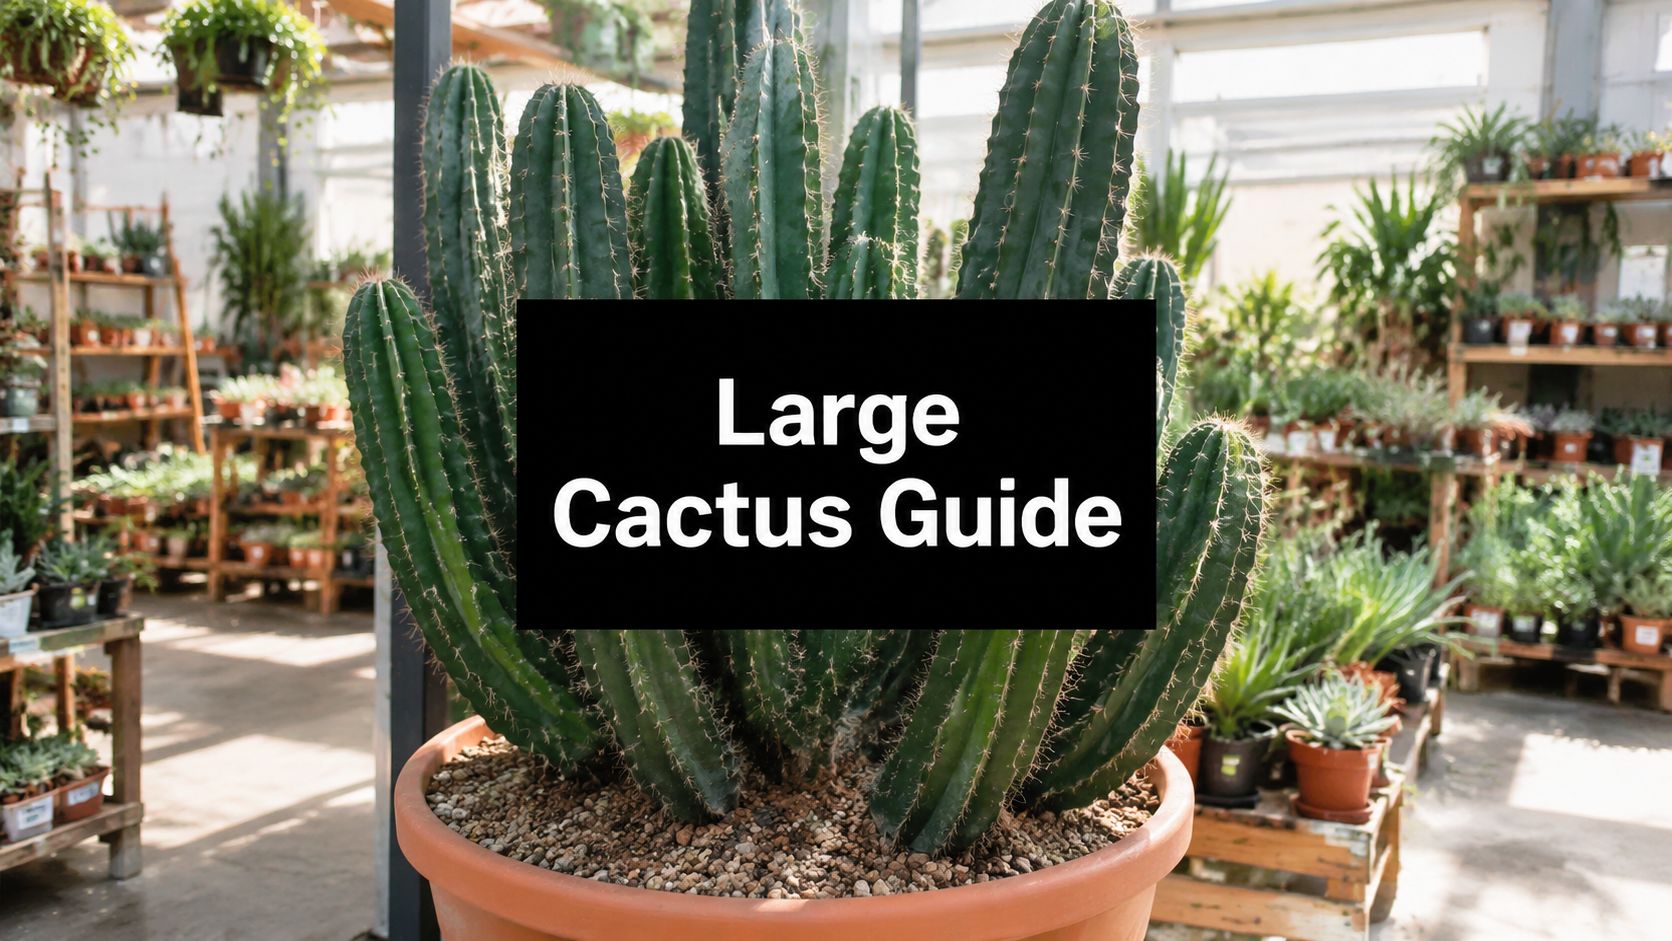
So, you want to get into cactus propagation? Good choice. Whether you're eyeing a friend's collection or just want more of a variety you already love, you've stumbled upon one of the easiest and cheapest ways to expand your desert garden. This guide will walk you through everything you need to know.
What we're doing here is tapping into the incredible resilience of these plants. Cacti are survival experts. Out in their natural habitat, a piece might get knocked off by an animal or a strong gust of wind. If that piece lands on suitable ground, it will often sprout its own roots and start a whole new life. We're just recreating that natural process in a more controlled way.
The Best Time to Plant Cactus Cuttings
Timing definitely plays a role in how quickly you'll see results. The best time to take and plant a cactus cutting is during its active growing season, which for most cacti runs from late spring through summer. This is when the plant is full of energy and ready to grow, meaning your cuttings will be primed to push out roots much faster. Trying to do this in the dead of winter often leads to a long, slow wait, if it works at all.
Gathering Your Tools
You don't need a high-tech setup for this. The beauty of propagating cacti is its simplicity. Here’s a short list of what you'll want to have on hand:
- A Clean, Sharp Knife or Pruners: A clean cut is non-negotiable. It helps prevent infection and ensures a nice, neat wound on both the parent plant and the cutting.
- Thick Gloves: This one’s obvious, but worth repeating. Protect your hands! Heavy-duty leather or specialized cactus-handling gloves are your best friend here.
- A Good Pot: For a new cutting, a small terracotta pot is ideal. The porous clay helps the soil dry out evenly and quickly, which is exactly what a rooting cactus needs. Always make sure it has a drainage hole.
The real magic of cactus propagation is that you’re simply helping the plant do what it already wants to do. By giving it a clean cut, a dry callusing period, and the right soil, you're just setting the stage for its natural survival instincts to kick in.
Rather than just giving you a list of steps, I want to explain the 'why' behind each part of the process. Once you understand the reasoning, you'll develop a feel for it and be able to troubleshoot any issues that pop up. This is how you go from following instructions to truly knowing how to turn one cactus into an entire collection.
How to Select and Prepare the Perfect Cactus Cutting
Everything that follows—rooting, potting, and long-term growth—really hinges on getting this first part right. Choosing a healthy, energetic cutting from a strong parent plant is the single best thing you can do to set yourself up for success. It’s like giving your new plant a genetic head start; a weak cutting will almost always lead to a long, frustrating struggle.
Your journey starts with finding a good parent plant. Look for a cactus that's clearly in its prime: growing well, with vibrant color, and absolutely no signs of stress or sickness. You'll want to steer clear of any plants with weird discoloration, mushy spots, or unwelcome visitors like scale or mealybugs. A healthy parent has plenty of energy to spare, which means its cuttings have a much better shot at surviving while they work on growing a brand new root system.
Identifying the Perfect Specimen
Once you've found a healthy mother plant, it's time to pick the right piece to snip. Not all pads or stems are good candidates. You're hunting for a section that's mature but not old and woody—these pieces have the perfect combination of stored energy and the get-up-and-go to sprout new roots.
Here’s what I always look for in a top-notch cutting:
- Firm and Plump: The cutting should feel solid, not squishy or limp. This tells you it’s full of water and ready for action. A shriveled piece is already dehydrated and will have a tough time.
- Vibrant Color: You want to see a rich, even green (or whatever the natural color is for that particular species). Any yellowing or pale spots can be a red flag for nutrient issues or other problems.
- Blemish-Free: Give it a good look-over for nicks, scars, or brown spots. A clean surface is far less likely to get infected once you've made your cut.
- Mature Growth: Aim for a piece that grew this season or last. This ensures it's old enough to have the resources it needs to go it alone.
If you don't have a plant to take a cutting from, buying one is a great option. If you're weighing your choices, checking out the pros and cons of buying a cactus cutting online can give you a better idea of what to expect when it arrives.
Making a Clean and Strategic Cut
Alright, this is where the action happens. Your goal is simple: a clean cut that doesn't mess up the parent plant or the cutting. A jagged, torn wound is basically an open door for rot and fungus.
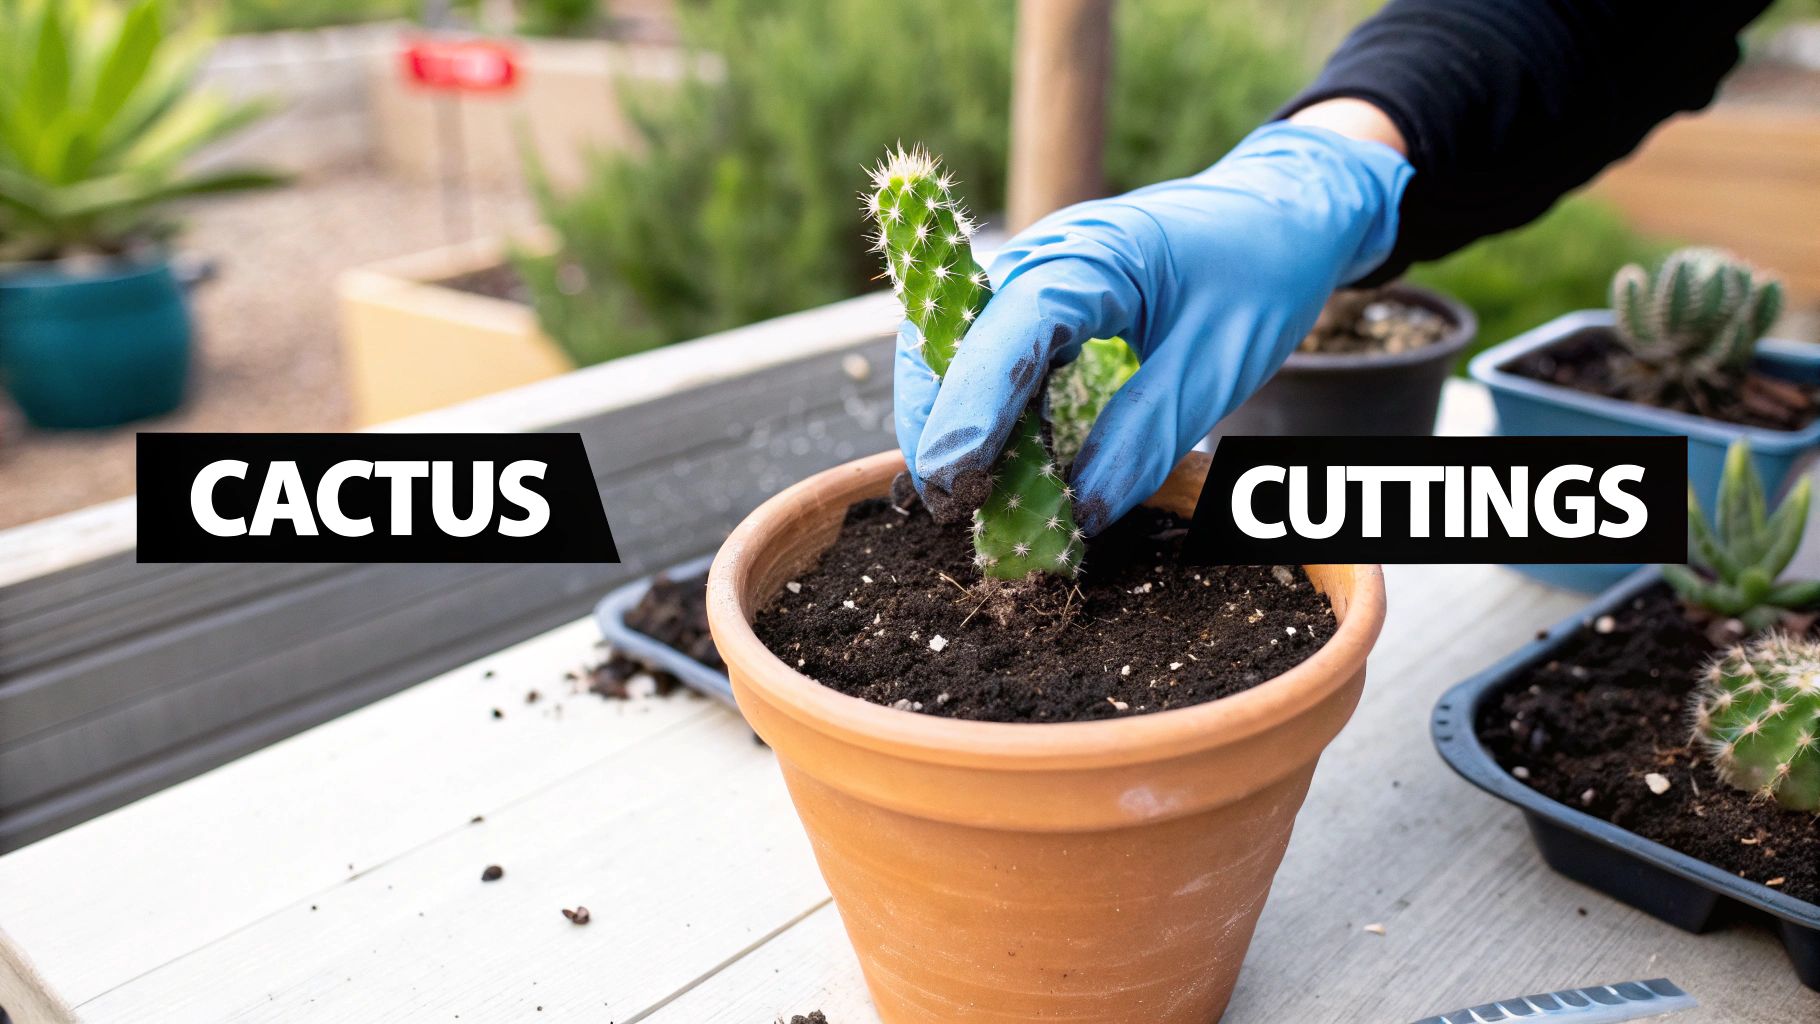
This simple graphic nails the essential gear you'll need to do this safely and effectively.

As you can see, having a sharp, clean knife, some protective gloves, and a pot ready to go makes the whole process a lot smoother.
Always, always use a sterile, sharp knife or a clean pair of pruners. I just wipe my blade down with rubbing alcohol before and after each cut to keep from spreading any nasty pathogens. Once you’ve picked your spot, make one quick, decisive cut. For columnar cacti like a San Pedro, a straight cut across the stem is perfect. If you're working with a prickly pear (Opuntia), it’s best to slice it right at the joint where the pad connects to the rest of the plant.
A little pro-tip I picked up years ago: make your cut on the parent plant at a slight angle. This keeps rainwater from pooling on the open wound, which dramatically cuts down the risk of rot, especially on outdoor plants.
Handling Your Cutting Safely
With the cutting separated, your next job is to handle it without getting hurt. Cacti didn't evolve to be cuddly, and their spines, glochids (those sneaky, hair-like prickles), and sharp edges mean business. Never, ever grab a spiny cactus with your bare hands.
A good pair of thick leather or rubber gardening gloves is non-negotiable. For the really spiky ones, I’ll often use a pair of kitchen tongs to get a firm grip without getting impaled. Another great trick is to wrap the cutting in a thick layer of folded newspaper or an old towel. This gives you a padded "handle" to hold onto, protecting your hands while you move it to a safe place to callus.
These simple precautions make the whole experience painless and let you manage the cutting with confidence as you get it ready for the next critical step.
Getting Your Cutting Ready: The Magic of Callusing
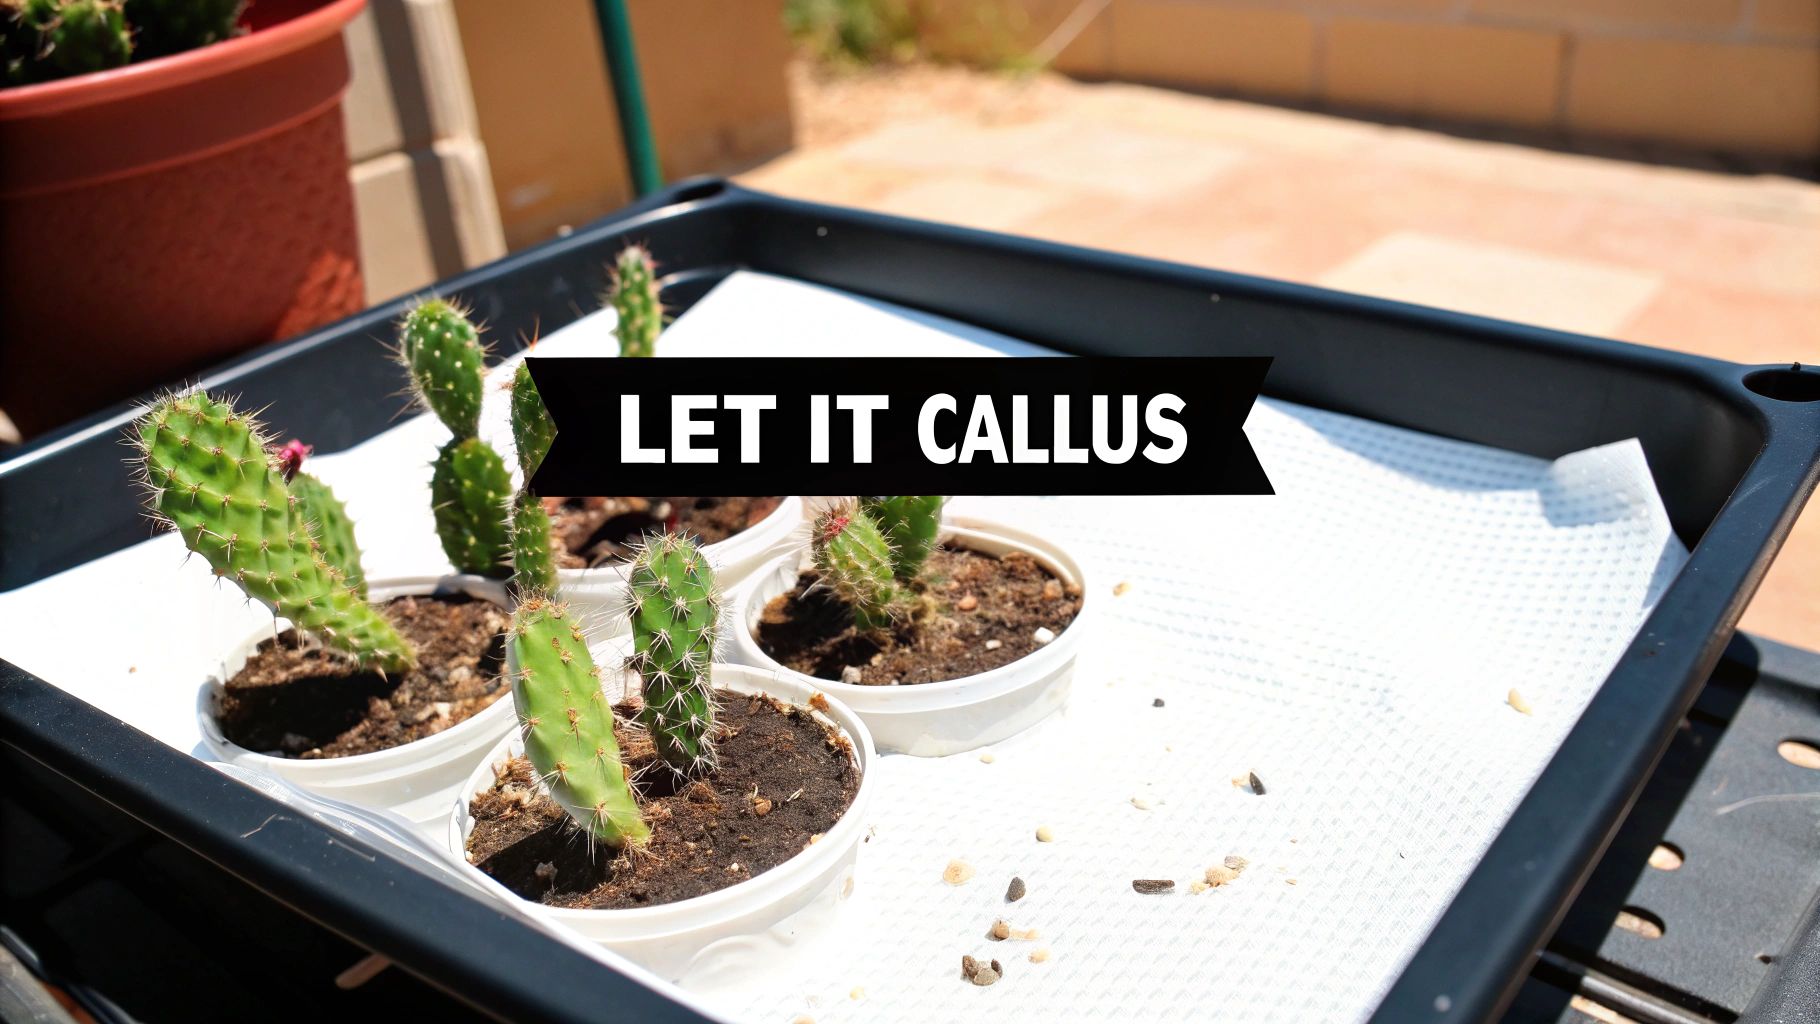
Once you've made that nice, clean slice, your first instinct is probably to get that cutting into a pot. But hold on—this is where a little bit of patience goes a long way. Before that cactus ever sees soil, it needs to heal. This drying-out process is called callusing, and it’s basically the plant’s way of forming a scab over its wound.
Skipping this part is the number one reason new cuttings fail. A fresh, wet cut is an open invitation for rot. The moment that moist tissue hits the soil, it starts soaking up water and any lurking bacteria or fungi, dooming your cutting before it even has a chance. A proper callus is your best defense against rot.
Finding the Right Spot for Healing
The whole idea is to let the cut end dry out completely, forming a tough, pale seal. You don't need anything fancy to make this happen. Just find a dry, warm spot with good airflow and bright, indirect light.
A common mistake is leaving the cutting in direct sun, which can scorch the poor thing and slow down the healing. You want a gentle environment where it can rest and recover.
- Where to put it: A shady spot on a covered patio, a windowsill that doesn’t get blasted by the afternoon sun, or even a dry shelf in your garage will work just fine.
- What to lay it on: Place the cutting on its side on a clean paper towel, a bit of newspaper, or an old tray. This keeps the cut end exposed to the air so it can dry evenly.
This simple propagation technique is a huge reason cacti are becoming so popular. The global market for cactus products is on track to hit USD 2.84 billion by 2035, and that’s thanks to how easy it is for everyone, from hobbyists to big growers, to make more plants. You can dig deeper into these cactus market growth and trends on Spherical Insights.
Knowing When It’s Time to Plant
So, how long does this take? It really depends. The thickness of the cutting and the humidity in your air are the two biggest factors. A thin Opuntia (prickly pear) pad might be ready in just 3-5 days. A thick, beefy columnar cutting, on the other hand, could need several weeks to fully callus over.
You’ll know it’s ready when the cut end is completely dry to the touch. It should look a little shrunken or puckered and feel hard, almost like cork. If it’s even slightly soft or sticky, give it more time. It’s always better to wait a little longer than to plant it too soon.
Resisting the urge to plant a fresh cutting is the first major test of a cactus grower’s discipline. A properly callused cutting is 90% of the way to rooting successfully. Rushing this step is the single most common reason new cuttings fail.
Once you see that tough, dry seal, you're good to go. The cutting has protected itself and is now ready to focus all its energy on its next big job: pushing out new roots.
Setting the Stage: The Perfect Home for Your New Cutting
Alright, your cutting has a beautiful, dry callus. Now comes the crucial part: giving it the perfect home to sprout new roots. This is more than just scooping some dirt into a pot. We're essentially creating a custom micro-environment that gives the cutting stability, airflow, and, most importantly, fantastic drainage. Get this right, and your cutting will thrive; get it wrong, and you risk rot.
Remember, cacti evolved in deserts. They're used to gritty, arid soils where rain shows up, says hello, and leaves just as quickly. Our job is to mimic that exact environment.
Picking the Right Pot
The container you choose is your first line of defense against moisture problems. While almost any pot with a hole will work in a pinch, some materials give you a serious advantage.
My personal favorite, and what I recommend to everyone starting out, is a classic, unglazed terracotta pot. Think of the porous clay as a safety net. It breathes, wicking moisture out of the soil and letting air circulate around the roots. This simple feature makes it much harder to overwater, which is the number one killer of new cuttings.
Size matters, too. It’s so tempting to give your cutting a big pot to grow into, but that's a classic beginner's mistake. A pot that's too large holds a ton of extra soil, and that soil holds extra moisture. This dampness can rot the cutting long before it has a chance to establish roots.
- A good rule of thumb: Choose a pot that’s just a bit wider than your cutting. You're looking for about 1-2 inches of space between the plant and the pot's rim. A snug fit helps the soil dry out faster and encourages a tight, healthy root ball to form.
The Absolute Must-Have: Drainage Holes
Let me be crystal clear: every pot you use for a cactus cutting must have a drainage hole. No ifs, ands, or buts. A pot without drainage is a death trap. It becomes a stagnant swamp, holding water right at the base of your cutting and creating a five-star resort for the fungi that cause rot.
Propagating a cactus is often less about what you do and more about what you don't do. Don't use a huge pot, don't use heavy soil, and never, ever let it sit in standing water. Excellent drainage is your best insurance policy.
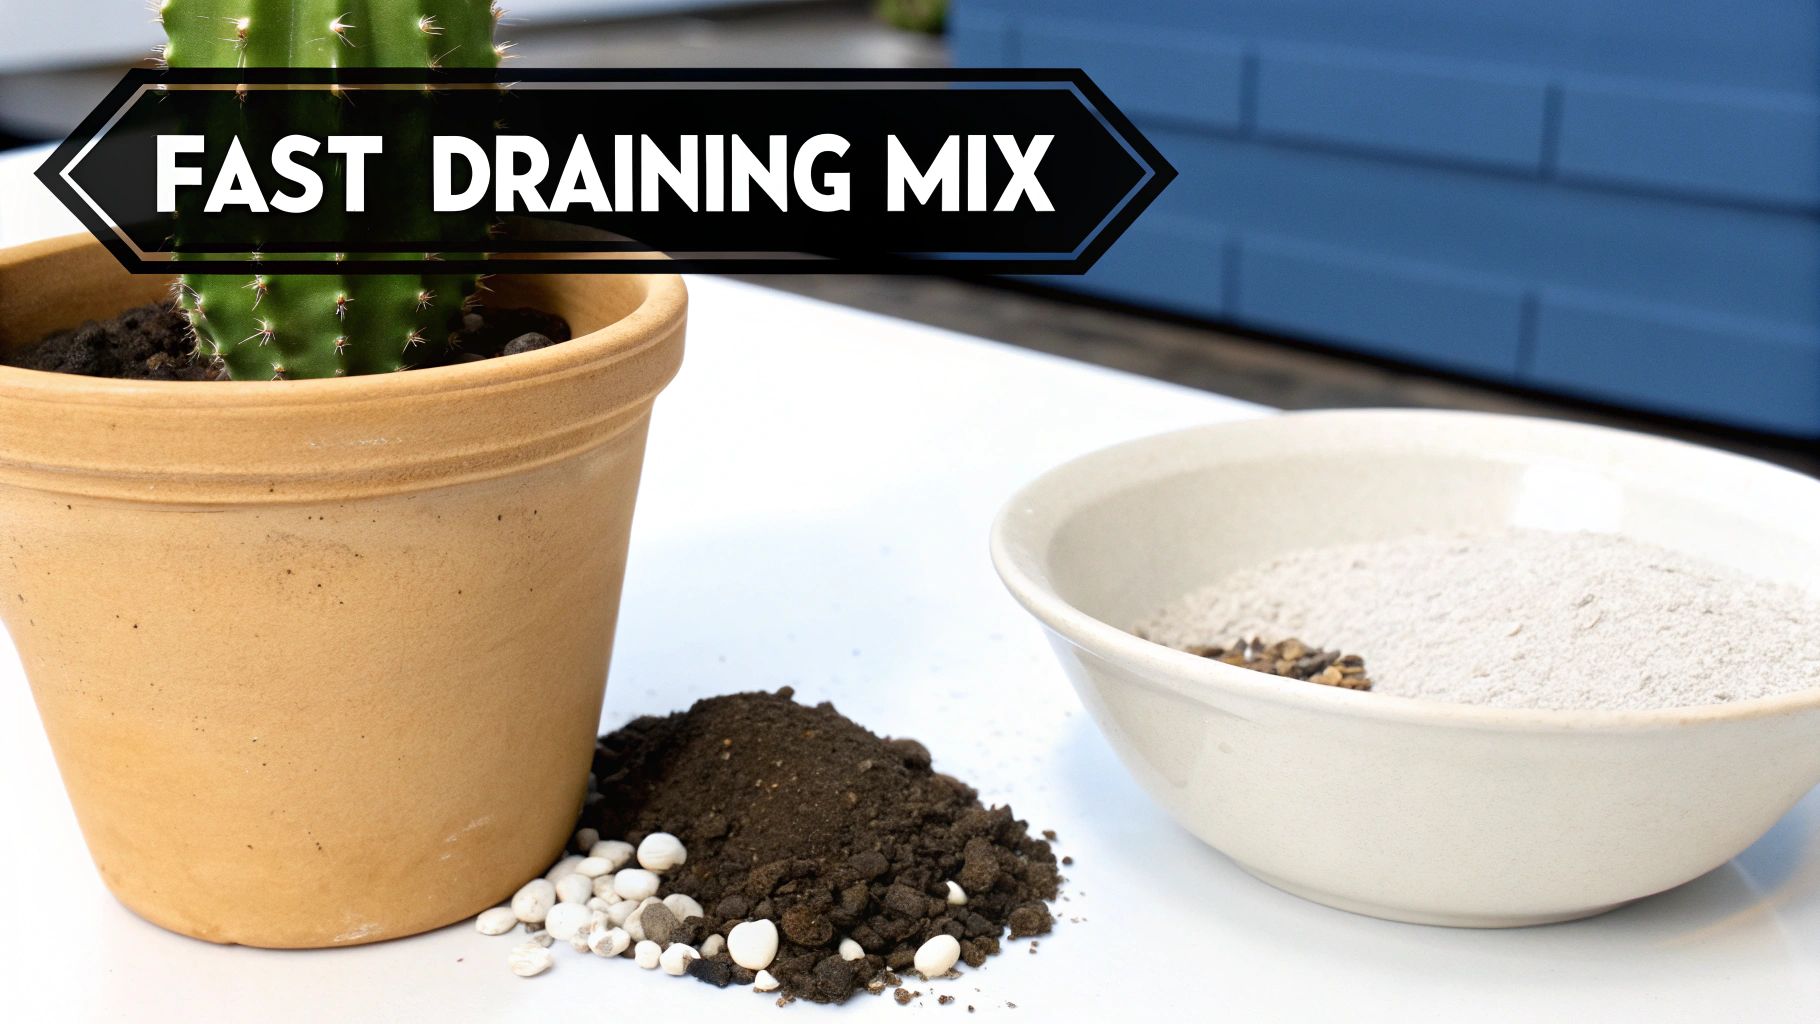
Mixing the Perfect Gritty Soil
You can find bags of "Cactus & Succulent Mix" at any garden center, but I've found that most of them still hold too much water for a delicate cutting. I always recommend mixing your own. It's surprisingly easy, cheaper in the long run, and gives you total control.
The goal is a mix that's airy, gritty, and drains like a sieve. You do this by taking a base soil and adding inorganic materials to it.
Here’s what you’ll need:
- The Base: A simple, peat-free potting soil or coco coir works great. This just adds a little structure and organic material.
- The Aerators: Perlite or pumice are non-negotiable. These lightweight volcanic rocks create tiny air pockets, preventing the soil from compacting and massively improving drainage. Pumice is a bit heavier, so it won't float to the top when you water.
- The Grit: Coarse sand or horticultural grit adds weight and helps water flow through. Just make sure it’s not fine play sand, which can clump together and defeat the purpose.
The global cactus plants market, valued at around USD 1.2 billion in 2024, is booming as more people discover the joy of these low-maintenance plants. Creating your own mix is a small part of this growing trend toward sustainable and hands-on gardening.
To get you started, here are a few simple recipes you can whip up.
DIY Cactus Potting Mix Recipes
This table offers a few tried-and-true combinations. The key is to experiment and see what works best for your specific cacti and your climate.
| Mix Type | Component 1 | Component 2 | Component 3 | Best For |
|---|---|---|---|---|
| The Classic | 1 Part Potting Soil/Coco Coir | 1 Part Coarse Sand/Grit | 1 Part Perlite/Pumice | General-purpose mix for most common cactus species |
| Extra Gritty | 1 Part Potting Soil/Coco Coir | 1 Part Coarse Sand/Grit | 2 Parts Perlite/Pumice | Desert cacti like Opuntia or Ferocactus |
| Jungle Cactus | 2 Parts Potting Soil/Coco Coir | 1 Part Perlite/Pumice | 1 Part Orchid Bark/Leaf Mold | Epiphytic species like Rhipsalis or Holiday Cacti |
Once you've mixed your ingredients thoroughly, you're ready to go. For a deeper dive into different amendments and ratios, you might find our guide on creating the ideal cactus and succulent soil mix helpful.
With the right pot and the perfect soil, you've built a solid foundation for your cutting to grow strong, healthy roots.
Giving Your New Cactus a Home: Planting and Early Care
You’ve patiently waited for your cutting to callus over, and now comes the rewarding part: planting. This is where your cactus-to-be gets its first real home. The process itself is straightforward, but a little care and precision here go a long way. Getting the planting depth, watering schedule, and light exposure right from the start is the key to encouraging strong roots and a healthy, thriving plant.
Think of it this way: you're trying to give the cutting a stable, supportive environment that mimics how it would naturally root in the wild. The goal is to encourage roots to form without creating a damp environment where rot can take hold. It’s a bit of a balancing act, and these first few weeks are the most crucial part of the whole journey.
How to Plant Your Cactus Cutting
First things first, grab your pot and fill it with that fast-draining cactus mix you prepared. You want to keep the soil light and airy, so don't pack it down. Just poke a small hole in the center, only deep enough to hold your cutting upright.
The trick is getting the depth just right. You only need to bury the cutting enough so it can stand on its own without toppling over.
- For a flat pad, like a prickly pear, this might be as little as an inch.
- For a taller, columnar cactus, I usually aim for about 10-15% of its total height to be under the soil.
Planting a cutting too deep is one of the most common mistakes I see, and it almost always ends in rot. Burying too much of the stem just creates a large, vulnerable surface area underground that can easily decay. Shallow planting is always safer.
My personal rule of thumb is simple: Plant for stability, not for depth. As long as the cutting is secure, you’ve done it right. The new roots will anchor it down firmly in no time.
Propping Up Taller Cuttings
Some cuttings, especially from columnar cacti like a San Pedro, can be a bit top-heavy and wobbly. The temptation is to plant them deeper for support, but don't do it! Instead, give them a little help. You can stick a few bamboo skewers or even clean chopsticks into the soil around the cutting to hold it steady. Another great method is to add a top dressing of heavier gravel or decorative rocks around the base, which adds weight and support without suffocating the stem.
The Golden Rule: Don't Water It Yet!
After you’ve got your cutting perfectly placed, your first instinct will be to give it a nice drink of water. Resist that urge. This is probably the single most important rule of planting cactus cuttings. A fresh cutting has zero roots to absorb water, so any moisture you add will just sit there, turning the soil into a breeding ground for rot.
You need to wait at least one to two weeks after planting before you even think about watering. This dry period gives any tiny nicks or scrapes from the planting process a chance to heal and, more importantly, signals the cutting to start pushing out its first new roots in search of moisture. Successful care hinges on understanding this. For a deeper dive into this concept, the principles of effective irrigation management offer some great insights.
When that first watering day finally arrives, be thorough. Drench the soil until water flows freely from the pot’s drainage hole. Then, and this is just as important, let the soil dry out completely before you water it again. Our guide on potting succulent cuttings has some more great tips on this crucial transition.
This isn’t just a little trick for hobbyists; it's a proven technique used worldwide. In Europe and the Asia Pacific, where cactus cultivation is booming, this method is standard. In fact, Europe's slice of the global cactus market was expected to reach 28.74% in 2025, with the market's value projected to jump by 55.15% between 2021 and 2025. This incredible growth is driven by reliable propagation techniques that make urban gardening and landscaping with cacti more accessible.
Finding the Perfect Spot
For the first month or so, your new cutting is in recovery mode. Find a spot for it that gets tons of bright, indirect light. Sticking it in direct, intense sun right away can scorch the poor thing and cause it to lose too much water before it even has roots. A spot near a sunny window with a sheer curtain or on a covered porch is usually perfect.
Now, you just have to watch and wait for the magic to happen. The first sign of new growth—a tiny new pad, some green fuzz appearing on an areole, or a columnar cactus getting visibly taller—is your confirmation of success. Once you see that, you know it has rooted, and you can start slowly getting it used to more direct sun and a more regular watering routine.
Answering Your Cactus Propagation Questions
Even when you follow all the steps, propagating cactus cuttings can feel like a bit of a waiting game. It's totally normal to have questions pop up along the way, especially when you're anxiously waiting for those first signs of life. I've been there. This section is all about tackling the most common hurdles and questions people run into.
Think of this as a troubleshooting guide from someone who's made all the mistakes so you don't have to. We'll dive into everything from figuring out if roots have actually formed to why a cutting might be looking a little sad.
How Can I Tell if My Cactus Cutting Has Rooted?
This is the big one, isn't it? After weeks of patience, you're dying to know if all your effort is paying off. Thankfully, there are a couple of ways to check without wrecking all your hard work.
The best method is what I call the "nudge test." After about four to six weeks, give the cutting a very gentle wiggle. If you feel any resistance—even a little bit—that's your victory sign. It means roots have started to form and are gripping the soil.
Of course, the most exciting confirmation is seeing new growth. This is the plant itself telling you it's happy and has established its new home. Keep an eye out for:
- Tiny new pads or arms sprouting from the areoles.
- The tip of a columnar cactus turning a brighter green or looking visibly taller.
- New little spines or even some green fuzz appearing on the top.
A Word of Warning: Resist the urge to pull the cutting out of the soil to look for roots. This is probably the single most common mistake, and it's a brutal one. Those brand-new roots are incredibly fragile, and yanking them up will tear them right off, setting you back weeks or even killing the cutting. Patience is everything here.
My Cactus Cutting Is Turning Soft and Mushy at the Base—What's Wrong?
That soft, mushy feeling at the base of a cutting is a gut-punch for any plant parent. It's almost always a clear sign of rot. This happens when the cut end sits in too much moisture before it can grow roots, creating a perfect storm for fungus and bacteria.
A few things can lead to this unhappy situation:
- Not Callusing Long Enough: If the cutting was planted before the wound was totally dry and hard, it acted like a sponge, soaking up moisture right from the soil.
- Watering Too Soon: This is a big one. Watering right after potting is a recipe for rot. You have to wait at least a week or two for that first drink.
- The Wrong Soil Mix: If your soil is too dense and holds onto water, it will just sit around the base of the cutting, suffocating it.
Once rot takes hold, it’s tough to come back from. But if you catch it early, you might have a shot. You have to be ruthless: cut off all the soft, rotted tissue until you see nothing but healthy, firm green flesh. Then, you're back to square one. Treat it like a brand-new cutting, let it re-callus for a week or more, and then replant it in fresh, bone-dry soil.
Can I Just Plant My Cactus Cutting Directly in the Garden?
You can, but it’s a bit of a gamble and really only works in certain climates. If you live somewhere arid or semi-arid where your garden soil is already sandy and drains like a sieve, you have a much better chance of success. In these places, the ground naturally mimics the ideal potting mix.
Even if you go this route, the most important rule still applies: you must callus the cutting first. Never, ever stick a fresh cutting straight into the ground.
Once it's properly callused, pick a spot in your garden that gets a ton of bright light but is shielded from the most punishing afternoon sun. Try to plant it during the hottest, driest time of year to avoid any surprise rainstorms. Just like with a pot, bury it only deep enough to stand up on its own. And whatever you do, don't water it for several weeks. Let it use the search for moisture to encourage its roots to grow. Just know that cuttings outdoors are more vulnerable to everything—pests, curious animals, and wild weather.
Why Does My Cactus Cutting Look Wrinkled and Shrivelled?
Don't panic! A little bit of wrinkling is actually a normal part of the process. Your cutting is basically a self-contained life raft, using its own stored water and energy to focus on the all-important task of pushing out new roots. This effort naturally causes it to lose a little plumpness.
However, if it starts to look severely shriveled, that's a cry for help. The number one cause is too much direct sun. A cutting with no roots has no way to drink up water and replenish what it loses to evaporation. Blasting it with intense sun will dehydrate it in a hurry.
If you see it getting too wrinkly, move it immediately to a spot with bright, indirect light—think under a porch roof, beneath a larger "nurse" plant, or near a window with a sheer curtain. Your first instinct might be to give it a big drink of water, but that's the worst thing you could do. Watering a stressed, rootless cutting will just invite rot. Have faith. Once the roots form and it can finally drink, it will plump right back up on its own.
Ready to find the perfect parent plant for your next propagation project? The Cactus Outlet offers a stunning variety of healthy, high-quality cacti and succulents delivered right to your door. Explore our collection and start growing your own desert garden today!
Find your next cactus at https://www.cactusoutlet.com.