
The first thing to do when you suspect your cactus is in trouble is a quick diagnosis. And honestly, it often comes down to a simple touch test. Is your cactus soft and mushy, or is it wrinkled and shriveled? One usually means too much water and rot, while the other is a desperate plea for a drink. Getting this right from the start is half the battle won.
How to Tell What Is Wrong with Your Cactus
Before you can bring a cactus back from the brink, you have to play detective. Cacti are tough, but they're not shy about showing you when they're unhappy. The trick is learning to read their signals correctly, because misinterpreting them can quickly make things worse.
Start by gently feeling the base of the plant. A healthy, happy cactus will feel firm and solid. If your fingers sink into a squishy, watery stem, you've almost certainly got an overwatering problem on your hands, which leads to the dreaded root rot.
This visual guide is a great starting point for figuring out what's going on. It really boils down to whether the plant feels mushy or just dried out.
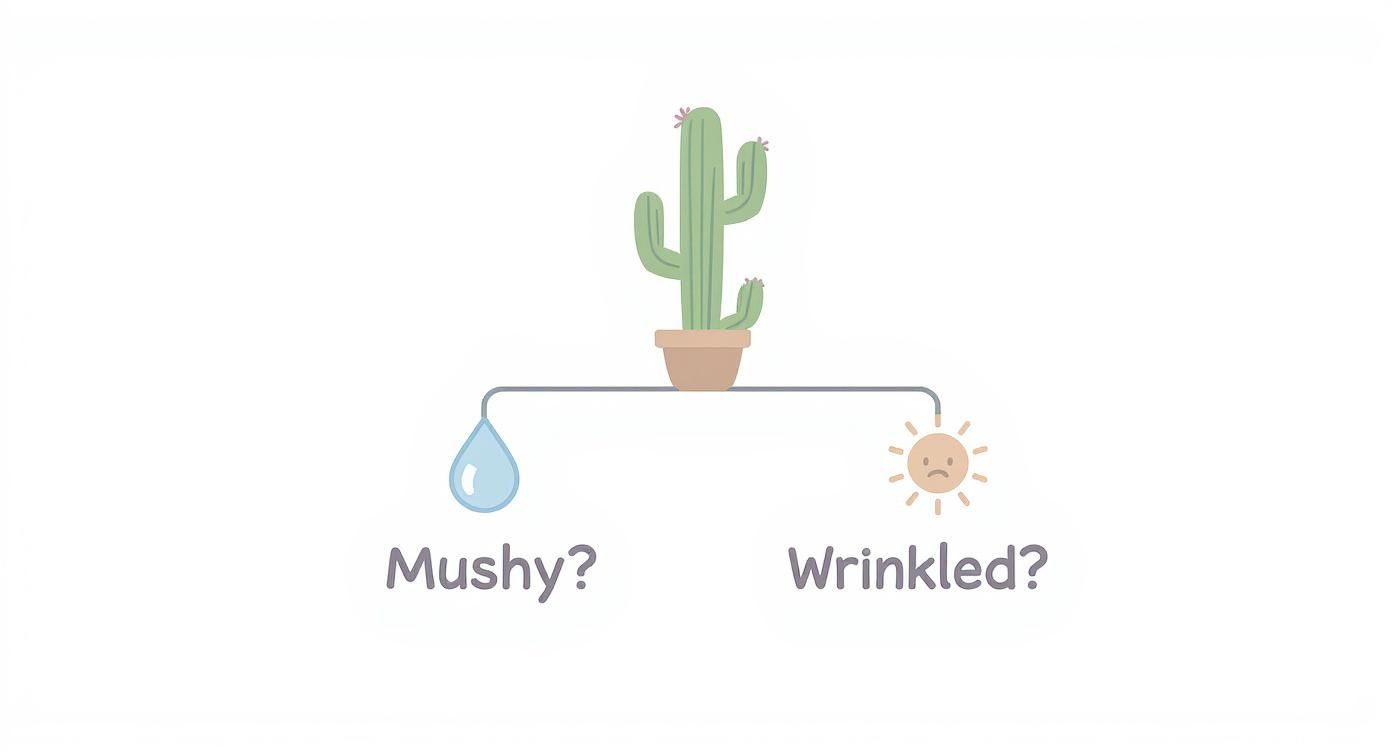
As you can see, the texture is your biggest clue. It’s the primary sign that separates a waterlogged cactus from one that's just thirsty or needs more light.
Decoding Common Cactus Symptoms
Beyond the initial touch test, the plant's color and shape will give you even more clues. Different symptoms point to wildly different issues, and the wrong "fix" can be a death sentence.
- Soft, Mushy, and Black at the Base: This is the classic, unmistakable sign of advanced root rot. It started in the roots from way too much moisture and is now working its way up the stem, turning the plant's tissue into goo. You have to act fast.
- Wrinkled, Shriveled, and Leaning: The cactus looks like a deflated balloon. Its skin might be puckered, and it probably feels lighter than it should. This is a clear cry for water—the plant has burned through all its stored reserves.
- Pale Yellow or Stretched Growth: Is your cactus growing tall, skinny, and looking a bit washed out? That’s a condition called etiolation. It means the plant is literally stretching itself thin trying to find more light. It needs more sun, badly.
- White, Yellow, or Brown Patches: If you see crispy, dry patches on the side of the cactus that gets the most sun, that’s sunburn. Yep, just like us, cacti can get scorched if they're suddenly moved into intense, direct sunlight.
To help you quickly connect the dots, here’s a simple reference table. It’s designed to help you match what you’re seeing with what’s likely happening and what to do first.
Cactus Symptom and Action Guide
| Symptom | Probable Cause | What to Do Now |
|---|---|---|
| Soft, mushy base, often black or brown | Overwatering & Root Rot | Immediately unpot, trim all rot, and let it dry out before repotting. |
| Wrinkled, shriveled skin, feels light | Underwatering | Give it a thorough, deep watering. Let the pot soak up water from the bottom. |
| Leaning, growing skinny, pale green/yellow | Not Enough Light (Etiolation) | Gradually move it to a much sunnier location. Don't rush it to avoid sunburn. |
| Dry, crispy brown or white patches | Sunburn | Move it to a spot with bright, but indirect, light to recover. The scars are permanent. |
| Visible fuzzy white spots or webbing | Pest Infestation (Mealybugs, Spider Mites) | Isolate the plant. Treat immediately with isopropyl alcohol or neem oil. |
Think of this table as your emergency room cheat sheet. It won't solve everything, but it will get you started on the right path immediately.
A critical mistake I see people make is noticing a yellowing cactus and immediately dousing it with water. If that yellowing is paired with a soft base, more water is like pouring gasoline on a fire. Always, always check the soil moisture and stem firmness before you grab the watering can.
The Difference Between Thirsty and Rotting
Learning to tell a thirsty cactus from a rotting one is probably the single most important skill you can have. It’s the fork in the road.
A thirsty Coryphantha, for example, might get a little reddish and its outer tubercles will look wrinkled, but the core of the plant will still feel firm. It's just deflating a bit as it uses up its water stores.
A rotting cactus, on the other hand, will feel squishy and unstable, especially at the base. You might even notice a swampy, foul smell. The discoloration is often a dark, spreading brown or black—not the kind of reddish or purplish hues that some cacti get from sun or water stress. Getting this distinction right is everything.
Mastering Water and Light for Cactus Recovery
Once you've figured out what's wrong, the road to recovery almost always comes down to two things: water and light. It's a classic story—more cacti are killed by kindness (overwatering) than by simple neglect. Getting this balance right isn't just a helpful tip; it's the absolute cornerstone of bringing your cactus back from the brink.
The most foolproof approach I've found is the "soak and dry" method. Drench the soil completely until water runs out of the drainage holes, then don't even think about watering it again until the soil is bone dry all the way through. Toss out any rigid schedule like "water once a week." A cactus's thirst changes wildly depending on the season, your home's humidity, and how much light it's getting.
But how can you be sure it's fully dry? Don't just trust the top inch. Grab a wooden skewer or a chopstick and stick it all the way down to the bottom of the pot. If it comes out clean and dry, it's time. If it has any damp soil clinging to it, give it a few more days.
Perfecting Your Watering Technique
A deep, thorough soak can be a miracle for a shriveled, underwatered cactus. But for a plant recovering from root rot, that first watering after repotting is a make-or-break moment. You absolutely have to wait a couple of weeks for the plant to start growing new, healthy roots before introducing water.
The quality of your water can also play a role over the long term. It can be helpful to understand the potential toxins that may be in tap water, as chemicals like chlorine can build up in the soil. Switching to filtered or even distilled water is an easy upgrade to your care routine.
My rule of thumb is simple: When in doubt, don't water. A cactus can bounce back from being thirsty far more easily than it can from drowned, rotted roots. Patience is your greatest tool here.
For a deeper dive into watering methods for all sorts of different cacti, this complete guide to watering cactus plants is a fantastic resource with more specific insights.
Solving the Lighting Mystery
Light is the other half of the recovery equation. Luckily, your cactus will give you pretty clear signals when its lighting is off.
- Etiolation (Not Enough Light): This is when your cactus starts growing tall, skinny, and pale, literally stretching itself thin to find a light source. The new growth is weak and can't support itself.
- Sunburn (Too Much Light): You’ll notice white, yellow, or brownish patches that look like scars, usually on the side getting the most intense sun. This is common when a cactus is moved abruptly into direct, harsh sunlight.
If your plant is etiolated, resist the urge to immediately move it into the sunniest spot you have—that’s a recipe for sunburn. You need to acclimate it slowly. Start with just an hour of brighter light per day, and gradually increase the exposure over a week or two.
For a sunburned cactus, the fix is simpler: move it somewhere it gets bright, indirect light instead of scorching direct rays. While the burn marks are permanent, the plant will be fine and can put out healthy new growth from that point on.
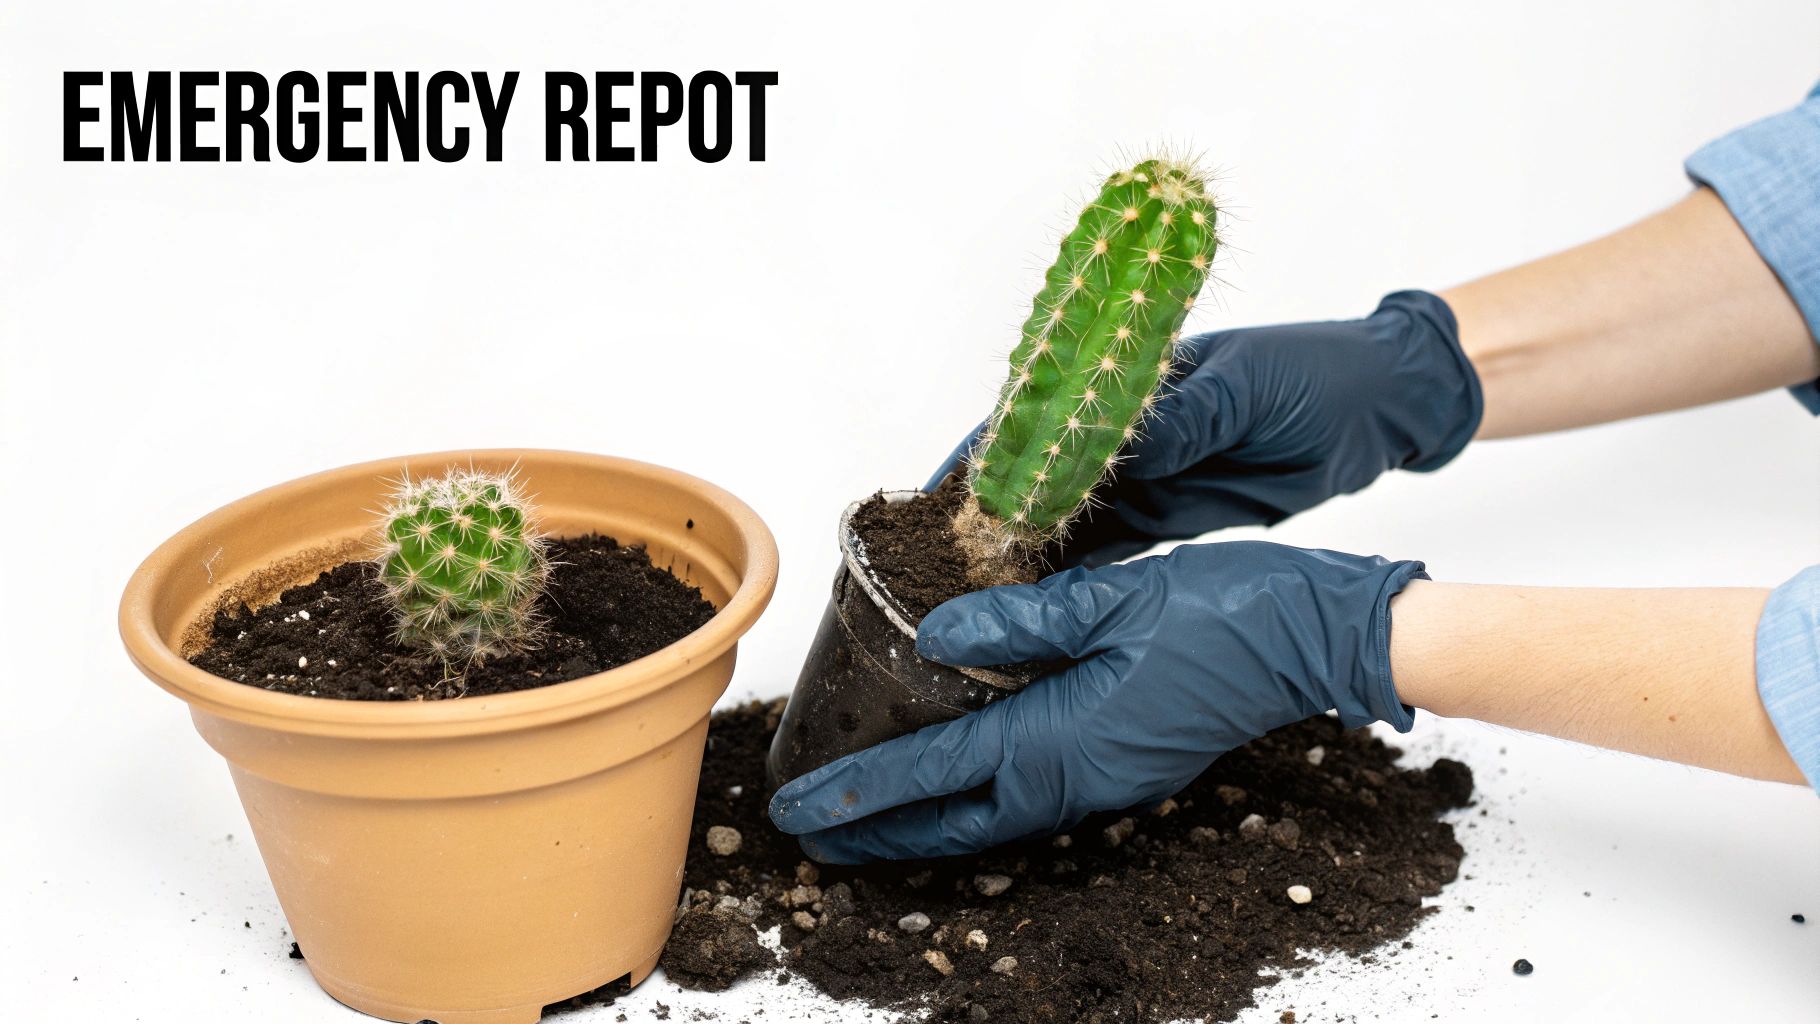
Emergency Repotting to Save Your Cactus
Sometimes, tweaking the watering schedule or moving your cactus to a sunnier spot just won't cut it. The real problem is often invisible, happening below the soil surface. When root rot takes hold or the soil becomes a compacted brick, an emergency repot is less of a suggestion and more like life-saving surgery for your plant. This is your chance to hit the reset button and give it a fighting chance.
First up, you have to get the cactus out of its pot. Grab a pair of thick gloves or wrap the plant in a folded-up newspaper to save your hands from the spines. Turn the pot on its side and try to gently slide the cactus out. If it’s really stuck, a few firm taps on the sides and bottom of the pot can help loosen things up. Don't just yank it out by its body.
Once it's free, you’ll get a firsthand look at the root system. This is the moment of truth.
Assessing and Treating the Roots
Healthy cactus roots are what you'd expect—firm, and typically white or a light tan. What you’re looking for, though, are the unhealthy ones. Rotted roots are the exact opposite: they'll be black, brown, mushy to the touch, and might even have a foul, swampy smell. Your mission is to get rid of every last bit of this decay.
Grab a clean, sharp knife or a pair of pruning shears. You have to be ruthless here.
- Trim Away All Rotted Roots: Slice off anything that looks dark, soft, or slimy. You need to keep cutting until you only see healthy, firm, white tissue.
- Inspect the Cactus Base: Check if the rot has started creeping up into the base of the plant itself. If you see dark, soft spots on the cactus body, you'll need to carefully slice those away, too. Shave off thin layers until you see only healthy, solid green flesh.
- Let it Callous: This is the single most critical step, and it's the one most people skip. After performing surgery, you have to let the open wounds dry out and form a protective callus. Just place the cactus on a paper towel in a spot with good air circulation, away from direct sun. This can take a few days, or even up to a week for larger cuts.
I see this mistake all the time: someone carefully trims the rot, then immediately plants the cactus in fresh, damp soil. That’s like putting a wet bandage on an open wound. The moisture gets right into the cuts, inviting bacteria and starting the rot all over again.
Creating the Perfect Recovery Soil Mix
While your cactus is callousing over, you can get its new home ready. The secret to a good recovery soil is one thing: excellent drainage. Your standard, all-purpose potting soil is a death sentence for a recovering cactus because it holds way too much water. You need a mix that's gritty and airy.
A simple, effective recipe I swear by is:
- 50% Potting Soil: Provides a base of nutrients and organic matter.
- 50% Inorganic Material: This is the key to drainage. Use a mix of perlite, pumice, or coarse sand.
This blend allows water to drain through quickly, giving the roots a chance to drink without ever being waterlogged. For a deeper dive into choosing the right pot and perfecting your soil mix, check out our complete guide on how to properly repot cacti.
It's fascinating, actually. In the wild, fungi in the soil form a symbiotic relationship with cacti, helping them absorb nutrients and fight off stress. While we can't perfectly mimic that environment in a pot, creating a super well-draining soil mix is the best foundation we can give our plants to help them recover.
Once the cuts on your cactus are dry to the touch and fully calloused, go ahead and pot it up in your new, dry soil mix. I can't stress this last part enough: do not water it for at least one to two weeks. This gives any fragile new roots time to grow and establish themselves before you introduce moisture, which is the best way to prevent the rot from coming right back.
Why Some Cacti Are Tougher Than Others
When you're faced with a dying cactus, it's easy to feel like you've failed. But here's something I've learned over the years: not all cacti are built to bounce back in the same way. The plant's very shape—its fundamental architecture—is its survival strategy. Understanding this helps set realistic expectations and explains why one of your plants might be on the brink while another shrugs off the same problem.
Think about it: a cactus's body is a masterclass in survival engineering. Its form, whether it’s a compact sphere, a towering column, or a series of flat pads, is the result of thousands of years of evolution in some of the planet's toughest spots. This design dictates how it manages everything from water storage and heat to physical damage.
The Survival Advantage of Shape
A cactus's form isn't just for looks; it directly impacts its ability to store water, manage its internal temperature, and shield its critical growth points from harm. This isn't just gardener's wisdom—it's backed by science.
You see this play out dramatically in nature. After a wildfire, for instance, a cactus's shape can mean the difference between life and death. One study from the central Argentine Mountains was particularly eye-opening. Following a fire, the arborescent (tree-like) cacti had a grim 25% survival rate. But get this—the globose (ball-shaped) cacti in the same burned area had an incredible 84% survival rate. That huge gap really drives home how a plant's structure can be its biggest strength or its Achilles' heel. You can explore the full findings to see how other shapes held up.
This kind of data is gold for us as growers because it gives us a real-world blueprint for understanding a plant's recovery potential.
A cactus's natural design is its first line of defense. A low, compact shape keeps the most vital tissues protected near the cooler ground, while a tall, branching form exposes more surface area to potential threats.
How Different Shapes Handle Stress
So, how does this apply to the cactus on your windowsill? Let’s break down what these different body plans mean for your revival efforts.
-
Globose (Ball-Shaped) Cacti: Think of the classic Golden Barrel (Echinocactus grusonii). Their tight, spherical shape is brilliant. It gives them a low surface-area-to-volume ratio, which is perfect for minimizing water loss. Plus, their most important part—the growing tip—is tucked safely at the top, shielded from many threats.
-
Arborescent (Tree-Like) Cacti: Tall, branching species like some Cereus are more exposed. Their growing points are way up in the air, making them vulnerable to frost, high winds, or even just toppling over if their root system gets weak. More of their body is out in the open, facing the elements.
-
Opuntioid (Pad-Like) Cacti: Prickly Pears (Opuntia) are masters of compartmentalization. Their modular, pad-by-pad design is a genius survival trick. If one pad succumbs to rot or pests, the plant can often just jettison it and push out new growth from a healthy section. This makes them remarkably resilient to localized damage.
By recognizing the inherent strengths and weaknesses tied to your cactus's shape, you can make a much smarter rescue plan. A struggling barrel cactus has a great shot at recovery if its core is still solid. On the other hand, if your tall columnar cactus is rotting from the base, you might be better off taking a cutting from the healthy top to start a new plant.
Saving Your Cactus with Propagation Techniques
Sometimes, no matter what you do, a cactus just starts to fail. The main part of the plant might be hit with irreversible rot or damage. But when things look really grim, you've still got one powerful ace up your sleeve: propagation. This is the ultimate revival method, letting you essentially clone your cactus from a healthy piece and give it a brand new life.
Think of it as carrying on the plant's legacy. If the base of your favorite columnar cactus has turned to complete mush but the top half is still green and firm, all is not lost. You can salvage a cutting from that healthy section and start a brand new, independent plant from what's left.
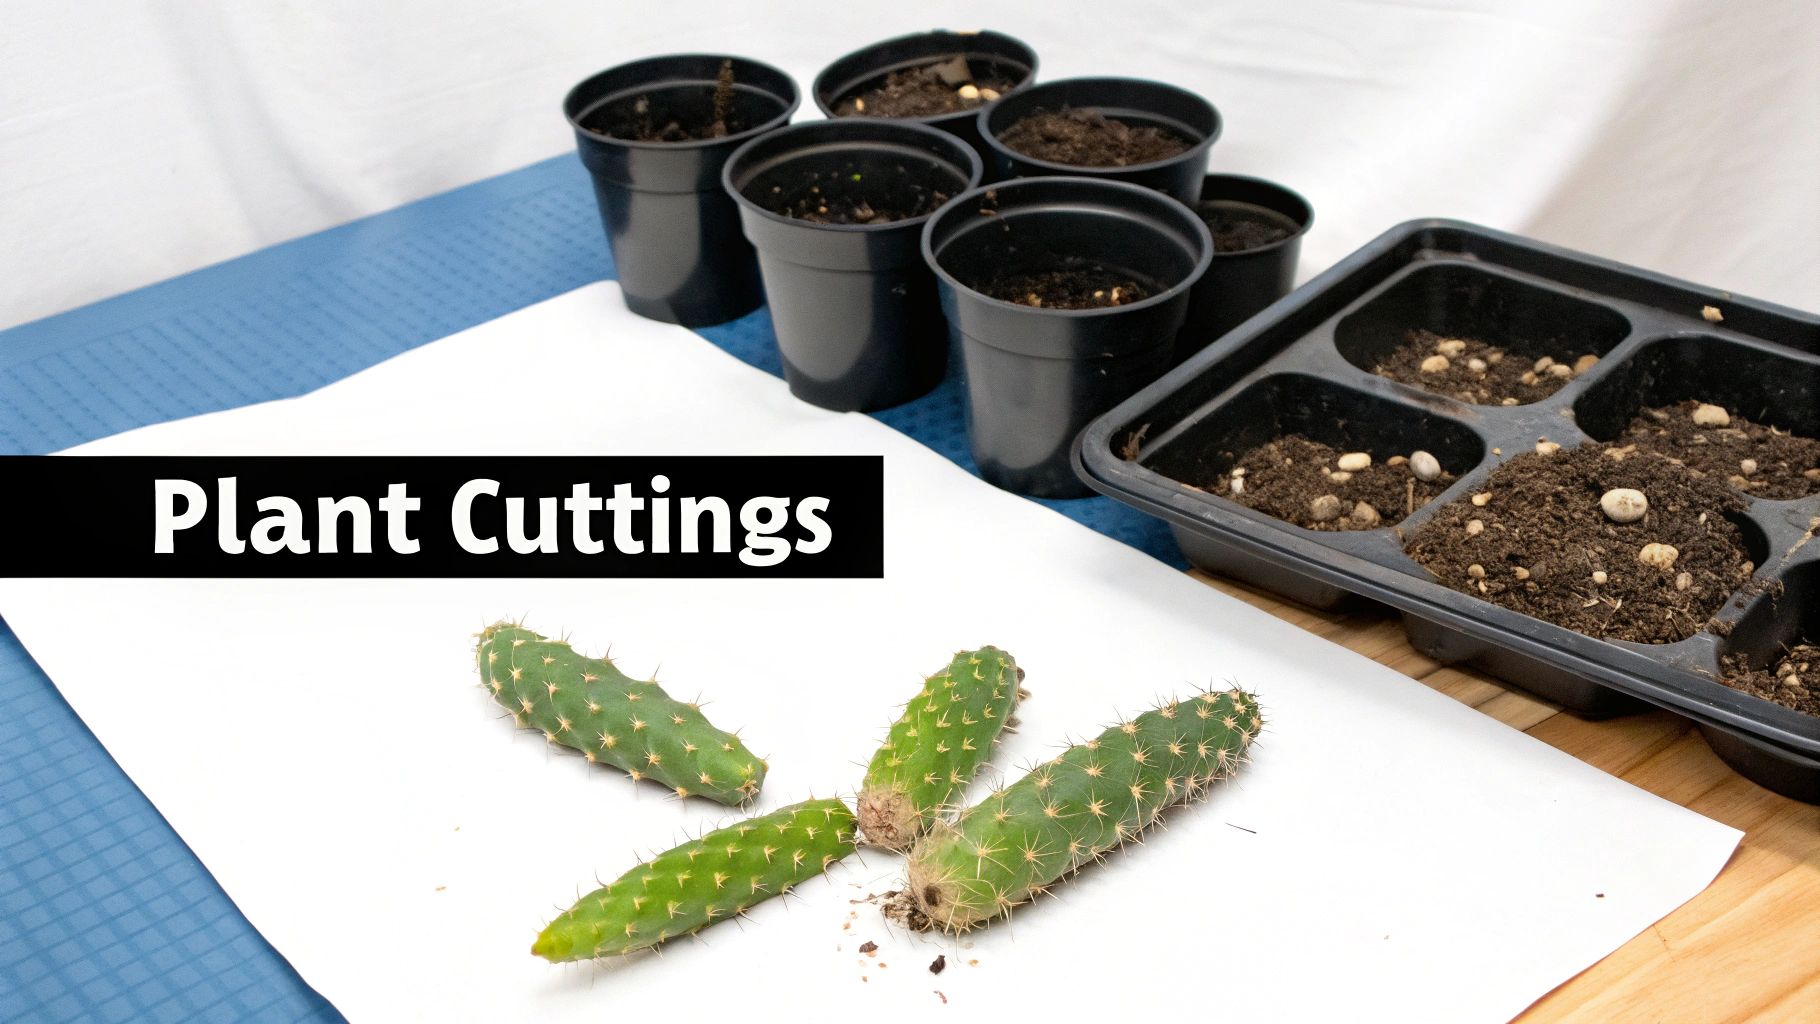
Taking a Healthy Cutting
Success here all comes down to choosing the right piece of the plant. You need to find a section—whether it's a stem, a pad, or an offshoot—that shows absolutely no signs of trouble. It needs to be firm to the touch, have good color, and be completely free of soft spots or discoloration.
Grab a clean, sharp knife and make one clean, decisive slice. Don't hack or saw at it; a clean cut heals faster and drastically reduces the risk of infection. This isn't just a trick for home gardeners, either—it's the same basic principle used in cactus conservation efforts out in the wild.
The size and health of the cutting really do matter. I've seen it time and time again, and the science backs it up. A study on cactus translocation—basically moving cactus parts to new spots to grow—found that heavier pads had a much better chance of making it.
- Pads averaging 34.8 grams had a significantly higher survival rate.
- Lighter pads, weighing only 16.2 grams, didn't fare nearly as well.
- Pads with no signs of dehydration survived at a 50% rate, while already shriveled ones only had a 33.3% survival rate.
You can dig into the specifics of that research yourself to learn about cactus translocation survival rates. The takeaway is clear: choose a healthy, hefty piece.
The Critical Callousing Process
Okay, you've got your cutting. Now, do not put it in soil yet. You absolutely must let the cut end heal and dry out first. This is called callousing, and it's a non-negotiable step. Just lay the cutting on a dry paper towel somewhere with good airflow, but keep it out of direct sun.
The biggest mistake people make is planting a fresh, wet cutting. That open wound is an invitation for bacteria and fungus, and it will almost certainly rot from the bottom up before it ever gets a chance to sprout roots.
The goal is for the wound to form a dry, tough scar over the cut surface. This can take a few days for a small cutting or a week or more for a larger one. You'll know it's ready when the end is completely dry and hard to the touch. Once it's fully calloused, it's ready for the next phase. Our full guide on how to propagate cactus from cuttings will walk you through planting it and encouraging those first new roots.
Got Questions? Here’s What Cactus Owners Often Ask
Even when you have a plan, bringing a cactus back from the brink can feel a little nerve-wracking. You probably have some specific questions popping into your head right now. Let's tackle the most common ones I hear so you can get some clear answers.
Is My Completely Mushy Cactus a Lost Cause?
I'll be straight with you: if the entire cactus is a brown, mushy mess from the soil line to the tip, the rot has likely taken over completely. The plant’s internal structure is too damaged to recover at that point.
But hold on—if you see any firm, healthy green tissue, especially near the top, there's still hope! You can perform a bit of "cactus surgery" by taking a cutting from a healthy section. Let the cut end dry and form a callous for a few days, and then you can try to propagate it into a whole new plant.
How Long Does It Really Take for a Cactus to Recover?
Patience is probably the most underrated tool in plant care. When you're trying to revive a cactus, the timeline really depends on what went wrong and how bad it was.
- Underwatering: If your cactus was just thirsty, you could see it start to look plumper and happier within a week of giving it a good, deep drink.
- Root Rot: This is the big one. Recovering from rot is a marathon, not a sprint. After you’ve cleaned it up and repotted it into fresh, dry soil, it could take several weeks—or even a few months—before it grows strong new roots and you see any new growth.
Don’t look for an overnight fix. The real magic happens with steady, proper care over time.
A mistake I see all the time is people giving up too early. Once you’ve fixed the core issue—like repotting a soggy cactus into a well-draining mix—you have to trust the process. The plant is busy rebuilding its foundation underground long before you'll see any visible proof on top.
What Does It Mean When a Cactus Turns Yellow?
Yellowing is a major red flag, but it can signal a few different problems. You need to play detective and look at the other clues to figure out the real culprit.
Here’s what a yellow cactus might be telling you:
- Overwatering: Is it yellow and soft, particularly at the base? That’s almost always a sign of root rot setting in.
- Not Enough Light: A pale, washed-out yellow accompanied by stretched, skinny growth means it's etiolating—desperately reaching for more sun.
- Sunburn: Did you suddenly move it into intense, direct sun? Bleached yellow or white patches, usually on the side facing the window, are classic signs of sun scorch.
- Nutrient Deficiency: A more uniform, faded yellow across the entire plant can sometimes indicate it's hungry. A dose of diluted, cactus-specific fertilizer during the growing season can often help.
Ready to add a new, healthy cactus to your collection? The Cactus Outlet has a stunning variety of resilient and beautiful cacti that are ready to thrive in your home. Explore our collection at The Cactus Outlet and find your next perfect plant today.