
Caring for a cactus indoors really boils down to getting four things right: giving it at least 4-6 hours of bright, indirect sunlight every day, watering only when the soil is bone dry, planting it in a gritty, well-draining cactus mix, and keeping it in a spot with a stable temperature between 60-80°F. If you can nail these basics, you’ll sidestep the number one cactus killer: overwatering.
Your Guide to a Thriving Indoor Cactus

So, you've brought home a new cactus. Welcome to the club! These unique desert plants have exploded in popularity, and it's easy to see why. They have a certain sculptural quality and a reputation for being tough.
That reputation is well-earned. The market for succulents and cacti shows that households make up 70% to 75% of the total value, largely because city dwellers love a plant that can handle a little neglect. But don't mistake "low-maintenance" for "no-maintenance." Knowing what your cactus actually needs is the secret to helping it flourish, not just survive. You can even explore additional market insights to see how big this trend has become.
Let’s skip the confusing botanical jargon and get straight to the practical advice that will give your new plant a fantastic start.
The Four Pillars of Cactus Success
I like to think of successful cactus care as a simple foundation built on four key pillars. If you get these right from the start, you'll prevent almost all of the common problems people run into.
- Sunlight: This is pure fuel for a cactus. Most indoor varieties crave several hours of bright, indirect light. A south-facing window is often the sweet spot, but watch out for the intense midday sun—it can actually scorch the plant's skin.
- Water: Here's where most beginners trip up. Overwatering is, without a doubt, the fastest way to kill a cactus. Their roots are designed for arid conditions and will rot in a heartbeat if they're sitting in soggy soil.
- Soil: Regular potting soil is a death sentence. It's far too dense and holds on to moisture for way too long. You absolutely need a specialized cactus and succulent mix that contains things like sand, perlite, or pumice to ensure fantastic drainage.
- Temperature: While cacti are pretty adaptable, they don't appreciate drama. They're happiest with the consistent temperatures found in most homes and hate being near drafty windows or vents with sudden hot or cold blasts.
Get these four pillars right, and you've already solved about 80% of the potential issues new cactus owners face. It's all about creating a mini-desert environment that works for your home.
It's really that straightforward to begin. Before you even think about fertilizer schedules or repotting, just focus on nailing this core setup.
For a quick reminder, I’ve put together a little cheat sheet to keep the basics top of mind.
Indoor Cactus Care Quick Reference Guide
This table summarizes the essential care requirements to help your indoor cacti thrive.
| Care Aspect | Optimal Condition | Common Mistake |
|---|---|---|
| Light | 4-6+ hours of bright, indirect sunlight | Placing in a dark corner or in harsh, direct sun |
| Water | Water thoroughly when soil is 100% dry | Watering on a fixed schedule or when soil is still damp |
| Soil | Fast-draining cactus/succulent mix | Using standard, moisture-retentive potting soil |
| Temperature | Stable indoor temps between 60°F and 80°F | Exposing to cold drafts or sudden temperature drops |
Keep this handy, and you'll be well on your way to becoming a confident cactus parent.
Getting Light and Location Just Right for Your Cacti
When it comes to keeping a cactus happy indoors, light isn't just a nice-to-have—it’s the main course. Think of sunlight as the fuel that powers literally everything your cactus does, from growing to thriving. If you can nail this one element, you’ll sidestep most of the common problems people run into.
A lot of folks think all cacti need to be baked in the hottest, most direct sun you can find. And while they are desert plants, the intense, unfiltered afternoon sun beaming through a window can easily be too much. It can actually cause sunburn, leaving permanent, ugly yellow or brown patches on your plant's skin. The real goal is to mimic the bright, but not necessarily scorching, conditions of their native homes.
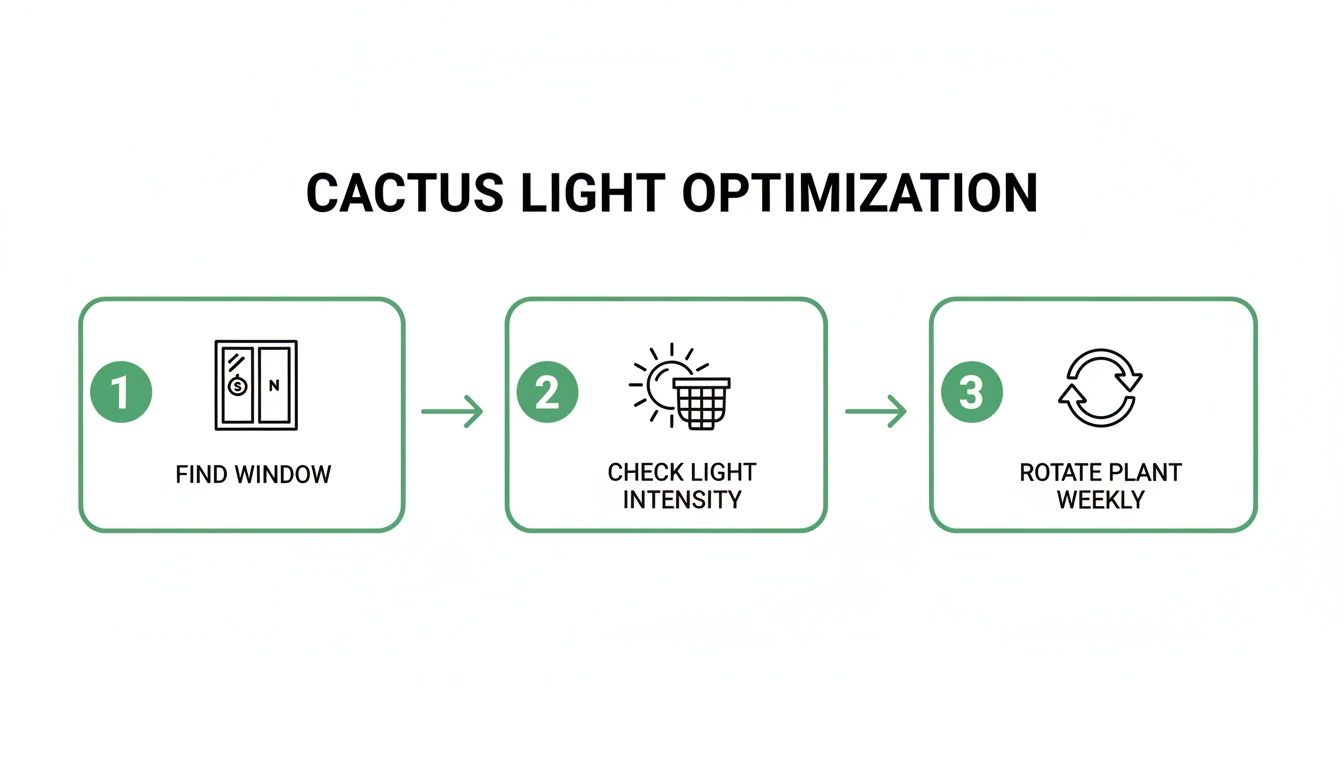
Finding Your Cactus's Sweet Spot
For most indoor cacti, the sweet spot is a location that gets at least six to eight hours of bright, indirect sunlight every day. In the Northern Hemisphere, a south-facing window is pretty much the gold standard because it delivers the most consistent and long-lasting light.
An east-facing window is another fantastic choice. It provides that gentle morning sun that’s far less likely to scorch your plant. West-facing windows are also an option, but you'll need to keep an eye on that intense afternoon heat. You might find you need to pull the plant back a foot or two from the glass or even hang a sheer curtain to soften the light.
If you're just starting, it pays to experiment with a few different spots. For a deeper dive, check out our guide on where is the best place to put a cactus in the house. It can make all the difference.
Learning to Read the Light Signals
Believe it or not, your cactus will tell you exactly how it feels about its lighting. You just have to learn to speak its language. Paying attention to these visual clues is the single best way to know when to make an adjustment.
Is Your Cactus Starving for Light?
- Stretching (Etiolation): This is the classic sign. The cactus will look thin, stretched-out, and pale as it desperately reaches toward the nearest light source.
- Stalled Growth: If it's spring or summer and your cactus hasn't put on any new growth, it's probably hungry for more light.
- Fading Color: A once-vibrant green cactus might start looking dull or yellowish. That's a sign it isn't getting enough sun to photosynthesize properly.
Or is it Getting Too Much Sun?
- Sunburn: Watch for white, yellow, or brownish patches that look scarred or feel crispy. Unfortunately, this damage is permanent.
- Bleached Look: The whole plant can take on a washed-out, pale appearance when the sun is too intense.
- Red or Purple Tones: Some cacti produce protective pigments to shield themselves from harsh sun, which shows up as a reddish or purplish stress color.
Finding that perfect balance is key. If your windows are a bit too intense, understanding the science behind light filtering curtains can help you create that ideal bright-but-indirect environment.
My Go-To Tip: I give my cacti a quarter turn every week or so. It’s a simple trick that encourages even, symmetrical growth and stops the plant from developing a permanent lean toward the window.
What if You Live in a Low-Light Home?
Don't have a sun-drenched window? Don't despair. Grow lights are a fantastic workaround, providing the consistent, full-spectrum light that cacti crave. You don't need a complicated setup; a simple LED grow light bulb can be screwed right into a standard lamp.
Just position the light about 6 to 12 inches above your plant and leave it on for 12-14 hours a day. This perfectly mimics a long day of strong, natural sun and will keep your cactus compact, healthy, and completely free of that sad, stretched-out look.
At the end of the day, getting the light right is the absolute cornerstone of good cactus care. In fact, our experience and industry data show that 90% of successful indoor cactus growth comes down to proper lighting. It's a huge deal—an estimated 65% of common cactus problems trace back to etiolation from insufficient light. And as more people bring these amazing plants into their homes, getting this right is more important than ever.
The Art of Watering and Feeding Your Desert Dwellers
When it comes to keeping a cactus happy indoors, nothing is more critical than how you water it. This is where most plant parents, despite their best intentions, go wrong. In fact, the quickest way to kill a cactus isn't neglect—it's too much love in the form of water.
Let's demystify cactus hydration and nutrition so you can avoid that common pitfall. The secret is surprisingly simple: you just have to think like a desert. Cacti are built for long, dry spells broken up by the occasional, intense downpour. If you can replicate that natural cycle inside your home, you're well on your way to a thriving plant.
Forget a Schedule, Embrace the "Soak and Dry" Method
Your cactus doesn’t have a calendar, so watering it every Saturday is a recipe for disaster. Its thirst changes with the light, temperature, and time of year. Instead, your new mantra should be the "soak and dry" method.
It’s just what it sounds like. When it's time to water, you drench the soil completely until water pours out of the drainage holes. This ensures all the roots get a good drink and encourages them to grow deep and strong. After that, you let the soil dry out entirely before you even consider watering it again. This dry period is crucial for letting the roots breathe and preventing the dreaded root rot that claims so many cacti.
So, how can you be sure the soil is completely dry? Don't just look at the topsoil. Get your hands dirty with one of these foolproof techniques:
- The Finger Test: The classic for a reason. Stick your index finger about two inches into the soil. If you feel even a hint of moisture, step away from the watering can. It needs to feel dusty and bone dry.
- The Skewer Trick: For bigger pots where your finger can't reach, a wooden kebab skewer is your best friend. Push it all the way to the bottom, leave it there for a minute, then pull it out. If it comes out with dark, damp soil clinging to it, give it more time. If it comes out clean and dry, you’re good to go.
This simple routine ensures your plant gets consistent light, which is directly tied to how much water it needs.
Adjusting for the Seasons
Your cactus lives by the sun. During the long, warm days of spring and summer—its active growing season—it's going to be much thirstier. You’ll likely find yourself doing the "soak and dry" routine every 2 to 4 weeks.
But when fall and winter roll around, your cactus enters a state of dormancy. Its growth slows to a crawl, and it needs far less water. You have to cut back significantly. You might only water it once every 6 to 8 weeks, sometimes even less depending on your home's conditions. Overwatering in the winter is one of the most common and fatal mistakes. For a deeper dive on this, check out our comprehensive guide to watering cactus plants.
The 'soak and dry' method is a game-changer. Statistically, indoor cacti survive 95% better with this approach. By watering deeply every 2-4 weeks during the growing season (March-September) and letting the soil dry out, you can cut the risk of root rot by 92%. That’s huge, considering root rot contributes to 70% of all indoor plant failures.
A Minimalist's Guide to Fertilizer
Just like with water, less is always more when feeding a cactus. These plants are survivors, adapted to the nutrient-poor soils of the desert. Hitting them with too much fertilizer will do more harm than good, often burning their sensitive roots.
Here’s the simple rule: only feed them during the active growing season, from spring through late summer. A little boost once a month during this time is plenty. Once autumn arrives, stop all fertilizing until the following spring.
Look for a fertilizer made specifically for cacti and succulents. It should be low in nitrogen and have a good balance of phosphorus and potassium—a 5-10-10 or 2-7-7 formula is perfect. To be extra safe, always dilute the fertilizer to half or even a quarter of the strength recommended on the bottle. This gentle feeding gives them just enough fuel to grow without overwhelming their system.
Choosing the Right Pot and Soil Mix
When you're learning how to care for cactus plants indoors, think of the pot and soil as your plant’s home. Get this foundation right, and you're well on your way to having a happy, thriving cactus for years to come. The wrong setup, especially one that holds onto water for too long, is the number one cause of root rot.
The two most important words to remember here are drainage and aeration. Cacti evolved in sandy, gritty deserts where rain disappears almost instantly. You want to mimic that environment in your pot. Standard potting soil just won't cut it—it’s far too dense and acts like a sponge, suffocating the roots in the soggy conditions that cacti simply can't stand.
The Perfect Cactus Soil Recipe
Mixing your own soil is much easier than it sounds and it gives you total control over what your cactus is growing in. It’s the best way to guarantee your plant gets the fast-draining home it needs. For a more detailed look, our guide on cactus and succulent soil mix has all the info you need.
Here’s a fantastic, no-fail recipe to get you started:
- One part standard potting soil: This provides a bit of organic material and nutrients.
- One part coarse sand or horticultural sand: This is the key to improving drainage. Make sure you avoid fine play sand, which can clump together and defeat the purpose.
- One part perlite or pumice: These lightweight volcanic rocks are brilliant for creating little air pockets in the soil, which stops it from getting compacted and lets the roots breathe.
Just mix these three ingredients together thoroughly. You'll end up with a blend that strikes the perfect balance between holding a little moisture and draining away the excess—exactly what your cactus wants.
A word of caution: never use soil straight from your garden. It’s usually too heavy, can harbor pests and diseases, and doesn't have the aeration that indoor cacti need. Always start with a fresh, sterile mix.
Deciding between making your own soil and buying a pre-made bag comes down to personal preference, time, and how many plants you have. Both are great options.
DIY Cactus Soil Mix vs. Store-Bought Mix
| Feature | DIY Soil Mix | Store-Bought Mix |
|---|---|---|
| Customization | Fully customizable to your specific cactus's needs and your home environment. | General-purpose formula; less control over ingredients. |
| Cost | More cost-effective for a large number of plants, but initial investment in components is higher. | Convenient and affordable for just one or two plants. |
| Convenience | Requires sourcing and mixing multiple ingredients. | Ready to use straight out of the bag. |
| Quality Control | You know exactly what’s in your mix. | Quality can vary between brands; check for good drainage components. |
Ultimately, whether you mix your own or buy a bag, the goal is the same: to provide a gritty, fast-draining medium that prevents water from sitting around the roots.
What Makes a Good Pot
The container you pick is every bit as important as the soil inside it. While pretty much any pot with a drainage hole will work in a pinch, certain materials are definitely better for desert plants.

Terracotta (unglazed clay) pots are the gold standard for a reason. They're porous, which means air and moisture can pass right through the walls. This helps the soil dry out much faster and more evenly, giving you a valuable buffer against accidental overwatering.
As you browse for the perfect home for your new plant, checking out different styles of indoor succulent pots can give you great ideas that match your decor. Just remember the one non-negotiable rule: it must have at least one good-sized drainage hole. No drainage hole is a recipe for disaster.
Knowing When and How to Repot
Repotting a spiky plant can feel a little daunting, but it's essential for its long-term health. The good news is that cacti don't mind being a bit snug in their pots, so you won't have to do it very often—usually only every 2-4 years.
It’s probably time for a new pot when you notice:
- Roots poking out of the drainage holes.
- The plant has stalled out and isn't growing during the spring or summer.
- Your cactus is getting top-heavy and seems like it might tip over.
To handle your cactus without getting pricked, try using kitchen tongs or wrapping it in a few layers of folded newspaper or an old towel. This gives you a good grip while keeping your hands safe. Gently wiggle the plant out of its old pot, brush off most of the old, depleted soil, and settle it into its new home. The new pot should only be about 1-2 inches wider than the old one. Backfill around the sides with your fresh cactus mix.
Here's the most important tip: do not water it right away! Let the cactus sit dry in its new pot for a week or so. This gives any roots that were bumped or broken during the move a chance to heal over. Watering too soon can introduce bacteria to those wounds and lead to rot.
Troubleshooting Common Cactus Problems
Even with the best of intentions, things can go wrong with our plants. Seeing your cactus look a little under the weather is frustrating, but don't worry. Most of the time, these issues are completely fixable if you know what to look for and act quickly.
Think of yourself as a plant detective. Your cactus will drop visual hints when it's not happy, from a slight color change to unwelcome little guests. Let's walk through how to read those clues and get your plant healthy again.
Decoding What Your Cactus is Telling You
Before we get into specific pests and diseases, let's learn to interpret the signals. Understanding what the symptoms mean is the first step to a proper diagnosis.
- Yellowing: If the whole plant is fading to a pale yellow, it's likely getting scorched by too much direct sun. But if the yellowing starts at the bottom and feels soft, you're probably looking at the beginning of root rot from overwatering.
- Shriveling or Wrinkling: This is a classic sign of thirst. The cactus is digging into its water reserves to survive. Before you grab the watering can, though, make absolutely sure the soil is bone-dry. Sometimes a rotting plant can't take up water, making it look thirsty when the real problem is too much moisture.
- Soft, Mushy Base: This is the big one, and it almost always means root rot. The base of the plant will feel squishy to the touch and might even turn brown or black. It's a critical situation that demands immediate action.
- Stretching and Thinning: You might hear this called "etiolation." It's what happens when a cactus isn't getting enough light. It will literally stretch itself thin, growing tall and spindly as it desperately reaches toward the nearest light source.
The vast majority of indoor cactus problems trace back to one of two things: incorrect watering or improper lighting. Mastering those two fundamentals will prevent nearly all of the issues we're about to cover.
Tackling Common Pests
While cacti are pretty tough, a few common houseplant pests can occasionally set up shop. The trick is to spot them early and evict them before they multiply.
Mealybugs You'll spot these as small, white, cotton-like fluff, usually tucked into the crevices where spines meet the plant's body. They're sap-suckers that will slowly weaken your cactus.
- The Fix: For a minor issue, just dip a cotton swab in 70% isopropyl alcohol and touch each mealybug. It dissolves their protective coating on contact. If you're facing a bigger invasion, spray the plant down with a good insecticidal soap or a neem oil solution.
Spider Mites These pests are incredibly tiny, so you probably won't see the mites themselves. Instead, look for their tell-tale signs: delicate, fine webbing between the spines and tiny, faded speckles on the cactus skin.
- The Fix: Spider mites thrive in dry conditions and hate humidity. A strong spray of water from a hose or showerhead can physically blast many of them off. Follow that up by spraying with neem oil every few days to catch the next generation.
Scale Insects Scale can be sneaky because they just look like small, brown, hard bumps on the cactus surface. They don't move. Like mealybugs, they latch on and feed on the plant's juices.
- The Fix: Their hard, shell-like coating makes them resistant to most sprays. The best method is physical removal. You can often just scrape them off with a fingernail. For stubborn ones, dab each bump with an alcohol-soaked cotton swab first to loosen their grip.
Dealing with Diseases
Cactus diseases are almost always fungal and are a direct result of too much water and not enough airflow. Prevention is your best strategy here.
Root Rot This is the number one killer of indoor cacti. It's a fungal infection that takes hold in soil that's kept too wet for too long. You'll know it by a mushy, blackening base, a funky smell coming from the soil, and a cactus that might start to lean over.
- The Fix: Act fast. Pull the cactus out of its pot immediately. Using a clean knife, cut away any roots that are dark, soft, or smell bad. Then, let the entire plant sit out in a dry, shady spot for a few days so the cuts can heal and form a callus. Once callused, repot it into fresh, completely dry cactus mix and don't even think about watering it for at least a week or two.
Fungal Spots (Rust Fungus) This usually appears as rusty orange or brown circular spots on the skin of the cactus. It’s typically caused by high humidity or from water sitting directly on the plant for too long.
- The Fix: First, increase the air circulation around your plant. When you do water, focus on watering the soil, not the plant itself. You can treat the existing spots with a copper-based fungicide, which you can find at most garden centers. Just be sure to follow the package directions and move the sick plant away from any others to prevent it from spreading.
Your Top Indoor Cactus Questions Answered
Even with the best guide in hand, you're bound to run into some specific head-scratchers when growing cacti indoors. These plants have their own unique language, and learning to interpret it is key. Let's tackle some of the most common questions we get from our community at The Cactus Outlet.
How Can I Tell if My Cactus Is Dormant?
You'll know your cactus has hit its winter snooze button when it just stops growing. Period. No new pads, no extra height—nothing. This is its natural dormant period, usually triggered by the shorter days and cooler temperatures of fall and winter. It's the plant's way of conserving resources for the big growth spurt in spring.
When you see this happen, it's your cue to back way off on the watering. We're talking maybe once a month or even every two months, just enough to keep it from looking like a raisin. And whatever you do, do not fertilize a dormant cactus. Just find it a cool, bright spot and let it chill out until you see the first signs of new growth in the spring.
Can a Cactus Live in a Bathroom or Kitchen?
I get this one a lot, and while I love the aesthetic, it's usually not a great long-term home for a cactus. These are desert plants, through and through. They’re built for dry air and absolutely loathe high humidity. All that steam from your daily shower or boiling pasta creates a damp environment that’s a breeding ground for rot and fungal diseases.
If your heart is set on it, you have to be strategic. Make sure there’s fantastic airflow, either from a window you can keep open or a consistent fan. The spot must get more than six hours of bright, direct light, and a breathable terracotta pot is non-negotiable. It's the only way to help that soil dry out quickly enough in a humid room.
A common mistake is assuming any bright spot will do. The humidity in a room is just as important as the light. For a desert plant, consistently damp air is a persistent threat that can undermine even the best watering and lighting practices.
Help! My Cactus Is Growing Tall and Skinny.
Ah, the classic "stretch." This is called etiolation, and it's a desperate cry for more light. Your cactus is literally stretching itself thin, reaching for the sun it needs to survive.
The bad news is that the stretched, skinny growth will never fill out or return to its normal shape. The first thing you need to do is move it to a much sunnier spot—a south-facing window is ideal—or get a good grow light on it. To fix its appearance, your best bet is to propagate the healthy part.
- Take a clean, sharp knife and chop off the healthy, compact top section.
- Let the cutting sit in a dry, well-ventilated spot for a few days until the cut end feels dry and hard, like a scab. This is called a callus.
- Once it's callused over, you can pot it up in some fresh, dry cactus mix.
This little bit of plant surgery gives you a chance to start over with a new, healthy, and compact cactus.
Are Cacti Safe to Have Around Pets and Kids?
This is such an important question, and the answer is: it really depends on the species. Obviously, the sharp spines on many cacti are a real hazard for curious kids and pets who might get a little too close.
But it's not just the spines. Some succulents often mistaken for cacti, like many Euphorbia species, have a milky white sap that's toxic. It can cause pretty nasty skin irritation and is harmful if ingested. Always, always identify your specific plant. To be on the safe side, the best practice is to keep any spiny or unidentified plants on high shelves, in hanging baskets, or in rooms that are off-limits to your little ones and furry friends.
Ready to find the perfect, low-maintenance succulent for your space? Explore the incredible variety of healthy, beautiful cacti at The Cactus Outlet and bring a piece of the desert into your home. Visit us today at https://www.cactusoutlet.com.