Most cactus soil advice is too simple to be useful.
“Use a cactus mix” sounds helpful until you realize one bag can behave very differently from another, and one recipe that works for a Saguaro in dry heat can be a poor fit for an epiphytic cactus in a humid room. The best soil for potted cactus is not one magic blend. It is a fast-draining, air-filled medium matched to the plant, the pot, and the climate.
That is the difference between a cactus that merely survives and one that roots hard, dries evenly, and keeps growing without hidden rot at the bottom of the pot. At The Cactus Outlet, that is the line we pay attention to. Small desktop cacti, specimen Euphorbia, bulk planting material, and large columnar plants all force the same lesson: the mix matters, but the context matters just as much.
Deconstructing the Ideal Cactus Potting Mix
“Fast-draining” is not enough to describe a good cactus mix. Two soils can both drain, yet one keeps a desert cactus firm and rooting hard while the other leaves the lower half of the pot damp for too long. The right mix is built around behavior in your conditions, not a label on the bag.
In a pot, cactus soil has four jobs. It needs to shed excess water quickly, keep air around the roots after watering, resist compaction as it ages, and stay in a pH range cacti can handle. Miss one of those, and growth often slows before the plant shows any obvious warning signs.
Drainage starts with how the mix behaves after watering
I judge a mix by what happens in the first minute. Water should pass through cleanly. The surface should not stay slick, and the pot should not feel swampy at the base long after runoff stops.
That is why standard potting soil causes so many problems with cacti. It is built to hold moisture for leafy plants that want a steady reserve around the roots. Desert cacti want the opposite. They need a root zone that gets wet, then clears out and re-oxygenates without delay.

Particle size controls airflow
Texture matters more than the name on the bag.
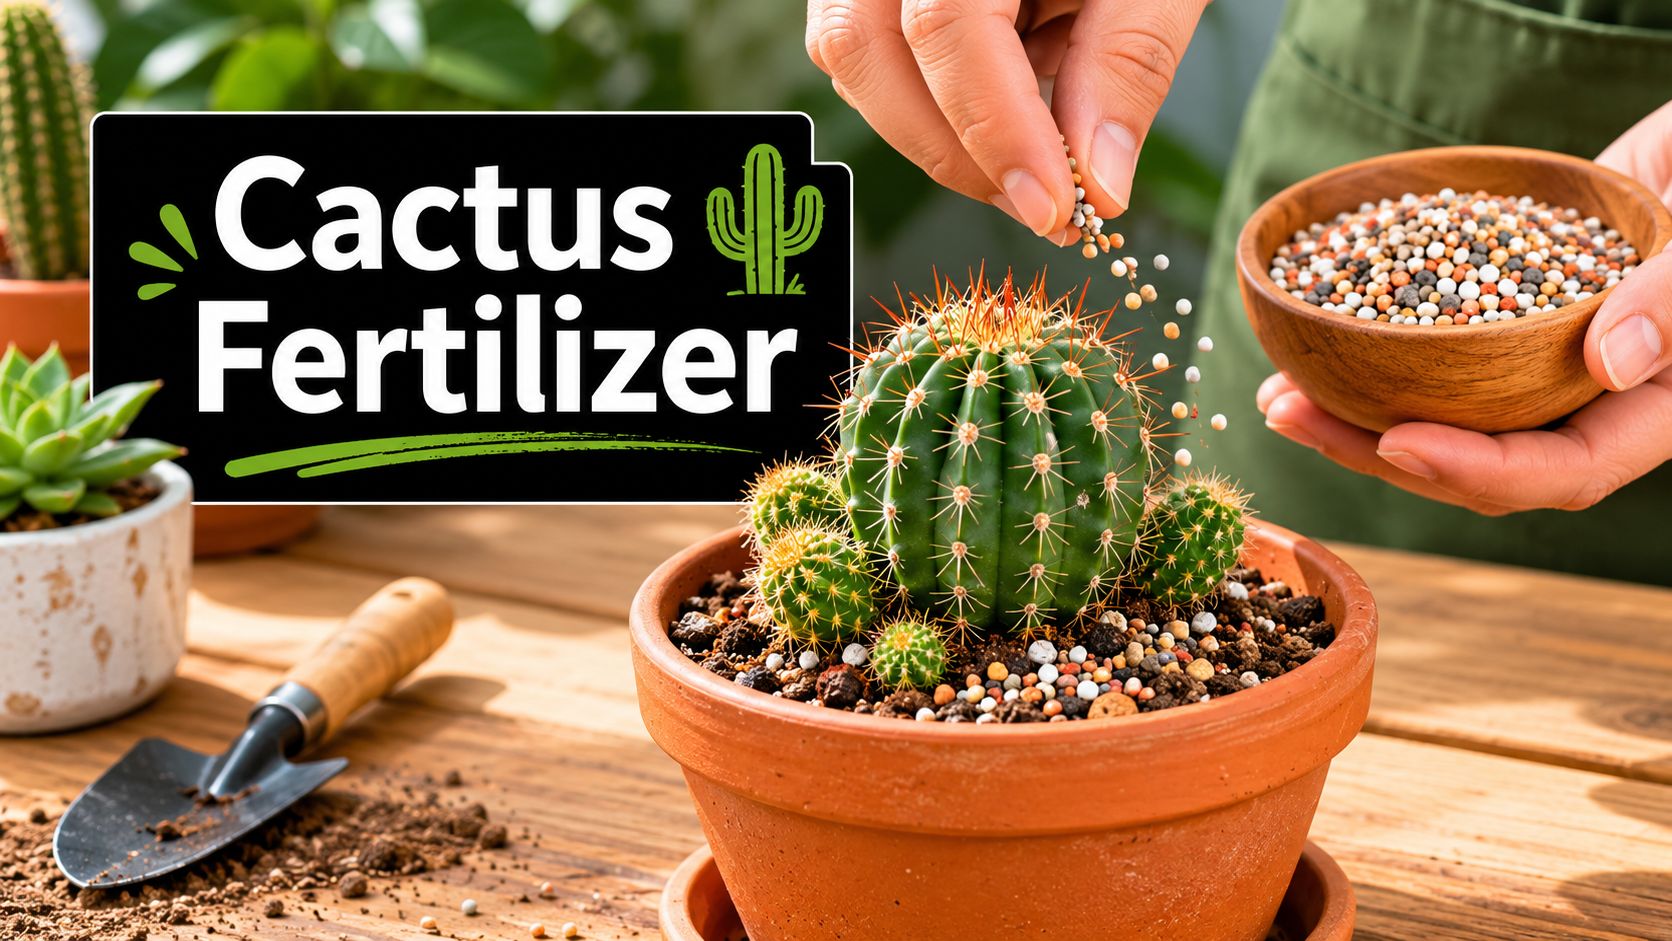
A useful cactus mix is coarse and irregular. Pumice, perlite, grit, lava rock, and coarse mineral particles create open spaces that let water move down and air move back in. Fine material does the opposite. It settles, fills the gaps, and turns a mix that looked airy at repotting time into something dense a few waterings later.
A quick hand test tells you a lot:
- You should feel distinct coarse particles: The mineral side of the mix should be obvious.
- There should be very little dust or powder: Fines clog air spaces and slow drying.
- A squeezed handful should break apart easily: If it stays packed like damp compost, it is too fine for most desert cacti.
That last point matters even more indoors, where evaporation is slower and the bottom of the pot stays wet longer than many growers expect.
Organic matter is a minor but necessary component
Cacti do not need rich soil, but they also do not thrive in every all-mineral blend. A little organic material helps young roots establish, holds a modest amount of moisture between waterings, and gives the mix some buffering capacity. The trade-off is breakdown over time. Too much bark, peat, compost, or coir can leave the root zone wetter and denser than it looked on day one.
For desert cacti, I keep organic content in a supporting role. For epiphytic cacti, such as holiday cactus, I allow more because those roots tolerate and often prefer a mix that holds moisture a bit longer. That is one reason a single “best soil” recipe never holds up across all cactus types.
Pot choice changes the calculation too. Terracotta dries faster than glazed ceramic or plastic, so the same soil can behave well in one container and stay wet too long in another. Drainage holes are part of the system, not an optional detail. If you need to sort that out before adjusting your mix, The Cactus Outlet has a practical guide on whether succulents need drainage.
pH still matters, even if drainage matters more
Most potted cacti do well in slightly acidic to near-neutral soil. If the pH drifts too far, the plant can struggle to use nutrients that are already present in the pot. The symptoms are easy to miss at first. Growth slows, color flattens, and the cactus stops putting on healthy new tissue during the growing season.
Poor drainage usually does more damage, faster. Still, pH is part of the full picture, especially if you reuse components, water with very hard tap water, or keep a plant in the same mix for years.
What the ideal mix does
A good cactus mix is judged by performance, not marketing language. In practice, it should:
- Drain quickly after a full watering: No lingering surface puddling or heavy, soggy base.
- Stay airy once wet: The mix should not collapse into a dense mass.
- Hold its structure over time: Repeated watering should not turn it into fine sludge.
- Match the plant and the setting: Desert cacti usually want more mineral content. Epiphytic cacti usually want more moisture retention. Humid rooms, plastic pots, and low light all push the mix toward more air and less organics.
That framework is more useful than any one recipe. It lets you adjust for a Ferocactus in terracotta, a small Mammillaria on a desk, or an epiphytic cactus in a hanging pot without guessing.
Store-Bought vs Homemade Cactus Soil Which Is Better
There is no universal winner here. There is only the better choice for your situation.
Store-bought cactus soil saves time. Homemade soil gives you control. Most growers eventually use both, depending on the plant in front of them.
Where store-bought mixes help
Commercial cactus soil makes sense when you need convenience, consistency in supply, or a quick fix for a single plant. A beginner with one or two small pots does not always need bins of pumice, sand, and coir sitting in the garage.
Good bagged mixes can also work as a base. That is often the smartest use for them. Buy a cactus blend, inspect the texture, then decide whether it needs more grit or pumice.
Store-bought is usually the better fit when:
- You have only a few plants: Buying multiple raw ingredients can be excessive.
- You want speed: Repotting day is easier with a ready-made bag.
- You are still learning your conditions: It helps to begin with a baseline, then adjust.
Where store-bought mixes disappoint
A label that says “cactus” does not guarantee a gritty mix. Some products are still too fine, too organic, or too moisture-retentive for desert species in indoor conditions.
That is the hidden problem. On the shelf, two bags can look similar. In the pot, one dries cleanly and the other stays heavy at the base.
If a commercial mix feels soft, peat-heavy, or dense when wet, I do not use it alone for desert cacti. I amend it or skip it.
Why experienced growers lean DIY
Homemade mixes let you match soil to plant type, climate, and container material. That control is the whole advantage.
A collector growing a Peruvian Apple Cactus in a dry patio setup needs something different from an apartment grower potting an epiphytic cactus in plastic. DIY lets you adjust the mineral load, the moisture-holding side, and the texture without guessing what is inside a bag.
The trade-offs are real:
| Choice | Main strength | Main drawback | Best fit |
|---|---|---|---|
| Store-bought | Convenience | Less control over texture and moisture behavior | Beginners, quick repots, small collections |
| DIY | Full customization | More effort and material sourcing | Collectors, contractors, climate-specific setups |
I usually tell newer growers this: if you own three cacti, buy a mix and improve it if needed. If you own thirty, start mixing your own.
A practical middle ground
The most useful approach for many growers is hybrid.
Start with a commercial cactus soil as the base, then add the missing structure yourself. That might mean more pumice, more perlite, or more coarse sand depending on your setup. This avoids the all-or-nothing debate and gets you closer to a reliable result.
One factual example from the trade side is The Cactus Outlet’s cactus and succulent growers soil, which uses a 50/50 mix of pumice and organic compost for fast drainage and nutrient support. That kind of formula is not a universal answer, but it is a clear example of a mix built around mineral structure rather than soft houseplant media.
The better option is the one you can evaluate and adjust without pretending every cactus wants the same thing.
Proven DIY Cactus Soil Recipes and Mixing Ratios
The easiest mistake in DIY cactus soil is copying a recipe without asking what plant it is for.
A desert cactus in terracotta in Arizona can take a much grittier mix than a tropical epiphytic cactus in a plastic pot in coastal humidity. The ratio should follow the growing conditions, not internet repetition.
One strong baseline is the 2 parts coarse sand, 1 part perlite, and 1 part potting soil formula. According to Ponderosa Cactus, that mix dries 70% faster than typical commercial mixes, which can cause root rot in 60% of cases within 6 months. It is a useful starting point because it puts drainage first without removing all organic support.
For a deeper look at ingredients and blend ideas, The Cactus Outlet also has a separate guide to cactus mix soil.
The building blocks that matter
You do not need a long ingredient list. You need the right roles covered.
- Pumice or perlite: These create air space and improve drainage. Pumice usually stays put better in the long run. Perlite is lighter and easier to find.
- Coarse sand or grit: Adds weight, drainage, and texture. It should be coarse, not powdery.
- Potting soil or coir: This is the moisture-buffering fraction. Keep it restrained for desert cacti.
- Optional organic enrichers: Small amounts can help certain plants, especially less desert-adapted types, but restraint matters.
Custom Cactus Soil Recipes
| Scenario | Pumice / Perlite | Coarse Sand | Potting Soil / Coir | Notes |
|---|---|---|---|---|
| Desert cactus in dry climate and terracotta | 2 parts | 2 parts | 1 part | Very gritty. Good for columnar cacti and many desert species. |
| Desert cactus in humid climate or plastic pot | 2 parts | 2 parts | 1/2 to 1 part | Reduce moisture-holding material so the pot does not stay wet too long. |
| General-use beginner mix | 1 part | 2 parts | 1 part | Mirrors the proven 2:1:1 style using sand as the dominant drainage ingredient. |
| Large specimen cactus | 2 parts | 1 to 2 parts | 1 part | Extra mineral structure helps stability and long-term airflow. |
| Epiphytic or tropical cactus | 1 part | 1 part | 2 parts | Slightly more moisture-holding content suits plants that do not want a harsh desert blend. |
These are working ratios, not commandments. If your room is humid, your pot is plastic, or your watering habits run generous, move the mix toward more mineral content. If your environment is hot, bright, and drying, you can allow a little more organic support.
How to mix it so it behaves properly
The ratio is only half the job. The physical process matters.
Start dry and mix thoroughly
Use a bucket, tote, or mixing tray. Add ingredients dry, then blend until the coarse material is evenly distributed through the whole batch. Pockets of fine soil defeat the purpose.
I want every scoop to look similar. If one corner of the bin is mostly potting soil and another is mostly pumice, the final pot will dry unevenly.
Check the texture by hand
Grab a handful and squeeze lightly.
A good desert-cactus mix should crumble apart easily. It should not smear, cake, or form a smooth ball. If it does, add more coarse material.
Test drainage before the plant goes in
This is the part often skipped.
Fill an empty pot with the mix, run water through it, and watch what happens. If water hesitates on the surface, the blend is too fine or too organic. If it races through so aggressively that the mix barely takes any moisture at all, you may need a slight increase in the moisture-holding fraction for that specific plant.
The right mix does not just drain fast. It drains evenly from top to bottom.
How to customize by climate and pot type
Generic advice breaks apart at this stage.
Humid climates
Indoor growers in humid regions usually need more mineral content than desert growers do. Moist air slows drying. Soil that might be fine in an arid greenhouse can stay damp too long in a humid apartment.
In those conditions, I shift the recipe toward pumice, perlite, or grit.
Arid climates
In hot, dry areas, especially outdoors, an excessively harsh mix can dry so quickly that new roots struggle to establish. A little more potting soil or coir can make the watering cycle more manageable.
Terracotta versus plastic
Terracotta breathes. Plastic holds moisture longer.
That means the same exact soil behaves differently depending on the container. If you are using plastic, build in extra drainage through the mix. If you are using terracotta, you can often tolerate a touch more organic support without trouble.
Desert versus epiphytic cactus
Desert cacti want lean, airy, mineral-heavy media. Epiphytic cacti usually accept more organic content and less aggressive drainage because their natural rooting habits differ. Treating both with the same harsh desert blend is one of the most common recipe mistakes I see.
There is no virtue in making every cactus suffer in the name of “grit.” The goal is root health, not austerity.
How to Pot and Repot a Cactus for Lasting Health
Repotting kills more cacti through bad handling than bad ingredients.
A strong soil mix still fails if the pot is oversized, the roots go back into damp old muck, or the plant gets watered before damaged roots have sealed. Potting technique has to match the cactus, your climate, and the container you chose.

Pick the pot before you touch the plant
Start with the root system, not the top of the plant. A small cactus in a large pot sits in more wet soil than it can use, and that is where trouble starts.
Terracotta gives you a wider margin for error because the walls dry faster. Plastic works fine for growers who water carefully or need a lighter pot, but I usually tighten up the soil mix if the plant is going into plastic. In a humid home, that adjustment matters even more.
The goal is simple. Choose a container just a bit wider than the active roots, with a drainage hole, and enough weight or stability for the plant you are growing.
If you want a more detailed walkthrough after this guide, The Cactus Outlet has a dedicated article on how to repot cacti.
Handle the root system with purpose
Repot during a dry spell in the watering cycle. Dry mix falls away cleanly, and you can see what shape the roots are in.
Once the cactus is out of the pot, remove old soil that has compacted, turned sour, or formed a dense plug around the roots. Dead roots should be cut back with a clean blade. Black, mushy, or hollow roots do not recover, and leaving them in place only gives rot a head start. If you make fresh cuts, let them dry before the plant goes back into soil.
Spiny species need different handling tools. Newspaper works for many small cacti. Foam, leather gloves, or lifting straps are better for thick-spined barrel and columnar types. Large specimens should be supported from more than one point so the base does not twist while you lift them.
Epiphytic cacti are a separate case. Their roots are often finer and less brutalized by old mix, so I disturb them less than I would a desert cactus packed into heavy, stale soil.
Set the plant at the right height and keep the mix open
Add enough mix at the bottom so the cactus sits at its previous soil line, or slightly higher if the old planting was too deep. Burying the stem higher than it grew before is a common mistake, especially with globular cacti that hold moisture near the base.
Backfill around the roots and tap the pot to settle the mix into gaps. Firm the soil lightly only until the plant stands straight. If you pack it hard with your thumbs, you crush the air spaces that keep roots healthy.
Large cacti need extra attention here. Their weight presses down on the lower root zone, so I use a more mineral-heavy backfill for them than I would for a small desk cactus in a breathable clay pot. The bigger the specimen, the less forgiving a soft, organic mix becomes over time.
Top dressing can help, but only if it suits the plant and the pot. A thin layer of gravel can stabilize a wobbly cactus and keep the stem off damp soil. A thick decorative layer on a plastic pot can slow drying and hide problems.
Wait on the first watering if roots were disturbed
Freshly repotted cacti do not always need water the same day.
If the roots were cleaned up, trimmed, or bruised, let the plant rest in dry soil first. The exact wait depends on species, root loss, temperature, and humidity. A small desert cactus in warm, dry conditions may be ready sooner than a jungle cactus in a cool room. The trade-off is straightforward. Water too soon and damaged roots sit in moisture. Wait too long in extreme heat and a stressed plant can stall.
For growers trying to improve timing after repotting, understanding proper watering techniques can help build better habits around root recovery and moisture control.
A visual demonstration helps with technique, especially for handling and depth.
What a successful repot looks like
A properly potted cactus sits firmly without being buried too deep. Water runs through the mix cleanly instead of pooling around the stem. The plant stays stable, the soil smells fresh, and the pot dries at a pace that fits the species, the room, and the container.
That last part matters.
A desert cactus in terracotta, a holiday cactus in plastic, and a large outdoor specimen in a heavy mineral mix should not all be potted the same way. Good repotting is not one recipe or one routine. It is matching the root zone to the plant in front of you.
Post-Potting Care and Solving Soil-Related Problems
Fresh soil does not guarantee a healthy cactus. The true test starts after potting, when the mix meets your watering habits, your climate, and the pot you chose.
I see the same pattern often. A grower uses a decent cactus mix, waters carefully, and still ends up with a plant that stalls or softens. The problem is usually not one mistake. It is a mismatch between soil type, cactus type, humidity, and container. A desert cactus in terracotta can forgive a mix that would keep an epiphytic cactus too dry. That same mix in glazed ceramic can stay wet longer than expected.
Read the pot and root zone
Start by watching how the container behaves over several watering cycles, not just one.
If water beads on the surface, the top layer is too fine, compacted, or dried into a crust. If the pot stays heavy long after watering, the lower root zone is holding more moisture than the plant can use. If the mix smells stale or sour, air exchange has dropped and roots are at risk.

The surface can be misleading. Many cactus losses begin in the lower half of the pot, where fine particles settle and moisture lingers longer than the top inch suggests.
Organic-heavy mixes cause more trouble than growers expect
Bagged cactus soil often looks coarse at first glance, but many blends still contain enough peat, compost, or fine forest products to stay wet too long in real home conditions.
That matters more in plastic pots, in humid rooms, and with slower-growing desert species that want long dry intervals. By contrast, an epiphytic cactus grown indoors may tolerate, and sometimes prefer, a bit more moisture retention if airflow is good. The fix is not one universal recipe. The fix is matching the mix to the plant and the setup.
Common soil problems and what to do
- Surface stays wet for days: The mix is usually too fine or too organic for that pot and environment. Increase the mineral share at the next repot.
- Soil pulls away from the pot edge: The organic portion has dried unevenly or broken down. Rewetting can help short term, but replacing the mix is the better answer.
- Base of the cactus turns soft or discolored: Unpot it and inspect the roots and lower stem right away. Waiting rarely improves the outcome.
- Top looks dry while the bottom stays wet: Check deeper with a wooden skewer or moisture probe before watering again.
- Plant wobbles even after settling in: The mix may be too chunky to anchor fine roots, or the root system may be weak. For small cacti, a slightly finer top layer can improve stability without making the whole pot soggy.
Watering and soil have to be judged together
A fast mix can still fail if it is watered before the root zone has dried enough. A slower mix can work well if the cactus is the right type for it and the watering interval fits the season.
That is why broader proper watering techniques are worth studying. The plant type is different, but the habit of reading pot weight, dry-back time, and root-zone moisture applies directly to cactus culture.
When to leave it alone, and when to act
Do not repot just because the soil dries a day slower in winter or after a stretch of humid weather. Seasonal shifts change everything from evaporation to root activity.
Intervene when the pattern stays wrong. Repeated slow drainage, a sour smell, collapsing soil structure, fungus gnats in a desert cactus mix, or a plant that no longer firms up after watering all point to a root-zone problem, not a minor fluctuation. At that stage, fresh soil matched to the species, your climate, and the pot material gives you a better chance than waiting for the mix to correct itself.
Your Cactus Soil Questions Answered
The questions that come up most often are usually the ones that matter most in practice.
Can I use beach sand or playground sand?
Usually, no.
For cactus soil, the goal is coarse, draining mineral texture. Fine sand can pack too tightly and reduce airflow. Salt contamination is an additional concern with beach sand. If you want sand in a mix, use coarse horticultural sand or grit.
Do I need to sterilize a DIY mix?
Not always.
If your ingredients are clean and dry, many growers use them as-is. Sterilizing can make sense in specific situations, such as reusing questionable material, but it is not a universal requirement for every batch. I care more about ingredient quality and storage than automatic sterilization.
Can I over-amend a commercial cactus mix?
Yes.
Adding grit improves many bagged mixes, but too much can create a blend that dries unevenly for your specific setup. This is especially true with small pots, hot exposures, or newly rooted plants. Adjust with purpose, then test the mix in a pot before committing a valuable cactus to it.
How often should I replace cactus soil?
Replace it when structure breaks down, drainage slows, or the root zone no longer behaves the way it should.
That interval depends on the ingredients, the pot, and the climate. A mineral-heavy mix holds structure longer than a soft organic blend. Large specimen cacti in stable inorganic-heavy media can go longer between full refreshes than small plants in finer, faster-degrading mixes.
Is one recipe good for every cactus I own?
No, and many care guides go wrong by suggesting otherwise.
As noted in a long-running discussion summarized by CactiGuide, there is no single soil mix that is best for all cacti in all areas. The debate between 50/50 and 60/40 pumice-to-soil ratios exists because humidity, pot material, and cactus type all change how the mix behaves.
That is why a desert cactus, an epiphytic cactus, and a Euphorbia should not automatically get the same blend.
What if I see insects in the potting soil?
First, identify the pest before reacting.
Some soil insects are mostly a nuisance. Others point to moisture staying too high for too long. If you are sorting out that difference, this guide on bugs in plant soil is a useful reference for understanding what may be living in the mix and why it appears.
What is the simplest rule to remember?
Build the mix around how fast the pot needs to dry in your conditions.
That one question solves most confusion. If the plant is a desert cactus, the air is humid, and the pot is plastic, push the soil toward more mineral drainage. If the plant is less desert-adapted and the environment is dry, allow a little more moisture-buffering material. The right soil is the one that matches the whole setup.
If you are choosing soil for a new plant or rebuilding a pot that never seemed to dry right, The Cactus Outlet offers cacti, succulents, and practical care guidance for growers working with everything from small indoor pots to large outdoor specimens.