
The best time to repot a Christmas cactus is during its "off-season"—typically in the spring, between February and April. You want to wait until after the last of its beautiful winter flowers have faded. This timing gives the plant a chance to settle into its new home and recover before it starts pushing out new growth.
Tackling this task during its rest period minimizes stress, which is key to avoiding things like bud drop later in the year.
Signs Your Christmas Cactus Needs a New Pot
Here's a little secret about Christmas cacti: they actually like their roots to be a bit snug. Unlike some houseplants that need annual repotting, these guys prefer to be slightly root-bound. Moving them too often can do more harm than good.
So, before you rush to grab a new pot, you need to play detective and look for specific clues that your plant is truly ready for an upgrade.

Repotting without a good reason is a classic mistake. Learning to spot these signals means you can act with confidence, knowing you're doing what's best for your plant's health and future blooms.
Obvious Visual Cues
The most undeniable signs are all about the roots. If you see roots making a break for it out of the drainage holes, that's a five-alarm fire. The plant is literally searching for more soil because it has used up everything in its current pot.
Another dead giveaway is when the root system has become a tightly-wound, solid mass. You might see roots coiled up right under the soil's surface, or they might even be pushing the entire plant up and out of its container. When things get really bad, the whole root ball will hold the exact shape of the pot, with almost no soil left in sight.
My Go-To Trick: Never just judge from the top. I always gently tip the pot on its side to get a look at the bottom. Roots circling the drainage hole are the first and most reliable sign that it's getting crowded in there.
Subtle Performance Issues
Sometimes, the clues are less obvious. You have to pay close attention to how your plant is behaving, especially when it comes to growth and watering. These little changes can tell you a big story about what’s happening below the surface.
Keep an eye out for these performance dips:
- Growth Has Stalled: A happy, healthy Christmas cactus will regularly produce new leaf segments, called cladophylls. If your plant has just stopped growing, even with good light and water, the roots have likely hit a wall and can't find the nutrients they need to expand.
- The Soil Dries Out Instantly: Are you watering thoroughly, only to find the pot is bone-dry a day or two later? That's a classic symptom of a root-bound plant. There's simply more root than soil, so there's nothing left to hold onto moisture.
- A Limp or Wilting Look: If the leaves seem a bit limp, shriveled, or just plain sad, it could be that the compacted root ball can't absorb water and nutrients effectively anymore, no matter how much you give it.
If you spot one—or worse, a few—of these signs, it’s a clear signal that it's time to give your Christmas cactus a little more room to grow.
Finding the Perfect Time to Repot
With houseplants, timing is everything. This is especially true when you’re thinking about repotting a Christmas cactus. Unlike a tough-as-nails pothos you can repot on a whim, these jungle cacti are a bit more particular about their schedule.
Get the timing right, and your plant will barely skip a beat. Get it wrong, and you could be looking at a stressed-out cactus that drops every single one of its beautiful blooms.
The golden rule is simple: never, ever repot while the plant is blooming or even thinking about it. When it's covered in buds or flowers, all its energy is going into that spectacular show, not into recovering from a major root disturbance.
The Ideal Repotting Window
So, when is the right time? The sweet spot is right after the plant finishes its last bloom, during its natural rest period. For most of us in the Northern Hemisphere, this falls somewhere between February and April.
During this quiet phase, your cactus isn't pushing out new growth or flowers, which makes it the perfect moment to give it a new home. Think of it like moving into a new house during a long, quiet weekend instead of trying to do it during a chaotic work week. This gives the plant plenty of time to settle in before its spring and summer growth spurt kicks in.
A plant’s natural cycle is your best guide. Working with its rhythm of growth and rest, rather than against it, minimizes stress and sets it up for long-term health and spectacular holiday displays.
Why This Timing Matters
When you understand the plant's annual cycle, the "when" of repotting becomes obvious. A Christmas cactus has a predictable rhythm:
- Growth (Spring/Summer): Actively puts on new leaf segments.
- Budding (Fall): Shorter days and cooler nights trigger bud formation.
- Blooming (Winter): The main event—its big floral show.
- Rest (Post-Bloom): A brief dormant period to recharge its batteries.
By choosing that post-bloom rest period, you’re catching the plant when its activity is at its lowest. It’s done with the demanding job of flowering and hasn't started its next growth phase.
This strategic timing gives the roots weeks to heal and get comfortable without the pressure of supporting new leaves or flowers. In fact, research shows that the best time to repot a Christmas cactus is after it blooms, and roughly 70% of experienced gardeners follow this schedule. You can learn more about optimal repotting frequency from the experts at Gardening Know How.
Waiting for this window is just a small act of patience, but it pays huge dividends in a healthier plant and a reliable bloom cycle year after year. Mark your calendar for a few weeks after that last flower fades—your Christmas cactus will thank you for it.
Gathering the Right Tools and Soil Mix
A successful repotting day is all about preparation. Walking into it without the right supplies can turn a simple task into a stressful ordeal for both you and your plant. Having everything clean and ready to go makes the process smooth, quick, and way less messy.
Think of it like being a surgeon in an operating room—you want all your tools sterilized and laid out before you begin. A little prep work makes all the difference in minimizing transplant shock and setting your Christmas cactus up for a speedy recovery.
Choosing the Perfect Pot
The single most important decision you'll make here is picking the right container. It’s so tempting to give your plant a massive upgrade, but for a Christmas cactus, going too big is a classic mistake. A pot that’s way too large holds onto excess moisture, creating a soggy environment that is the number one cause of root rot.
Stick to this simple rule: choose a new pot that is only one to two inches wider in diameter than the current one. This small increase provides just enough fresh real estate for the roots to explore without overwhelming them.
When it comes to material, you have a couple of solid options:
- Terracotta: These classic clay pots are my personal favorite because they're porous, allowing air and water to move through the sides. This helps the soil dry out more evenly, significantly reducing the risk of waterlogged roots. They're a fantastic choice if you tend to be a little heavy-handed with the watering can.
- Plastic or Glazed Ceramic: These non-porous pots retain moisture longer. They can be a good fit if you live in a very dry climate or admit you’re a bit of an under-waterer.
Regardless of what material you choose, one feature is absolutely non-negotiable: drainage holes. If a pot doesn’t have them, just walk away. It's not worth the risk. Proper drainage is everything for a Christmas cactus.
Crafting the Ideal Soil Blend
First things first: step away from the heavy garden soil or standard potting mix straight from the bag. Christmas cacti are epiphytes. In their native Brazilian habitat, they grow on tree branches, anchoring themselves in pockets of leaf litter and organic matter—not dense soil. Their roots are built for incredible air circulation and sharp drainage.
Your goal is to create a soil mix that's light, airy, and drains in a flash. You're trying to mimic that chunky, organic-rich debris found in their natural environment. A dense, water-retentive soil is the fastest way to invite root problems.
To get this right, you'll need to create a custom blend or start with a high-quality pre-made mix.
Creating your own soil mix might sound like a hassle, but it's incredibly simple and gives you complete control over the growing medium. A foolproof recipe that I’ve used for years is:
- One part standard potting soil (provides a base and some nutrients)
- One part perlite or pumice (creates essential air pockets and improves drainage)
- One part orchid bark (adds a chunky texture for aeration and mimics their natural habitat)
Mixing these three components gives you a substrate that holds just enough moisture without ever becoming compacted or suffocating the delicate roots.
To help you decide what's best for your situation, here's a quick comparison of using a pre-made mix versus blending your own.
Choosing the Right Potting Mix for Your Christmas Cactus
A comparison of pre-made mixes versus creating your own DIY blend to ensure optimal drainage and aeration for your plant.
| Feature | Pre-Made Succulent/Cacti Mix | DIY Custom Blend |
|---|---|---|
| Convenience | High - Ready to use right out of the bag. | Low - Requires sourcing and mixing separate ingredients. |
| Customization | Low - What you see is what you get. | High - You can adjust ratios based on your climate and watering habits. |
| Cost | Generally more expensive per quart. | Often more cost-effective, especially for multiple plants. |
| Quality Control | Varies by brand; some can be too dense or peaty. | You control the quality of every single component. |
Ultimately, both options can lead to a healthy plant, but taking a few extra minutes to create a custom blend often yields the best long-term results.
For a deeper dive into creating the perfect foundation for your plant, you can find more information about crafting the ideal cactus and succulent soil in our detailed guide. This balanced approach is the key to a thriving, happy plant post-repot.
A Gentle Guide to the Repotting Process
With your new pot and perfect soil mix at the ready, it's time to get down to business. Repotting a Christmas cactus isn't a race; it's a slow and steady process that’s all about minimizing stress for your plant. Think of it as a careful, deliberate relocation.
The goal is to make the transition so smooth that your cactus barely notices it has a new home. The fleshy leaf segments—those are called cladophylls—can be a bit brittle, and it's easy to snap a few off if you're not careful. A little breakage is normal, but a gentle touch goes a long way. Patience really is your best friend here.
First things first, get all your supplies in one place. Working efficiently is key.
This flowchart lays out the essentials you'll want to have on hand.
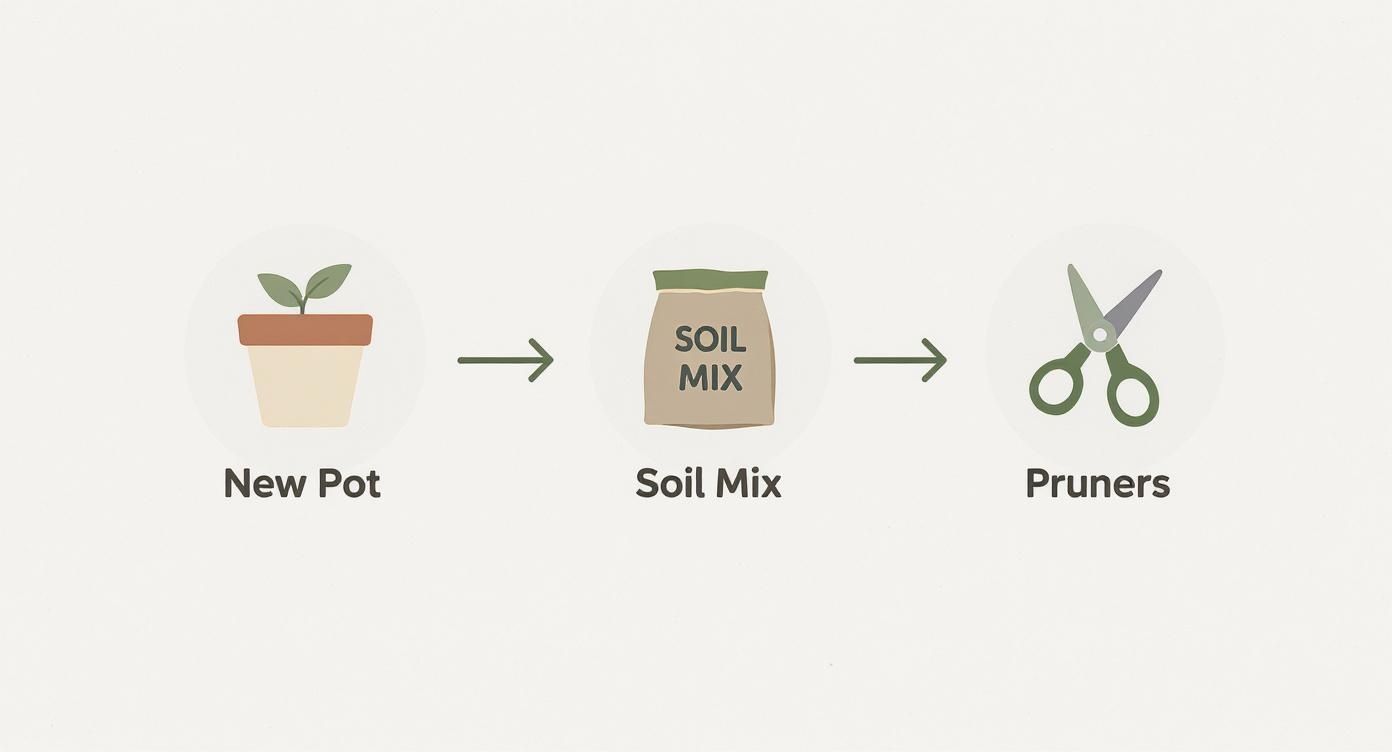
Having your new pot, soil blend, and clean pruners ready means you won't be scrambling mid-repot, which significantly cuts down on how long the plant's roots are exposed to the air.
Carefully Removing the Plant
Start by tipping the pot gently on its side. If the soil is on the drier side, the plant might just slide out with a bit of encouragement. Try tapping the bottom of the pot or giving the sides a gentle squeeze if it's in a plastic nursery pot.
Whatever you do, don't pull the plant out by its delicate leaf segments! Instead, support the base of the plant with one hand and guide the pot away with the other. If it’s really being stubborn, a butter knife or a thin spatula run around the inside edge of the pot will usually break the seal. This little trick works like a charm for even the most pot-bound plants.
Inspecting and Pruning the Roots
Once the plant is free, you’ve got the perfect chance to give its root system a quick health check. Lay it on a tarp or some newspaper and gently break away the old, tired soil from around the roots. You don't need to get every last bit off—just enough to see what you're working with.
Now, let's do a little trimming. You're looking for any roots that are:
- Mushy or black: These are a clear sign of root rot. Snip them off with clean, sterile scissors.
- Dry and brittle: These are dead roots that aren't doing the plant any good.
- Thick and circling: If you see dense roots wrapped tightly around the bottom, trim them back a bit. This encourages them to grow outward into the new soil instead of continuing to circle.
After a quick prune, gently tease the remaining healthy roots apart with your fingers. The idea is to loosen up the compacted ball so the roots are ready to explore their new, spacious home. For a closer look at this step, our guide on how to repot cacti has some great visuals and extra tips.
Settling into the New Home
With the roots prepped, it's time for the final move. Add a layer of your fresh soil mix to the bottom of the new pot. You'll want just enough so that when you set the plant inside, the top of its root ball sits about an inch below the pot's rim.
Center your Christmas cactus, then start backfilling with more soil, gently working it down and around the sides of the root ball.
Crucial Tip: Resist the urge to pack the soil down firmly! This is a common mistake. Christmas cacti need air around their roots to thrive. A few light taps of the pot on your work surface is all it takes to settle the soil and get rid of any large air pockets.
Once you’re done, the soil level should be right where it was in the old pot. Repotting is a big day for a plant, but by handling it with care, you're setting it up for a quick recovery and a future full of vibrant growth and those iconic holiday blooms.
Post-Repotting Care for a Fast Recovery
Alright, your Christmas cactus is in its new home. But your work isn't quite done yet. The first few weeks after repotting are crucial. Think of it as a recovery period—your main job is to help the roots heal and avoid stressing the plant out.

The biggest mistake I see people make is watering right away. It feels like the right thing to do, but trust me on this: don't. The roots inevitably get a little bruised during the move, and they need time to callous over. Watering immediately invites moisture into those tiny wounds, which is a fast track to root rot.
Hold Off on the Water: Let your freshly repotted cactus sit in its new, dry soil for about a week. This "dry rest" period is probably the single most important step for a successful, rot-free recovery.
After that first week, you can give it a light but thorough drink—just enough to see water come out the bottom. From then on, let the top inch of soil get completely dry before you even think about watering again. For a deeper dive into its year-round needs, check out our complete guide on caring for Christmas cactus plants.
Finding the Right Light and Temperature
Just like you’re holding back on water, you need to ease up on the light, too. Repotting is a shock to the plant's system. Blasting it with intense, direct sunlight only adds to that stress, potentially scorching its leaves while its roots are still struggling to get established.
For the first two to three weeks, move your cactus to a spot that gets bright, indirect light. An east-facing window that gets gentle morning sun is perfect, or even a spot a few feet back from a bright southern window. Just keep it out of that harsh afternoon sun.
Keep its environment as stable as possible:
- Temperature: A comfortable room temperature between 60-70°F (15-21°C) is ideal.
- Drafts: Avoid placing it near drafty windows or blasting heat vents.
When to Resume Fertilizing
Patience is the name of the game with fertilizer as well. Feeding encourages new growth, but right now, your cactus needs to put all its energy into re-establishing its root system, not pushing out new leaves.
Wait until you see definite signs of new growth. You'll spot little reddish segments starting to form at the tips of the branches. That's your cactus telling you its roots have recovered and are ready to support more growth. This usually takes about a month or two. Once you see those new little leaves, you can get back to your regular fertilizing routine.
Common Questions About Repotting Christmas Cacti
Even with the best instructions, you're bound to have a few questions when it's time to repot your Christmas cactus. It’s totally normal. Getting these details right can be the difference between a stressed plant and one that’s ready to thrive. Let’s clear up some of the most common things people ask.
One of the biggest questions I hear is, "Can I repot my Christmas cactus while it's blooming?" The short answer is a hard no. Repotting a plant when it’s putting all its energy into producing flowers or buds is a sure way to shock it. The stress is often too much, and the plant will almost certainly drop all those gorgeous blooms to focus on survival.
The golden rule is simple: always wait until the flowering cycle is completely over. That post-bloom rest period is the ideal window for repotting without causing a big fuss.
Troubleshooting Common Issues
So you’ve repotted it, and now it looks sad and droopy. What gives? If your Christmas cactus is wilting a bit after its move, don't panic. This is a classic sign of transplant shock, and it's perfectly normal as the roots get used to their new home.
The best medicine here is a little patience and leaving it alone.
- Don't Overwater: Your first instinct might be to drench it, but please don't. The roots need time to heal. Let the soil stay dry for about a week before you give it a light watering.
- Dim the Lights: Move your plant out of any direct, bright sunlight for a couple of weeks. Less light means less stress while it recovers.
- Give It Time: In most cases, your cactus should start to look lively again within a week or two as the roots settle in and get back to work.
Plant Placement and Home Decor
Once your cactus is happy and recovered, you can move it back to its prime spot. It's always fun to see how a freshly potted plant can liven up a room. For more ideas on how to style your indoor garden, you might find some great inspiration in this guide to trendy houseplants to complement your home.
Knowing how to handle these little hiccups will help you keep your Christmas cactus healthy and beautiful for many holiday seasons to come.
At The Cactus Outlet, we provide healthy, beautiful cacti and succulents to help you build the indoor jungle of your dreams. Explore our collection today at https://www.cactusoutlet.com