
When you boil it down, successful indoor cactus care really comes down to three things: plenty of light, the right amount of water (which is less than you think), and a soil that drains like a sieve. If you can get these three fundamentals right, you've cracked the code to keeping your cacti happy and avoiding common pitfalls like root rot.
Your Foundation for Thriving Indoor Cacti
So, you've brought a cactus home. Welcome to the club! People often think these plants thrive on being completely ignored. While they're definitely tough, they don't just survive with a little thoughtful care—they truly flourish, becoming incredible living sculptures in your space.
Forget about complex, demanding plant routines. Success with cacti starts with understanding their desert origins. The balance between light, water, and soil is everything. Get these elements working together, and you’re setting your plant up for a long, healthy life.
Why Cacti Fit So Well in Modern Homes
There's more to the appeal of these spiny friends than just their cool, geometric shapes. Let's be honest, their low-maintenance vibe is a perfect match for a busy schedule. You get all the benefits of having a living plant without the constant need for attention.
This convenience is a big reason for their explosion in popularity. As more people embrace indoor gardening, cacti have become a go-to choice, especially for city dwellers. It's a trend that's not slowing down, fueled by a desire for unique, sustainable decor that makes a statement without making demands. If you're curious, you can read more about the cactus plant market growth and see just how popular they've become.
Indoor Cactus Care Quick Reference Chart
Before we dive into the details, let's get a quick snapshot of what your cactus needs to thrive. Think of this chart as your cheat sheet for the absolute essentials.
| Care Factor | Optimal Condition | Common Mistake to Avoid |
|---|---|---|
| Light | 6+ hours of bright, indirect sunlight daily. A south- or west-facing window is usually perfect. | Sticking it in a dark corner or scorching it with intense, direct midday sun. |
| Water | The "soak and dry" method. Water deeply only when the soil is 100% dry to the touch. | Watering on a rigid schedule or giving it tiny sips of water frequently. |
| Soil | A gritty, fast-draining mix made for cacti and succulents. | Using standard potting soil, which holds onto water and will rot the roots. |
| Temperature | Warm days (65-85°F) during the growing season and a cooler, drier rest period in winter. | Exposing it to drafts, sudden temperature swings, or frost. |
Getting these four factors right is 90% of the battle. Keep this table in mind as we explore each element in more detail throughout the rest of this guide.
Finding the Perfect Spot: Light and Placement for Your Cactus
Light is everything to a cactus. It's not just a nice-to-have; it's the main ingredient for its survival and growth. You'll hear a lot of advice to just "find a sunny window," but it's not that simple. The real secret is understanding the quality and duration of the light in your home, because that’s what makes the difference between a cactus that’s truly thriving and one that's just hanging on.
Your cactus will tell you exactly what it thinks of its lighting situation. You just have to know how to listen. Is it stretching and leaning towards the window, looking pale and skinny at the top? That's called etiolation, and it's a desperate cry for more sun. The poor thing is using all its energy to reach for a better spot, leading to weak growth that, unfortunately, you can't undo.
On the flip side, too much intense sun can be a problem, too. If you see yellow, brown, or bleached-out patches on the side facing the glass, you're looking at a cactus sunburn. Just like for us, it can leave permanent scars on the plant's skin.
Reading Your Windows Like a Pro
Let's be clear: not all windows are the same. The direction your window faces is the single biggest factor in determining the kind of light it gets. Getting this right is a huge part of learning the care of cactus plants indoors.
-
South-Facing Windows: This is the jackpot. It's prime real estate for those classic, sun-guzzling desert cacti. They get the most intense, direct light for the longest part of the day. Think iconic Saguaro or a brilliant Golden Barrel—they'll be happiest here.
-
West-Facing Windows: These get blasted with bright, direct sun in the afternoon, which can get incredibly hot. Most cacti will do well, but you’ll need to keep a close eye out for scorching, especially during the hottest summer months.
-
East-Facing Windows: Perfect for gentler morning sun. This spot is ideal for cacti that like it bright but not brutal, like many jungle cacti. Your Christmas Cactus or a trailing Rhipsalis would love it here.
-
North-Facing Windows: This is the most challenging spot, offering the least direct light. Honestly, most cacti will struggle here. You might get away with a low-light tolerant Haworthia or Gasteria, but a grow light is a much better long-term plan.
When Your Home Doesn't Cooperate
What if you don't have that perfect, sun-drenched window? Don't give up! Lots of us live in apartments or have big shade trees that block the sun. This is where a little technology saves the day.
Grow lights have come a long way from those clunky, purple-hued industrial fixtures. You can now get sleek, full-spectrum LED bulbs that screw right into your favorite lamp, giving your plants the exact light waves they need for photosynthesis without cramping your style.
I see this all the time: people place a cactus ten feet from a window and think the room is "bright." But a plant's perception of light is totally different from ours. Light intensity plummets with every single foot you move away from the window.
If you're dealing with a dark corner or just want to give your plant a boost, looking into specialized planter lamps can be a game-changer. They can supplement weak natural light or even serve as the main light source, ensuring your cactus gets the consistent energy it craves.
The Two Most Overlooked Details: Acclimation and Rotation
Finally, two quick things that make a world of difference. First, never shock your plant. A cactus that's been growing in a cozy, shaded greenhouse will absolutely get scorched if you throw it into your sunniest window on day one. You have to acclimate it. Start with an hour of direct sun and slowly increase it over a week or two.
Second, get in the habit of rotating your cactus. Every time you water it, just give it a little quarter-turn. It's such a simple trick, but it ensures all sides of the plant get their share of the light. This prevents that permanent lean and promotes strong, symmetrical growth. It’s a tiny detail that pays off big in the long run.
The Art of Watering an Indoor Cactus
When it comes to keeping a cactus happy indoors, there's one mistake that looms larger than all the others: overwatering. It's the number one killer, hands down. The secret isn't neglect; it's about getting into a rhythm that mimics the dry-then-drenched cycle of a desert.
Forget about giving your cactus a little splash of water every few days. That's a one-way ticket to root rot. It only dampens the topsoil, encouraging weak, shallow roots and creating a swampy mess below the surface where fungus thrives. A far better approach is what we call the "soak and dry" method.
The Superior Soak and Dry Method
The name says it all. When it's time to water, you go all in. I usually take my pots to the sink and give the soil a thorough drenching, letting water run all the way through until it pours out of the drainage holes. This ensures every single root gets access to a good, deep drink.
Then comes the critical part: letting it dry out completely. And I mean completely. Not just the top inch, but the whole pot, top to bottom. This dry spell is non-negotiable. It gives the roots a chance to breathe and prevents the dreaded rot that so many well-intentioned plant parents fall victim to.
If there's one thing I've learned, it's that patience is your best tool for watering cacti. The fear of underwatering is what drives most people to overwater. You have to trust the plant's incredible resilience and wait longer than you think you should.
How to Know When Your Cactus Is Thirsty
Ditch the calendar. The best way to know when to water is to learn the language of your plant and its soil. Your cactus will absolutely tell you when it needs a drink.
1. The Soil Test: This is your most reliable method. Grab a wooden chopstick or skewer and stick it all the way down to the bottom of the pot. If it comes out clean and dry, it's go-time. If you see any dark, damp soil clinging to it, hold off.
2. The Pot Weight Test: This becomes second nature after a while. Get a feel for how heavy the pot is right after you’ve given it a deep watering. Then, just pick it up every so often. You’ll be amazed at how light it feels when the soil is bone dry.
3. Visual Cues from the Plant: A thirsty cactus might look a little less plump or show some subtle, fine wrinkling on its skin. This is a sign it's tapping into its water reserves. It’s not in distress yet, but it's ready for a drink.
Adjusting Your Watering for the Seasons
Your cactus lives by the seasons, and your watering can should, too. It has two main modes: growing and resting.
-
Growing Season (Spring and Summer): With longer days and warmer weather, your cactus is in growth mode. It’s using water much more quickly. You’ll probably find yourself watering every two to four weeks, but always let the soil test be your final guide.
-
Dormant Season (Fall and Winter): When the light fades and things cool down, your cactus hits the pause button. Growth slows to a crawl, and so does its need for water. During this rest period, you might only water once every six to eight weeks—sometimes even less.
Getting this seasonal shift right is a game-changer for long-term cactus health. For a deeper dive into this topic, you can explore our comprehensive guide to watering cactus plants.
Environmental Factors That Change Everything
Every home is a unique microclimate, and a few key factors can dramatically change how fast your cactus dries out.
-
Pot Material: A classic, unglazed terracotta pot is porous. It breathes, pulling moisture out of the soil and helping it dry faster. On the other hand, a glazed ceramic or plastic pot is non-porous and will hold moisture for much longer, meaning you'll water far less often.
-
Humidity and Airflow: A cactus living in a steamy bathroom will stay damp for ages compared to one in a dry, airy living room. Good circulation from a fan or an open window makes a big difference.
-
Light and Temperature: This is a big one. A cactus in a blazing hot, south-facing window is going to guzzle water compared to its cousin in a cooler, north-facing spot. More light and heat mean more thirst.

As you can see, the intensity of light changes dramatically depending on which direction your window faces. A cactus placed in that high-light south window will have a much higher water demand than one in a low-light north window, and you have to adjust your "soak and dry" timing accordingly.
Getting the Soil and Pot Just Right
You can give a cactus the perfect amount of sun and water, but if its foundation is wrong, you're fighting a losing battle. The pot and the soil inside it are where healthy roots are made—or broken. This is easily one of the most common places new cactus owners go wrong.
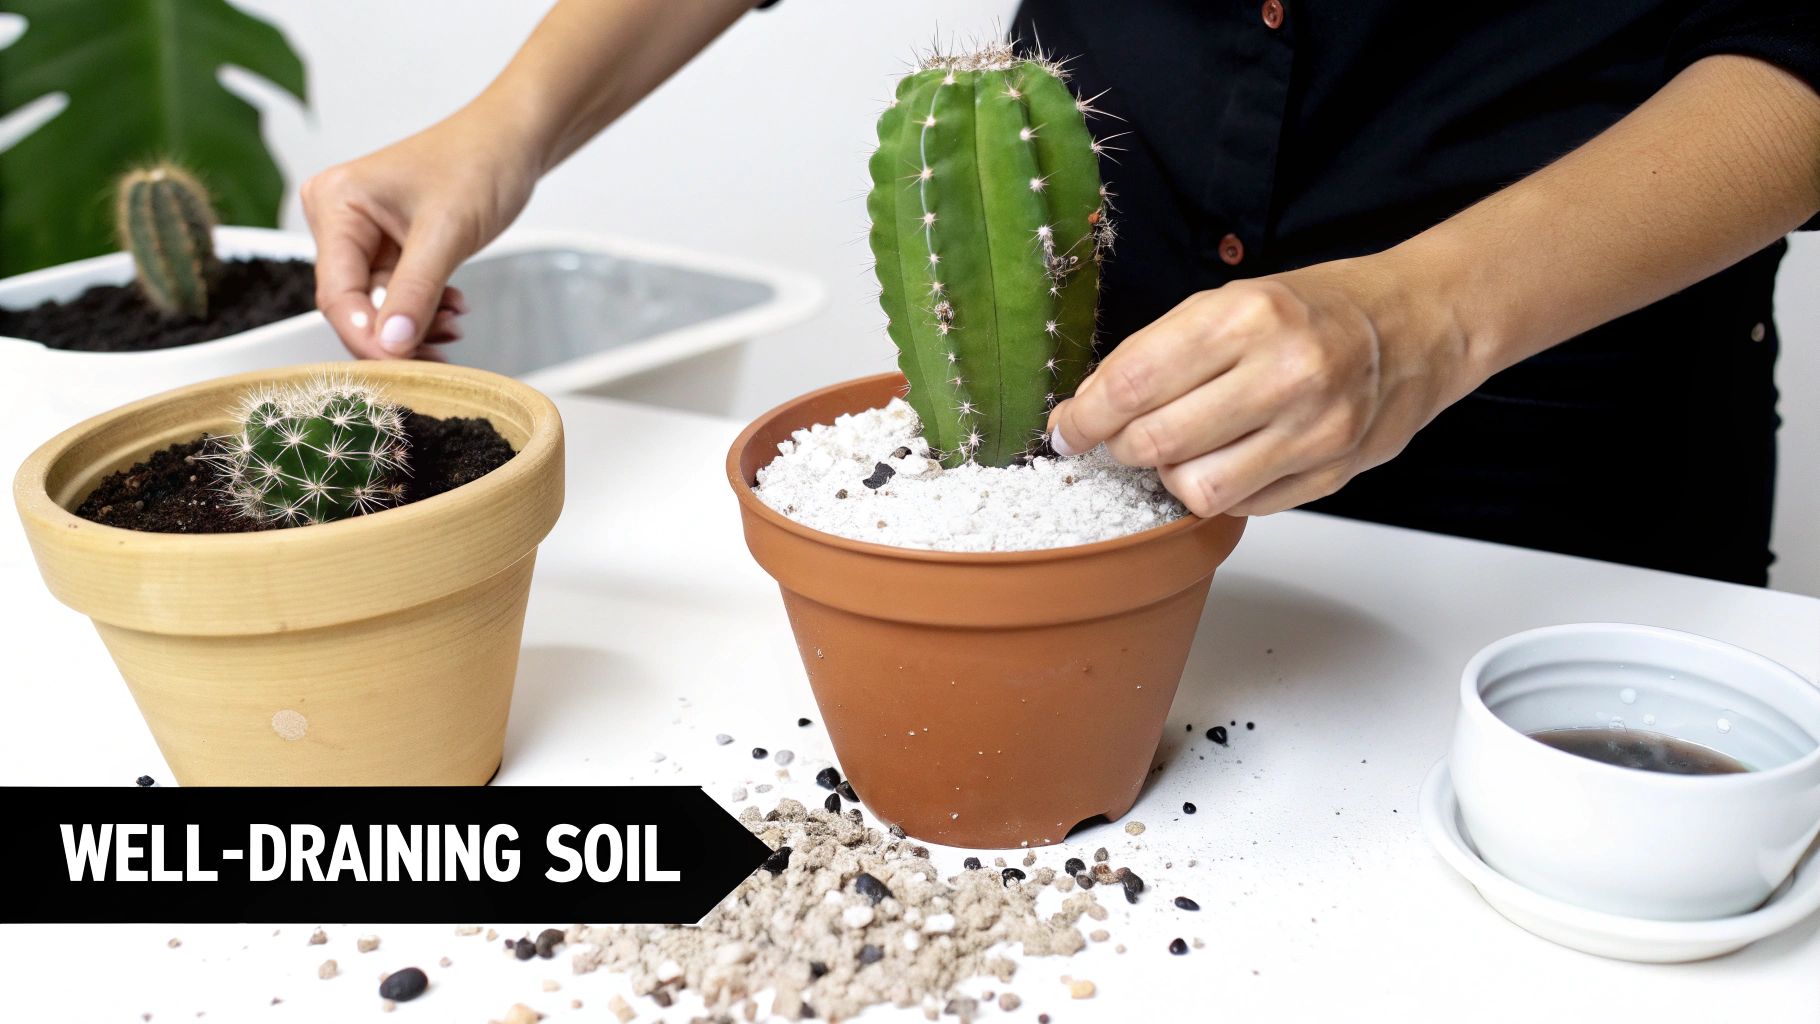
Putting a cactus in standard potting mix is like asking it to swim in a swamp. That dense, peaty soil is designed to hold moisture, which is the exact opposite of what a cactus needs to survive. The roots can't breathe, and it creates the perfect soggy environment for rot to take hold.
Your cactus is desperate for soil that mimics its gritty, dry homeland. You want a mix so airy that water flushes right through, giving the roots a quick drink before making a swift exit. Anything that stays soggy is a problem waiting to happen.
Crafting the Perfect Cactus Soil
You’ve got two paths here: buy a pre-made mix or get your hands dirty and make your own. Commercial cactus and succulent soils are a decent starting point, though I often find they can still benefit from a little extra grit. If you're buying a bag, check the ingredients—you want to see things like pumice, perlite, or sand near the top of the list.
Mixing your own is incredibly easy and lets you dial in the perfect blend. Here’s a classic, no-fail recipe that works for almost any cactus.
- One part standard potting soil: This provides a bit of organic matter and nutrients.
- One part coarse sand: Make sure it's horticultural sand. Fine play sand will just compact into concrete.
- One part perlite or pumice: These lightweight volcanic rocks are the key to creating air pockets for drainage.
Just mix these three ingredients in equal amounts, and you've got a fantastic, fast-draining home for your cactus. If you're ready to dive deeper into the science of soil, you can learn more about how to make cactus soil with our detailed guide.
Selecting the Ideal Container
With your soil sorted, it’s time to pick a pot. And while it's fun to match your decor, function has to come first. There's one rule that is absolutely non-negotiable: the pot must have a drainage hole. No ifs, ands, or buts. A pot without drainage is just a pretty container for root rot.
The material of the pot also makes a huge difference in how quickly the soil dries out, which in turn affects how often you'll need to water.
| Pot Material | The Good | The Bad |
|---|---|---|
| Unglazed Terracotta | It breathes! The porous clay wicks moisture away, helping soil dry out quickly and preventing overwatering. | Dries out very fast in direct sun, so you'll need to check on it more often. Can get brittle with age. |
| Glazed Ceramic & Plastic | These non-porous materials hold moisture for much longer. They also offer endless style and color options. | The risk of overwatering is much higher. They are far less forgiving if you give your plant too much to drink. |
If you're just starting out, terracotta is your best friend. It provides a built-in buffer against watering mistakes, giving you a much wider margin for error while you're learning your plant's rhythm.
A huge mistake I see all the time is putting a tiny cactus in a giant pot, assuming it needs "room to grow." What actually happens is that massive amount of soil stays wet for way too long, overwhelming the small root system and causing it to rot.
Finding the Right Fit
Sizing is a balancing act. A pot that's too big is just as bad as one that's too small. As a rule of thumb, choose a pot that is only about 1-2 inches wider in diameter than the cactus itself.
This slightly snug fit prevents having a large volume of soil that stays wet long after the roots have had their fill. When it's time to repot, just move up to the next available size. This gradual approach keeps the root-to-soil ratio in a healthy balance, setting your cactus up for a long and happy life indoors.
Fertilizing, Repotting, and Propagation
Once you have the basics of light, water, and soil down, you can start digging into the next level of care. Fertilizing, repotting, and propagation are what shift your cactus from just surviving to truly thriving.
These aren't complex, intimidating tasks. Think of fertilizing as a little energy bar for its growing season, repotting as a much-needed room upgrade, and propagation as the fun part where you get to multiply your collection for free.
When and How to Fertilize Your Cactus
The biggest mistake I see with fertilizer? Too much, too soon. Cacti are built for tough, nutrient-poor desert soils, so their roots are incredibly sensitive. Over-fertilizing is the fastest way to scorch them.
The golden rule is this: only fertilize during the active growing season. That’s your window from spring through summer, when your plant is pushing out new growth. Once fall and winter hit, it goes dormant and doesn't need the extra fuel.
For the best care of cactus plants indoors, a light touch is all you need:
- Get the Right Stuff: Grab a liquid fertilizer made specifically for cacti and succulents. It’ll have less nitrogen, which prevents weak, stretched-out growth.
- Dilute, Dilute, Dilute: This is non-negotiable. Whatever the bottle says, cut that recommendation in half. I often go down to a quarter-strength mix. It's a gentle nudge, not a shove.
- Feed Sparingly: A light feeding every 4-6 weeks during the growing season is perfect. And always apply it to soil that's already a little damp—never fertilize a bone-dry plant.
Knowing When It’s Time to Repot
Repotting a spiky plant can seem like a daunting task, but a pot-bound cactus is a sad, stunted cactus. Its roots simply run out of room and resources. Luckily, your plant will tell you when it's feeling the squeeze.
Keep an eye out for these tell-tale signs:
- Roots are peeking out of the drainage hole.
- The plant looks top-heavy and tips over easily.
- Water rushes straight through the pot, a sure sign it’s more roots than soil in there.
- It's been 2-4 years since its last upgrade.
The absolute best time to repot is right at the start of the growing season in early spring. This gives your cactus the entire season to get comfortable in its new home and establish a solid root system. It's a universal best practice for indoor cactus care, from here to Europe, where regulated care schedules are key. To see how care trends differ worldwide, check out these insights on the global cactus plant care market.
A Fearless Guide to Propagation
This is where the real magic happens. Turning one plant into many is one of the most rewarding parts of this hobby, and cacti are wonderfully cooperative. The two easiest methods are by taking cuttings and separating offsets.
Taking Cuttings
This approach is perfect for columnar or branching cacti like the San Pedro or many Opuntia species.
- Make the Cut: With a clean, sharp knife, slice off a healthy section from the mother plant. A piece around 4-6 inches long is a great starting size.
- Let it Callus: This is the secret to success. Set the cutting aside in a dry, shady spot for a few days up to a week. You're waiting for the cut end to dry out and form a hard, pale "scab." This step is crucial for preventing rot.
- Plant it: Once you have a good callus, just push the cut end about an inch deep into a pot filled with dry cactus mix.
- Be Patient: Don't water it! Let it sit for a few weeks to encourage roots to form. You can check for progress by giving the cutting a very gentle wiggle. If you feel resistance, you've got roots. Now you can start watering lightly.
Separating Offsets (Pups)
Many clumping cacti, like those in the Mammillaria family, produce little baby plants—or "pups"—around their base.
Separating pups is nature's way of cloning. These offsets are genetically identical to the parent, so you know exactly what kind of plant you're going to get. It’s a foolproof method for expanding your collection of favorites.
To propagate a pup, just gently twist it off or use a clean knife to separate it from the main plant. If it already has a few tiny roots, you're ahead of the game. Let the wound dry out for a couple of days, then pot it up in its own small container with fresh cactus soil. Give it a week or two to settle in before its first sip of water, and you've got a brand-new plant.
Answering Your Top Indoor Cactus Questions
Even the most seasoned cactus keeper runs into problems now and then. This is where you graduate from just following steps to truly understanding your plant's language. Let's dig into some of the most common issues people face with their indoor cacti, so you can learn to spot them and react with confidence.
These are the real-world head-scratchers, from weird color changes to unwelcome little visitors. Getting a handle on these scenarios now will make you a much better plant parent down the road.
"Why Is My Cactus Changing Color?"
A cactus turning yellow or brown can be alarming, but the color and texture tell you everything you need to know.
If the base of your cactus feels soft, almost mushy, and has a sickly yellow or brownish hue, you're almost certainly dealing with root rot. This is an emergency caused by overwatering. Stop watering immediately, pull the plant out of its pot, and get ready to perform some root surgery.
Brown spots are a different story and require a bit more detective work.
- Sunburn: Are you seeing dry, papery brown or tan patches on the side of the cactus that gets the most sun? That's a classic sunburn. The plant got too much intense light too fast. The scarred tissue won't heal, but you can save it from more damage by moving it to a spot with bright, indirect light.
- Corking: If the brown area is firm, woody, and creeping up from the base of an older cactus, it’s probably just corking. This is a totally normal aging process where the plant reinforces its base to support new growth. Think of it as a sign of maturity, not a cry for help.
"How Do I Get My Indoor Cactus to Bloom?"
Getting your cactus to flower is the ultimate reward, but it rarely happens by accident. The trick is to mimic the seasonal rhythm of its native desert home. For most species, this means giving them a proper winter rest.
This dormancy period is the critical trigger for setting flower buds. Starting in the fall, you need to make two big changes:
- Drop the Temperature: Find a cooler spot in your home for your cactus, somewhere that consistently stays between 50-55°F (10-13°C). A drafty windowsill, an unheated guest room, or even a bright corner of the garage can be perfect.
- Cut Way Back on Water: During this cool rest, only water about once a month, if that. You want the soil to be bone-dry for long stretches.
This cool, dry period signals to the cactus that it's time to rest up for the coming growing season. When spring rolls around with warmer days and more light, move it back to its sunny home, resume your normal watering schedule, and watch for the show.
Many people are hesitant to "stress" their cactus with a cold, dry winter, but this rest isn't stressful—it's essential. It's the biological alarm clock that tells a mature plant it's time to make flowers. Without this dormancy, you'll likely be waiting forever for it to bloom indoors.
"What Are These White Fuzzy Spots on My Cactus?"
If you see little bits of white fluff that look like tiny cotton balls tucked into the ribs and crevices of your cactus, you've got mealybugs. These common pests suck the life out of your plant and can spread quickly if you don't act. The good news? They're manageable if you catch them early.
Your best weapon is surprisingly simple. Grab a cotton swab, dip it in 70% isopropyl alcohol, and touch it directly to each white pest. The alcohol instantly dissolves their waxy coating and kills them. If you're dealing with a larger infestation, you can mix up a solution of insecticidal soap or neem oil in a spray bottle to treat the whole plant. Most importantly, quarantine any infested plant immediately to keep the bugs from marching over to your other houseplants.
"Can I Just Use Regular Tap Water?"
Sure, you can use tap water, and your cactus will probably survive. But for long-term health, it’s not the best choice. Most tap water is loaded with dissolved minerals like calcium and magnesium, which build up in the soil over time. This mineral accumulation can throw off the soil's pH and eventually damage the plant's delicate roots.
Ever seen a white, crusty film on your soil or around the rim of your terracotta pot? That's the mineral buildup. For the happiest cacti, rainwater, distilled water, or even filtered water is a far better option. If tap water is your only choice, here’s a simple trick: let it sit out in an open container for at least 24 hours before watering. This allows some of the chlorine to evaporate, making it a little kinder to your plant.
At The Cactus Outlet, we know that a thriving cactus starts with a solid foundation. Whether you need a perfectly gritty, fast-draining soil mix or a beautiful terracotta pot with proper drainage, we have you covered. Explore our full collection of plants and supplies at https://www.cactusoutlet.com.