
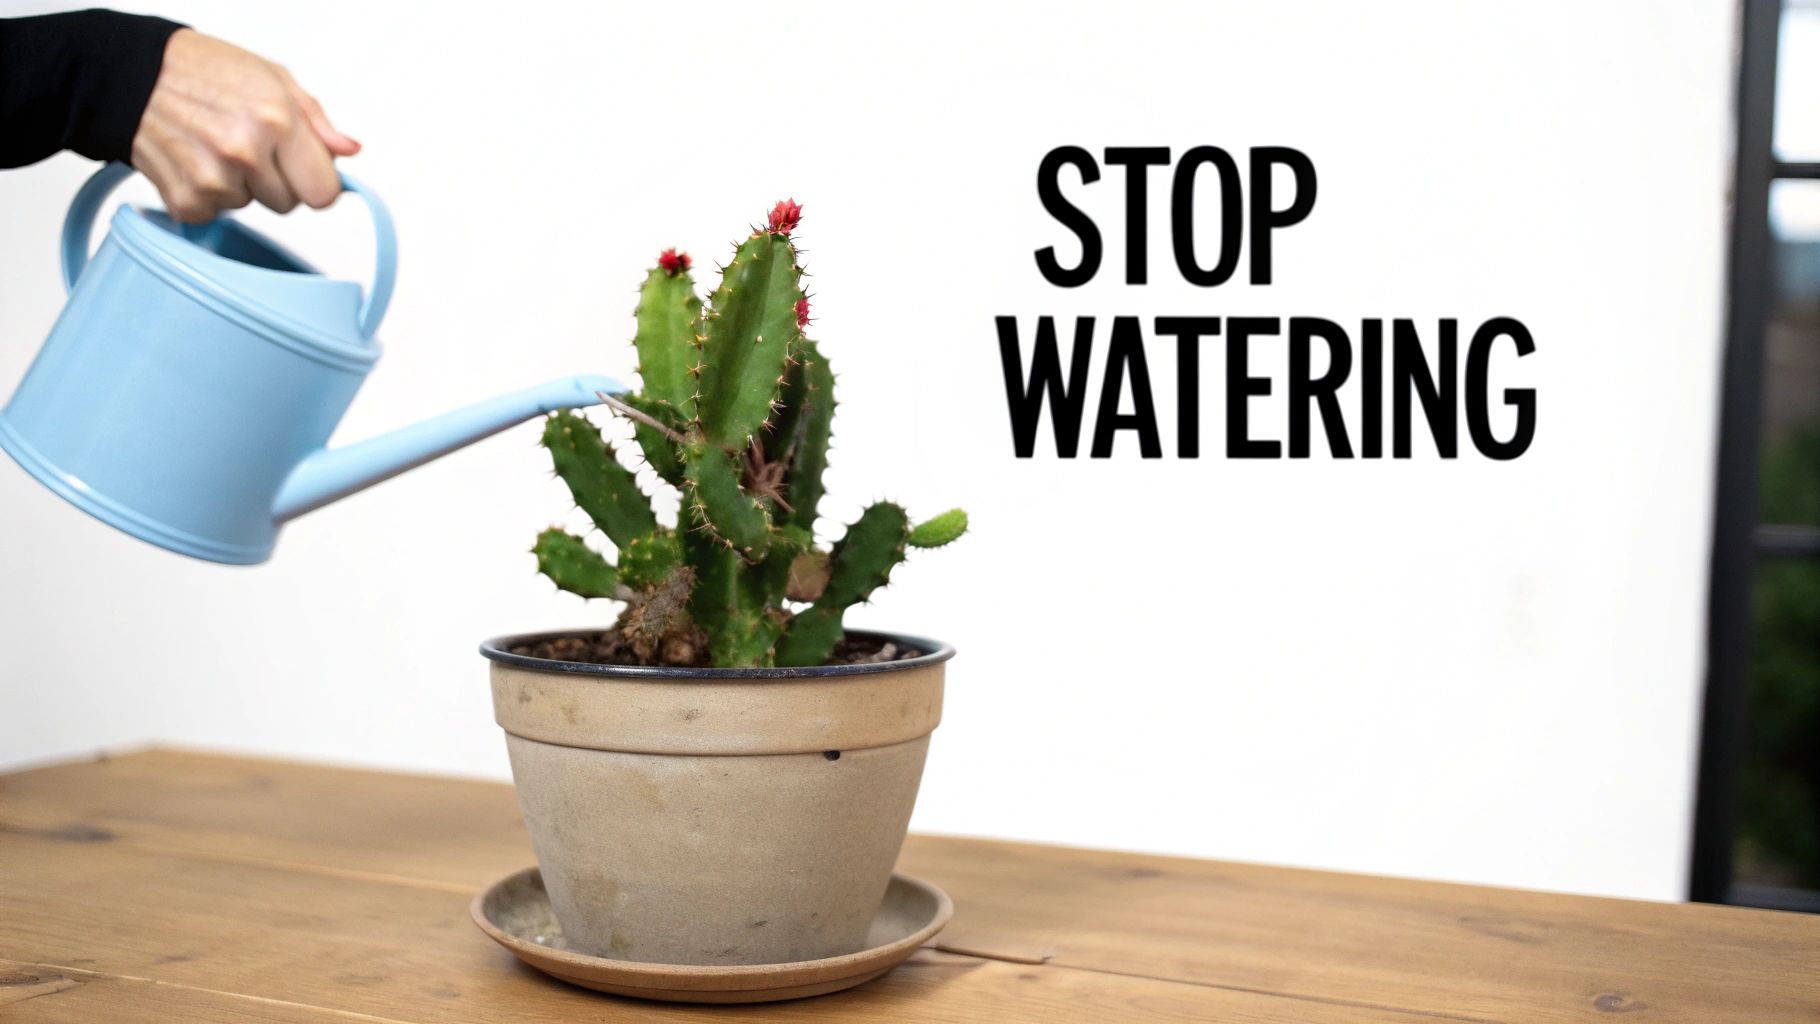
That sinking feeling when you see your beloved Christmas cactus looking limp, yellow, or dropping its segments is something many plant owners know too well. Before you do anything else, the single most important first step is to stop watering. Seriously, put the watering can down.
This pause is your chance to play detective and figure out what’s really going on—usually, it’s soggy soil—before you jump in with a fix.
Your 5-Step Christmas Cactus Rescue Plan
When a plant looks sick, our gut reaction is often to give it a drink. With a Christmas cactus (Schlumbergera), that’s almost always the worst move you can make. These plants are tropical cacti, not desert dwellers, and they're extremely prone to root rot if their feet stay wet.
Rescuing your plant is a process of elimination. Before you even think about pulling it out of the pot, just take a moment to look it over. This quick visual check can often point you straight to the problem and save you from making things worse.
The Initial Triage
A quick once-over can tell you almost everything you need to know. Use this table to match what you see with the most likely problem and the right first move.
Initial Christmas Cactus Triage Checklist
| Symptom | Most Likely Cause | Immediate Action |
|---|---|---|
| Limp, Droopy Segments | Overwatering (if soil is wet) or Underwatering (if soil is bone-dry) | Stop watering and check soil moisture. If dry, water lightly. |
| Yellowing Leaves | Overwatering, leading to nutrient issues as roots struggle. | Stop watering. Let the top 1-2 inches of soil dry out completely. |
| Dropping Segments or Buds | Sudden environmental stress (temperature, light, or watering change). | Stabilize its environment. Move it away from drafts or direct sun. |
| Mushy Base or Stem | Advanced root rot. This is an emergency. | Prepare for immediate surgery (repotting and trimming rotten roots). |
This quick assessment will guide your next steps, ensuring you’re solving the right problem from the get-go.
Why Soil and Watering Are Everything
The relationship between your soil mix and your watering habits is at the core of most Christmas cactus issues. These plants absolutely need a light, airy, well-draining potting mix. A standard, dense potting soil is a recipe for disaster because it holds onto too much water.
Ideally, you want a loamy, slightly acidic mix with a pH between 5.5 and 6.2. If the soil is too heavy, it suffocates the roots, and that’s when root rot sets in—the number one killer of these beautiful plants.
By putting a pause on watering, you're giving the roots a chance to breathe and dry out. This simple act can stop root rot in its tracks and gives you a much clearer picture of the plant's true condition. It’s the most effective first move in any rescue mission.
As you start this process, it helps to brush up on the fundamentals. Understanding the basics of general tree and plant care provides a great foundation for reviving not just your cactus, but any struggling plant in your home.
Getting to the Root of the Problem
When your Christmas cactus starts looking sad—whether the leaves are wilting, yellowing, or dropping off—the real problem is almost always hiding underground. The root system is the plant's engine room, and if it's in trouble, nothing you do for the leaves will fix the core issue. To really save your plant, you have to get your hands dirty and take a look at what’s happening in the pot.
Don't worry, this isn't as scary as it sounds. Think of it as a wellness check, not major surgery. A quick look at the roots will tell you everything you need to know, usually pointing to one of two common culprits: root rot or a root-bound plant.
How to Unpot Your Cactus Without Causing More Stress
The key here is to be gentle. The plant is already stressed, so yanking it out by its stems is a huge no-no. That's a surefire way to break off segments and damage the few healthy roots it might have left.
Instead, try this much kinder approach:
- First, loosen the soil. If the soil is soaking wet, it's best to wait a day or two for it to dry out a bit. This helps it shrink away from the pot's edges. If it's bone-dry and hard, giving it a little water an hour before you start can make things easier.
- Next, tip and tap. Turn the pot on its side and gently roll and tap it on your work surface. This little vibration is usually enough to convince the root ball to let go.
- Finally, support and slide. With one hand over the top of the soil (let the plant's base rest between your fingers), turn the pot upside down. The whole thing should slide right out. If it’s being stubborn, a few more firm taps should do the trick.
This method keeps the root ball intact, giving you a clear, honest picture of its health without adding any extra trauma.
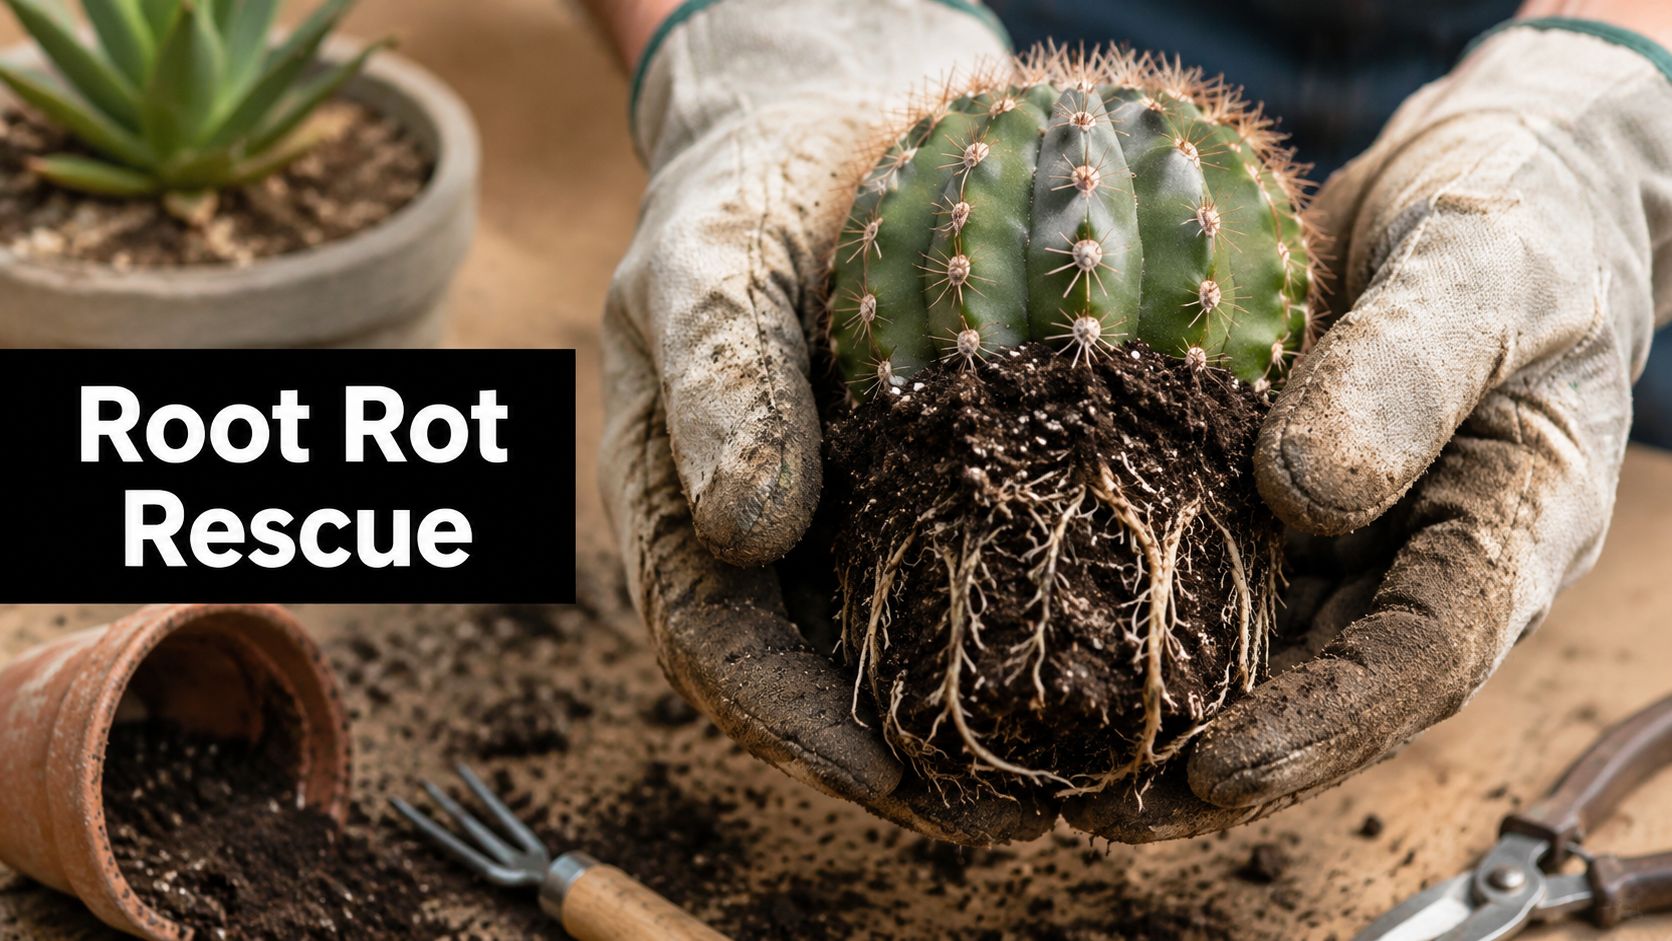
Healthy Roots vs. Unhealthy Roots: What to Look For
Once the plant is free, you'll immediately see what you're dealing with. You don't need a botany degree to tell the difference between a healthy root system and a sick one.
Here’s what you want to see:
- Firm, plump roots. They should feel sturdy, not soft or flimsy.
- A white or light tan color. This is the color of life! Fresh, new root growth is often a vibrant, clean white.
- An earthy, clean smell. Healthy soil and roots smell like a walk in the woods after it rains.
The signs of trouble are just as obvious. Unhealthy roots are:
- Brown or even black. This discoloration is the classic sign of decay.
- Mushy and soft to the touch. If the roots feel slimy or practically dissolve when you handle them, root rot has taken over.
- A foul, sour odor. A swampy or rotten smell is a dead giveaway that bacteria and fungi are having a party in there.
A healthy root system is the foundation for a thriving Christmas cactus. If you find brown, mushy roots, it confirms that root rot is the primary problem, and swift action is needed to save the plant.
What if the Roots Are Just… Everywhere?
Sometimes the problem isn't decay, but the opposite: too much growth. A root-bound plant has simply run out of room. Its roots have formed a dense, tangled web that has completely filled the pot, often circling the bottom in a tight spiral. You might see more roots than actual soil.
While it's a sign that your plant was once a happy camper, being root-bound is a form of suffocation. The plant can no longer absorb water or nutrients efficiently, which is why it might be wilting even if you're watering it correctly. The fix is to gently massage the root ball to loosen up those tightly coiled roots before moving it to a pot that’s just a little bit bigger.
Time for a Little Plant Surgery: Trimming the Rot
If you’ve confirmed root rot, it's time to play surgeon. Getting rid of the dead and diseased tissue is the only way to give your cactus a fighting chance.
First things first, sterilize your tools. A quick wipe of your scissors or pruning shears with rubbing alcohol will prevent you from introducing any new nasty microbes.
Then, start trimming. Carefully cut away every single brown, mushy, or smelly root. You have to be ruthless here—leaving even a tiny bit of rot behind can let the infection flare up all over again. You might feel like you're removing a lot, and you probably are. When you're done, you may be left with a much smaller root system, but what’s left will be clean, healthy, and ready for a fresh start.
The Repotting Procedure to Revive Your Plant
When you've found root rot or a plant that's hopelessly root-bound, repotting is your best chance for a rescue mission. Think of this as less of a simple move to a new home and more of a critical surgical procedure. Your goal is to give the plant a fresh start in a clean, healthy environment where its roots can finally heal and regrow.
This isn't just about swapping out the container. Getting the pot, the soil mix, and your technique just right is what sets the stage for a strong comeback.
Choosing the Right Pot and Soil
Your choice of pot is a make-or-break decision. After you’ve trimmed away all the rotted, mushy bits, the remaining root ball is going to be a lot smaller. It’s so tempting to give it a big new pot with plenty of room to grow, but that’s one of the most common mistakes I see. It almost always leads right back to overwatering.
Instead, find a pot that is only slightly larger than the trimmed-down root ball. You might even need to size down from the original pot. That snug fit is key, as it prevents a large volume of excess soil from staying soggy for too long, which is what got you into this mess in the first place.
A pot with excellent drainage is completely non-negotiable. If the container you're eyeing doesn't have holes in the bottom, put it back. For a Christmas cactus, especially one in recovery, good drainage is your first and best line of defense against root rot.
The soil itself is just as critical. Remember, these plants are epiphytes. In their native Brazilian rainforests, they grow on tree branches, not in heavy, dense dirt. Your potting mix needs to mimic that light, airy, and fast-draining environment.
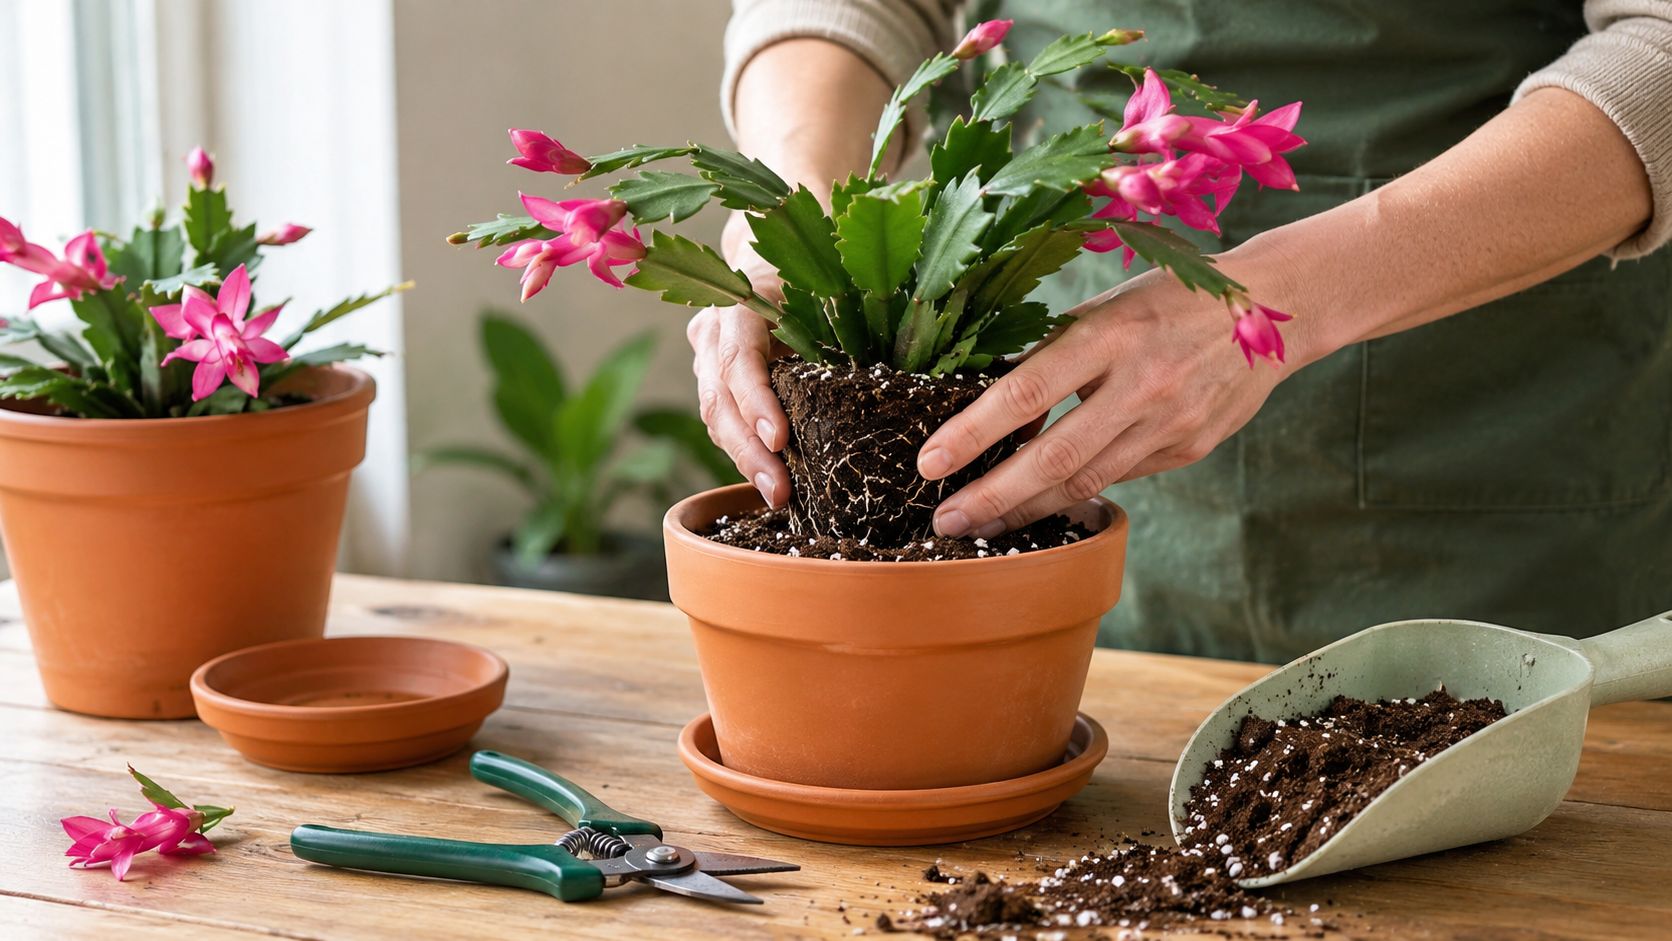
This simple three-step process shows you exactly what to do with the roots before they go into their new home.
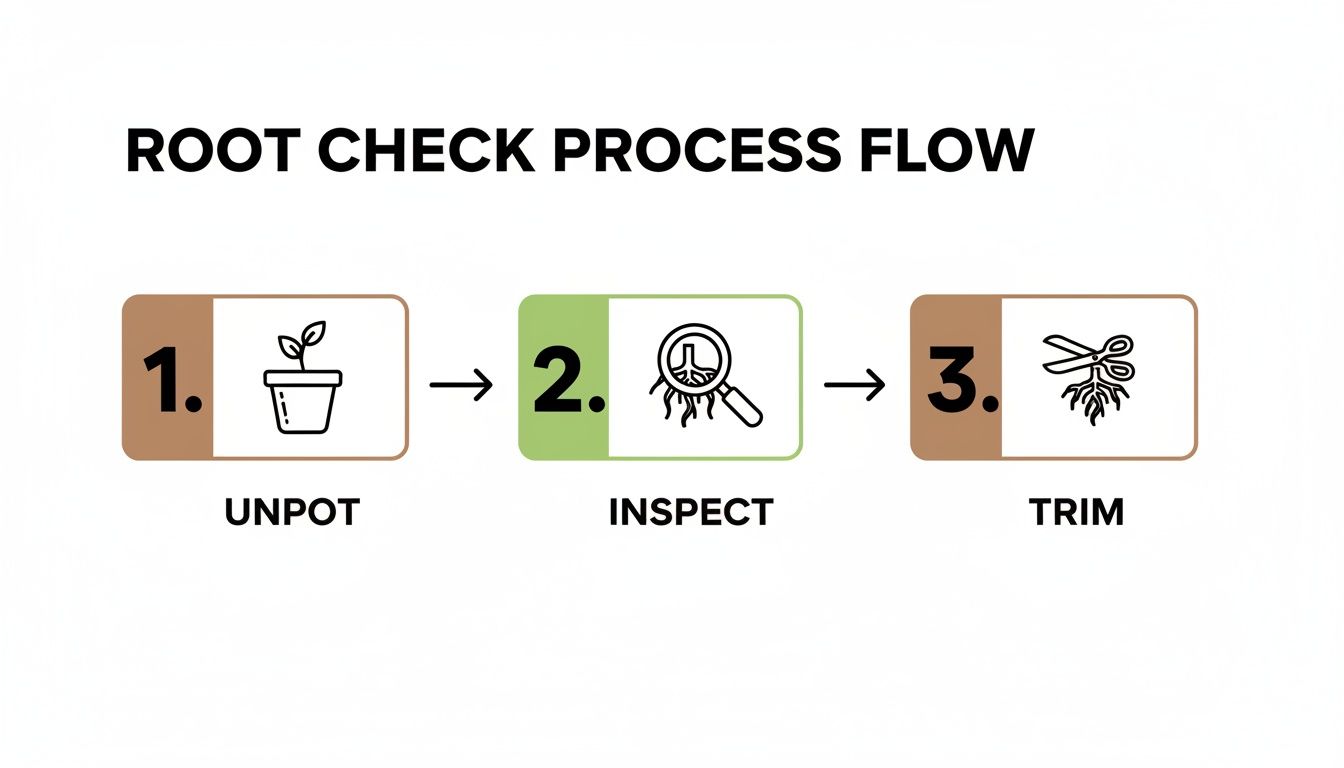
The idea is simple: gently slide the plant out of its pot, get a good look at the roots to see what’s healthy and what’s not, and snip away anything that looks like decay before repotting.
Creating the Ideal Soil Mix
You can whip up the perfect growing medium with just a few ingredients from any garden center. This DIY recipe gives a recovering cactus the fast drainage and aeration it desperately needs.
- 2 parts high-quality potting soil: This is the foundation, providing basic structure and nutrients.
- 1 part perlite or pumice: These lightweight volcanic rocks are fantastic for creating air pockets, which prevents the soil from compacting and lets water flow right through.
- 1 part orchid bark: Adding small chips of bark helps replicate the plant's natural home on a tree branch, boosting airflow right where it counts—around the roots.
Just mix these components together thoroughly in a bucket or tub. This custom blend ensures that water drains freely, preventing the soggy conditions that lead to rot.
The Repotting Technique
With your trimmed plant, new pot, and fresh soil at the ready, you can get down to the actual repotting.
Start by adding a shallow layer of your new soil mix to the bottom of the pot. Center the trimmed root ball inside, making sure the base of the plant—where the stems meet the roots—sits about an inch below the pot's rim.
Next, gently fill in the space around the root ball with your soil mix. Lightly tamp it down with your fingers to get rid of any major air pockets, but don’t pack it in. You want to keep that light, airy structure you just created.
Now for the most important step: wait before you water. I can't stress this enough. This pause is absolutely essential for a successful recovery. Those freshly cut roots are like open wounds, and they are incredibly susceptible to infection if you drench them in water right away.
Let your repotted cactus sit in its new, dry home for at least a week. This "dry rest" gives the cut ends of the roots time to callous over and heal, forming a protective barrier against bacteria and fungi. After that healing period is over, you can start a very careful watering routine, which we'll cover in the next section. For more tips on when to repot a healthy plant down the road, check out our guide on when to repot your Christmas cactus.
Setting Up the Perfect Recovery Zone
Think of your repotted Christmas cactus as being in intensive care. It's just gone through a major ordeal, and now it’s vulnerable. Your job is to create a calm, stable environment where it can focus all its energy on healing its roots and getting strong again. Getting this right is every bit as important as the repotting itself—it's what prevents further shock and coaxes out that first sign of new growth.
The biggest factor during this fragile period is light. A healthy Christmas cactus loves a bright spot, but a weakened one just can't handle that kind of intensity. Direct sun will absolutely scorch its segments, often turning them a stressed-out reddish-purple, and it drains energy the plant desperately needs for root repair.
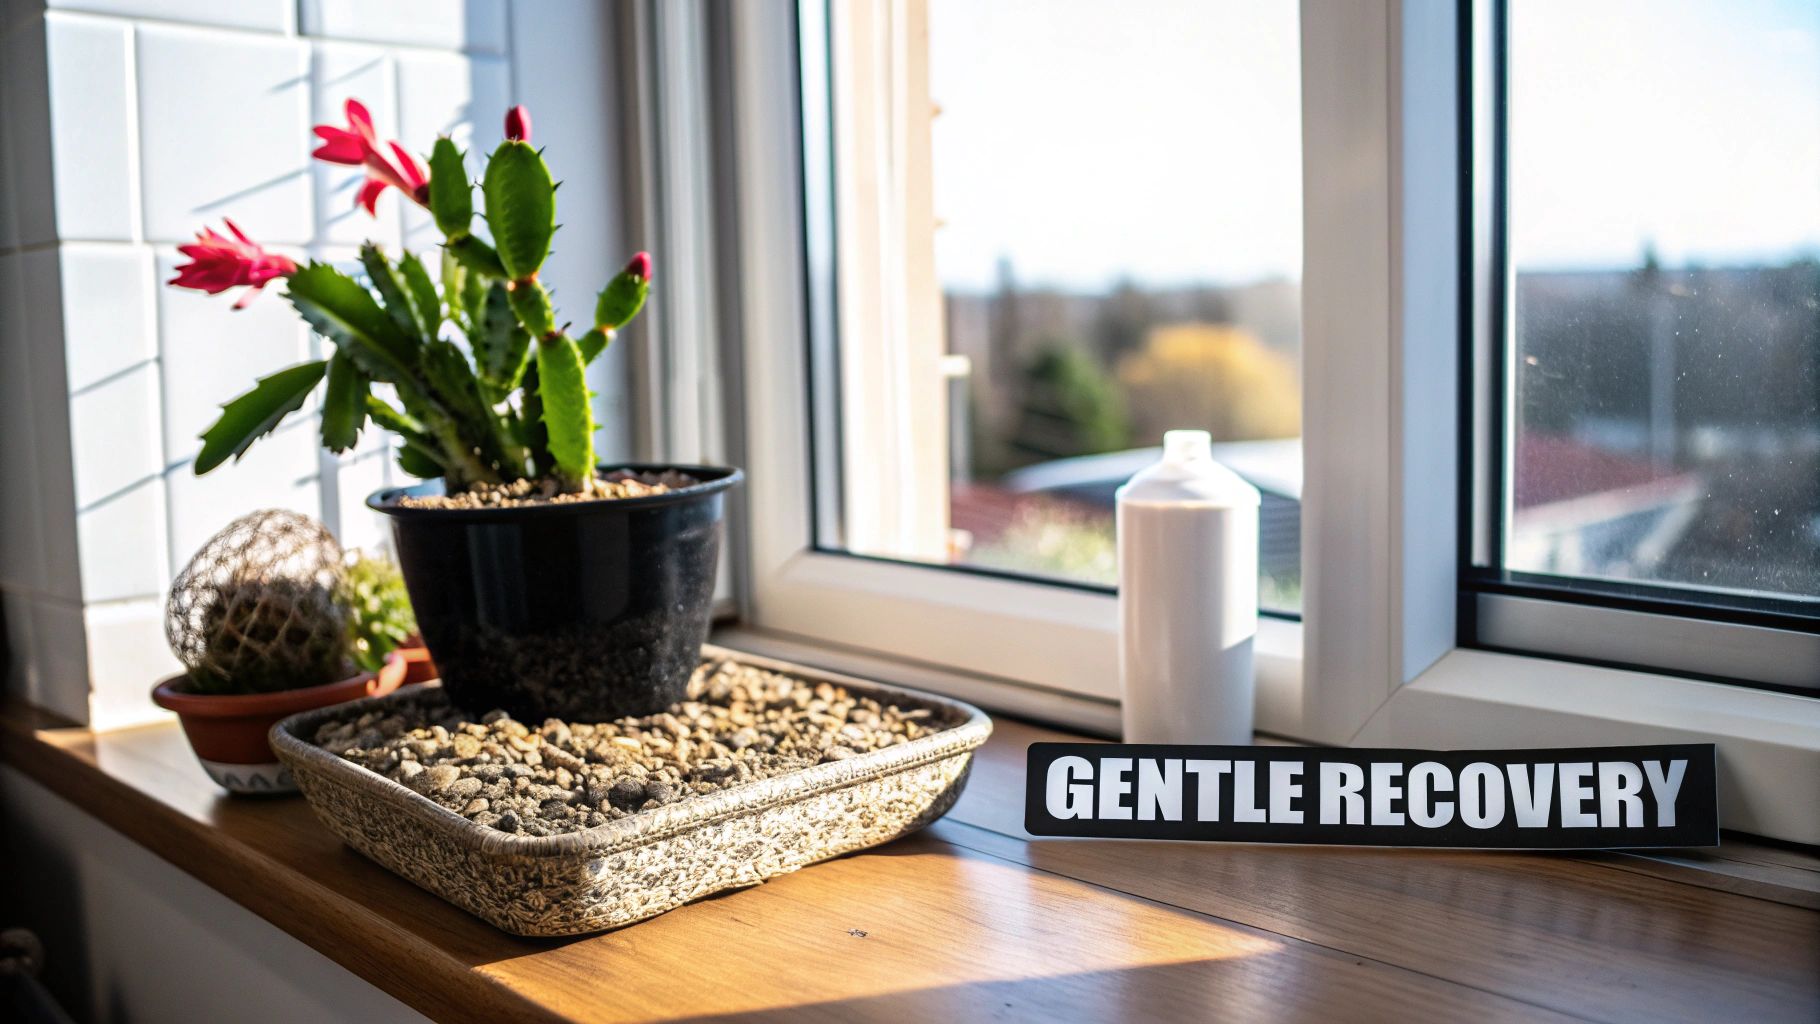
Your mission here is to provide plenty of gentle, bright, but indirect light. This gives the plant enough fuel for photosynthesis without causing any more stress.
Finding the Sweet Spot for Light
So what does "bright, indirect light" actually look like inside your home? It's that soft, ambient glow that fills a room but doesn't cast harsh, sharp shadows.
I've found a few spots work perfectly for a recovering cactus:
- Near an east-facing window: This is my go-to. The plant gets that soft, gentle morning sun that won’t do any harm, and then it’s in indirect light for the rest of the day. It’s pretty much ideal.
- A few feet back from a south or west-facing window: These windows get blasted with intense sun. Pull your plant back about five or six feet, or just tuck it behind a sheer curtain. This diffuses the light perfectly and protects those delicate segments from sunburn.
- In a room with a north-facing window: While it’s not as bright, a large, clear northern window offers consistent, gentle light all day long. For a plant in a really fragile state, this can be the perfect low-stress solution.
Once your plant is back on its feet and thriving, its light needs will change a bit. To get ready for that, you can check out this detailed guide on how much sunlight a Christmas cactus needs.
Nailing the Temperature and Humidity
Beyond light, the next step is to remember where these plants come from. A Schlumbergera is not a desert cactus. It's a tropical plant from the humid rainforests of Brazil, where it grows on tree branches. This means it absolutely despises dry air and big temperature swings. A stable environment is a non-negotiable part of any plan for how to save a Christmas cactus.
The perfect temperature range for recovery is a steady 65-75°F (18-24°C). Keep it away from drafty windows, heating vents, and air conditioners—those sudden hot and cold blasts are exactly what cause a stressed plant to start dropping segments.
Remember, stability is key. A plant that has just undergone root surgery doesn't have the reserves to constantly adjust to changing conditions. A consistent, predictable environment is the fastest path to recovery.
Humidity is the last piece of the puzzle. Dry indoor air, especially in the winter, can make the segments look shriveled and dehydrated. Getting the humidity up to around 50-60% can make a world of difference.
These plants evolved in Brazil's Atlantic Forest, so they're used to high moisture levels. In fact, low humidity is a massive stressor, affecting up to 30% of these plants grown indoors. Keeping the air moist not only prevents shriveling but also supports overall health. It even helps set the stage for blooming later on, which is triggered by cool 55-65°F nights and long dark periods in the fall.
You don't need a fancy greenhouse to do this. A few simple tricks work wonders:
- Make a pebble tray: Just put a layer of pebbles in a shallow tray, add water until it's just below the tops of the rocks, and set your pot on top. As the water evaporates, it creates a lovely little humid microclimate right where your plant needs it.
- Group it with other plants: Plants naturally release moisture through a process called transpiration. By clustering a few of them together, you can raise the humidity for the whole group.
- Run a small humidifier: This is probably the easiest and most effective method. A small, inexpensive humidifier placed nearby will give your recovering cactus the consistent moisture it's craving.
Nurturing Your Plant Back to Health: Watering and Feeding
After the stress of repotting and root work, your Christmas cactus is in a fragile state. How you reintroduce water and nutrients is completely different from your normal routine and can make or break its recovery. The plant’s brand-new, delicate root system simply can't handle the old schedule, so this phase demands patience and a light touch to avoid sending it right back into root rot.
The single biggest mistake you can make is watering too soon after repotting. Think of those freshly trimmed roots as open wounds. They need time to heal and form protective calluses. Watering right away is like inviting bacteria and fungi straight into the plant's system.
You absolutely must wait at least a full week after repotting before even considering giving it a drink. This dry period is a non-negotiable step for a successful comeback.
The First Sip of Water
Once that week is up, it's time for that first, crucial watering. But hold back. Don't drench the pot like you would for a healthy, established plant. The goal here is just to provide a whisper of moisture to coax out new root growth, not to overwhelm the system.
Forget the full soak for now. Instead, lightly and evenly moisten just the top layer of the new soil. I find that a turkey baster or a small measuring cup is perfect for this task because it gives you precise control. You're aiming for barely damp, not wet. After this initial sip, you’ll shift to a modified watering routine specifically for recovery.
Recovery Watering Rule: Poke your finger into the soil. If the top one to two inches feel dry, it's time to water lightly again. A sick plant drinks very slowly, so this could take much longer than you're used to. Watering too often now will erase all your hard work.
For a deeper dive into the "soak and dry" method that we're adapting here, our detailed guide on how to water succulent plants is a great resource.
Hold the Fertilizer
You wouldn't serve a steak dinner to someone recovering from major surgery, and the same logic applies here. Don't fertilize your sick Christmas cactus. Fertilizer is essentially a mix of mineral salts. While beneficial for healthy plants, it's incredibly harsh on delicate, newly forming root hairs.
Applying fertilizer now will cause fertilizer burn, literally scorching the new growth you’re trying so hard to encourage.
Put the fertilizer away for at least one to two months after repotting. The fresh potting mix has all the nutrients the plant needs to get through this initial healing phase. Pushing for growth with fertilizer will only stress the plant further.
Your cactus will tell you when it's ready for food. Be on the lookout for clear, unmistakable signs of new growth—usually tiny, bright green leaf segments sprouting from the tips of the older pads.
Reintroducing Nutrients Gently
Once you see that new growth popping up consistently, you can start thinking about fertilizer again. The strategy is simple: start weak and go slow.
- Pick the Right Food: A balanced, water-soluble fertilizer for houseplants (like a 10-10-10 or 20-20-20 formula) is ideal.
- Dilute, Dilute, Dilute: Mix the fertilizer to one-quarter of the strength recommended on the package. If the directions say one teaspoon per gallon, you use just a quarter-teaspoon.
- Feed Sparingly: Apply this super-diluted solution only once a month, and only during the spring and summer growing seasons.
This gentle feeding schedule gives your cactus the support it needs to rebuild its strength without the risk of damaging its recovering roots. As you see it become stronger over the next few months, you can gradually increase the dose to half-strength. This patient and observant approach is the final, critical piece of the puzzle to nursing your Christmas cactus back to vibrant health.
Still Have Questions? Your Christmas Cactus FAQ
Even with the best game plan, you're bound to run into some head-scratching moments when trying to bring a Christmas cactus back from the brink. It’s one thing to follow steps, but it's another to understand what your plant is actually trying to tell you. Let's tackle some of the most common questions that pop up during a plant rescue.
Feeling a little unsure is totally normal, especially when the symptoms seem confusing. Let’s clear things up.
Why Are My Christmas Cactus Leaves Turning Red or Purple?
When you see those normally green segments flushing with red or purple, it’s a giant, waving flag that your plant is stressed. It looks dramatic, but don't panic—it’s not a death sentence. In most cases, it’s an easy fix.
This color shift is almost always caused by one of these things:
- Too much sun: This is the number one culprit. The plant is essentially getting a sunburn and produces protective pigments called anthocyanins to shield itself. Think of it as a plant's version of sunscreen. If your struggling cactus is sitting in direct sunlight, move it to a spot with bright, indirect light right away.
- Big temperature swings: Sudden cold drafts or being too close to a heater can also trigger this stress response. Keep your plant in a stable environment, away from drafty windows or blasting vents.
- A nutrient problem: This is less common, but a purplish tint can point to a phosphorus deficiency, especially if it’s been in the same tired soil for years. But remember, you should never fertilize a sick plant, so always check the light and temperature first.
Once you remove the source of stress, you should see the segments gradually return to their healthy green color over a few weeks.
The Whole Plant Is Limp. What Should I Do?
A limp, droopy Christmas cactus is the classic sign of a watering disaster. The tricky part? It can mean both too much and too little water. The only way to know for sure is to get your fingers dirty and check the soil.
If the soil feels soggy, wet, or heavy, you’re dealing with root rot. The roots are literally drowning and have stopped sending water up to the rest of the plant, causing it to go limp. You need to act fast: get the plant out of that pot, trim off every last bit of black or mushy root, and repot it in fresh, dry, fast-draining soil.
On the other hand, if the soil is bone-dry and pulling away from the edges of the pot, your plant is severely dehydrated. The fix isn’t to flood it immediately, which can shock the poor thing. Instead, give it a small drink of water, wait an hour or so, and then give it a more thorough watering until you see drainage. It should start to look much happier within a day or two.
How Do I Know if It’s Really Too Late to Save My Plant?
It’s the question every plant parent dreads, but Christmas cacti are tougher than they look. You've reached the point of no return when the rot has worked its way up from the roots and into the base of the plant itself. If the part where the stems come out of the soil is brown, soft, and mushy, the core is likely dead.
But here’s the ultimate test: look for any firm, green segments left on the plant. Even if the entire root system is a lost cause, you can often save the plant by taking healthy cuttings from the tips and starting over.
As long as you have a few healthy pieces to work with, there’s still hope. Never give up until you’ve at least tried to propagate what’s left.
Can I Save a Cactus That Has Lost All Its Roots?
Absolutely, yes! It sounds hopeless, I know, but saving a Christmas cactus after it has lost all its roots to rot is something I’ve done many times. The secret is to stop thinking of it as a plant and start treating it like one big cutting.
Here’s your game plan:
- Clean Up the Damage: Gently break or cut off any remaining rotted bits at the base. You want to get back to clean, firm, healthy tissue.
- Let It Callous: This is the most important step. Let the entire plant sit out in a dry, shady spot for a few days. This allows the raw ends to dry and form a callus, which prevents them from rotting as soon as they touch moisture.
- Encourage New Roots: You have two great options here. You can stick the calloused base into a jar of water (changing it every few days) until you see new roots form. Or, you can pot it directly into a small container with a lightly moist, well-draining cactus mix.
This process takes patience—it could be several weeks before you see new growth. Just keep the soil barely damp and the light indirect. You’re essentially giving your plant a complete do-over, and you’d be surprised how often it works.
At The Cactus Outlet, we know that every plant enthusiast faces challenges. With the right knowledge and a bit of patience, you can bring even the most troubled Christmas cactus back to life. Explore our extensive collection of beautiful cacti and succulents to add more resilient beauty to your home. Visit us today at https://www.cactusoutlet.com.