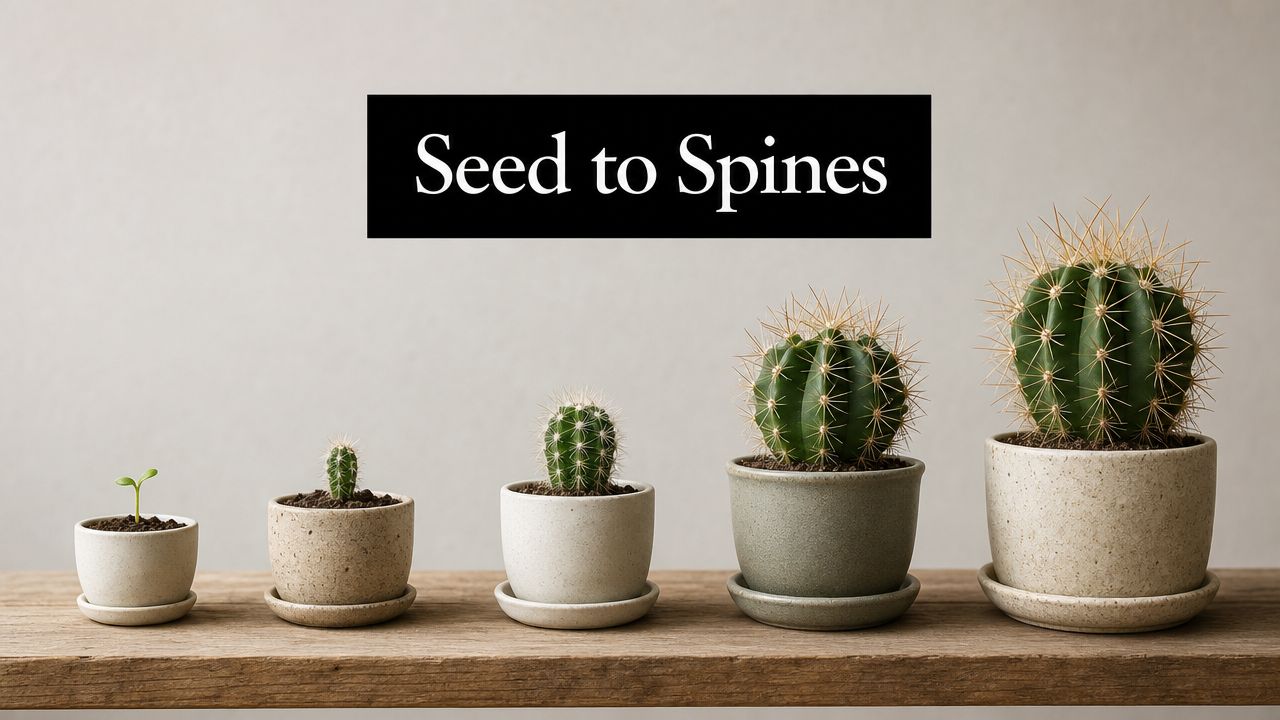

Picture a plant that's equal parts striking garden centerpiece and edible powerhouse. That’s the prickly pear cactus (Opuntia). It’s an icon of the desert, famous for its unique, paddle-shaped stems, and a seriously smart pick for gardeners looking for something that’s beautiful, tough, and even tasty.
Get to Know the Prickly Pear Cactus
The prickly pear is so much more than just another spiky plant. It belongs to the huge Opuntia family, and you'll know one when you see it—those flat, fleshy pads are a dead giveaway. These pads, technically called cladodes, are modified stems that do all the heavy lifting: they handle photosynthesis, store water, and produce the plant's gorgeous flowers and fruit.
You could almost call the prickly pear the ultimate survivalist. Its entire design is a masterclass in thriving with less.
- Pads (Nopales): These thick paddles are basically built-in water tanks. This storage system is what lets the cactus sail through long, dry spells. In many parts of the world, these pads are a food staple called nopales.
- Spines: Those sharp needles aren't just for show—they're actually modified leaves. They're the plant's first line of defense against hungry animals, but they also cast tiny shadows on the pad's surface, which helps cut down on water loss.
- Glochids: Now, these are the ones to watch out for. Glochids are the tiny, hair-like bristles you'll find in clusters on the pads. They detach at the slightest touch and can be a real pain to get out of your skin, so handle with care!
More Than Just a Tough Guy
Don't let that rugged exterior fool you; the prickly pear has a softer side. When it blooms, it puts on a spectacular show of cup-shaped flowers in brilliant yellows, fiery oranges, and vibrant pinks. These blossoms are a huge draw for pollinators like bees.
After the flowers fade, the real treat appears: the fruit, famously known as tunas. These oval fruits have a sweet, refreshing flavor that many people say tastes like a cross between watermelon and bubblegum. They’re used to make everything from juices and jams to syrups, turning this desert survivor into a sweet harvest.
The prickly pear's ability to flourish on very little water has made it a symbol of resilience. It's a plant that doesn’t just endure its environment; it creates beauty and food from it—a pretty good lesson in making the most of what you've got.
This incredible adaptability makes the prickly pear a fantastic choice for any garden. Its bold, architectural shape adds drama to xeriscapes, rock gardens, or even just a pot on the patio. Whether you want a low-water ornamental, a living fence, or ingredients you can harvest yourself, this plant delivers.
Choosing Your Perfect Prickly Pear Variety
When you first dip your toes into the world of prickly pear cacti, you’ll discover an incredible variety to choose from. With over 200 species in the Opuntia genus alone, picking the right one can feel a bit like trying to find the perfect tool for a job. The trick is to match the plant's natural strengths to your climate, your garden's space, and what you want to get out of it—whether that's stunning flowers, edible fruit, or just rugged, low-maintenance beauty.
Think of it like choosing a dog breed. You wouldn’t bring a Siberian Husky home to a tiny apartment in Miami, right? In the same way, you wouldn't plant a tropical, fruit-focused cactus in a garden that sees heavy snow. Getting to know the personalities of the most popular varieties is the key to picking a plant that will really flourish.
All the parts you see—the pads (nopales), the fruits (tunas), and the flowers—are all connected, growing from the same amazing plant.
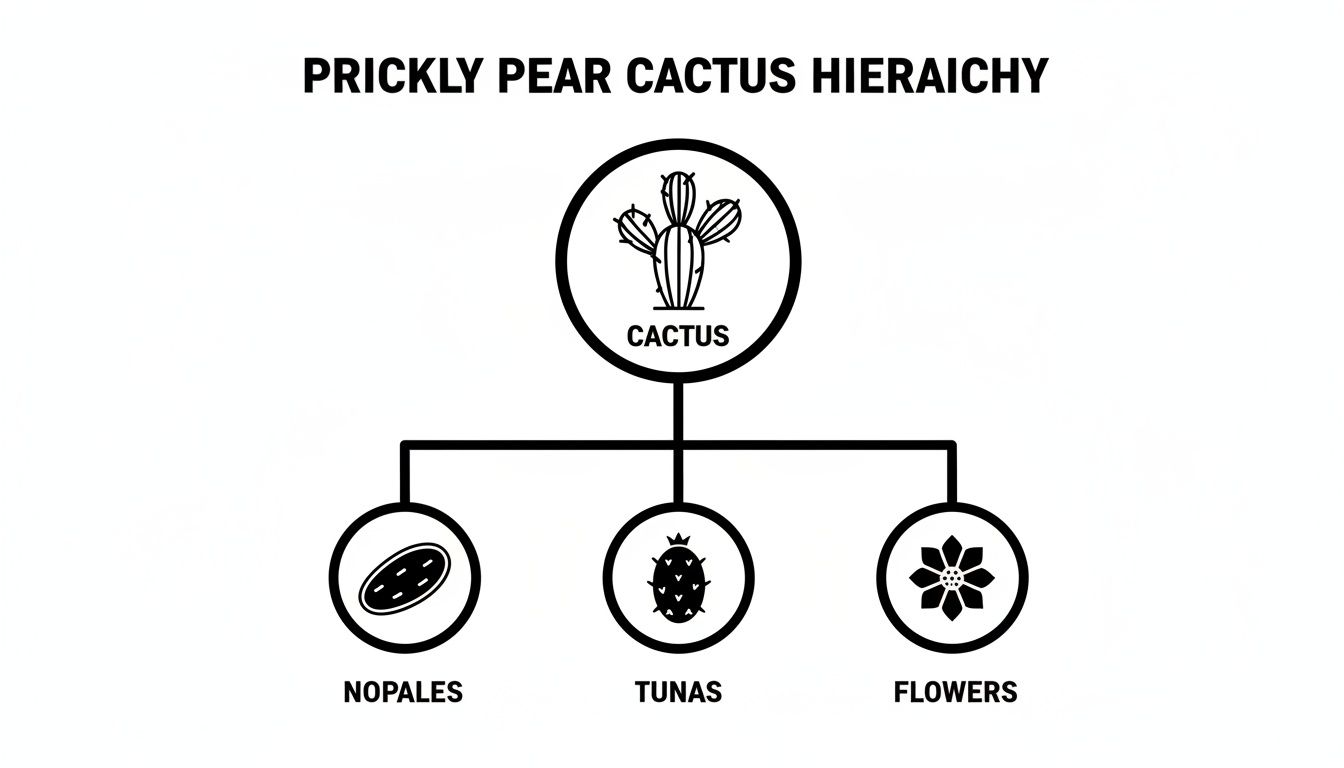
This just shows how everything from the food it produces to its beautiful blooms is part of one efficient system.
Key Varieties for Your Garden
Let’s get to know some of the all-stars of the prickly pear world. Each brings a little something different to the table, and knowing what makes them unique is the first step toward making a great choice.
-
Indian Fig (Opuntia ficus-indica): This is the undisputed champion of edible cacti. Prized for its large, sweet fruits (tunas), the Indian Fig can grow into an impressive tree-like form, sometimes reaching up to 15 feet tall. Its pads are huge, have very few spines, and are what you’ll typically find sold as nopales. It’s a perfect fit for hot, dry climates where you want a plant that’s both beautiful and productive.
-
Eastern Prickly Pear (Opuntia humifusa): If you live in a colder region, don't despair! The Eastern Prickly Pear is your go-to. This tough, low-growing species is incredibly cold-hardy and can handle temperatures well below freezing. It usually stays under 18 inches tall and spreads out, making it an amazing, drought-tolerant groundcover for a rock garden. The fruit is smaller, but its cheerful yellow flowers are a real treat in early summer.
-
**Santa Rita Prickly Pear (Opuntia 'Santa Rita')**: Looking for a serious wow factor? The Santa Rita is a showstopper. Its claim to fame is its gorgeous pads that turn a deep, smoky purple when stressed by cold or drought. That incredible color makes its bright yellow flowers pop even more. It’s a medium-sized cactus, making it a fantastic centerpiece in a pot or a sunny spot in the garden that needs a splash of year-round color.
Prickly Pear Variety Snapshot
Sometimes, seeing things side-by-side just makes it easier. This quick table breaks down the defining features of these popular varieties to help you find the perfect match for your garden goals.
| Variety Name | Key Features | Best For | Cold Hardiness |
|---|---|---|---|
| Indian Fig | Large size, sweet edible fruit, minimal spines | Gardeners seeking fruit production, warm climates | Down to 25°F (-4°C) |
| Eastern Prickly Pear | Low, spreading habit, extremely cold-hardy | Cold climates, groundcover, rock gardens | Down to -20°F (-29°C) |
| Santa Rita | Striking purple pads, beautiful yellow flowers | Ornamental focal point, containers, color contrast | Down to 15°F (-9°C) |
When you're making your final decision, always start with your climate zone. A Santa Rita won't show off that famous purple without some cold stress, and an Indian Fig simply won't make it through a harsh northern winter. Matching the plant to its preferred environment is the single most important thing you can do for its long-term health.
In the end, whether you're after a practical food source from an Indian Fig or a living sculpture like the Santa Rita, there’s a prickly pear that’s practically made for your yard. By understanding their core differences, you can pick a cactus that will bring you joy—and a touch of desert magic—for years to come.
Getting Your Prickly Pear to Thrive
Growing a beautiful, healthy prickly pear is surprisingly straightforward. These are tough plants, built by nature to survive with very little coddling. But getting the basics right from the start is what separates a cactus that merely survives from one that truly thrives. Think of it less like delicate gardening and more like giving the plant a little slice of the desert it calls home.
It all boils down to one thing first and foremost: light. Prickly pears are absolute sun-worshippers. To get those big, healthy pads and vibrant flowers, you need to find a spot that gets at least six to eight hours of direct, blazing sun each day. A south-facing wall or an open, exposed part of your yard is usually the perfect spot. If they don't get enough light, they'll tell you by growing long, skinny, and pale—a condition called etiolation—as they desperately stretch for the sun.
It All Starts with the Right Soil
If sunlight is the fuel, the right soil is the foundation. For any cactus, and especially a prickly pear, the number one enemy isn't drought or bugs; it's wet feet. Root rot from soggy, dense soil is the fastest way to kill one. These plants evolved where rain comes in quick bursts and drains away almost instantly. Your job is to mimic that.
Here's the golden rule for cactus soil: when in doubt, add more drainage. You can always save a thirsty cactus, but a rotting one is often a goner.
Whether you're planting in a pot or in the ground, the soil has to be incredibly well-draining. Your average bag of potting soil or heavy garden clay is a death sentence; it just holds onto water for far too long. You need a gritty, loose mix that lets water rush right through.
-
Planting in the Ground: If your yard is mostly clay, you've got some work to do. Dig a hole at least twice as wide as the plant's root ball and amend the soil you dug out. A good mix is about half native soil and half drainage material like coarse sand, perlite, or fine gravel.
-
Planting in a Pot: The easiest route is a pre-made cactus and succulent mix from a garden center. To make an even better mix yourself, just combine one part regular potting soil with two parts drainage material like pumice or perlite. For an expert-level recipe, check out our in-depth guide to creating the perfect cactus soil mix.
How to Water (Hint: Don't Overthink It)
The biggest mistake people make is watering on a strict schedule. Instead, think like a desert rainstorm: a big downpour, followed by a long dry spell.
When it's time to water, give it a thorough soaking. For a potted plant, that means watering until you see it running freely from the drainage holes. For one in the ground, give it a deep, long drink. Then—and this is the most important part—let the soil dry out completely before you even think about watering again. For a pot, that might be every two to four weeks in the hot summer, and maybe once a month (or less!) in the winter.
The easiest way to check is with your finger. Stick it two inches down into the soil. If you feel even a hint of moisture, walk away and check again in a few days. This "drench and dry" method encourages the roots to grow deep and strong. It's also what makes these plants such sustainable landscaping heroes. A prickly pear uses 3 to 6 times less water than a crop like corn but can produce just as much bioenergy. It’s a beautiful, tough, and incredibly efficient plant for our changing climate.
A Word on Feeding and Seasonal Care
Prickly pears aren't picky eaters. They’re used to lean, mean desert soils and will do just fine with no fertilizer at all. That said, if you want to encourage a flush of new growth and a few more flowers, a little snack during the growing season (spring and summer) can help.
If you do fertilize, go easy. Use a balanced liquid fertilizer with low nitrogen, and dilute it to half the recommended strength. Once or twice during the spring and summer is plenty. Never feed in the fall or winter; the plant is trying to sleep, and forcing new growth then just makes it weak and vulnerable to cold or disease.
Your cactus's needs will change with the seasons.
- Spring: As the weather warms up, you'll see new pads starting to pop out. This is your cue to gradually start watering more often. If you plan to fertilize, now’s the time.
- Summer: This is peak growing time. Water deeply, but only when the soil is bone dry.
- Fall: As the days get shorter and cooler, start tapering off the water. This signals to the plant that it's time to prepare for its winter nap.
- Winter: The plant is dormant. For cacti in the ground, winter rain is usually more than enough. For potted ones, you might only water them once all season just to keep the pads from shriveling up. Keeping the soil dry is the best defense against frost damage.
How to Propagate Prickly Pear Cuttings
Ready to multiply your prickly pear collection for free? Propagation is easily one of the most rewarding parts of growing these tough plants. The process is surprisingly straightforward and lets you expand your garden, share with friends, or even start a living fence over time.
Think of each cactus pad as its own little starter kit, already packed with everything it needs to become a whole new plant. Your job is just to give it the right environment to get started.
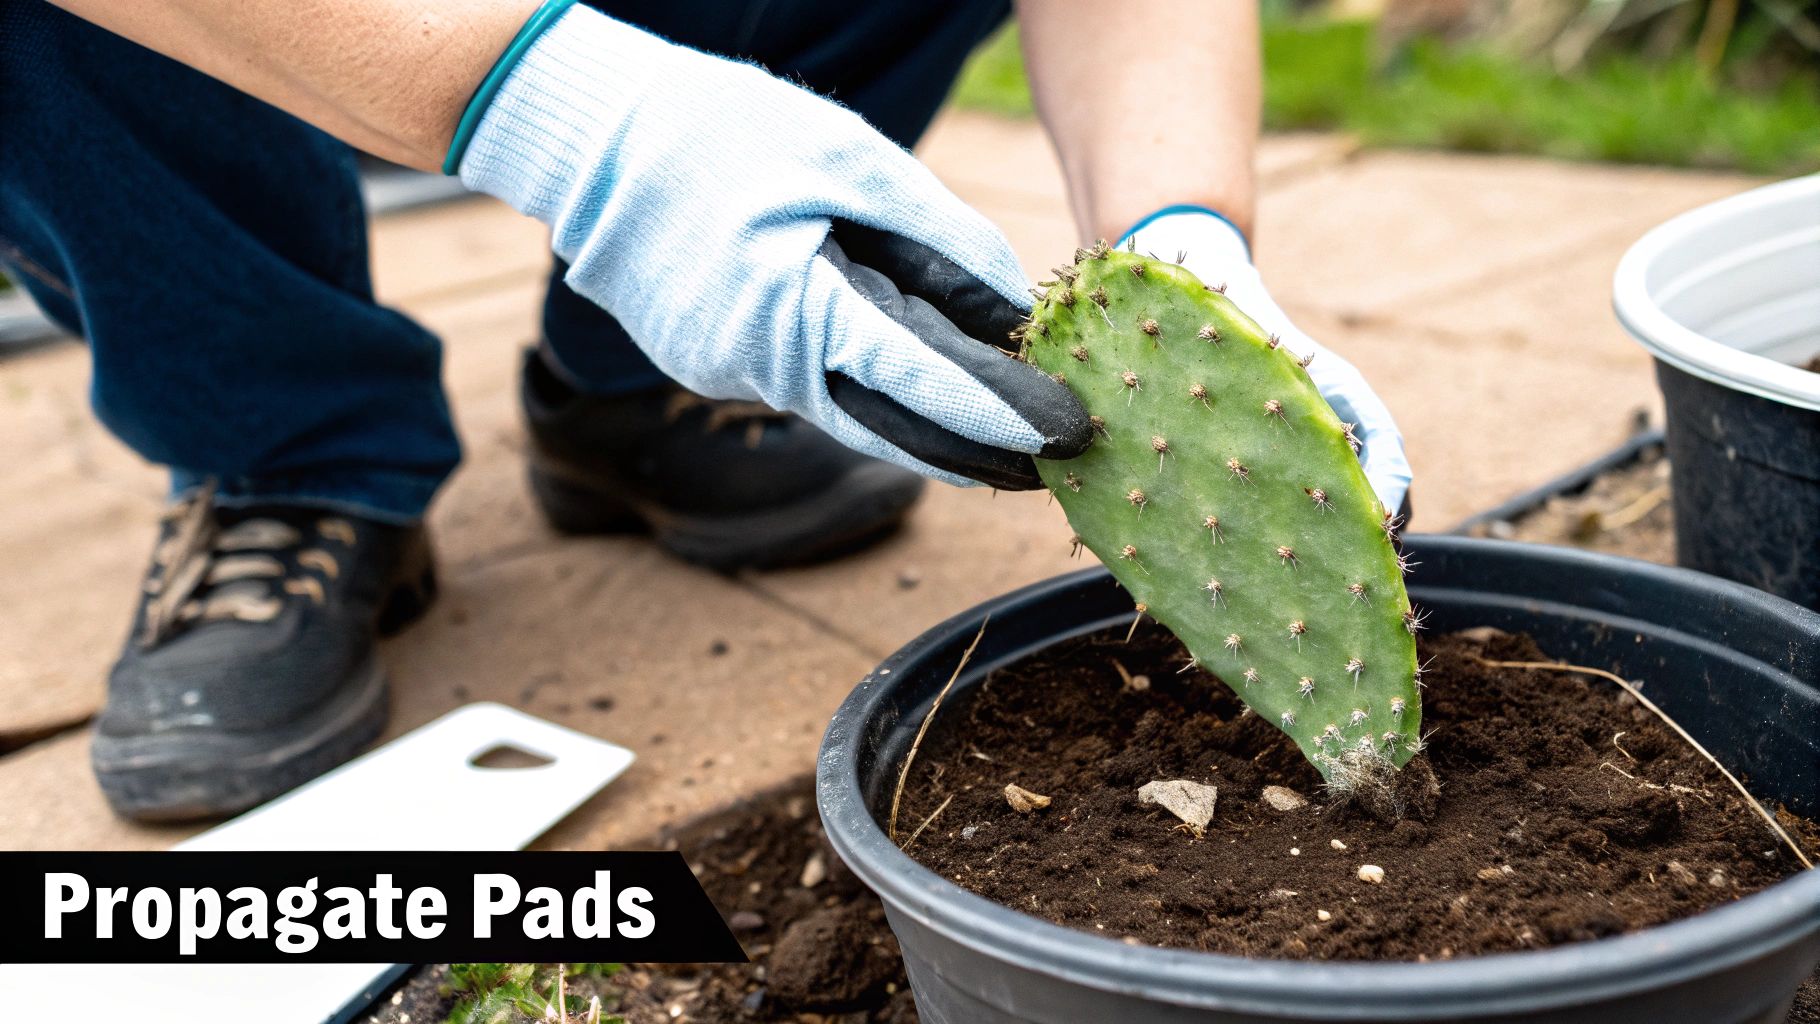
The entire method hinges on one make-or-break step: letting the cutting heal before you plant it. This is what prevents rot and really sets your new cactus up for success.
Step 1: Select and Remove a Healthy Pad
First things first, you need to pick a good candidate for cloning. Look for a mature, healthy pad that’s at least six months old. It should be plump and firm, with no weird spots, blemishes, or signs of disease. Younger, flimsy pads just don't have enough stored-up energy to make it on their own.
Once you've got your eye on the perfect pad, it's time for a little surgery. Grab some thick leather gloves and a pair of tongs to handle the cactus safely. Using a sharp, sterilized knife, make a clean cut at the joint where it connects to the main plant. You can also gently twist and pull the pad until it pops off cleanly.
Step 2: Let the Cutting Callus Over
Now for the most important step—the one that requires a bit of patience. Lay your fresh cutting in a dry, shady spot with plenty of air circulation for about 7 to 14 days. Over this period, the open wound at the base of the pad will dry out and form a hard, protective layer. This is called a callus.
Don't skip this! Planting a fresh, "wet" cutting is an open invitation for bacteria and fungus to move in. The callus essentially acts like a scab, sealing off the moist interior from the soil and preventing the pad from rotting before it even has a chance to grow roots.
Step 3: Plant Your New Prickly Pear Cutting
When a firm callus has formed over the cut, your pad is officially ready for soil. You’ve got two main options here:
- In a Pot: Fill a container with a fast-draining cactus and succulent mix. Stick the callused end of the pad about 1-2 inches deep into the soil—just enough to keep it standing upright. If it’s a little wobbly, you can use a few rocks to prop it up.
- In the Ground: Find a sunny, well-draining spot in your yard. If you have heavy clay soil, mix in some sand or perlite to improve drainage first. Plant the pad just like you would in a pot, making sure it's stable.
Here comes another test of patience. Do not water it right away. Wait at least a full week after planting before you give it the first light drink. This little bit of thirst encourages the pad to start pushing out roots in search of moisture.
For the next month or two, water very lightly and only when the soil is bone dry. You’ll know you've succeeded when you see the first sign of a new pad sprouting from the top. This can take anywhere from a few weeks to several months, so hang in there!
For a deeper dive into cloning your favorite succulents, check out our specialized guide on how to propagate cactus from cuttings.
Harvesting and Enjoying Your Edible Cactus
Beyond its sharp looks, the prickly pear holds a delicious secret that people have enjoyed for centuries. Both its sweet fruits, called tunas, and the fleshy pads, known as nopales, are edible and bring a unique taste of the desert right to your kitchen. Harvesting them yourself is an incredibly rewarding experience, turning your ornamental cactus into a true garden-to-table treat.
The trick to a good harvest is simply respecting the plant's defenses. It's not the big spines you have to worry about so much as the tiny, hair-like ones called glochids. These things detach at the slightest touch and are a real pain to get out of your skin, so coming prepared is non-negotiable. Always arm yourself with thick leather gloves and a long pair of metal tongs for handling both the fruit and the pads.
This isn't just a backyard tradition; it's a massive agricultural industry. Mexico is the world leader in prickly pear production, responsible for a whopping 45% of the world's total output. They harvest hundreds of thousands of tons every year, making it a more significant crop there than even peaches or table grapes. You can dive deeper into this incredible agricultural system by reading up on recent studies about sustainable food systems.
Safely Harvesting Prickly Pear Fruit
When it comes to harvesting the tunas, timing and technique are everything. You'll know the fruits are ready when they develop a deep, vibrant color—usually a rich magenta, red, or deep orange—and give just a little when you gently squeeze them. A ripe one should twist off the pad with very little argument.
Here’s the simple process:
- Get a Grip: Use your tongs to get a firm but gentle hold on a ripe-looking fruit.
- Twist, Don't Pull: Give it a gentle twist. If it's ready, it will pop right off. If it puts up a fight, leave it for a few more days to ripen.
- Collect Carefully: Drop the harvested tunas into a bucket. Try not to pile them too high, as they can bruise easily.
Now for the tricky part: getting rid of those pesky glochids. One of the best and quickest ways is to use a small flame from a propane torch or even your gas stove. Holding the fruit with your tongs, carefully roll it over the flame until you see all the tiny spines singe off. They burn away in an instant. After that, just give the fruit a good rinse under cool water to wash off any soot before peeling and enjoying.
Preparing the Nopales for Cooking
Harvesting the pads is just as straightforward. You want to pick the young, tender ones that are bright green and roughly the size of your hand. The older, darker pads get tough and fibrous, so they're best left on the plant.
To harvest a pad, just hold it steady with your tongs and use a sharp knife to slice it cleanly off at the joint where it connects to the cactus.
Once you have your pads, it's time to de-spine them. You have a few options here:
- The Scrape Method: Lay the pad flat and use the dull side of a knife to scrape away the spine clusters.
- The Peeler Method: A simple vegetable peeler works wonders for shaving off the outer layer where the spines grow.
- The Flame Method: Just like with the fruit, a quick pass over an open flame is a very effective way to burn off the glochids.
After they’re clean, give the nopales a thorough rinse, trim the tough outer edge, and chop them up for your recipe. They are fantastic boiled, grilled, or sautéed and have a unique flavor that people often compare to a tart green bean or asparagus.
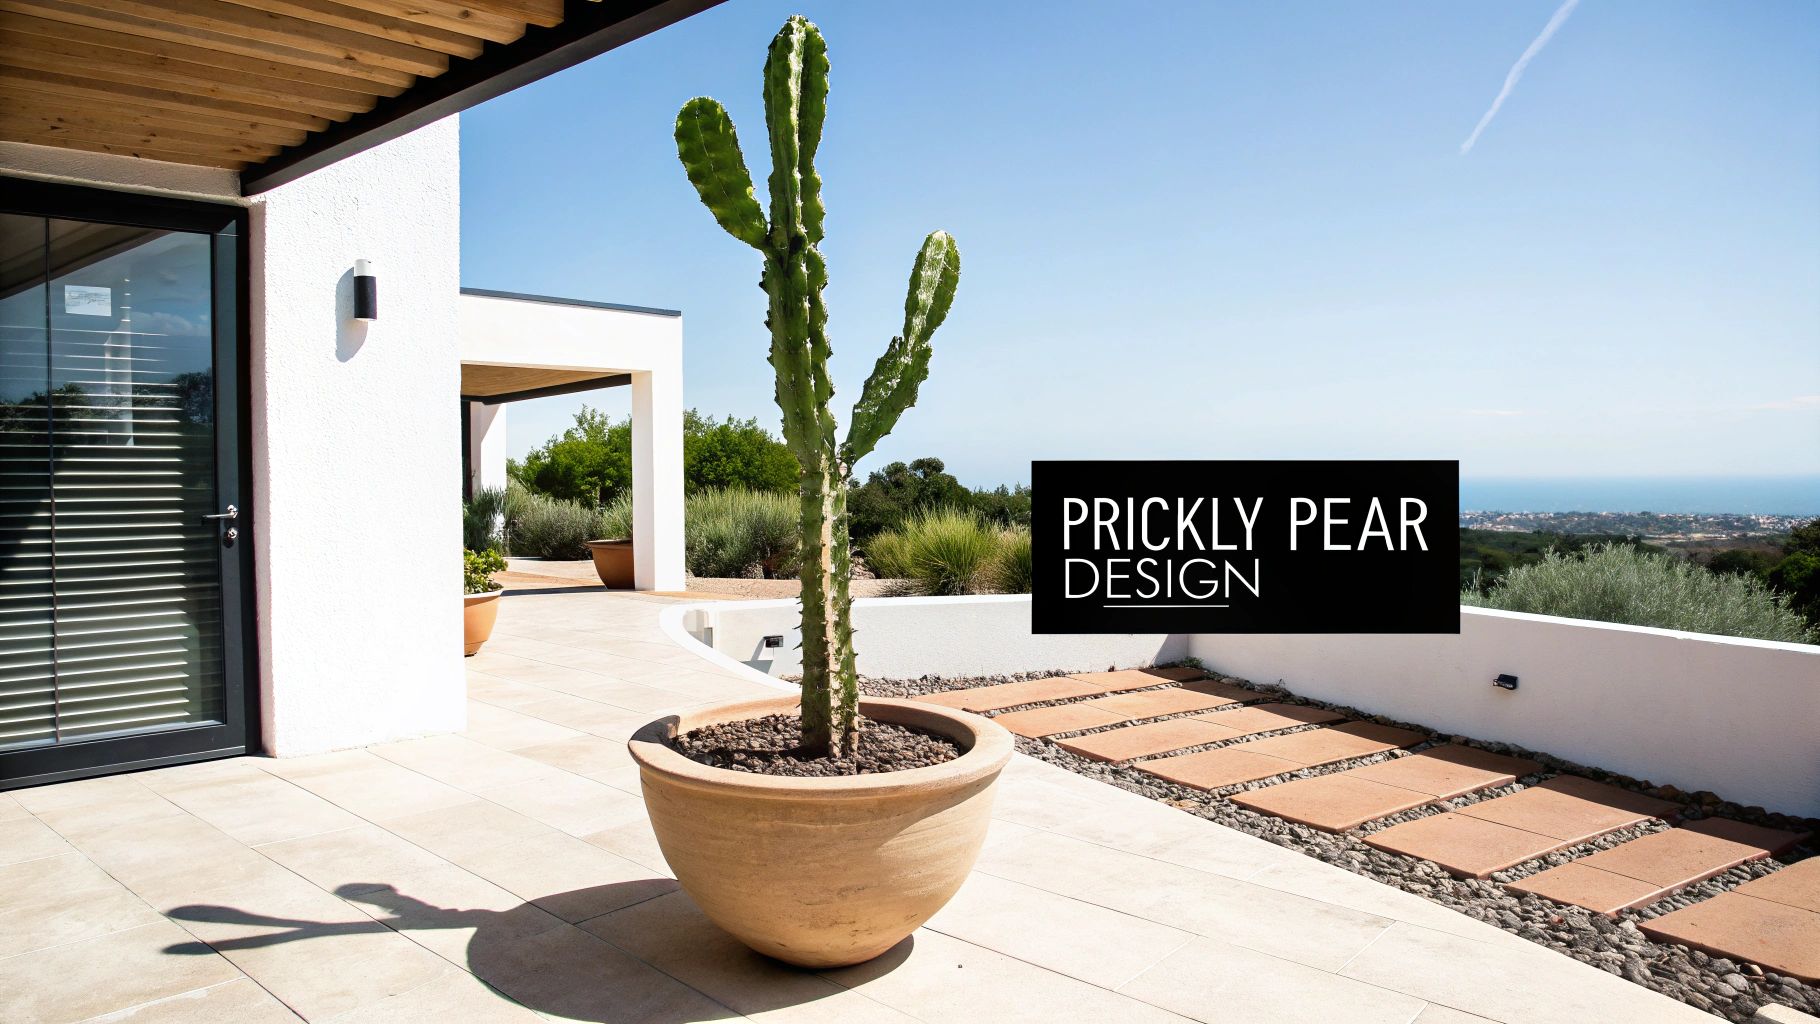
Using Prickly Pear in Your Landscape Design
A prickly pear is so much more than just a plant—it’s a living sculpture. Its bold, architectural pads bring a texture and form to any space that few other plants can match, making it an incredible tool for landscape designers and home gardeners. To really make a prickly pear work for you, you have to think beyond just planting it and consider its shape, size, and overall presence in your garden's story.
Whether you use a single magnificent specimen as a dramatic focal point or group several together to form a natural, impenetrable barrier, this cactus absolutely commands attention. That versatility is one of its greatest strengths.
Outdoor Design Strategies
Outdoors, the prickly pear is the undeniable star of any water-wise xeriscape. It thrives on next to no water, making it the perfect anchor plant for a beautiful, sustainable garden. If you want to dive deeper into this style, we've put together a complete guide to drought-tolerant landscape design.
Here are a few powerful ways to use them in your yard:
- Create a Dramatic Focal Point: A single, large prickly pear, like a mature Opuntia ficus-indica, can look absolutely stunning as a centerpiece against a modern wall or in a clean gravel bed.
- Plant a Living Security Fence: A dense row of a particularly spiny variety creates a barrier that is both beautiful and highly effective along a property line. When planning this, it's worth looking at different Fence Styles to see how the cactus can complement or replace traditional fencing.
- Play with Textural Contrast: The broad, flat pads of the cactus look incredible when paired with soft, feathery grasses or succulents with fine leaves. This creates a dynamic visual tension that really makes a garden pop.
The worldwide appeal of these plants is huge. Interestingly, while it might not be the biggest producer, Italy is the world's top exporter of prickly pear. They cultivate thousands of hectares to grow up to 87,000 tons of fruit each year. For those of us at The Cactus Outlet, this just underscores the plant's time-tested quality and aesthetic value—it’s a reliable and gorgeous choice for any landscape.
Indoor Living Sculptures
Don't think the prickly pear's design potential is limited to the great outdoors. Bringing a single, well-chosen specimen inside can completely transform a room, adding a touch of organic modernism.
A potted prickly pear does more than just fill a corner; it introduces a strong, vertical element and a connection to nature that softens minimalist or industrial interiors.
When you bring a prickly pear indoors, the pot is just as important as the plant. A simple terracotta container gives off a rustic, earthy feel, while a sleek ceramic or metal planter pushes it into more contemporary territory. Just be sure to place it in a sunny spot where its unique silhouette can be admired, turning a simple houseplant into a genuine piece of decor.
A Few Common Prickly Pear Questions
Every plant has its quirks, and even the tough-as-nails prickly pear can leave you wondering what's going on. It's all part of the fun of getting to know your new cactus.
Think of this as your go-to guide for those "what does this mean?" moments. From a sudden cold snap to a mysterious color change, we've got the answers.
How Do I Protect My Prickly Pear From Frost?
Many prickly pear varieties can handle a surprising amount of cold, but a hard frost can be a problem, especially for young plants or those living in pots. The secret to protecting them is all about managing moisture and giving them a little extra insulation on the coldest nights.
Your number one defense is making sure the soil is completely dry. When wet soil freezes, the expanding ice can shatter the plant's roots—a fatal combination.
Here are a couple of easy ways to shield your plant:
- Cover It Up: Before the sun sets, drape a frost cloth or an old bedsheet over the cactus. This simple trick traps heat radiating from the ground and can make a difference of several degrees right around your plant.
- Bring It Inside: If your prickly pear is potted, the simplest solution is to just move it into a garage, shed, or covered patio until the cold spell passes.
Why Are My Cactus Pads Turning Yellow?
When a cactus pad turns yellow, it’s sending up a flare. It looks alarming, but once you figure out the cause, it's usually an easy fix. The most common culprit, by far, is overwatering. Too much water leads to root rot, which means the plant can't drink up the nutrients it needs.
But a few other things could be going on:
- Nutrient Deficiency: If it’s been a while since you repotted, the soil might just be worn out. A single dose of a diluted, low-nitrogen cactus fertilizer during the spring growing season can often work wonders.
- Sunburn: Yes, it’s true—even a cactus can get sunburned! If you move a plant from a shady spot straight into intense, direct sun, the pads can get scorched, turning a bleached-out yellow or white.
- Natural Aging: Don't panic if the oldest, lowest pads on the plant start to yellow and get a bit woody. This is a natural part of the aging process as they form a tough, supportive base for new growth.
The first thing you should always do when you see yellow pads is check the soil. Stick your finger a few inches down. If you feel any moisture at all, step away from the watering can until it's bone dry.
Is Prickly Pear Cactus Safe for Pets?
This is a huge one for all of us with furry family members. The good news is the plant itself is not toxic. If your dog or cat managed to chew on a piece of pad or fruit, poisoning isn't the concern. The real danger is physical.
Prickly pears are armed with big spines and, even worse, tiny, hair-like glochids that are a nightmare to remove. These can get stuck in paws, noses, and mouths, causing a lot of pain and almost certainly requiring a trip to the vet. Because of this, it's always safest to keep your prickly pear well out of your pet's reach.
Ready to bring one of these stunning living sculptures into your own space? We've got an incredible selection of healthy, unique prickly pears just waiting for a new home. Explore our collection at The Cactus Outlet and find your perfect match. Shop our Prickly Pear collection today!