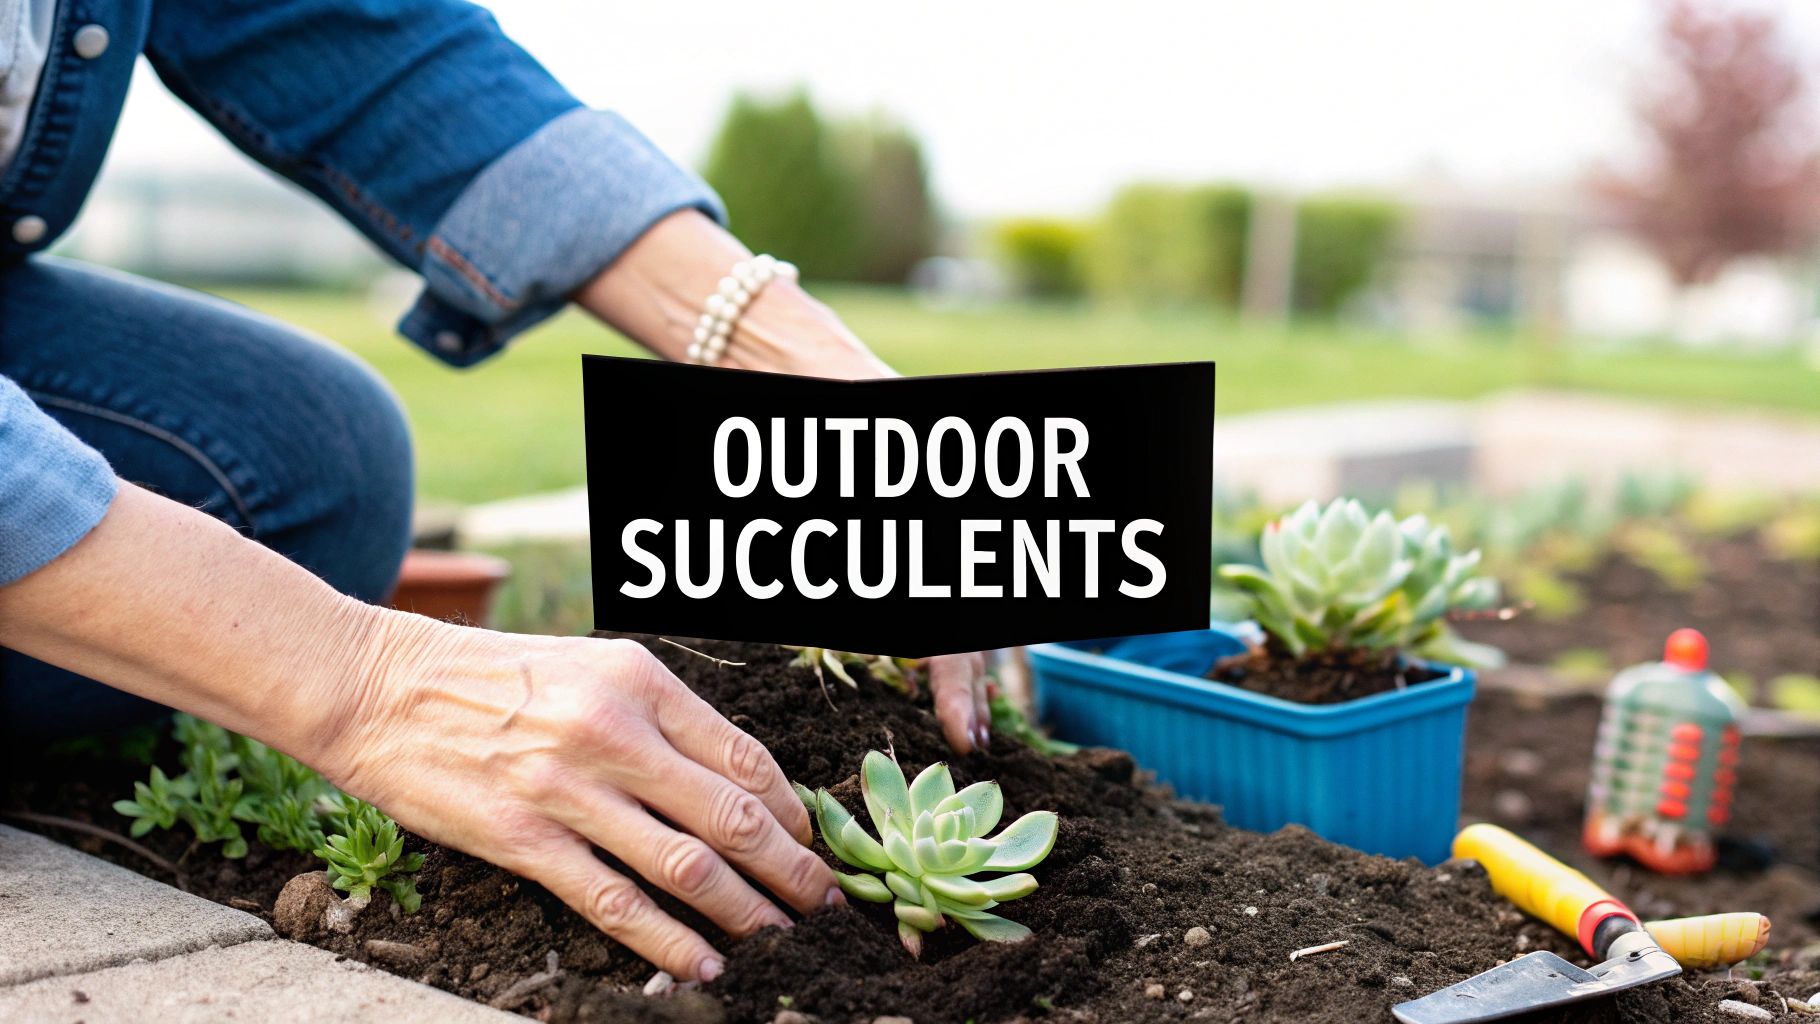

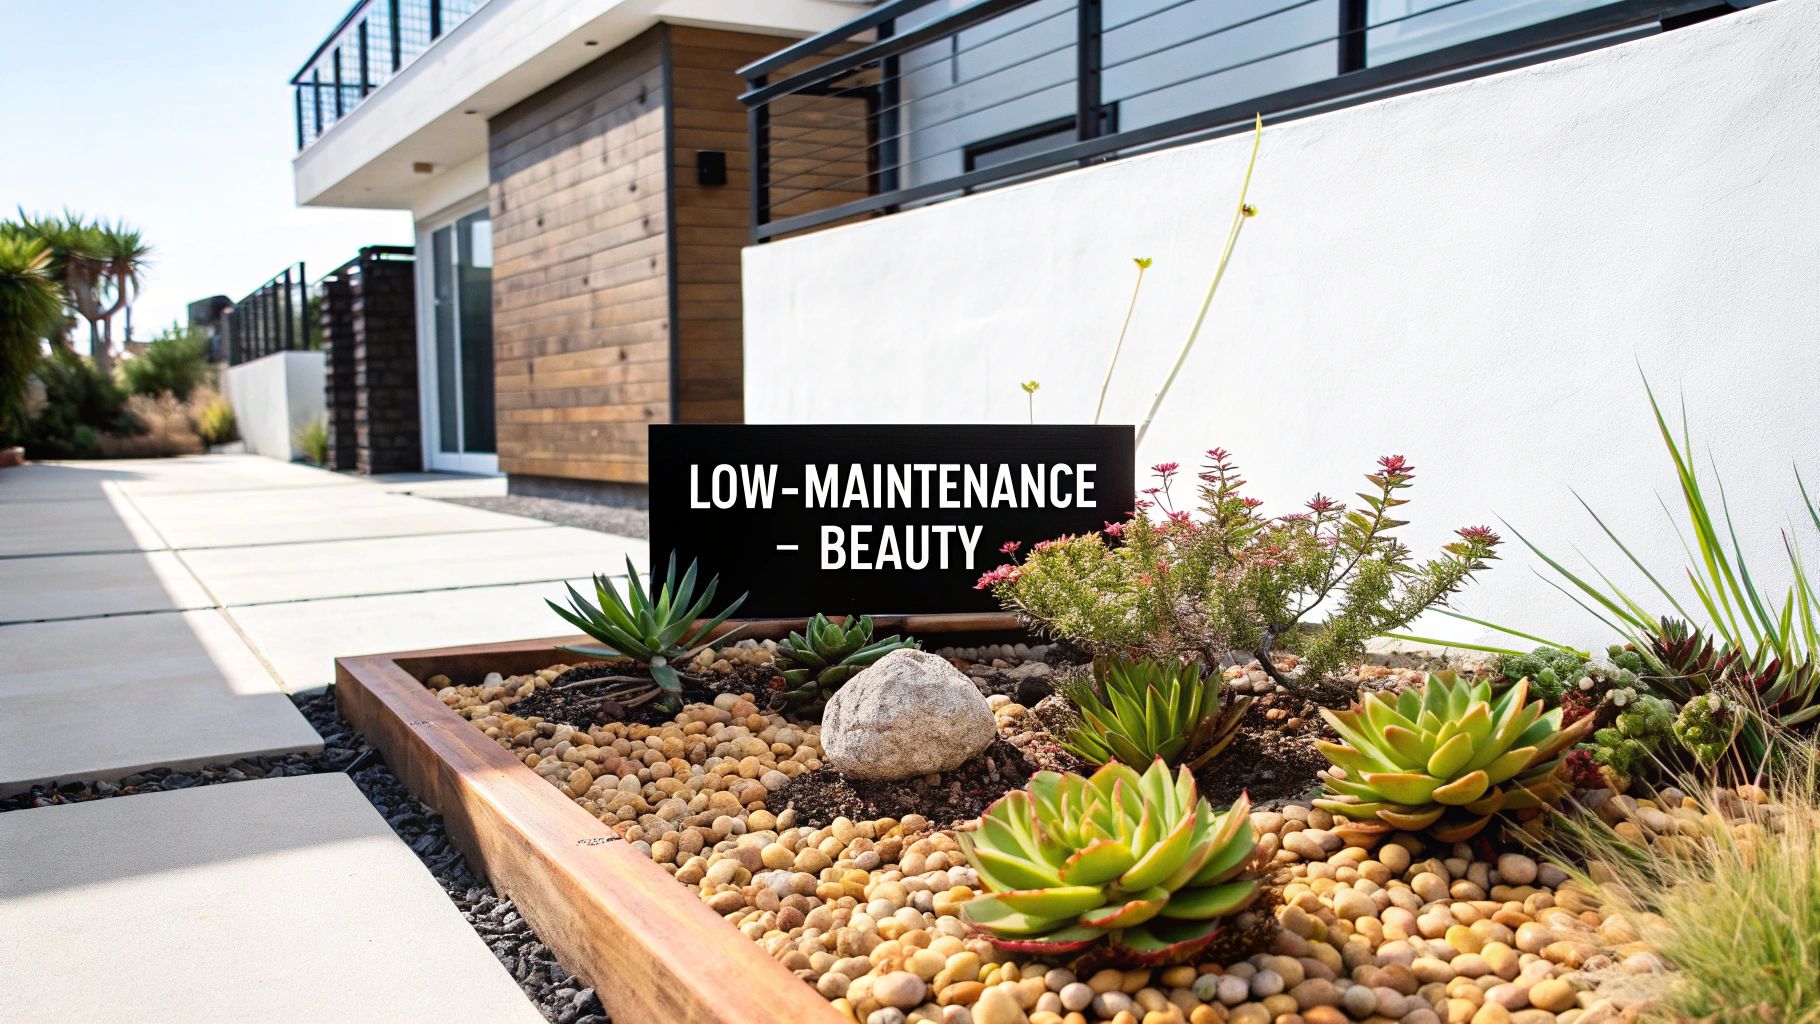
If you've ever wanted a stunning garden that doesn't demand all your free time, planting succulents outdoors might be your perfect solution. These remarkable plants offer an incredible range of colors, shapes, and textures, letting you craft a landscape that's as tough as it is beautiful. This guide is your starting point for getting it right.
Why An Outdoor Succulent Garden Is Such a Great Idea
Succulents are far more than a passing fad—they're a genuinely smart move in modern landscaping. Their popularity has exploded not just because of their sculptural, otherworldly looks, but because they make so much sense. For anyone looking to create a garden that's both striking and sustainable, succulents are the answer.
This isn't just a niche hobby, either. The global succulent market was valued at around $5.9 billion in 2025 and is expected to grow at a compound rate of 17.9% through 2033. A huge part of that boom comes from people planting them outdoors, especially in places like North America where water conservation is becoming a bigger and bigger deal.
The Real-World Benefits of an Outdoor Succulent Garden
The magic of an outdoor succulent garden really comes down to a few key advantages that fit perfectly with today's busy world. You get maximum visual impact with minimum fuss.
Plus, succulents are a fantastic way to add resilient, artistic elements to your outdoor living spaces, tying your home and garden together.
Here’s why they’re such a compelling choice:
- They Sip, Not Gulp: Succulents are built for dry climates, storing water in their leaves and stems. This means they need way less water than a thirsty lawn or a bed of traditional flowers, which is great for the environment and your water bill.
- More Enjoying, Less Toiling: Once they get settled in, these plants pretty much take care of themselves. Forget constant pruning, fertilizing, and battling pests—your weekends are yours again.
- A Garden for All Seasons: Many succulents look fantastic year-round, unlike annuals that fade away. You can count on the cool blue of an Agave or the rich purple of an Echeveria to provide color and structure no matter the season.
A well-designed succulent garden isn't just a collection of plants; it's a living sculpture. It adds architectural interest and texture to your landscape in a way few other plant groups can, transforming ordinary spaces into extraordinary ones.
By choosing to plant succulents, you're not just creating a beautiful garden—you're investing in one that's sustainable and built to last. Let's walk through the steps to build your own thriving outdoor succulent paradise with confidence.
Matching Succulents to Your Local Climate
Getting your succulent garden right starts long before you ever pick up a shovel. The single most important decision you'll make is choosing plants that are actually suited to your environment. It's a simple truth: a stunning succulent bed in Phoenix, full of tender, heat-loving species, would turn to mush in a single Portland winter.
So, let's start with the basics. You need to know your USDA Plant Hardiness Zone. This isn't just gardening jargon; it's a map that tells you the average coldest temperature your area experiences in winter. Knowing your zone—whether you're in a toasty Zone 9b or a chilly Zone 8b—is the first filter that separates the plants that will thrive from those that will, frankly, die.
Hardy Succulents vs. Soft Succulents
Once you have your zone, you can dive into the two main camps of succulents: hardy and soft. This distinction is all about cold tolerance, and it's absolutely critical if your area sees freezing temperatures.
Hardy succulents are the tough guys of the plant world. They can handle frost, snow, and freezing temperatures, with some varieties surviving all the way down to Zone 4 or 5 (that's a bone-chilling -30°F). These are your best bet for a year-round, in-ground garden in most of the country.
- Sempervivum ('Hens and Chicks'): These are famous for a reason. They form beautiful, tight rosettes and send out little "chicks" on runners, creating a dense mat over time. They are incredibly resilient and come in a wild array of colors.
- Sedum ('Stonecrop'): This is a huge and diverse group, from low-growing groundcovers to taller, more upright plants. They're the workhorses of any cold-climate succulent garden.
Soft succulents, on the other hand, are much more delicate. As their name implies, they can't handle frost. A single freeze will damage or kill them. These are the plants for truly mild climates (think Zones 9 and up) or for beautiful container arrangements that you can bring indoors when the temperature drops.
- Echeveria: Everyone loves their stunning, rose-like shapes and vibrant colors, but they absolutely need protection from the cold.
- Aeonium: These often have striking, architectural forms with rosettes sitting on long stems, but they're incredibly sensitive to frost.
If you're gardening in a colder region and want to keep your succulents outside all year, your focus has to be on the hardy varieties. For a closer look at which species can really brave the elements, check out our guide on cactus that can survive winter—it’s packed with great options for tougher climates.
To help you visualize the best choices for your garden, here's a quick breakdown of some popular hardy and soft succulents.
Hardy vs Soft Succulents for Outdoor Planting
This table compares popular hardy and soft succulent varieties, their cold tolerance, and ideal growing conditions to help you choose the right plants for your climate zone.
| Succulent Type | Popular Genera | Cold Hardiness | Ideal Light | Best For |
|---|---|---|---|---|
| Hardy | Sempervivum, Sedum, Jovibarba, Delosperma | Zones 4-9 (some to Zone 3) | Full sun to light shade | Year-round outdoor gardens, rockeries, groundcover in cold climates |
| Soft | Echeveria, Aeonium, Crassula, Kalanchoe | Zones 9-11 | Bright, indirect light or morning sun | Frost-free climates, container gardens, seasonal outdoor displays |
Choosing between these categories is the first major step in designing a garden that works with your local weather, not against it.
Climate Scenarios: A Tale of Two Gardens
Let’s see how this plays out in the real world. Imagine a gardener in the blistering heat of Scottsdale, Arizona (Zone 9b) and another in the cool, damp Pacific Northwest, near Seattle (Zone 8b).
The Scottsdale gardener can go wild with a huge range of soft succulents right in the ground. Their biggest challenge isn't frost, but the brutal summer sun. Their shopping list might include:
- Golden Barrel Cactus (Echinocactus grusonii) for that classic, dramatic spherical shape.
- Whale's Tongue Agave (Agave ovatifolia) for its massive, architectural silver-blue leaves.
- Firestick Plant (Euphorbia tirucalli) for a splash of vibrant red and orange vertical interest.
Our Seattle gardener, however, has to be far more selective for their permanent outdoor beds. They need plants that can shrug off freezing winters and don't mind a lot of rain. Their choices would look completely different:
- 'Angelina' Sedum for a brilliant chartreuse groundcover that blushes orange in the cold.
- Cobweb Hens and Chicks (Sempervivum arachnoideum) for its unique rosettes covered in fine, web-like hairs that help shed water.
- Hardy ice plants (Delosperma) to create a carpet of dazzling, daisy-like flowers that can handle a freeze.
The goal is to work with your climate, not against it. Trying to force a plant to survive where it’s not meant to be is just a recipe for frustration. The real secret to success is putting the right plant in the right place from the start.
Sun Exposure: Full Sun, Partial Shade, or Dappled Light
After temperature, sunlight is the next piece of the puzzle. The amount of direct sun a spot gets will completely change what you can plant there. Take a day to really watch your yard and map out its light patterns.
Full Sun (6+ hours of direct sun) This is prime real estate for true desert natives. Think of bold Agaves, many types of Yucca, and sun-worshipping cacti. But a word of caution: even the toughest sun-lovers can get scorched during the peak of summer in intense climates, so a little afternoon shade is often a blessing.
Partial Shade or Morning Sun (4-6 hours of sun) This is the sweet spot for so many popular succulents, especially the beautiful rosette-formers like Echeveria and Graptopetalum. They'll get plenty of light to maintain their compact shape and vibrant colors without getting fried.
Dappled Light or Bright Shade Fewer succulents thrive in low light, but you still have options. Haworthia and Gasteria, which are often grown as houseplants, can do beautifully outdoors in a protected, shady corner. They're perfect for adding interesting textures to those tricky, darker spots in the garden.
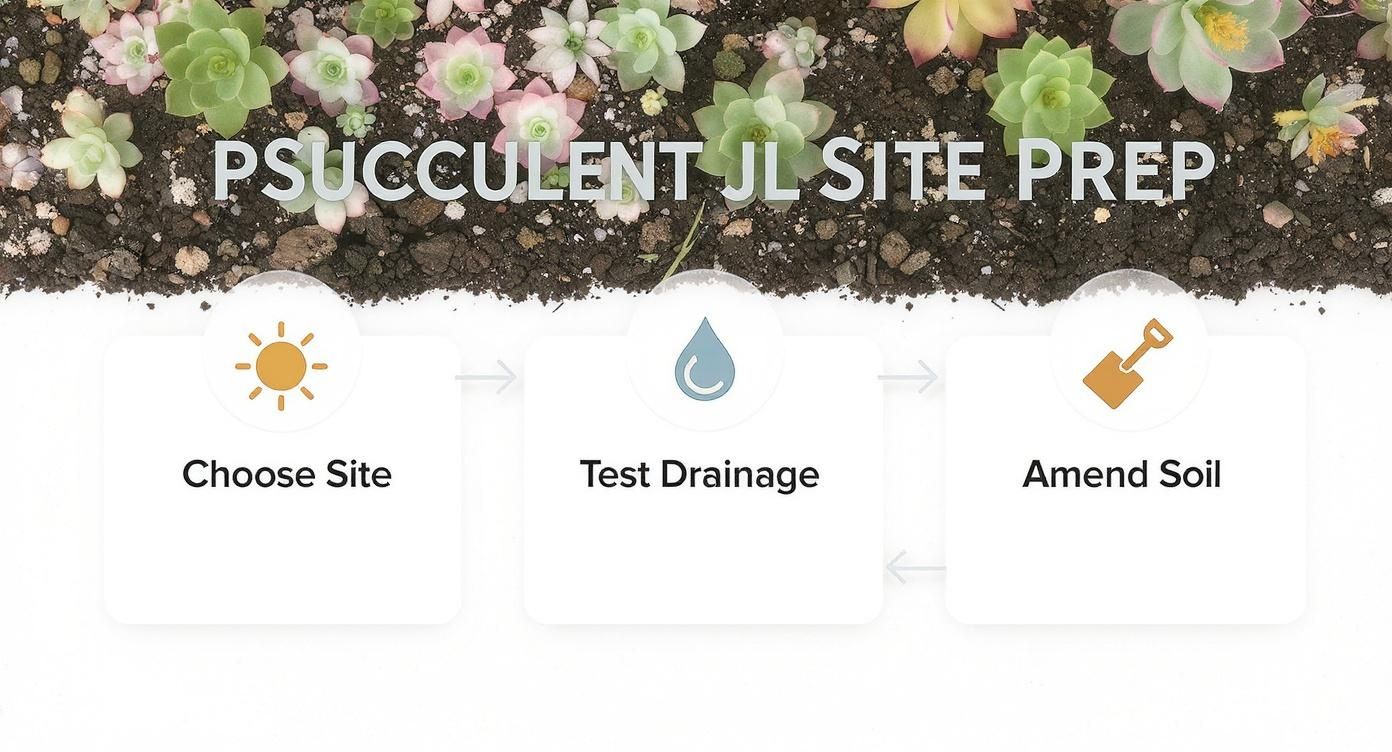
Creating the Perfect Soil and Planting Site
If there’s one secret to successfully growing succulents outdoors, it’s all about the soil. Honestly, you can pick the perfect plant and give it the perfect amount of sun, but if the soil doesn't drain well, you're setting yourself up for failure. Succulents are desert plants at heart—their roots just can’t handle sitting in wet, soggy ground. That’s a one-way ticket to root rot.
The good news? This is the one factor you have almost total control over. It doesn't matter if your yard is a sticky clay pit or compacted loam; you can fix it. This isn't just about digging a hole and plopping a plant in. It’s about building a little ecosystem where your succulents can truly thrive for years to come.
First, Figure Out What You're Working With
Before you can start improving your soil, you need to know what you're up against. Most garden soils have their own quirks. Heavy clay, for example, clings to water for dear life, while super sandy soil might let it rush through a little too fast.
Here’s a simple trick I use to test drainage. Dig a hole in your planting area, about a foot deep and a foot wide. Fill it with water and let it all drain out. Then, fill it up a second time and start your watch.
- Excellent Drainage: The water is gone within a few hours. You're in great shape.
- Average Drainage: It takes 4 to 6 hours. Your soil needs some help, but it's manageable.
- Poor Drainage: The water is still standing there after 8 hours or more. This means you have a serious drainage issue and will need to do some more significant work.
The foundation of any successful outdoor succulent garden lies in meticulous site preparation. For significant landscape alterations, referring to an expert guide to site preparation excavation can provide crucial insights into grading and contouring for optimal drainage.
The Perfect Soil Recipe
The goal here is simple: add grit. By mixing inorganic materials into your native soil, you create air pockets that let water flow through freely instead of suffocating the roots. You're basically trying to mimic the loose, rocky ground where these plants grow in the wild.
I've found the sweet spot is a mix that contains at least 50% inorganic material. If I'm dealing with really heavy clay, I'll even push that up to 60% or 70%. One quick tip: never just add sand to clay. It can turn into a substance that feels a lot like concrete.
Here are my go-to ingredients for a custom soil mix:
- Pumice: This is my absolute favorite. It's a porous volcanic rock that provides incredible aeration and doesn't break down or compact over time.
- Perlite: A fantastic, lightweight alternative to pumice, though I’ve noticed it sometimes likes to float to the surface after a heavy rain.
- Coarse Sand: Make sure you're using construction-grade sand, not the fine stuff from a playground. This really helps break up dense soil.
When you’re ready to amend a planting bed, spread a 3-4 inch layer of these materials right on top. Then, just work them into the top 8-12 inches of soil with a good shovel or a tiller. For a deeper dive into creating the perfect blend from scratch, we have a complete guide on the ideal cactus and succulent soil mix.
Choosing the Ideal Planting Location
Soil is key, but the physical spot you choose is just as important. Take a day to just watch your yard and see where the sun hits and for how long. Most succulents need at least six hours of direct sun to be happy. But be careful—in really hot climates, that brutal afternoon sun can be a killer. An east-facing spot that gets plenty of morning light but is shaded in the afternoon is often the perfect compromise.
Also, take a look at the lay of your land. A gentle slope is a succulent's best friend because gravity does the hard work of pulling water away from the roots. Flat areas can be tricky, especially if you have heavy soil.
But don't despair if you're stuck with a flat, boggy spot. You can easily create raised mounds or berms. Just build up the planting area 6-12 inches above the ground level. This simple technique lifts the root ball up and out of the danger zone, keeping it dry even after a downpour. It's a game-changer for guaranteeing your plants a healthy, rot-free life.
Putting Down Roots: The Art of Planting and Establishment
You've done the hard work of prepping your site and picking the perfect plants. Now comes the best part: getting those succulents in the ground. This is where your garden vision truly starts taking shape, but it pays to be patient here. Rushing the planting process can stress your new plants, so taking a little extra care now ensures they get the best possible start.
Think of this as more than just digging a hole; you're introducing a living thing to its new, permanent home. The steps we covered earlier—site selection, drainage testing, and amending the soil—are the critical foundation.
As you can see, a successful planting day really starts weeks before you even pick up a shovel.
Don't Skip Acclimation
One of the quickest ways to damage a beautiful new succulent is to move it directly from a sheltered nursery into the blazing afternoon sun. The result is sunburn—ugly white or brown patches on the leaves that can permanently scar the plant. To prevent this shock, you have to acclimate, or "harden off," your new arrivals.
It’s a simple but non-negotiable step.
Start by finding a spot for your new plants that gets some gentle morning light but is protected from intense afternoon sun. Over the next one to two weeks, gradually move them into more direct sunlight, adding an hour or two every few days. This slow and steady process gives the plant's cells time to adjust to the increased UV exposure, making for a much smoother transition.
The Planting Process, Step by Step
Once your succulents have adjusted to the outdoor climate, it's time to plant. Getting the technique right at this stage encourages strong root growth and minimizes transplant shock.
-
Digging the Right-Sized Hole: You want a hole that's slightly wider than the root ball but just as deep. A common mistake is digging too deep. If you do, the plant can settle over time, sinking below the soil line where water will pool around its base and invite crown rot.
-
Handling the Roots: Gently slide the succulent out of its nursery pot. If the roots are a tangled, dense mat (a classic case of being root-bound), take a moment to gently tease them apart with your fingers. This small action signals the roots to grow outward into their new home rather than continuing to strangle themselves.
-
Giving Them Room to Grow: It’s so tempting to plant everything close together for that instant, lush look. Resist the urge! Overcrowding cuts down on air circulation and can create a perfect environment for fungal diseases. Always check the mature size of your plants and space them out. A good rule of thumb is to leave at least half of the plant's future diameter as empty space around it. For instance, an Agave that will grow to be two feet wide should be planted at least one foot from its neighbors.
The First Few Weeks Are Everything
After setting the plant in the hole, backfill with your gritty soil mix, firming it gently around the base. The top of the root ball should be level with or even a tiny bit above the surrounding soil, especially if you get a lot of rain.
Here's a pro tip that sounds wrong but is absolutely critical: Wait a few days before you water. Any roots that were bruised or broken during planting need time to heal over. Watering right away can introduce rot-causing bacteria to those fresh wounds.
After waiting three to five days, give your newly planted succulents a deep, thorough soaking. This helps settle the soil and gets rid of any air pockets around the roots. For the next several weeks, keep a close eye on them. Let the soil dry out completely between waterings. This is the establishment period, when the roots are branching out in search of moisture, building the foundation for a tough, drought-tolerant plant. You'll know they're happily settled when you spot the first signs of new growth.
Long-Term Care for a Thriving Succulent Garden
Alright, your succulents are in the ground. Now the real fun begins—watching them grow. This next phase is all about shifting from planting to nurturing. The great thing about outdoor succulents is their rugged independence, but "low-maintenance" isn't the same as "no-maintenance."
Think of it as building a relationship with your garden. You'll soon learn to read your plants' subtle cues, like the difference between a thirsty droop and a plant just relaxing in the sun. Mastering these simple routines is what will make your garden truly spectacular year after year.
The Truth About Watering Outdoor Succulents
Let’s bust a common myth right away: succulents are not "no-water" plants. Yes, they are incredibly drought-tolerant, but they aren’t invincible. Giving them the right amount of water at the right time is probably the single most important thing you can do for their long-term health, especially during that first year of establishment.
The principle is simple: water deeply, but infrequently.
When it's time to water, don't be shy. Give the soil a thorough soaking until you're confident the moisture has penetrated at least six to eight inches down. This encourages the roots to grow deep, creating a much more resilient plant that can handle dry spells.
After that deep soak, the most crucial step is to let the soil completely dry out. This "drought" period is just as vital as the water itself, as it prevents the roots from sitting in damp soil—the number one cause of rot. How often you do this depends entirely on your climate. A garden in Phoenix might need a drink every 10-14 days in the summer, while one in a milder coastal area could easily go three weeks or more.
Your best watering tool is your own finger. Seriously. Stick it a couple of inches into the soil near the plant's base. If you feel any moisture at all, hold off for a few more days. If it's bone dry, it's time to water.
For a deeper dive into watering methods for all kinds of succulents, our guide on how to water succulent plants has you covered.
Feeding Your Succulents (Sparingly!)
When it comes to fertilizer, the golden rule for succulents is less is more. These plants evolved in soils that aren't rich in nutrients, so over-fertilizing is a common mistake. Too much food can cause weak, stretched-out growth that's a magnet for pests and disease.
That said, a little boost during the active growing season (usually spring and summer) can really make their colors pop and encourage beautiful blooms. Just be sure to hold off during their winter dormancy.
Here’s a practical way to approach it:
- Pick the Right Stuff: Look for a balanced liquid fertilizer made specifically for cacti and succulents. It will have the lower nitrogen content they prefer.
- Dilute, Dilute, Dilute: This is key. Always mix the fertilizer to half or even a quarter of the strength recommended on the bottle. It's a gentle snack, not a full meal.
- Time It Right: Feed them once in the spring as new growth starts to show, and maybe once more in the middle of summer. For most, that’s plenty for the entire year.
Practical Pruning for Health and Shape
Pruning a succulent garden isn't a major chore. It's more about light housekeeping to keep your plants healthy and looking sharp.
The most common task is simply removing spent flower stalks once the show is over. Just snip the stalk off as close to the base as you can without nicking any leaves. This tidies things up and, more importantly, tells the plant to put its energy back into growing strong roots and leaves instead of making seeds.
You'll also want to keep an eye out for any leaves that are dried, damaged, or looking a bit mushy. Trimming these off promptly improves air circulation around the plant's base, which is a great way to prevent fungal problems. A clean pair of pruning shears or even a sharp knife will do the trick. These simple tasks are what truly elevate a patch of plants into a beautiful, thriving garden.
Shielding Your Garden from Weather Extremes
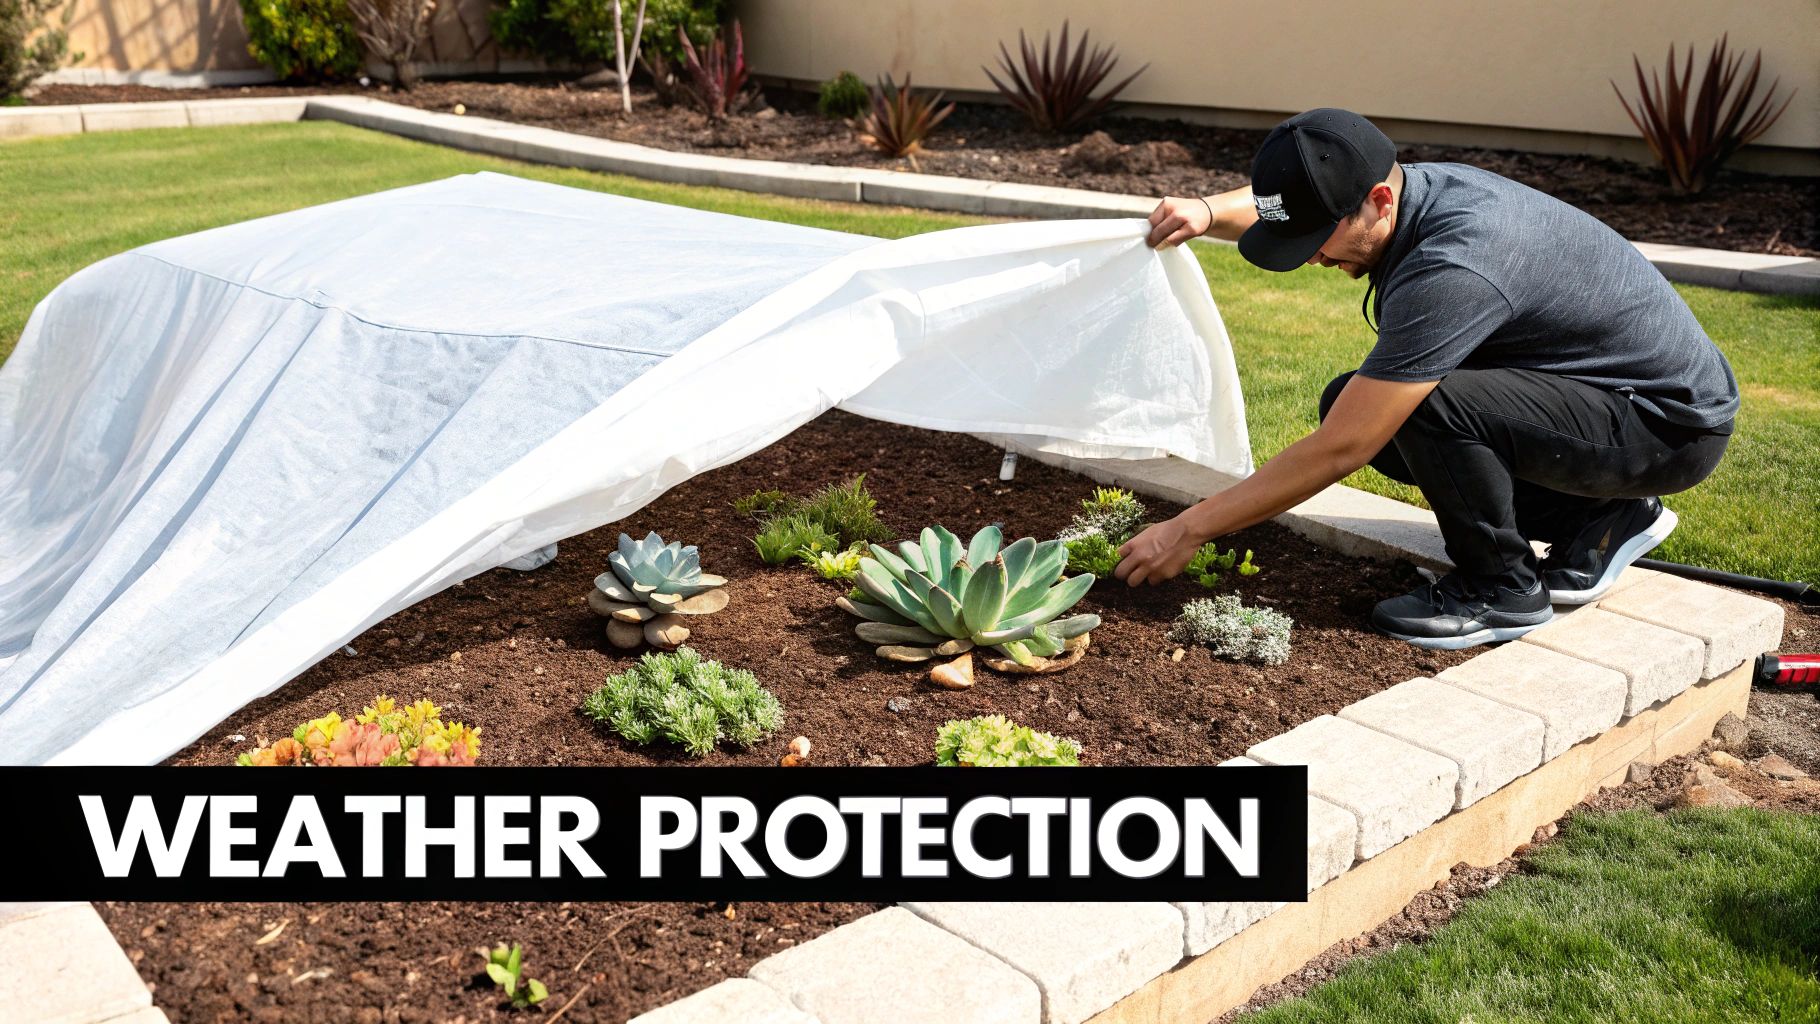
Even the toughest succulents appreciate a little help when the weather gets wild. Whether you're dealing with a surprise frost or a brutal summer heatwave, a bit of prep work is the key to keeping your outdoor succulent garden looking its best.
For those of us gardening in areas that see freezing temperatures, frost protection is an absolute must. That first dip below 32°F can be a death sentence for soft succulents like Echeveria and Aeonium. Their water-filled cells freeze and expand, turning a beautiful plant into mush overnight. The trick is to be ready before the cold snap hits.
Keeping Your Plants Safe from Frost
When you see a frost warning in the forecast, the goal is simple: trap the ground's warmth and keep the cold air off the leaves. Acting fast is what separates a healthy plant from a sad, frozen one.
Here are a few methods I rely on year after year:
- Frost Cloths: This is the best tool for the job, hands down. These fabrics are lightweight and breathable, made specifically for this purpose. Drape them over your plants before the sun goes down, but try to keep the fabric from touching the leaves directly. I use simple stakes or frames to create a small tent.
- A Thick Layer of Mulch: Spreading a generous layer of straw or dry leaves around the base of your plants helps insulate the soil. This can protect the root system from a hard freeze, even if the top growth gets a little nipped.
A common mistake I see is people throwing a plastic tarp over their plants. Don't do it! Plastic traps moisture against the leaves, which then freezes and does even more damage. If you're in a pinch, an old bedsheet is a much better option than plastic.
Getting Through Summer Heatwaves
On the flip side, intense heat can be just as rough on your succulents, causing nasty sunburn and stress. When the thermometer starts pushing past 90°F for days on end, even the most sun-loving plants can start to struggle.
The best defense is a good offense. I recommend investing in a shade cloth that provides 30% to 50% light reduction. You can easily drape it over the most exposed parts of your garden during the scorching afternoon hours.
Another pro tip: make sure your plants are well-watered before a heatwave is predicted. A succulent that is already hydrated can handle heat stress far better than one that’s going into it thirsty.
Got Questions? We've Got Answers
Even the most seasoned gardeners run into questions when starting a new project, and outdoor succulents are no exception. Let's tackle some of the most common queries I hear from folks just getting started. Getting these right from the beginning makes all the difference.
"How Often Should I Really Be Watering These Things?"
This is, without a doubt, the number one question. It's tempting to look for a simple "water every X days" answer, but with succulents, it's all about observation, not a rigid schedule.
The golden rule for outdoor succulents is to water deeply but infrequently. You need to let the soil dry out completely, and I mean a good few inches down, before you even think about grabbing the hose again. Sticking to this one principle is your absolute best defense against root rot.
"Can I Move My Indoor Succulents Outside?"
Absolutely, but you can't just toss them into the bright sun. An indoor plant moved directly outdoors will get a nasty sunburn, fast. The trick is to "harden them off" by gradually introducing them to the new environment over a period of one to two weeks. Start with a shady spot, then slowly increase their daily sun exposure.
"Which Succulents Are Easiest for Beginners?"
It's always smart to start with a few forgiving plants to build your confidence. You really can't go wrong with these tough-as-nails varieties:
- Sempervivum ('Hens and Chicks'): These are incredibly resilient and will spread to form a beautiful, dense mat. They handle cold and a bit of neglect like champs.
- Sedum ('Stonecrop'): A huge family of plants with everything from low-growing groundcovers to taller, more upright varieties. They're all famously durable.
If you live in a warmer, frost-free area (think USDA Zone 9+), classics like Aloe vera and many kinds of Agave are fantastic, low-maintenance choices that give you that instant, dramatic, architectural look.
Ready to dig in and create your own stunning succulent garden? The Cactus Outlet has an incredible selection of hardy and unique succulents perfect for any outdoor project. You can explore our full collection at https://www.cactusoutlet.com and find the perfect plants to bring your garden vision to life.