

The popular advice for firestick plant propagation is wrong in the way that matters most. "Take any cutting, let it dry, stick it in soil" skips the decision that controls drying time, planting depth, watering risk, and whether you'll end up with a tidy patio plant or an awkward hedge stem rotting in a pot. Cutting length isn't a detail. It's the method. Pick the plant you want first, then cut to match it, and treat the latex as a hazard before a blade ever touches the stem.
Choose a Cutting Length for the Plant You Want
Choose the finished plant before you cut. A short piece suits a patio pot, while a longer branch takes more room and needs different support. The University of Arizona taxon page notes that stem cuttings root readily; it also describes seed propagation as difficult because seeds are hard to obtain and have low germination rates.
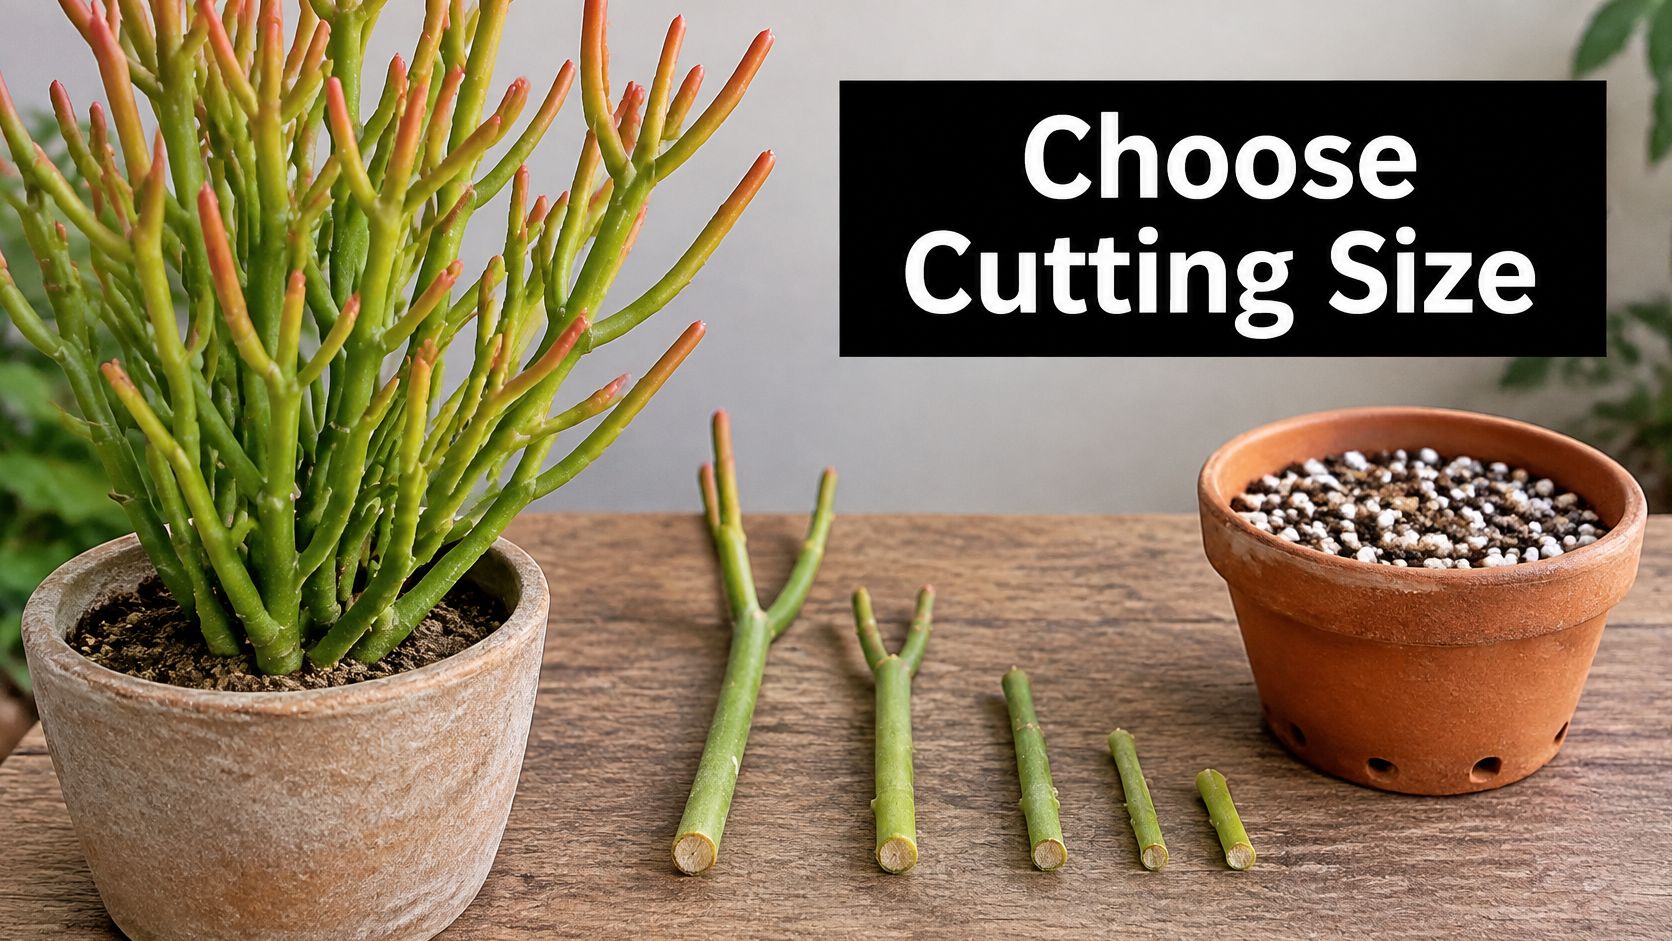
Ornamental cuttings are usually kept short, around 10 cm, while hedge material can run much longer, up to about 1 m. The table gives practical size choices by goal. Match the drying and planting approach to the piece you choose.
Firestick Cutting Size by Goal
| Goal | Cutting length | Dry the cut | How deep to set it | What to expect |
|---|---|---|---|---|
| Patio or windowsill start | 10-15 cm | At least 24 hours; longer if thick or humid | Shallow, only enough to stand | Slow establishment; not a screen within months |
| Fuller container plant | 15-30 cm branched piece | Until the end is sealed and dry | Shallow; most of the stem stays above the mix | Slower start than a short cutting |
| Hedge or field screen | 35-40 cm; hedge material up to about 1 m | Dry the cut end before planting | Shallow trench in coarse, draining soil | Landscape stock, not a neat pot plant |
| Seed | Not applicable | Not applicable | Not applicable | Low germination; cuttings are the usual method |
For a patio start, a 10-15 cm piece is easier to dry evenly, support in a small pot, and inspect if the base softens. A fuller container plant benefits from a longer, preferably branched piece, but it takes longer to establish and still needs shallow planting.
Long branches suit outdoor planting better than decorative pots. Set them in a shallow trench or coarse, draining soil; avoid ground that stays waterlogged after rain. Burying a long stem to hold it upright keeps unrooted tissue wet and raises the risk of rot.
Where Each Size Fails
- Too short: A tiny tip can shrivel before it makes roots, especially in heat and moving air.
- Planted fresh: A wet, tacky cut end sitting in mix is an invitation to rot, whatever the length.
- Too large for the pot: A meter stem buried deep to stop it toppling stays wet at the base and often fails from the bottom up.
- Wrong timeline: Early growth is slow, then speeds up after establishment, so don't judge a cutting by its first quiet weeks.
Practical rule: Name the finished use first: patio pot, fuller container, or hedge.
Drying time depends on the cutting and its conditions. A thin tip in warm, dry air may seal quickly; a thick stem in a humid room can take longer. Plant when the cut end is dry and sealed, rather than relying on the clock alone.
Seed is a poor backup for home propagation because availability and germination work against it. If you are weighing a small cutting against buying a plant with established form, check current Euphorbia listings at The Cactus Outlet. A rooted cutting still needs time to develop into a larger specimen.
Protect Skin and Eyes Before You Cut
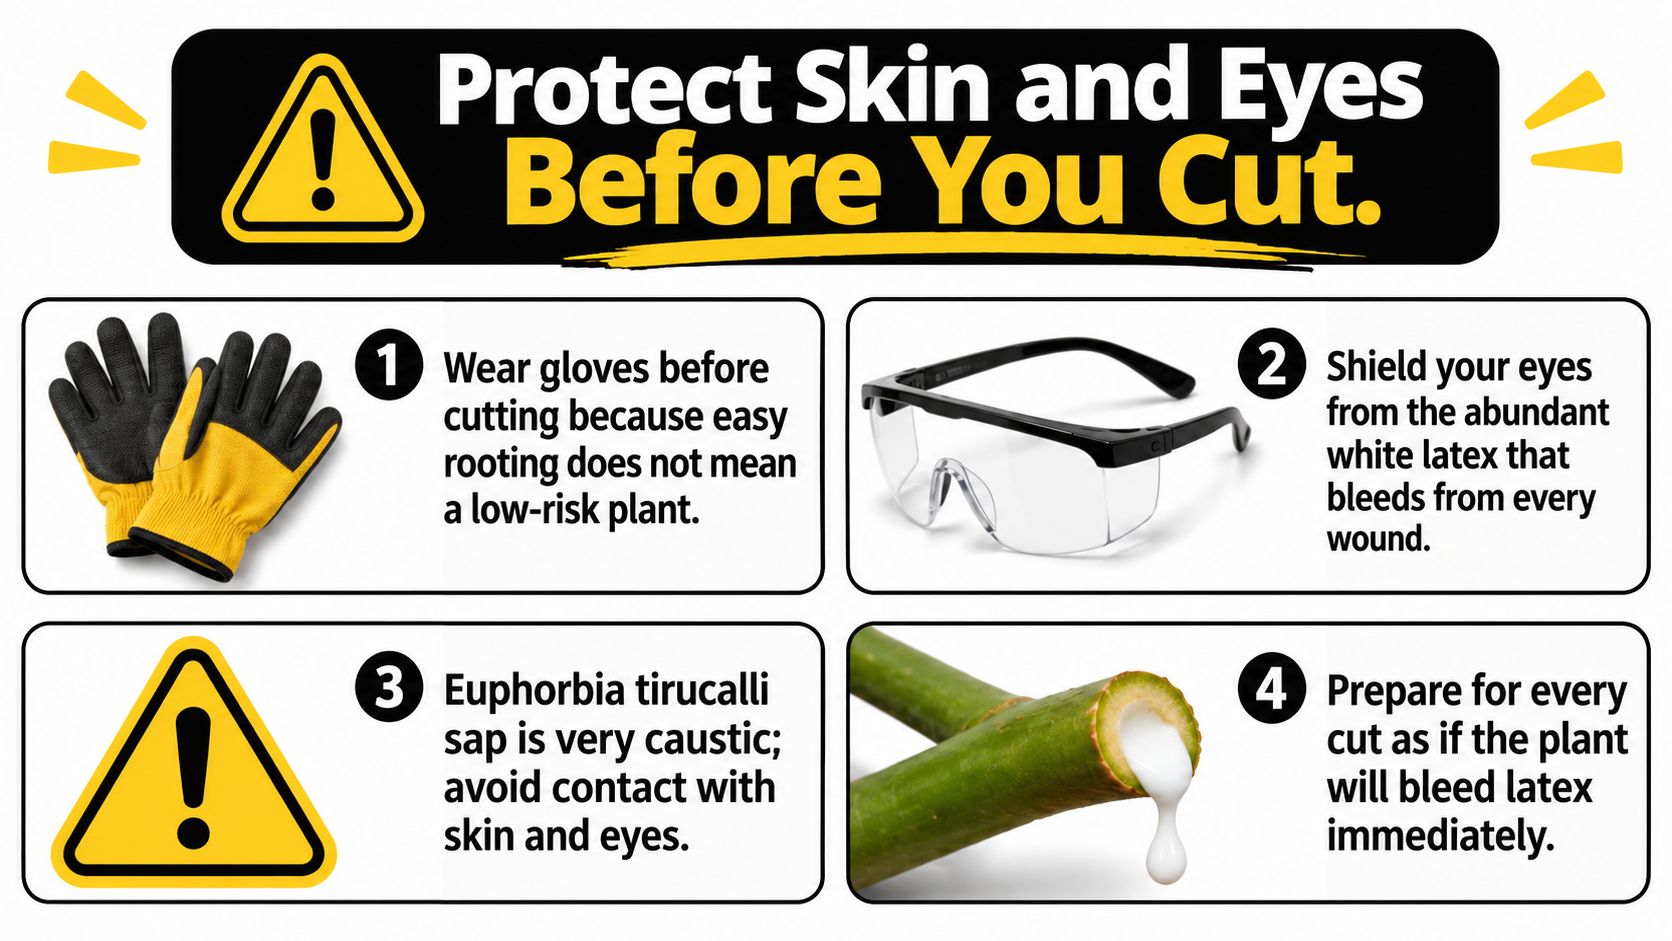
Easy to root doesn't mean low risk to handle. Every wound on Euphorbia tirucalli bleeds abundant white latex, and firestick plant propagation creates fresh wounds on purpose, first on the parent plant and again if you have to recut a rotted base. North Carolina State Extension's pencil tree page identifies the sap as very caustic and recommends gloves, keeping the plant away from children and pets, and seeking immediate medical attention after ingestion or eye exposure.
Treat that warning as a procedure, not a footnote. Work outdoors or in a ventilated space, never over a kitchen counter or near food. Put children and pets out of the area before you start, and keep them away from drying cuttings afterward.
Gear to Gather First
- Cutting tool: A sharp, clean blade or pruners that won't crush the stem.
- Hand and eye protection: Chemical-resistant gloves and sealed eye protection, plus long sleeves and closed shoes.
- Containment: Disposable paper to catch drips, and a labeled spot where cuttings can dry undisturbed.
- Planting supplies: A pot with a drainage hole and a gritty mineral mix, kept separate from food-prep tools.
Lay the branch on disposable paper and let latex drip there, not onto a bench you'll touch barehanded later. Wipe the blade, then wash it, and don't use unwashed pruners on food plants. Label or segregate drying pieces so nobody picks one up thinking it's a harmless stick.
For a fuller account of the hazard before you handle a large plant, read the guide to whether firestick plant is toxic. It's relevant to placement too, not just cutting, particularly near paths, play areas, and pets.
Latex Exposure Responses
| Exposure | Do immediately | Medical care |
|---|---|---|
| Skin | Wash with soap and water; wash clothes and gloves | If irritation is severe or spreading |
| Eyes | Do not rub; avoid further contact | Urgent care; ocular latex exposure is an emergency |
| Mouth or ingestion | Do not wait out blistering of lips or mouth | Immediate medical attention |
| Child or pet contact | Separate them from plant, sap, and cuttings | Contact a clinician or veterinarian if exposure is suspected |
Don't rub your eyes with a gloved hand that's been handling cut stems. That single habit defeats the gloves. If latex reaches skin, washing promptly matters, and contaminated gloves or clothing shouldn't sit in a laundry basket for someone else to handle unaware.
No rooting step starts until you're protected and the wound is isolated.
Eye exposure or ingestion isn't a wait-and-see situation, and a home rinse isn't the whole response. Get urgent care. I'd rather see a grower delay a cutting by a day to buy proper eye protection than treat goggles as optional because the stem looks dry.
How to Root a Firestick Cutting
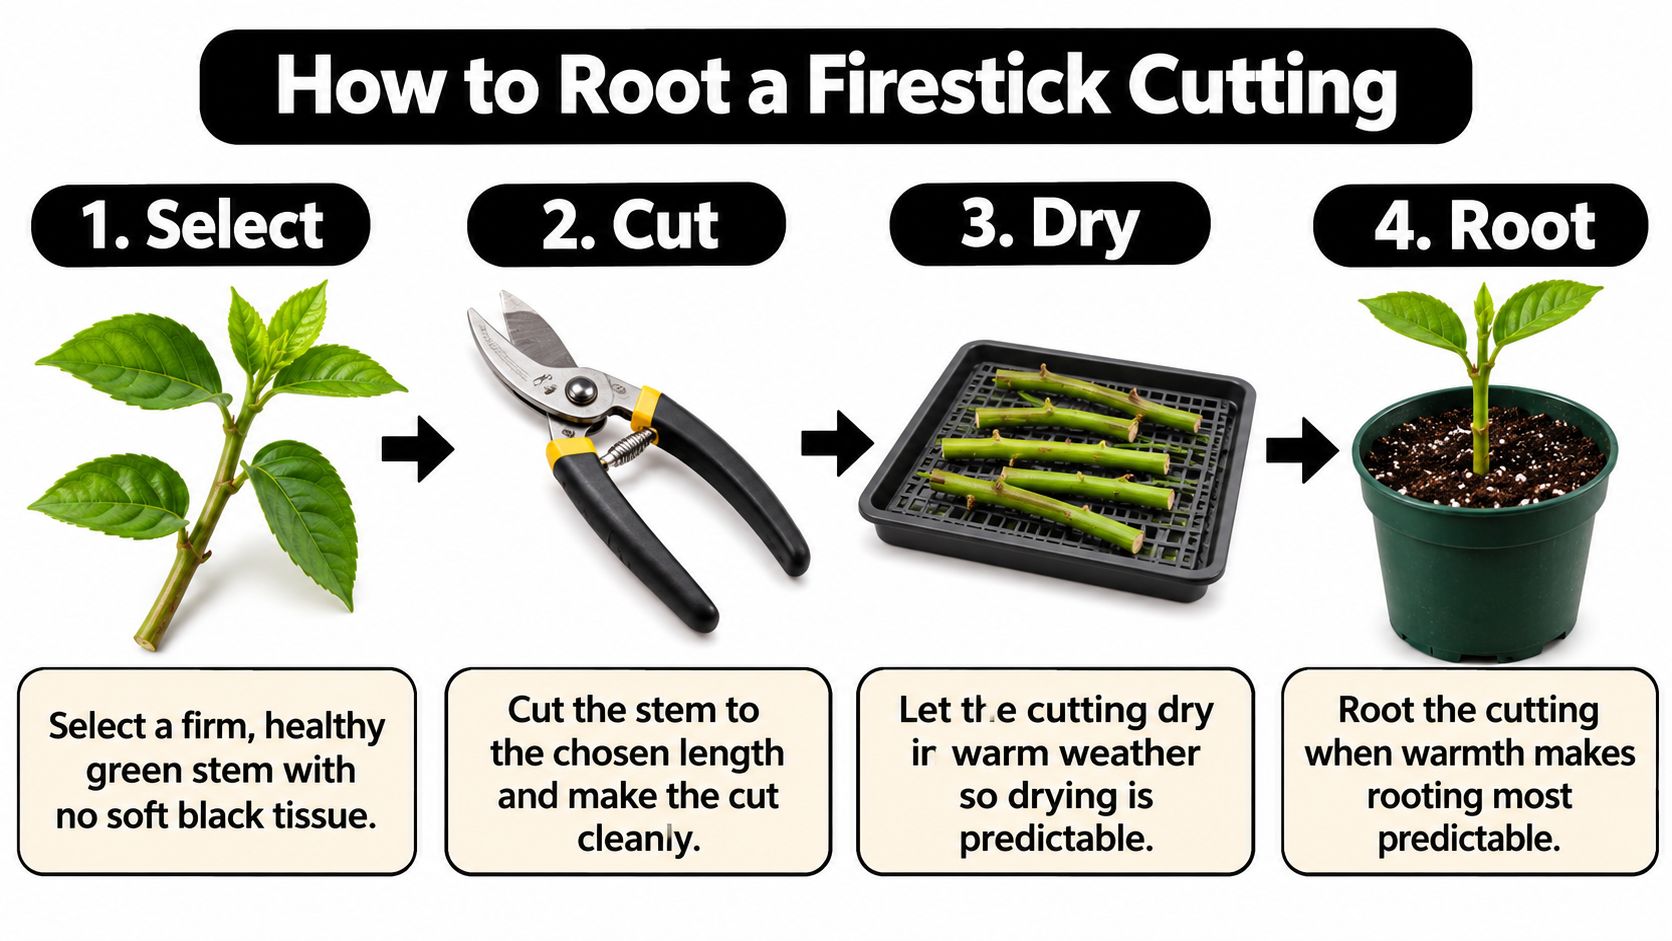
Do this work in warm weather if you can choose the timing. Warmth makes drying more predictable and rooting less sluggish, while a cold, damp spell leaves a fresh wound sitting around with nothing good happening. The controlled 2013 botanical study used healthy cuttings measuring 10–15 cm, planted in 436 cm³ pots containing a clay-loam-to-sand mixture at a 2:1 ratio. Use that as a size and drainage benchmark for small starts, not as a promise that every home setup will behave like a greenhouse.
The Procedure in Order
- Select the stem: Choose a firm, healthy green stem with no soft, black, or collapsing tissue, and confirm it matches the length you chose for your goal.
- Cut cleanly: Wearing gloves and eye protection, cut with a clean blade in one deliberate motion rather than sawing or tearing.
- Contain the latex: Lay the piece on disposable paper so sap drips there, away from household surfaces and soil you'll reuse.
- Dry the wound: Set the cutting in a dry, shaded, airy place for at least 24 hours, and longer for thick stems, humid rooms, or cool weather.
- Check the end: Plant only when the cut surface is sealed and dry to the touch, not tacky.
- Pot it shallowly: Fill a draining pot with sharply draining mineral mix and insert only the dried end, deep enough to stand.
- Set the conditions: Give it bright indirect light, warmth, and airflow, and skip any sealed humidity dome.
- Wait to water: Hold off until the end has callused, then water by drying speed rather than by habit.
Step 4 is the one people rush, and it's the step tied directly to the most common failure. A tacky end planted early sits in contact with moist mix before it has sealed, and rot gets a head start that roots can't outrun. If you're unsure whether it's ready, wait another day. A cutting tolerates extra dry time far better than it tolerates a wet wound.
Rooting hormone is optional. I wouldn't buy it specifically for this plant and I wouldn't let it substitute for drying. If you already use it on other cuttings, apply it to a dried end, but understand that the callus and drainage are doing the essential work.
Mix and Depth Matter More Than Extras
Your mix should wet evenly, then release water fast. If a test watering leaves the pot heavy and soggy for days, add more coarse grit, pumice, or perlite before you plant, not after the base turns soft. The principles in this guide to cactus and succulent soil apply directly here, because a firestick cutting has no roots yet to help it cope with a dense, wet mix.
Depth is a stability decision, not a rooting trick. Burying more stem doesn't produce proportionally more roots. It puts more unrooted tissue below the surface where moisture lingers, and it hides early discoloration you need to see.
Depth test: If the cutting needs deep burial to stay upright, support it or choose a shorter piece. Don't solve a toppling problem by creating a rot problem.
For a branched container piece, a small stake or a few stones at the surface can steady it while roots form. Keep the support loose and removable. For hedge-length material, don't force this pot method at all. Plant it where it will grow, in coarse draining soil, once the end is dry.
Water and Wait Through the First Months
| Checkpoint | Typical window | Healthy sign | Change course if |
|---|---|---|---|
| Callus | At least 24 hours; longer if thick, cool, or humid | Cut end dry and sealed | End still wet or sticky |
| First roots | About 3–6 weeks in warm conditions; longer in cool conditions | Stem stays firm; later, a gentle tug meets resistance | Base softens or there are no roots after about 6 warm weeks |
| Potting on | About 4–6 weeks, once roots hold | Rooted plug drains quickly | Mix stays soggy |
| Young plant | About 2–3 months | Firm growth in a draining pot | It is being treated as a finished specimen |
Use these windows as checkpoints, not promises. Healthy Houseplants' pencil cactus guide puts first rooting at about 3–6 weeks in warm conditions. Slower plants can take longer, so a cutting in a cool winter room may need more time. Extra water will not speed it up.
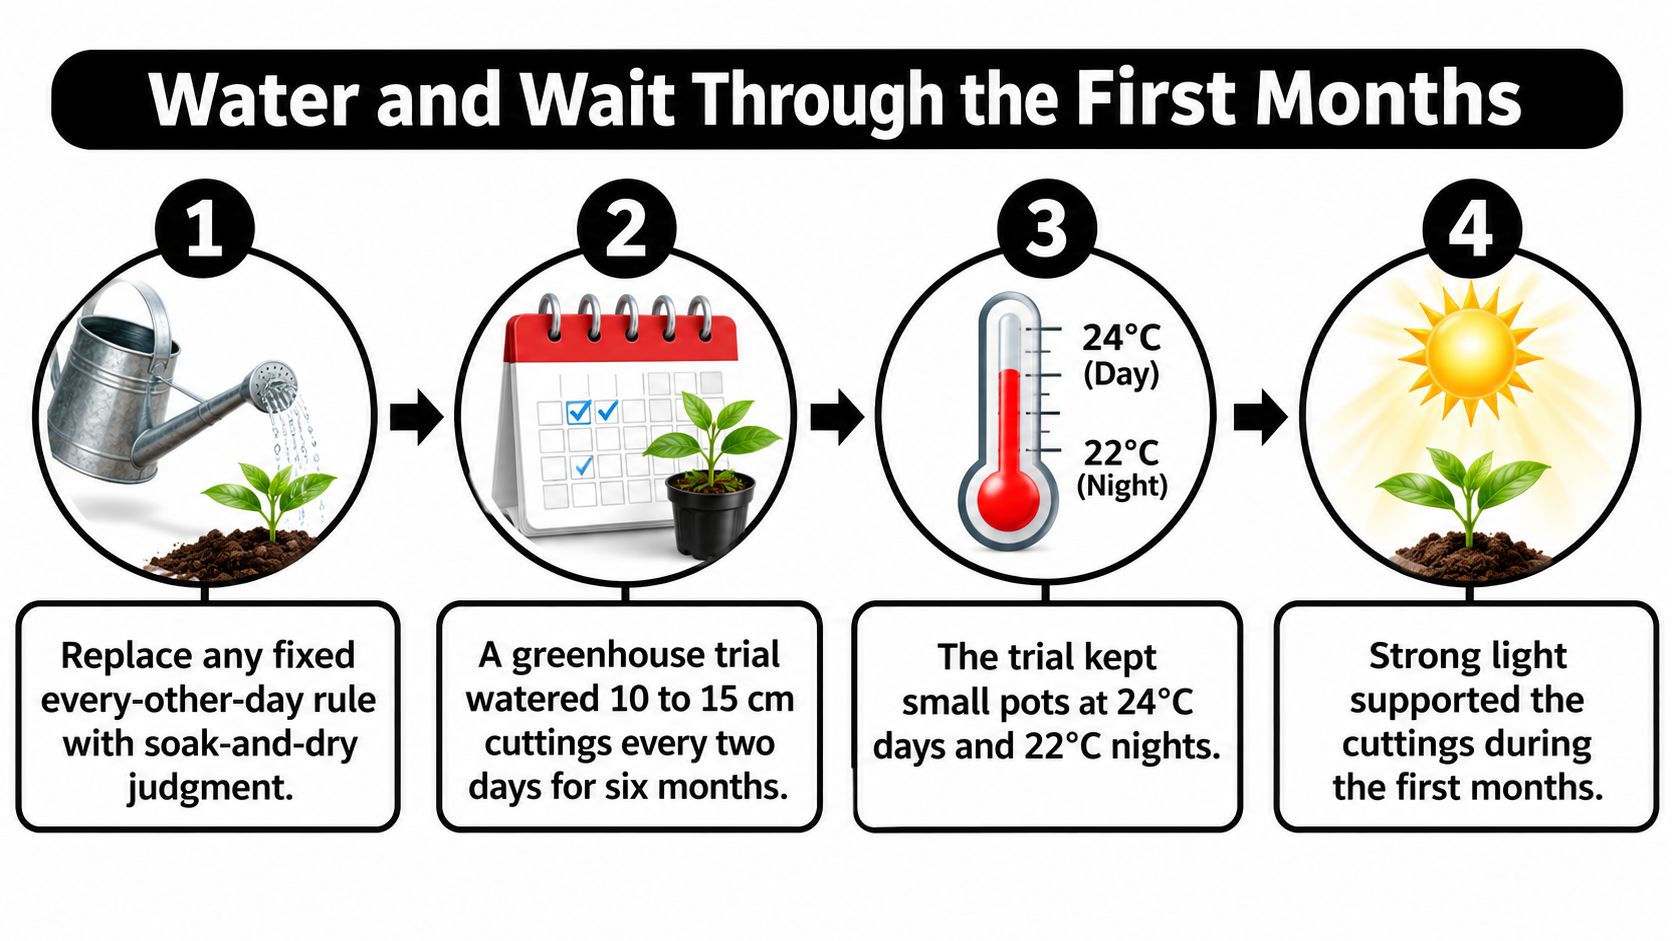
A controlled propagation study in PLOS ONE watered its 10–15 cm cuttings once every two days during six months of greenhouse cultivation at 24°C days and 22°C nights. Those conditions do not provide a home watering schedule. Pot size, room temperature, and mix change how quickly a pot dries.
Soak and Dry, Judged by the Pot
Once the cutting has callused, water thoroughly only after the mix has dried, then let the pot drain completely. A cool room, large pot, or fine mix slows drying. A small terracotta pot with gritty mix in a warm spot dries faster, so check it sooner.
Frequent small sips keep the base damp without giving developing roots a proper drink followed by air. If the pot's weight is hard to judge, lift it just after watering, then compare its weight as the mix dries. That difference is a more useful guide than a fixed schedule.
For ongoing watering, light, and placement, see the firestick plant care guide. During the first months, water more conservatively than you would for an established plant.
What to Check, and When
At two weeks, check that the stem remains firm and holds its color. Leave it in place rather than digging for roots. Later, a very gentle tug that meets resistance suggests the roots are anchoring it.
Wait to repot until roots hold the plug together, unless the mix stays soggy. Choose a slightly larger draining pot and keep the new mix similarly gritty. A large pot leaves more wet mix around a small root system.
Increase light gradually after roots appear. Start with bright indirect light, then introduce more sun in stages. A rooted cutting is still a young plant, not a mature specimen, and its new roots need time to support it.
Fix Rot, Stalls, and Shriveling on Cuttings
Diagnose from the base upward, because that's where firestick failures usually start. A black, soft, or smelly base is rot, and it typically traces back to water applied before roots existed, a cut end that wasn't fully dry, or a pot that couldn't drain. Don't fertilize it, don't bury it deeper, and don't wait for it to firm up on its own.
Unpot the cutting and inspect it with gloves and eye protection on. Cut back to firm, clean tissue with a clean blade, let the fresh wound dry fully, and restart it in a grittier mix in a draining pot. If the soft section keeps advancing faster than you can recut it, discard the piece and start again with healthy material.
Stalled Rooting
Use the longest window before you declare a stall. Healthy Houseplants' pencil cactus guide states that pencil cactus typically roots from cuttings within 3–6 weeks and establishes as a self-sufficient young plant within 2–3 months. A cutting at week three with a firm base isn't failing. It's mid-process.
If you pass about six warm weeks with no resistance to a gentle tug, change one thing. Move the cutting somewhere warmer and brighter with better airflow. If it's a long stem sulking in a pot, I'd abandon that format and start a fresh 10 to 15 cm piece instead of nursing the wrong size for another month.
Cold, dry conditions can delay rooting, so check temperature before you blame the cutting. But don't correct a stall with constant moisture. Persistent wetness loses cuttings faster than cool air does.
Shriveling and Yellowing
- Wrinkled but firm: The cutting is probably living on stored water while roots form. One light watering after callusing is enough; don't follow it with daily sips.
- Yellowing in a soggy mix: Treat it as a drainage problem. Check the hole, the mix, and how long the pot stays heavy.
- Soft and wrinkled together: Unpot and inspect the base. That combination points to rot, not thirst.
Change one variable at a time. If you move the pot, repot it, and water it on the same day, you'll never know which change helped or hurt.
If insects appear on tender new growth, isolate the plant first. Wipe them off carefully with gloved hands so you don't break stems and smear latex across healthy tissue. Deal with the pest, but don't create fresh wounds all over a cutting that's still rooting.
When you start several cuttings at once, note the cutting date, length, and when each one rooted. That simple record tells you which size performs best in your conditions, which is worth more than generic advice repeated from a different climate.
Keep the Cutting or Plant a Larger Specimen
Choose propagation when a small plant fits the goal and the wait is acceptable. A patio pot, a backup of a plant you already own, or practice with safe handling can all make a cutting worthwhile. Rooting one also shows how the plant responds to your light and how quickly your mix dries.
Transplant once roots hold the mix. Keep the plant at the same shallow depth, using a draining container or ground that does not stay waterlogged. Match the growing medium as closely as possible, then acclimate the plant to brighter light in stages. Water when the pot or soil has dried, not by the calendar.
Latex precautions apply every time you prune, move, or repot the plant. Choose a spot where children and pets cannot brush against the stems, and avoid narrow paths where a broken stem could expose passersby.
When Buying Makes More Sense
Be realistic about the timeline. A 10 to 15 cm cutting remains a young plant for months; fertilizer and frequent watering will not turn it into a multi-stem focal point this season. Hedge-length cuttings are better suited to planting in the ground than to a neat decorative pot.
If you need height, branching, or immediate impact, choose an established specimen rather than relying on more cuttings to create the same effect. The Cactus Outlet offers Euphorbia and large outdoor cactus specimens, along with columnar cacti, agaves, and aloes for dry plantings. Check current listings for availability.
The Cactus Outlet carefully packages its plants so they arrive healthy and intact. On delivery, inspect the roots and cut ends, then plant into draining soil rather than leaving the plant unpotted.
A Simple Decision Test
- Keep the cutting: You want a small plant, enjoy the process, and can wait through months of juvenile growth.
- Plant a specimen: You need height, form, or screening on a project timeline, or the cutting size you need is better suited to the ground.
- Do neither yet: You cannot provide drainage, bright light, or a placement that is safe around children and pets.
Firestick propagation is straightforward, but latex exposure and poor placement can make a cutting the wrong choice for a particular spot. Choose for the finished planting, not just the ease of taking a cutting.
If your project needs established height and form rather than months of growth from a small cutting, browse the Euphorbia, large cactus, agave, and aloe specimens at The Cactus Outlet. Choose a plant suited to the space, and have a draining pot or planting spot ready for delivery.