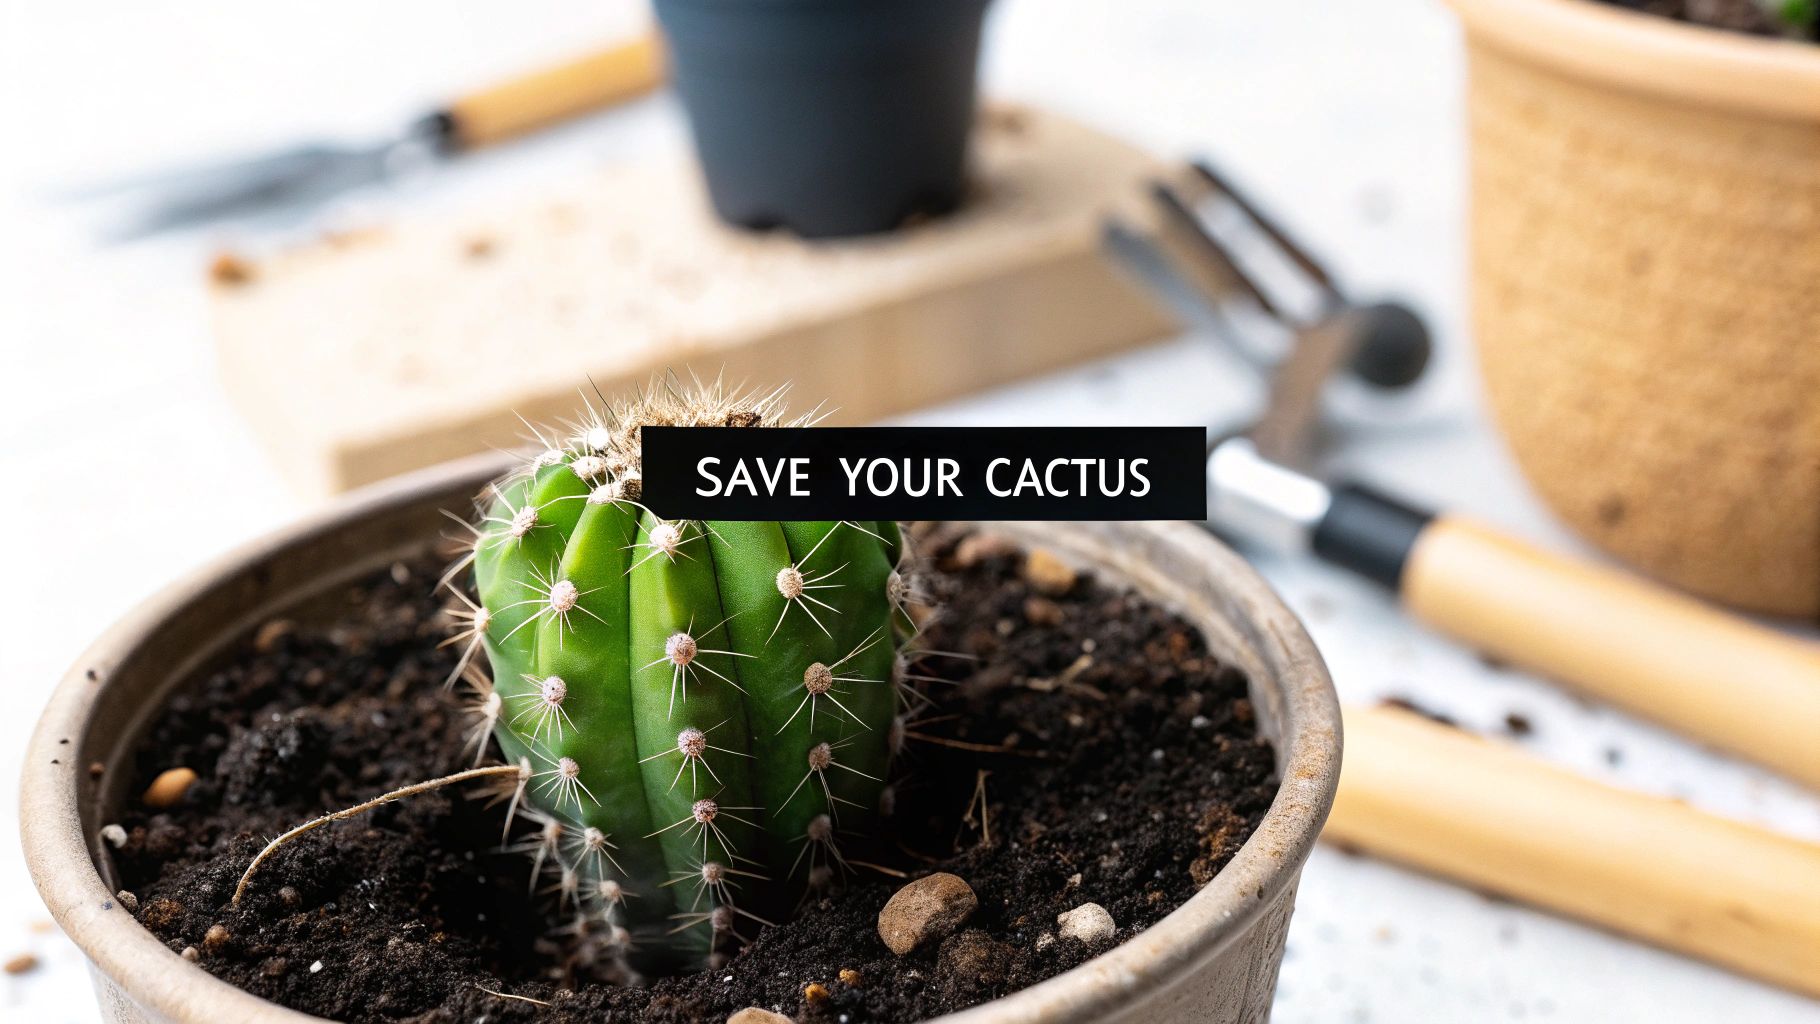

It’s a heart-sinking moment for any plant owner: you check on your cactus and discover it's turning black. But before you panic, take a deep breath. This is a common problem, and figuring out what's wrong is the first step to saving your plant.
The culprit is almost always one of three things: excess moisture, disease, or environmental stress. Your most important clue lies not just in the color, but in the feel of the blackened area.
What to Do When Your Cactus Turns Black
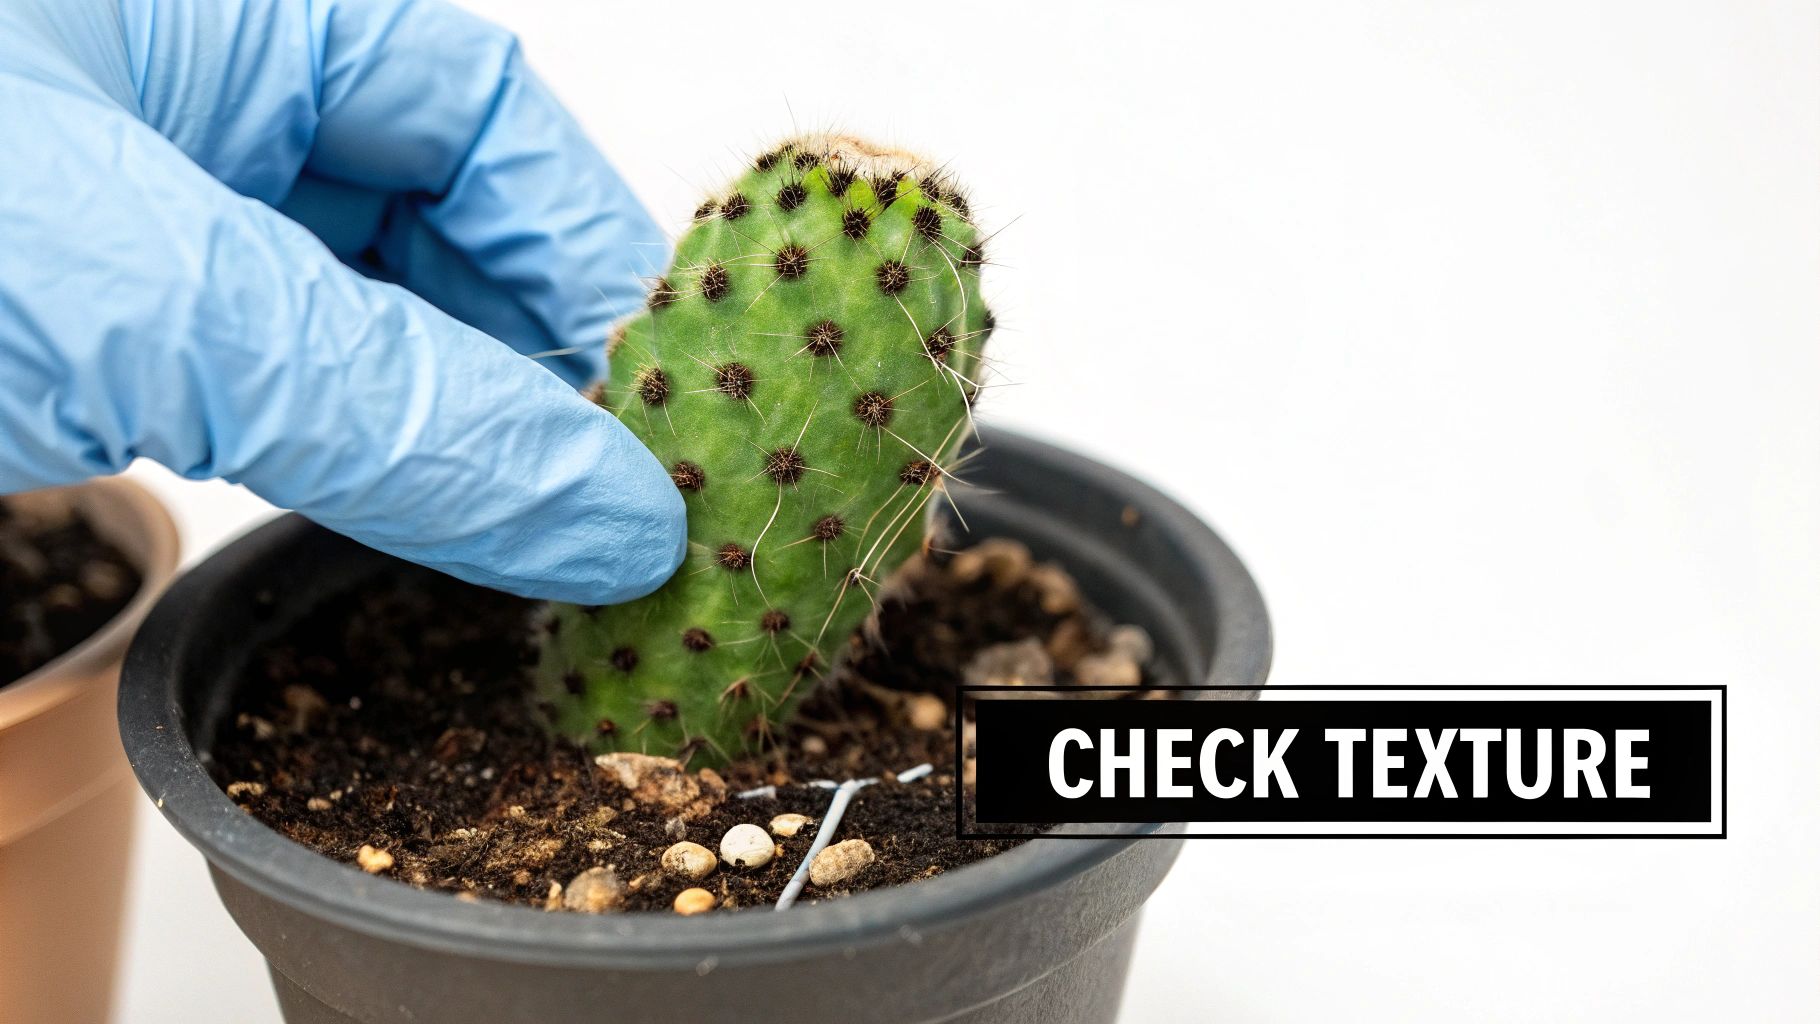
So, you've found black spots on your cactus. The first thing to do is a quick touch test. This simple action will tell you almost everything you need to know and point you toward the right solution.
Is the black area soft, mushy, or squishy? This is the classic sign of overwatering, which has likely led to root rot. If the spots are hard, dry, or crusty, you’re probably looking at an environmental issue like sunburn or frost damage. Sometimes, a fungal infection can also cause hard, scabby patches before the tissue starts to decay.
Decoding the Symptoms
Before you reach for your gardening tools, play detective for a minute. Where on the cactus is the blackening? Is it creeping up from the base, or are there random spots on the stems? If you gently wiggle the plant, does it feel loose or wobbly in its pot?
A wobbly cactus with soft black tissue at the soil line is a dead giveaway for advanced root rot, a condition that needs immediate intervention. If you're facing this worst-case scenario, our guide on how to revive a dying cactus walks you through the emergency steps.
Key Takeaway: The texture of the black area is your most reliable diagnostic tool. Soft and mushy points to water-related rot, while hard and dry suggests sunburn, frost, or certain fungal issues.

This simple decision tree confirms it: separating the problem into "soft" versus "hard" is the quickest way to find the cause and start the right treatment.
To make it even clearer, I've put together a quick reference table.
Quick Diagnosis Guide: Black Cactus Symptoms
| Symptom | Texture | Common Cause |
|---|---|---|
| Blackening at the Base | Soft, Mushy, Squishy | Overwatering / Root Rot |
| Dark Spots on the Stem | Hard, Dry, Scabby | Sunburn / Fungal Disease |
| Widespread Blackening | Soft, Watery | Frost Damage / Severe Rot |
| Black Base, Wobbly Plant | Mushy at Soil Line | Advanced Root Rot |
Keep this table handy as you examine your plant. By matching the look and feel of the black spots to the causes listed here, you'll be well on your way to a confident diagnosis.
Tackling the Number One Culprit: Root Rot
Nine times out of ten, a cactus turning black is a victim of too much love—specifically, too much water. When soil stays soggy for too long, the roots can't breathe. This creates the perfect, damp environment for fungi and bacteria to throw a party, leading to the dreaded root rot.
This is almost always the reason a cactus starts blackening from the base up. You might even notice the plant feels a bit wobbly in its pot, or catch a faint, musty smell coming from the soil. Don't dismiss these signs. They’re your cactus’s first and only cry for help.
Your First Move: Confirming the Diagnosis
To know for sure, you have to get your hands dirty and look below the soil line. It sounds a bit drastic, but checking the roots is the only way to get a clear picture of what's really going on with your plant's health.
Start by gently easing the cactus out of its pot. If the soil is soaking wet, carefully crumble it away from the root ball, trying not to break any of the healthy roots in the process. The goal here is to get a good, clean look at the entire root system.
Pro Tip: For a spiky cactus, I always grab a thick towel or a few folded-up sheets of newspaper. Wrap it around the body of the plant—this gives you a solid grip without getting a handful of needles.
Once you’ve got the roots exposed, it’s time to play detective. Healthy cactus roots should be firm, a little flexible, and typically a white or light tan color. They’re the engine of the plant, after all.
Identifying Healthy vs. Rotten Roots
The difference between healthy roots and rotted ones is usually night and day. You're on the lookout for anything that's dark brown or black, feels slimy or mushy, and might even disintegrate when you touch it. These are the classic signs of decay.
Here’s a quick breakdown of what to look for:
- Healthy Roots: Firm, strong, and white or off-white.
- Rotten Roots: Black or dark brown, soft, squishy, and sometimes they give off a funky smell.
Even if you only find a little bit of rot, you need to act fast. It can spread through the root system and into the base of the plant with alarming speed, which is why catching it early is so critical. To avoid this problem in the future, it's all about mastering the watering schedule. Our guide on watering cactus plants has some great advice on getting that balance just right. Letting it go will only allow the rot to advance, making a comeback much, much harder.
Identifying and Treating Cactus Diseases

So, you've checked the roots and they're fine, but your cactus still has black spots. What now? It’s time to play plant detective, because you might be looking at a fungal or bacterial infection.
Unlike root rot that creeps up from the soil, diseases can pop up as ugly black spots or patches anywhere on the cactus. These infections often sneak in through tiny wounds—maybe from a bump, a scratch, or even a pest taking a bite. Once they’re in, high humidity and stagnant air create the perfect breeding ground for them to take over.
Recognizing the Signs of Disease
A diseased cactus has a different look than one that's simply overwatered. The black spots often start out dry and crusty, almost like a scab, before they start to spread or sink into the plant’s tissue. You could be dealing with anthracnose, which is often called black spot disease, or a nasty case of bacterial necrosis.
Fungal infections are a real headache, especially for commercially grown cacti. These fungi release toxins that destroy the plant's cells, causing that tell-tale blackening as the tissue dies off. It’s a bigger problem than you might think; research on prickly pear plantations found that black spot disease can devastate anywhere from 10% to 60% of the plants. If you want to dive deeper, you can review the full study on black spot disease in cacti to see just how serious it can be.
Crucial First Step: The second you even think it might be a disease, get that cactus away from your other plants. Fungal spores and bacteria are notorious for spreading through the air or on your hands and tools. Don't risk your whole collection.
Creating an Action Plan for Treatment
After you’ve quarantined the patient, it's time for a little plant surgery. It sounds scary, I know, but cutting out the infection is usually the only way to stop it from spreading and killing the whole cactus.
Here’s exactly what you need to do:
- Sterilize Your Tools: Grab a sharp knife or razor blade and clean it thoroughly with isopropyl alcohol or a diluted bleach solution. You don't want to be the one introducing new germs into a fresh wound.
- Excise the Black Spot: Carefully cut away the black, diseased area. Don't just stop at the edge of the spot—be sure to remove a small ring of the healthy green tissue around it to ensure you've gotten every last infected cell.
- Check Your Work: Take a hard look at the cut. See any dark specks or discoloration left behind? You need to cut a little deeper. The exposed flesh should be clean, healthy, and uniformly green.
Once you’ve removed all the bad stuff, just let the wound air out and form a callus on its own. If you want to give it an extra layer of protection, you can dust the open cut with a little sulfur powder, which is a great natural fungicide. A quick, decisive snip is often all it takes to give your cactus a fighting chance at a full recovery.
Reading the Room: Is Your Cactus Stressed by Its Environment?
Not every black spot on your cactus is a death sentence from disease or rot. Sometimes, the plant is just telling you it's unhappy with its living conditions. These environmental stressors can look pretty alarming, but the good news is they're often much easier to fix than a deep-seated infection.
Think about it—your cactus is a tough little desert dweller, but it's not invincible. A sudden, drastic change in its world can put it into shock, and that shock shows up as physical damage. The trick is learning to read the signs and make a few simple adjustments.
Sunburn or Frostbite?
One of the easiest mistakes to make is moving a cactus from a shady indoor corner straight into the blazing afternoon sun. Just like us, cacti can get a nasty sunburn. You'll see it as dry, tough, and blackened areas, or sometimes it can look pale and bleached. These spots are basically scars; they won't go green again, but the damage won't spread once you move the plant to a more suitable spot.
The flip side of that coin is frost damage. If your cactus gets caught in a freeze, the water inside its cells expands and ruptures the cell walls. The result is soft, mushy, black tissue that can look a lot like rot. The giveaway is usually the location—frost damage tends to show up on the most exposed parts of the plant, while rot often creeps up from the base.
A Little Pro Tip: To avoid sunburn, you have to acclimate your cactus. Think of it like easing into a hot bath. Start it off with just an hour of direct morning sun, then slowly increase the exposure over a couple of weeks. This gives the plant time to toughen up.
When Bumps and Bruises Are to Blame
Accidents happen. Maybe the cat knocked it over, or you scraped it during repotting. These kinds of physical injuries can create wounds that turn black or dark brown as they scab over and heal. It’s the plant's version of a callus.
A simple, dry scar is nothing to worry about. The real danger is when that open wound becomes an invitation for bacteria and fungi to move in. A minor scrape that starts to feel soft and spread is a huge red flag that an infection is taking hold.
Here's how to tell what you're looking at:
- A Healing Scar: The black spot will feel hard, dry to the touch, and won't get any bigger.
- An Infection Brewing: The area will be soft or mushy, and you'll notice it slowly expanding day by day.
Catching these environmental problems early is key. A simple change of location or a more careful handling routine can prevent these issues from ever becoming a serious threat, keeping your cactus healthy and thriving for the long haul.
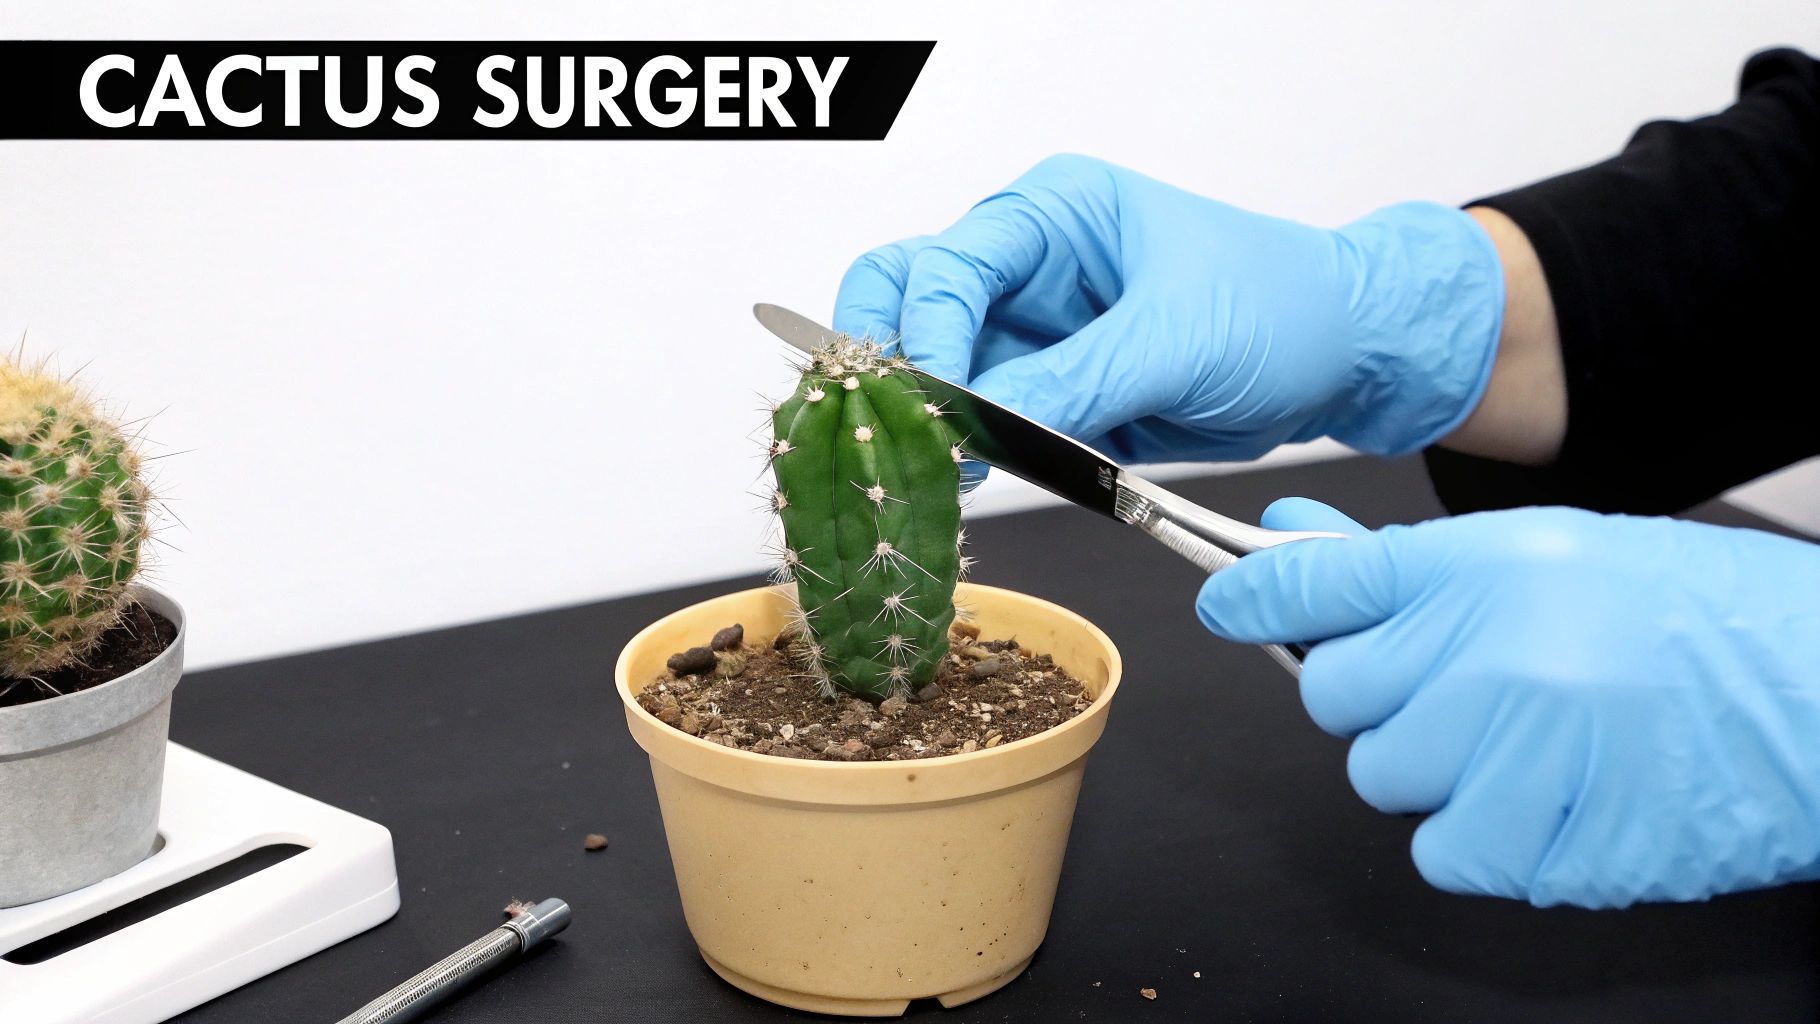
A Practical Guide to Cactus Surgery and Recovery
When you see black spreading on your cactus, especially if it’s soft and mushy, it’s time to play surgeon. Think of it less as gardening and more as a life-saving operation. Acting decisively is the only way to give your plant a fighting chance.
First things first, get your operating room ready. You’ll need a clean, sharp knife (a razor blade works well too), some rubbing alcohol to keep it sterile, a new pot, and fresh, dry, fast-draining cactus mix. Whatever you do, don't reuse the old soil—it’s likely a breeding ground for the exact problem you’re trying to fix.
Performing the Amputation
Ease the cactus out of its pot. I usually wrap a thick towel or a few layers of newspaper around the spiny parts to save my hands. Once it's out, gently knock off all the old soil so you can get a good, clear look at the roots and the base.
Now, take a deep breath. With your sterilized blade, you need to cut away every single bit of black, mushy, or discolored tissue. This is not the time to be hesitant. Keep slicing until you see nothing but healthy, vibrant, green flesh. If there are any dark spots or strange streaks left, you haven't cut far enough.
Crucial Tip: Sterilize your blade with rubbing alcohol after every single cut. This is so important. If you don't, you risk smearing fungal spores or bacteria from the sick part right into the healthy tissue you’re trying to save.
This step is make-or-break, particularly with nasty bacterial infections that can turn a cactus to goo in no time. For instance, bacterial necrosis in saguaros often starts from a small injury and spreads fast. One study found that after a major freeze, 64% of younger saguaros died from these kinds of infections within a year. It just goes to show how quickly things can go south. You can learn more about the impact of bacterial necrosis on cacti to really understand why clean, aggressive cuts are non-negotiable.
The Healing and Repotting Process
Once the surgery is over, the hardest part begins: waiting. You absolutely cannot stick that freshly cut cactus back into soil. The open wound needs time to dry out and form a hard, protective callus.
Set the cactus cutting somewhere dry and shady with good air circulation. Depending on the size of the cut, this could take a few days or even a week or more. You'll know it's ready when the cut surface is dry to the touch, firm, and looks like a scar. Planting it before it’s callused is a surefire way to invite rot all over again.
After a solid callus has formed, it’s time to give your cactus its new home.
- Pick a New Pot: Grab a container with great drainage holes that’s just a little bit bigger than the cactus's base or remaining roots.
- Get Fresh Soil: Fill the pot with a completely new, bone-dry, gritty cactus soil mix.
- Settle It In: Gently place the callused end into the soil, just deep enough so it stands up on its own. If it’s a bit wobbly, you can use a few small rocks or bamboo stakes to prop it up.
And now for the final test of your patience: do not water it. Let it sit dry for at least one to two weeks. This gives any small roots that might have been damaged time to heal, so they don’t become a new entry point for rot. For a more detailed walkthrough of this part, our complete guide on how to repot cacti correctly has you covered.
Building a Rot-Proof Cactus Care Routine
The best fix for a blackening cactus is to never let it happen in the first place. A proactive approach is always your strongest defense, helping you raise a resilient plant that can naturally fight off the very issues that cause black spots and rot. It all starts with the soil.
Think of your cactus pot as a miniature desert. The soil needs to be gritty and exceptionally well-draining, letting water rush through instead of hanging around and suffocating the roots. Standard potting mix is a death sentence; it holds way too much moisture and is probably the #1 cause of root rot I see.
Mastering the Art of Watering
If you learn one skill, make it knowing when to water. Forget rigid schedules like "once a week." Instead, live by the 'soak and dry' method. This is simple: you drench the soil completely until water pours from the drainage holes, and then you don't even think about watering again until the soil is bone-dry all the way through.
Not sure if it's dry enough? There's an easy trick. Stick a wooden skewer or chopstick deep into the pot. If it comes out with even a hint of moisture or a crumb of damp soil clinging to it, walk away. It’s not time yet. This one test takes all the guesswork out of the equation.
A thirsty cactus is a happy cactus. Trust me, it's far easier to fix a cactus that's a little too dry than it is to save one from the devastating damage caused by just one or two overwatering sessions.
Sunlight and Airflow: Your Best Allies
Sunlight and fresh air are your secret weapons against the nasty fungal and bacterial diseases that lead to blackening. Cacti are sun-worshippers; they need plenty of bright light to stay strong and healthy. A cactus sitting in a dark corner is a weak cactus, making it an easy target for pathogens.
Good airflow is just as vital. Stagnant, humid air is a breeding ground for fungal spores. Simply placing your plant near an open window or even running a small fan on low for a few hours can make a huge difference, especially for indoor collections.
For a more comprehensive, long-term approach, it's worth looking into Integrated Pest Management (IPM) strategies to keep your entire collection healthy.
At The Cactus Outlet, we provide healthy, well-established cacti that give you the best possible start. Explore our collection of beautiful and resilient plants today at https://www.cactusoutlet.com.