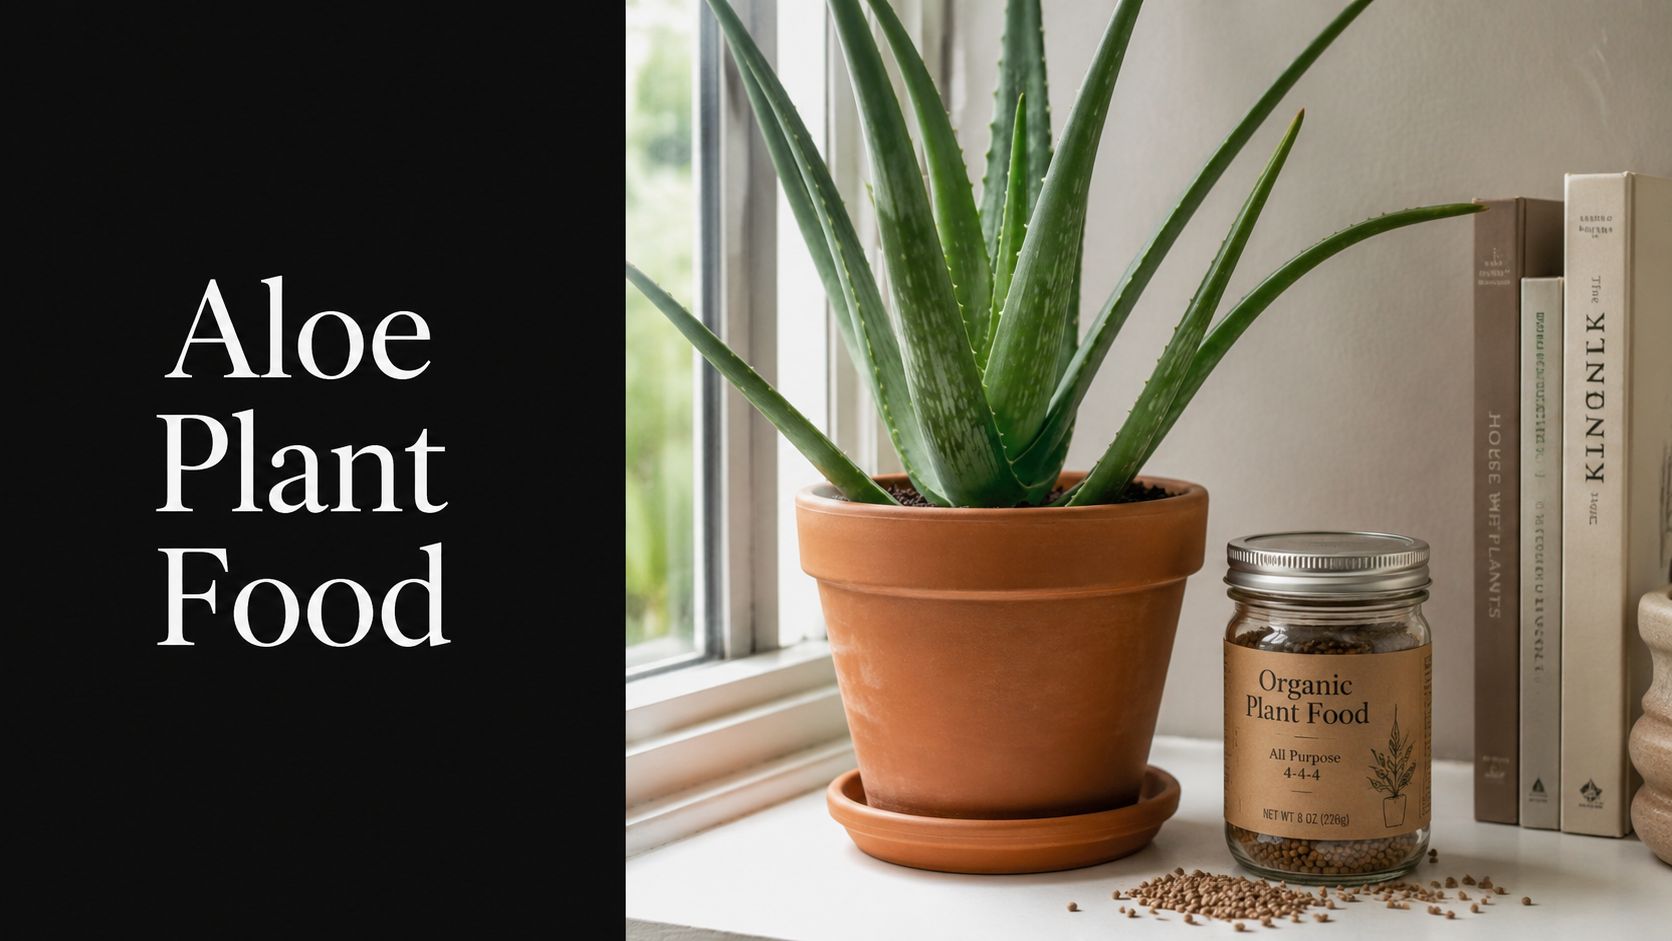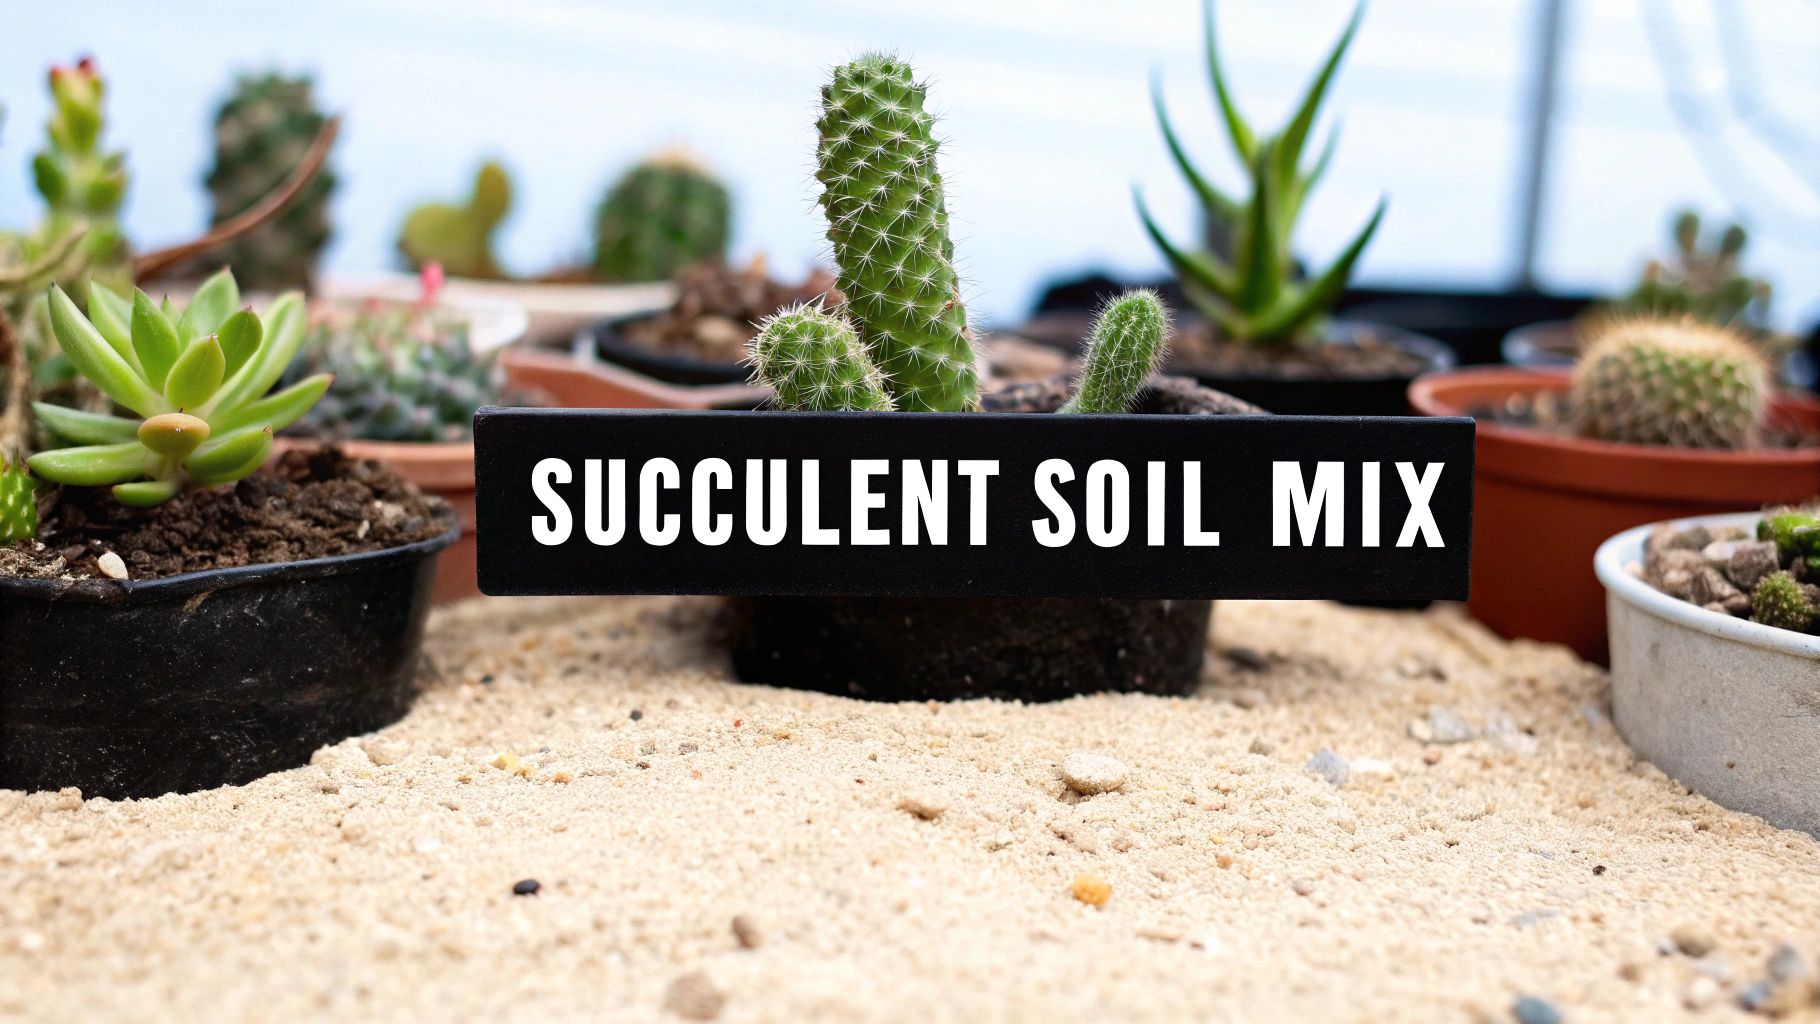

Using a generic, all-purpose potting soil is one of the fastest ways to kill a cactus or succulent. I've seen it happen time and time again. The right cactus succulent soil mix is built from the ground up for one thing: getting water away from the roots as quickly as possible. This mimics their natural, arid homes and is the single most important factor in preventing root rot.
Why Generic Potting Soil Fails Your Succulents
Ever brought home a gorgeous, healthy succulent from the nursery, only to watch it turn mushy and sad within a few weeks? The soil is almost always the culprit. Standard potting mixes are designed to hold onto water for moisture-loving houseplants like ferns or pothos—the complete opposite of what your desert plants need.
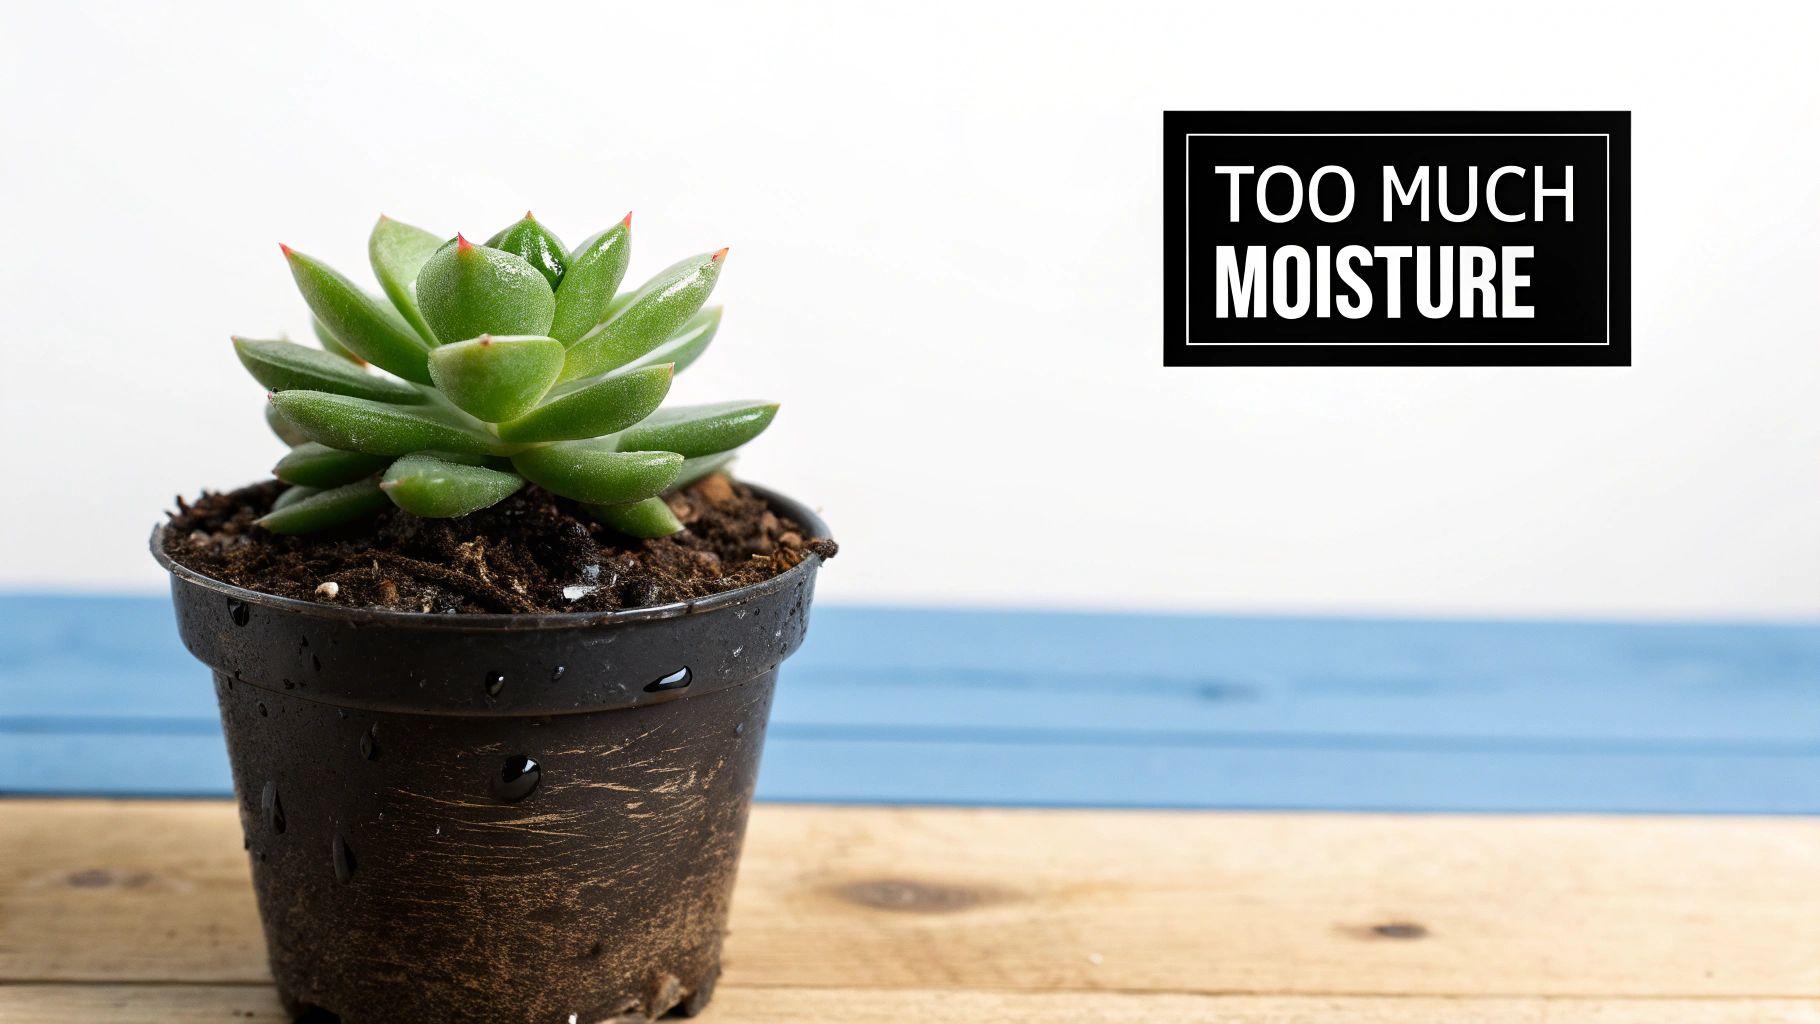
These off-the-shelf soils are usually packed with organic matter like peat moss, which is basically a sponge. When you water a succulent planted in that dense medium, the soil stays soggy for days, literally suffocating the roots. Succulent and cactus roots evolved to quickly slurp up water after a rare desert rainstorm and then expect the soil to dry out almost immediately.
The Three Pillars of an Ideal Mix
To really get why a specialized mix is non-negotiable, you have to think about what it’s trying to accomplish. A great cactus and succulent soil is built on a foundation of drainage, aeration, and stability.
- Superior Drainage: The number one job is to let water flow straight through the pot. Standing water is the enemy, and a gritty, porous mix ensures roots never sit in a puddle.
- Optimal Aeration: Roots need to breathe. When soil gets compacted, it chokes off oxygen and invites decay. Ingredients like pumice and perlite are key because they create tiny air pockets throughout the mix.
- Reliable Stability: While the soil needs to be loose, it still has to be substantial enough to anchor the plant. A well-balanced mix provides solid physical support without packing down over time.
This approach is a total mindset shift from traditional gardening. For these plants, the soil’s purpose is less about providing a constant source of nutrients and more about creating a healthy, breathable environment for the roots. It's such a critical need that a global market for specialized succulent soil, valued at around USD 1.34 billion in 2024, has sprung up to meet the demand. You can read up on the growth of this market on growthmarketreports.com to see just how big it's become.
The biggest mistake new succulent owners make is treating them like traditional houseplants. Their soil needs are fundamentally different, and respecting that difference is the key to success.
Comparing the Two Soil Types
Seeing the differences side-by-side makes it obvious. Below is a quick breakdown of what sets these two types of soil apart.
Standard Potting Soil vs Cactus Succulent Mix
| Characteristic | Standard Potting Soil | Cactus Succulent Soil Mix |
|---|---|---|
| Moisture Retention | High (designed to stay wet) | Very Low (designed to dry out fast) |
| Primary Components | Peat moss, compost, coir | Pumice, perlite, sand, grit |
| Texture | Spongy, dense, and dark | Gritty, loose, and lightweight |
| Aeration | Low to moderate | High (plenty of air pockets) |
| Best For | Tropicals, ferns, most houseplants | Cacti, succulents, arid plants |
After a while, you can tell the difference by feel alone. Standard soil is dark and feels like a damp sponge. A proper cactus mix, on the other hand, looks and feels gritty, almost like sandy gravel. You can actually see the little white specks of perlite or tiny rocks of pumice. This simple tactile difference represents two entirely different worlds for a plant's root system. To dig deeper into this, check out our guide explaining why drainage is so crucial for succulents.
What Goes Into the Perfect Cactus Soil Mix?
Think of making the perfect soil mix like following a recipe from a seasoned chef. You can't just throw things in a bowl and hope for the best. Every single ingredient has a job to do, and getting that balance just right is what separates a thriving cactus from a sad, mushy one.
All the components we'll use fall into two main camps that have to work together: the gritty stuff and the organic stuff.
First, you have your Gritty Aerators. These are the inorganic, rock-like bits that make up the bulk of your mix. Their whole purpose is to create tiny air pockets, keep the soil from turning into a concrete brick, and let water rush right through. This is your number one defense against root rot.
Then, you have the Organic Binders. This is the stuff that holds a tiny bit of moisture and nutrients for the roots to grab onto. It also acts like a glue, giving the gritty bits some structure so the roots have something to anchor themselves into. The trick is to use just enough to do the job without making the soil soggy.
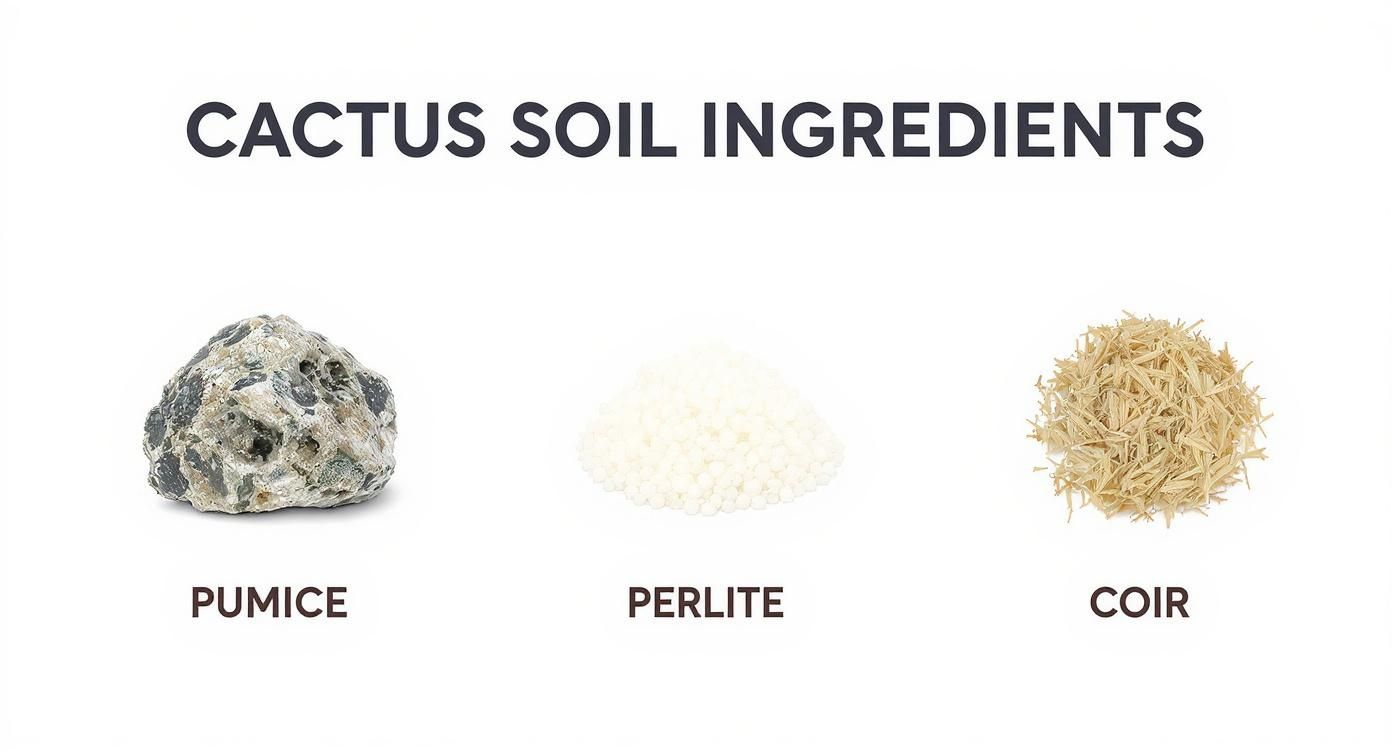
Gritty Aerators: The Key to Drainage and Airflow
This is the non-negotiable part of any cactus or succulent mix. These materials are what give your soil that fast-draining quality we're after, and they are absolutely crucial for preventing root rot.
-
Pumice: This is my go-to, hands down. It's a volcanic rock that’s super light and absolutely riddled with tiny pores. Those pores are fantastic for aeration, and unlike some other options, pumice has enough weight to it to keep a top-heavy cactus from tipping over. Best of all, it doesn’t compact or break down over time.
-
Perlite: You've definitely seen perlite before—it's those little white, styrofoam-looking balls in most commercial potting soils. It’s an expanded volcanic glass, making it incredibly lightweight and great for adding air to the mix. The downside? It's so light that it often floats to the surface when you water, and it can be crushed into dust over a few years.
-
Coarse Sand: And I mean coarse. We're not talking about fine beach sand or play sand here—that stuff will compact like crazy and suffocate the roots. You need a horticultural-grade sand with chunky, irregular grains. It’s great for drainage and adds some helpful weight to stabilize taller plants.
A Quick Tip from Experience: Deciding between pumice and perlite often comes down to the plant itself. For bigger, heavier cacti that need a solid anchor, the weight of pumice is a huge plus. For tiny, delicate succulents in a small pot, the ultra-lightweight perlite works just fine.
Organic Binders: For Moisture and Nutrients
While we want water to drain fast, a mix made of pure rock would dry out almost instantly, which isn't ideal for most homes. A little bit of organic material gives the roots something to hold onto and provides a small moisture reserve.
-
Coconut Coir: Usually sold in a compressed brick, coco coir is a fantastic, sustainable alternative to peat moss. It’s a byproduct of the coconut industry, wets much more easily than peat, and has a friendlier, more neutral pH. It holds onto moisture without ever getting truly waterlogged and takes a very long time to break down.
-
Compost or Worm Castings: Adding a small amount of mature, well-sifted compost or worm castings introduces a gentle touch of micronutrients. The key word here is small. Too much organic matter will hold way too much water and can even "burn" sensitive roots. Think of it as a pinch of seasoning, not a main course.
It's no surprise that getting this right has become so important. The global market for succulents and cacti hit around $5.18 billion in 2023 and is expected to explode to $15.08 billion by 2031. That's a lot of new plant parents discovering the need for good soil! As you start mixing your own, it helps to understand the fundamentals of creating healthy soil in general. This massive market growth just shows how many people are learning that the right foundation is everything.
Once you really get a feel for what each of these ingredients does, you can stop just following recipes. You'll be able to tweak and customize your cactus succulent soil mix perfectly for your specific plants, your choice of pots, and the unique conditions of your home.
Field-Tested DIY Soil Mix Recipes
Alright, this is where the fun begins—rolling up our sleeves and actually mixing the soil. I'm going to skip the vague, "a little of this, a little of that" advice. The secret to a great cactus and succulent soil mix that works every single time is using clear, ratio-based formulas. It takes all the guesswork out of the process and makes it simple to scale your batches, whether you're potting one new plant or a dozen.
The best part about DIY is being in complete control. You know exactly what's in your mix and can fine-tune it for specific plants. I'm sharing my three go-to recipes, which I've refined over years of growing everything from tough Echeverias to finicky Fenestraria. Each one is built for a different need, but they all share the same non-negotiable foundation: excellent drainage and aeration.
First, let's get familiar with our core gritty ingredients. Seeing them side-by-side helps you understand their different textures and roles in a mix.
Getting a feel for these components is the first step toward creating your own custom blends. Each one brings something unique to the table for creating the perfect structure and airflow in your final product.
The All-Purpose Gritty Mix
This is my workhorse recipe. Seriously, I use it for about 80% of my entire collection. It’s the perfect starting point if you're new to making your own soil and works beautifully for a huge range of common succulents and cacti—think Haworthia, Gasteria, and most of the rosette-forming succulents you see everywhere.
It strikes that perfect balance, holding just enough moisture for the roots to get a good drink while ensuring the pot dries out quickly. This isn't just a hunch; research confirms that top-tier mixes contain 50-70% inorganic grit for drainage and 30-50% organic matter for nutrients and structure. The demand for these specialized soils is huge, pushing the global potting soil market to over USD 2.14 billion back in 2021. You can dive deeper into these market trends over at Arizton.com.
The All-Purpose Gritty Mix Recipe:
- 1 Part Pumice or Perlite
- 1 Part Coarse Horticultural Sand
- 1 Part Coconut Coir
To make it, just combine equal volumes of each ingredient in a bucket or tub. I usually use a large garden scoop—one scoop of pumice, one of sand, and one of coir. Mix it all up until the different colors and textures are evenly distributed, and you're good to go.
The Ultra-Drainage Mix for Desert Specialists
Some plants are just dramatic about wet feet and will rot if you look at them wrong. This recipe is for them. We're talking about the true desert specialists: Lithops (Living Stones), Split Rocks (Pleiospilos), and certain caudiciform plants that store water in their swollen stems and can't afford to sit in damp soil.
These guys come from harsh environments where the "soil" is basically just rocky grit and rain is a rare event. They absolutely cannot tolerate lingering moisture. This mix is designed so water rushes straight through, leaving just a tiny bit of moisture clinging to the particles for the roots to find.
The Ultra-Drainage Mix Recipe:
- 3 Parts Pumice
- 1 Part Coarse Horticultural Sand
- 1/2 Part Sifted Coconut Coir or Compost
Look at that ratio shift. We've slashed the organic component to almost nothing to keep water retention at a bare minimum. When you mix this batch, you'll feel the difference immediately. It's much heavier and feels more like gravel than soil—which is precisely what these sensitive plants crave.
The Moisture-Boost Mix for Thirsty Succulents
Then you have the other side of the coin: succulents that actually appreciate a bit more moisture. This includes tropical, tree-dwelling cacti like Rhipsalis and Schlumbergera (Christmas Cactus), as well as fast-growing succulents in hot climates or porous terracotta pots that dry out in a flash.
This recipe bumps up the organic matter just enough to hold onto water for an extra day or two without ever becoming soggy. It's still a fast-draining mix compared to regular potting soil, but it gives that little buffer to plants that are always thirsty.
The Moisture-Boost Mix Recipe:
- 1 Part Pumice or Perlite
- 1 Part Coarse Horticultural Sand
- 1.5 Parts Coconut Coir
The only change is a slight increase in coconut coir, from one part to one-and-a-half. It's a subtle tweak, but it makes a world of difference. For instance, my string of pearls used to shrivel constantly in the dry summer heat until I moved it into this slightly richer blend.
To make choosing the right mix easier, here’s a quick-reference table summarizing the recipes.
DIY Soil Recipe Cheat Sheet
This table provides a snapshot of each recipe, its core components, and the types of plants that will thrive in it.
| Recipe Name | Key Ingredients and Ratio | Best For |
|---|---|---|
| All-Purpose Gritty Mix | 1:1:1 - Pumice/Perlite : Coarse Sand : Coconut Coir | Most common succulents and cacti (Echeveria, Haworthia, Gasteria). A great starting point for beginners. |
| Ultra-Drainage Mix | 3:1:0.5 - Pumice : Coarse Sand : Sifted Coir/Compost | Root-rot prone desert specialists like Lithops, Pleiospilos, and caudiciforms that demand extremely fast drainage. |
| Moisture-Boost Mix | 1:1:1.5 - Pumice/Perlite : Coarse Sand : Coconut Coir | Thirsty or tropical succulents like Rhipsalis, Schlumbergera, and trailing plants in terracotta or dry climates. |
Matching the perfect recipe to the right plant is one of the most rewarding parts of making your own cactus succulent soil mix. It empowers you to give each plant exactly what it needs, setting it up for a long, healthy life.
Mixing and Potting Your Plants Like a Pro
Having the perfect recipe for a cactus and succulent soil mix is a fantastic start, but the real magic happens when you bring it all together. This is where you transform a pile of ingredients into a thriving home for your plant. Let's walk through the small but crucial steps that will elevate your potting game from good to great.
Before you even grab a pot, you need to prep your materials. This isn’t just about measuring ingredients; it's about refining them to head off future problems like soil compaction and disease.
Prepping Your Soil for Success
First, let's talk about sifting. Bagged ingredients like coconut coir or compost often contain a lot of fine dust. If you mix this in, it will eventually work its way to the bottom of the pot, creating a dense, soggy layer that suffocates roots and kills drainage.
I always run my organic materials through a basic mesh screen or even a kitchen colander before mixing. This simple step filters out those tiny particles, ensuring the final mix stays light and airy from top to bottom. It's a quick task that pays huge dividends for root health.
Next up is sterilization. While you can sometimes skip this for established, healthy plants, I consider it a non-negotiable step when potting up new or vulnerable ones. Store-bought soil can harbor fungus gnat eggs and other unwanted pathogens. A quick bake on a sheet pan in the oven at 200°F (93°C) for about 30 minutes is all it takes to make your mix clean and safe.
Your goal is to create a clean, uniform, and well-aerated medium. Sifting removes compaction risks, while sterilization eliminates potential pests and diseases before they have a chance to take hold.
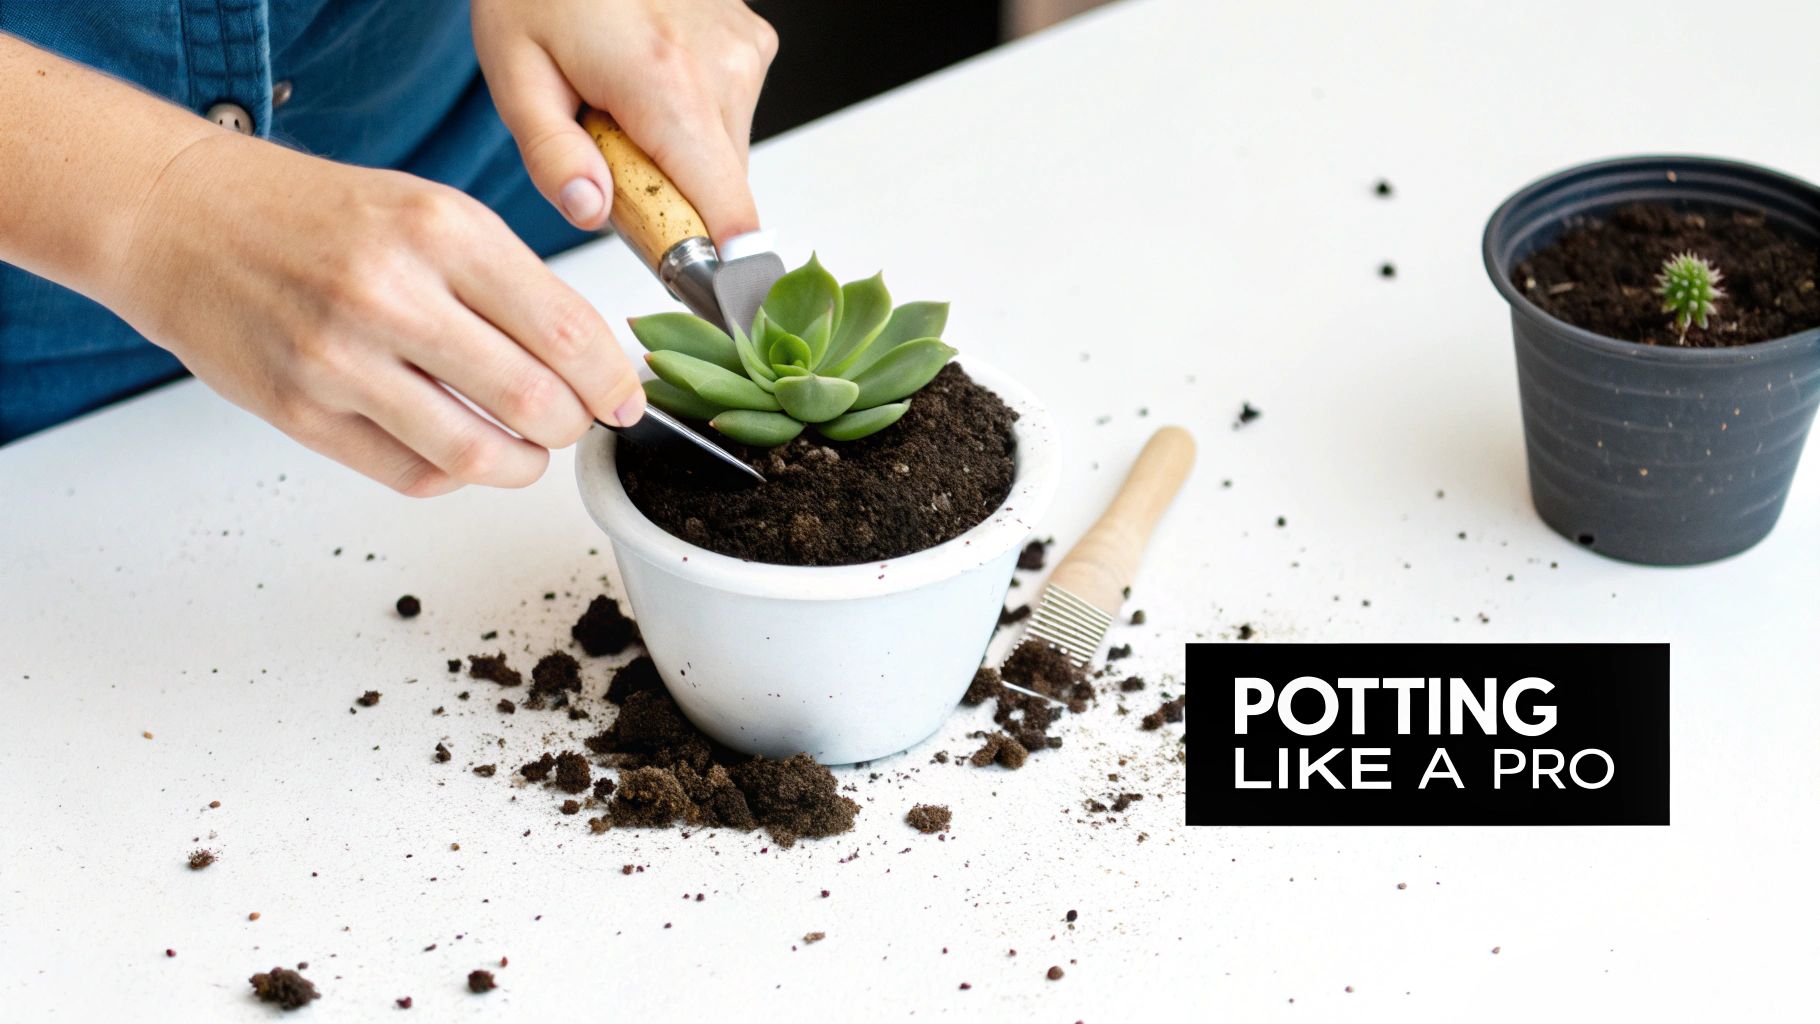
The Potting Process: A Step-By-Step Guide
With your soil mixed and prepped, you're ready to get your hands dirty. Potting is more than just stuffing a plant in a container; it's about setting it up for long-term growth.
-
Gather Your Tools: You’ll need your pot (with a drainage hole!), your soil mix, the plant, and a small piece of mesh screen or a coffee filter. I also like to have a small trowel, a soft brush, and a chopstick on hand.
-
Prepare the Pot: Cover the drainage hole with your mesh screen. This is a game-changing tip. It stops your gritty soil from washing out every time you water, but it won't block drainage the way a layer of rocks can.
-
Inspect the Plant: Gently slide the plant out of its nursery pot and take a good look at the roots. You want to see firm, white, or light-colored roots. Trim off any that are dark, mushy, or completely dried out. If the root ball is tight, gently tease it apart to encourage the roots to grow outward into their new home.
-
Add Soil and Position: Add a base layer of your new soil to the pot. Center the plant, making sure its base sits just a bit below the rim of the pot.
-
Fill and Settle: Carefully fill in around the plant with more soil. Instead of packing it down with your hands (which causes compaction), use a chopstick to gently poke the soil and work it into any large air pockets. A few light taps of the pot on your workbench will help everything settle naturally.
Potting isn't a one-and-done event; it's part of a cycle of care. For a deeper dive, our guide on how to repot cacti has great visuals and advice for handling even the prickliest plants.
So, when do you water? This is a critical question. I always recommend waiting at least a week before that first watering. This gives any roots that were bruised or broken during repotting a chance to heal and callus over, which dramatically reduces the risk of root rot. It’s a patient approach, but it gives your plant the best possible start in its new home.
Troubleshooting Common Soil and Watering Problems
Even with what you think is the perfect soil mix, things can still go sideways. From my experience, most issues people blame on their soil are actually watering problems in disguise. The right soil mix is your best defense, giving you a buffer against mistakes, but you still need to know what to look for.
Learning to read your plant's signals is the key to catching a problem before it becomes a disaster.
The most common mistake? Loving your plants to death with too much water. It's a classic for a reason. What trips people up is that the signs for too much and too little water can look surprisingly similar until you know exactly what you’re looking at.
Decoding Your Plant's Distress Signals
The leaves are telling you a story about what's happening below the surface. If you can learn to read them, you'll save countless plants. Pay close attention to their texture, color, and firmness.
- Overwatering: Leaves will look puffy and swollen, almost like they're about to burst. They feel mushy or soft to the touch and might turn yellow or even translucent. This is the biggest danger zone because it means root rot is likely setting in.
- Underwatering: The leaves will look wrinkled, deflated, or shriveled up like a raisin. They might feel limp, but they won’t be mushy. This just means the plant is dipping into its water reserves.
An overwatered plant is in far more immediate danger than a thirsty one. You can almost always bring a dry succulent back from the brink with a good soak, but a rotting one needs emergency surgery. A well-draining soil mix is your safety net here—it dries out quickly enough to forgive you for being a little too enthusiastic with the watering can.
For a deeper dive into getting the frequency and technique just right, check out our complete guide on how to water succulent plants.
The Dreaded Root Rot and How to Fight It
Root rot is the number one killer of succulents. It happens when soil stays soggy for too long, creating the perfect breeding ground for fungi that attack and destroy the roots. If you spot yellow, mushy leaves starting at the base of the plant, you need to act fast.
Gently slide the plant out of its pot and take a hard look at the roots. Healthy roots are firm and usually white or light tan. Rotted roots are a dead giveaway—they'll be dark brown or black, feel slimy, and might even fall apart in your hands.
To save your plant, it's time to play surgeon.
- Trim the Damage: Get a sterile, sharp knife or a pair of shears and cut off every last bit of the rotted, mushy roots. You have to be ruthless here. Any infected tissue you leave behind will just keep spreading.
- Let It Heal: After the trim, let the plant sit out in a dry, shaded spot for a few days. This allows the fresh cuts to callus over, forming a protective seal against new infections.
- Repot Fresh: Plant it in a brand-new, completely dry batch of your cactus mix. Never reuse the contaminated soil. And don't even think about watering it for at least a week, and when you do, make it a very light one.
If you suspect you've been too heavy-handed with the water, this guide on saving an overwatered plant has some great emergency tips.
Dealing with Compacted or Hydrophobic Soil
Sometimes the problem isn't just how often you water, but how the soil itself is behaving. Even a great mix can develop issues over time.
Hydrophobic soil is a real headache. It's soil that has gotten so bone-dry that it actually starts to repel water. You’ll see water pool on the surface or run straight down the sides of the pot and out the bottom, never actually soaking into the root ball. This is especially common in mixes with a lot of peat moss or coir that have been left dry for too long.
The best fix for this is bottom-watering. Place the entire pot in a sink or tray filled with a few inches of water and just let it sit. Give it a good 30-60 minutes to soak up moisture from the bottom up. This slow, steady rehydration is much more effective than top-watering.
If the soil feels like a solid brick, you can gently poke a few holes in it with a chopstick before you soak it. This helps break up the compaction and allows water to penetrate the core of the root ball.
Frequently Asked Questions About Succulent Soil
Even with the best recipes in hand, some questions always seem to come up when you're mixing your own soil. Nailing these little details is often what separates a decent succulent mix from a truly great one. Let's tackle some of the most common uncertainties people run into.
Think of these as the final tweaks to perfect your technique and give your plants the absolute best foundation to grow in.
Can I Use Sand From a Beach or Playground?
I get this question a lot, and the answer is always a firm "no." It might look like a free and easy option, but grabbing sand from a beach or your kid's sandbox is a fast track to killing your succulents.
Beach sand is a triple threat. It’s incredibly fine, which means it compacts like cement when it gets wet, suffocating the roots. On top of that, it's loaded with salts that will literally burn your plant’s delicate root system. Play sand isn't any better; its fine texture clogs up all the essential air pockets your plant needs. Always, always stick with coarse horticultural sand—its large, irregular grains are what create that perfect drainage and airflow.
How Often Should I Replace Succulent Soil?
As a general rule, plan on repotting your cacti and succulents with a fresh batch of soil every 2 to 3 years. This isn't just about giving the plant more room; it’s about the soil itself breaking down.
Over time, organic materials like coconut coir decompose and become compacted, squeezing out air and slowing down drainage. At the same time, mineral salts from your tap water and any fertilizers you use can build up to toxic levels. Hitting the reset button with a fresh soil mix gives your plant a clean, airy home with a gentle nutrient boost to get it going again.
A complete soil refresh every few years is one of the most effective ways to prevent long-term decline in your plants. It addresses soil compaction, nutrient depletion, and salt buildup all at once.
Can I Add Fertilizer Directly to My DIY Mix?
I'd advise against adding granular, slow-release fertilizers right into the soil you're mixing. Cacti and succulents are very light feeders, and it's far too easy to cause root burn, especially if you're potting up a young plant or a recent transplant.
You have much more control if you stick to a diluted liquid fertilizer made specifically for cacti and succulents. Just use it during the growing season (usually spring and summer). This approach lets you give the plant nutrients exactly when it can use them, avoiding any dangerous buildup in the soil.
My Soil Dries Out Too Quickly. What Can I Do?
If you water your plant and the soil is bone-dry again in just a day or two, your mix is likely a bit too gritty for your environment. This happens a lot to growers in really hot, dry climates or to people who love using terracotta pots, which dry out very quickly.
Thankfully, the fix is easy. Just tweak your mix to include a little more of the organic component. For example, if you were using a 1:1:1 ratio, try shifting it to a 1:1:1.5 ratio (Pumice:Horticultural Sand:Coconut Coir). That small change will help the soil hold onto moisture for a little longer without becoming waterlogged.
At The Cactus Outlet, we live and breathe all things cacti and succulents. Whether you're looking for your next statement plant or need advice on keeping your collection healthy, we have the expertise and selection to help. Explore our stunning collection of plants and find your perfect desert gem today at https://www.cactusoutlet.com.