
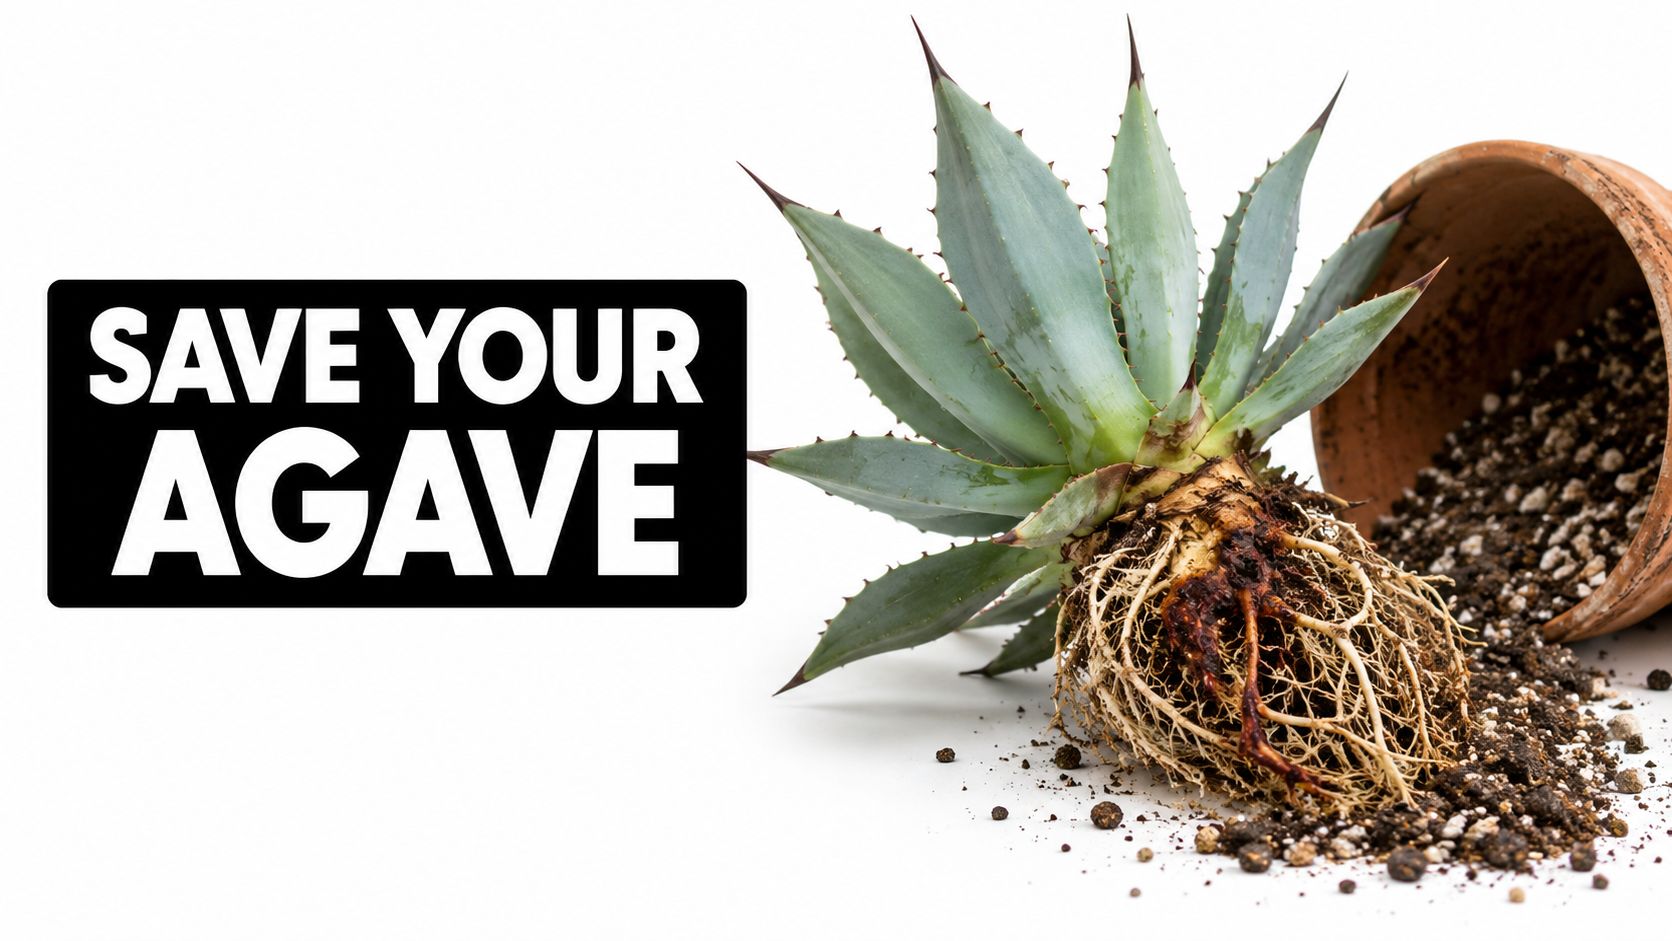

A large agave can look perfectly healthy after a wet spell, then start leaning when its roots have already lost their grip. The temptation is to blame one extra watering and reach for fungicide. In practice, agave root rot is a drainage and diagnosis problem first. The plant may be reacting to saturated soil, crown damage, a soilborne pathogen, or even an agave snout weevil.
If your agave is newly loose, soft at the base, or declining while the soil remains wet, don't add water just because the leaves look limp. Check the plant and the root zone before deciding whether it can be saved.
Why Agave Root Rot Is Harder to Spot Than It Looks
A homeowner emails photos of a Blue Glow agave after a wet spring. The leaves are still mostly green, but the plant leans when nudged and the soil around it hasn't dried as expected. That combination deserves attention. A green rosette doesn't prove the roots are healthy, and visible decline may not show up until underground damage has progressed.
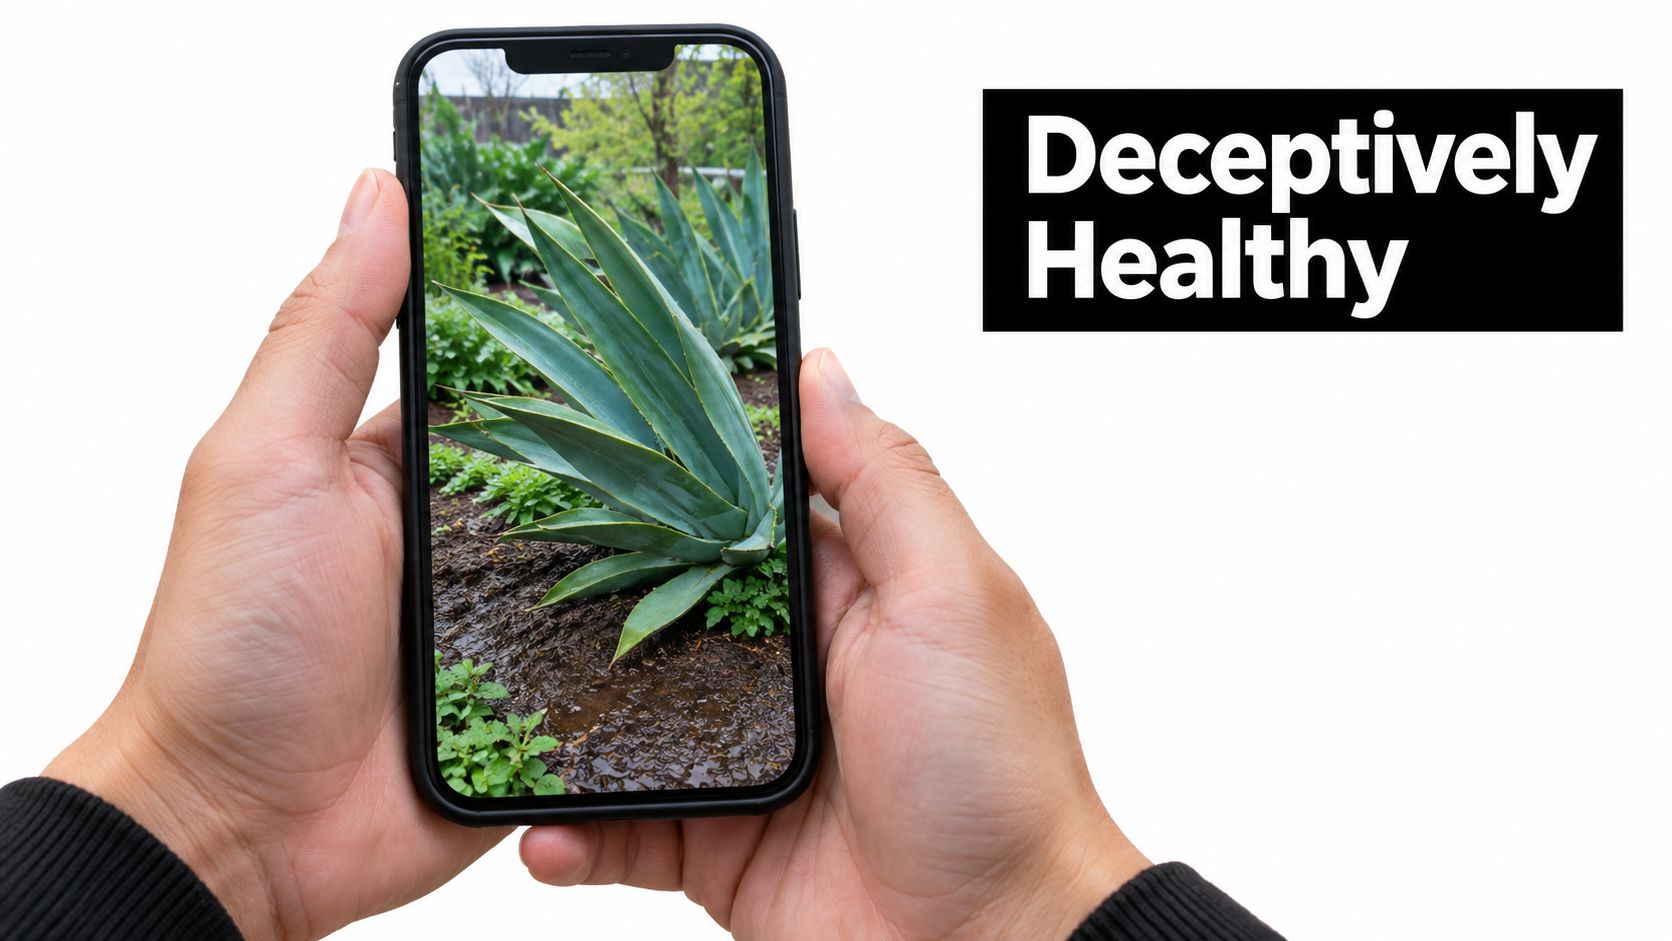
Three assumptions tend to delay a useful response: “It looks fine,” “Agaves are drought tolerant,” and “The soil should have dried by now.” None tells you what's happening at the roots. A plant can hold its shape while root loss reduces both water uptake and anchorage. By the time it visibly collapses, there may be little healthy root structure left to support it.
Root rot also isn't a single diagnosis. Water injury, crown rot, vascular wilt, and pathogen-driven root disease can overlap in their visible effects. “Too much water” may describe the conditions that favored decline, but it doesn't identify the cause or tell you whether the plant is salvageable.
Practical rule: If a previously stable agave has become loose and its root zone stays wet, inspect it rather than waiting for the leaves to settle the question.
For a general primer on the visible signs, this guide to how to fix root rot can help you recognize why a leaf-only diagnosis is unreliable. With a valuable specimen, the next move is to check the base and roots carefully, not to assume every limp leaf means the same thing.
Reading the Plant Before You Touch It
Start with the plant's condition before cutting or pulling at it. A single yellow lower leaf can be normal aging, while several changes together deserve a closer look. Keep the inspection gentle: agave leaves can be sharp, and a damaged crown or root can complicate the diagnosis.
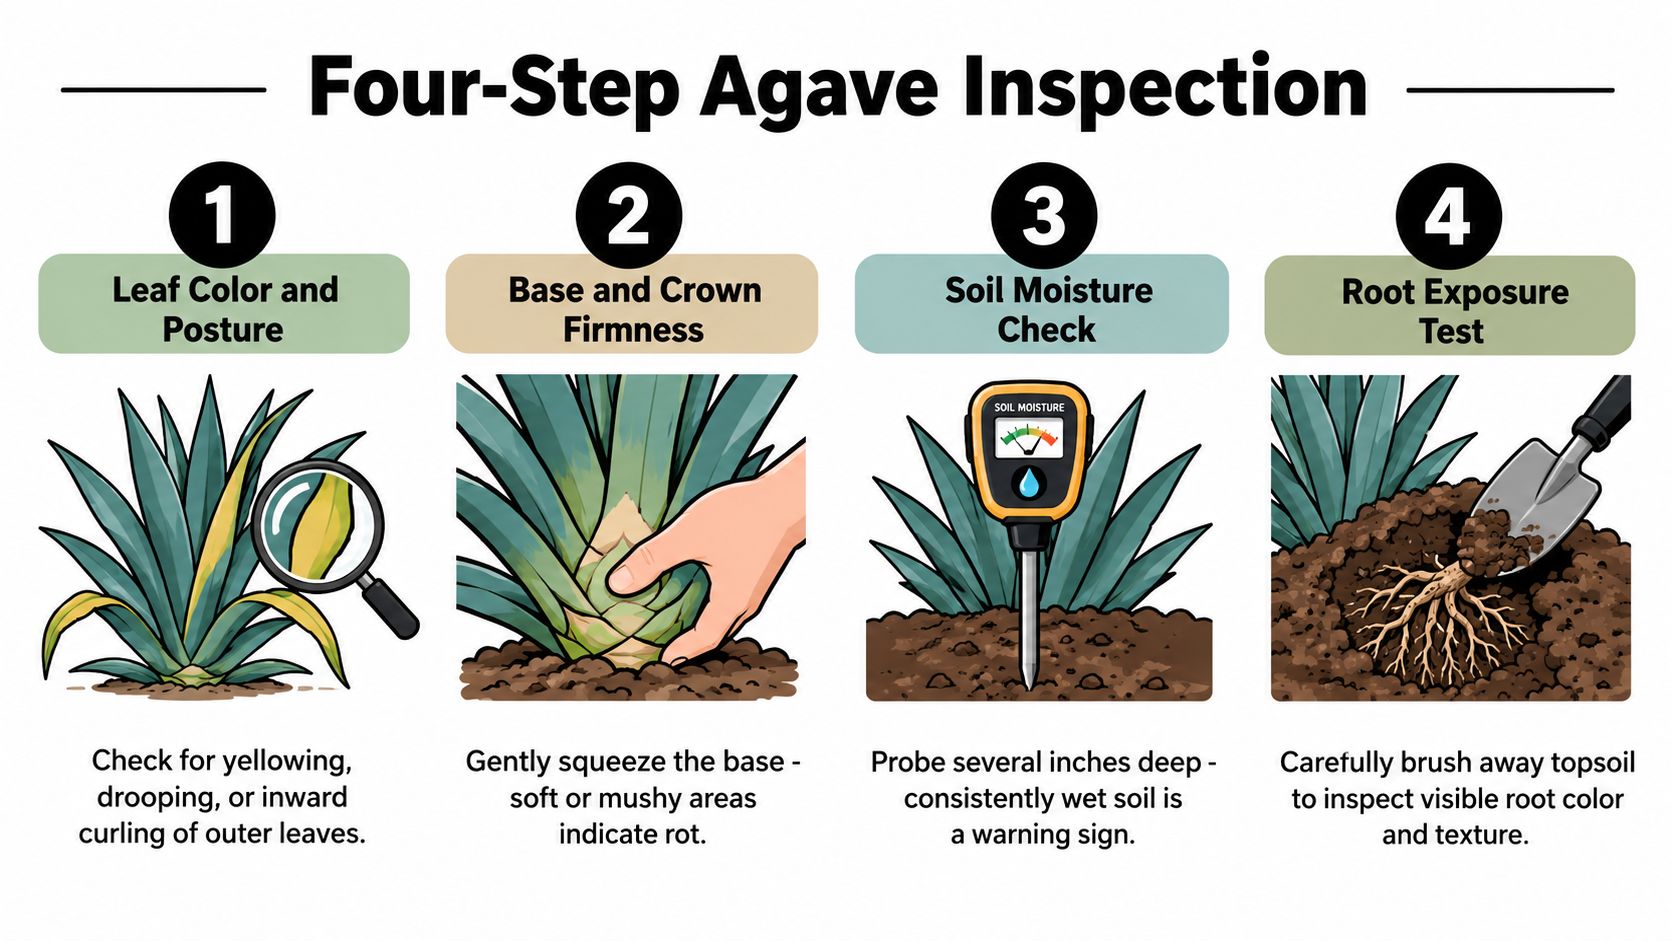
- Look at leaf color and posture. Check the older outer leaves, then the inner leaves. Note yellowing, drooping, or loss of firmness, but don't call it root rot based on color alone.
- Check anchorage and the crown. Gently rock the base rather than tugging on the leaves. A newly planted or recently repotted agave can move before it roots in; a plant that was stable and is now loose is more concerning. Feel for soft tissue at the base and center without pressing hard enough to injure it.
- Notice moisture and odor. Check whether the soil remains damp below the surface. A sour smell can add concern, but neither odor nor wet soil identifies a pathogen.
- Expose roots only if needed. Brush away top-dressing or carefully lift the plant from its pot if surface clues don't answer the question. Look at texture and attachment as well as color; color by itself isn't a reliable test.
Water injury may leave tissue soft while the plant remains anchored. Crown rot is more concerning when the center or base has become soft or discolored. Reddish-brown roots paired with poor anchorage raise concern for pathogen-driven disease, though they don't prove its cause. The aim is to sort the plant into a practical category: likely recoverable, uncertain and worth testing, or severely compromised.
A leaning agave is a clue, not a diagnosis. Pair what you see above ground with what you find at the base and roots.
If you are designing a garden around a large specimen, a guide to safe agave layout for yards can help with placement. For a sick plant, though, inspection comes first.
What Is Actually Causing the Rot
Poor drainage and prolonged saturation can leave roots short of the air exchange they need. That's a major reason to treat soil, site, container, and irrigation as one system rather than assuming that a watering adjustment alone will solve the problem. Warm, humid conditions and compacted or poorly drained soil can favor fungal development, so an agave planted in a low spot may face different risks from one in a freely draining bed.
Soilborne Fusarium is another possibility. A 2017 epidemiological study linked agave root rot strongly with Fusarium species, especially Fusarium solani and Fusarium oxysporum, in commercial blue-agave production. Disease incidence in surveyed fields ranged from 21.75% to 82.25%; the study associated F. oxysporum with agave wilt and frequently isolated F. solani from plants with severe reddish root rot and loss of anchorage (2017 epidemiological study). Those findings matter to owners because root damage can undermine stability and water uptake before the whole plant falls.
Age and field conditions also influence severity. In a 2024 study, non-inoculated two- and four-year-old blue agaves had root-rot severity of about 6%, compared with 18.75% in five-year-old plants. After inoculation with pregerminated F. solani spores, mean severity reached 20% in two-year-old plants and 29% in four-year-old plants (2024 study). This isn't a prediction for an individual ornamental agave. It does show why the same wet conditions can have different consequences depending on plant age and pathogen pressure.
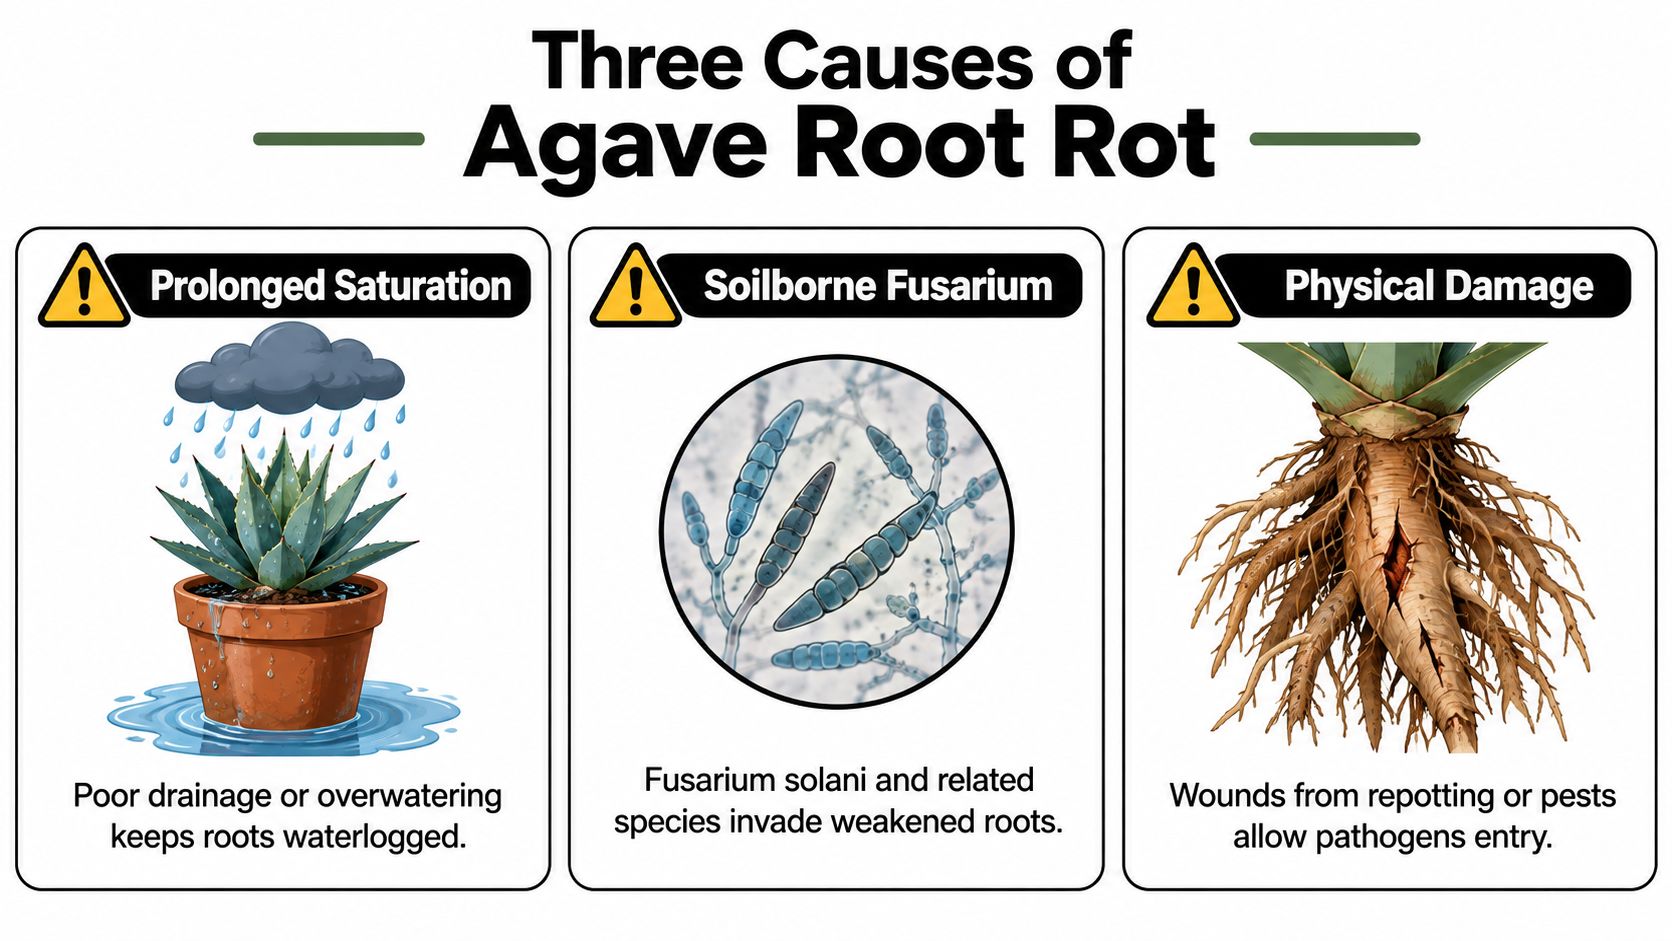
A third cause can masquerade as rot: agave snout weevil damage. Adults bore into the base and lay eggs; larvae tunnel through the plant, damaging roots and internal tissue. Look for small holes near the base, dying lower leaves, separation from the roots, or sudden collapse. Secondary infection can follow the feeding wounds. If weevil infestation is confirmed, UC Agriculture and Natural Resources advises removing the affected plant and surrounding soil (agave pest guidance).
For a broader look at how watering decisions fit into care for desert plants, see watering cacti and succulents.
How to Unpot, Cut, and Disinfect an Infected Agave
Rescue work starts with containment, not the knife. Move a suspect plant away from healthy stock, and stop shifting its soil, offsets, or tools between plants. Set up a clean work area and use gloves and a stable surface. If you're dealing with a large specimen, get help moving it rather than pulling on the leaves.
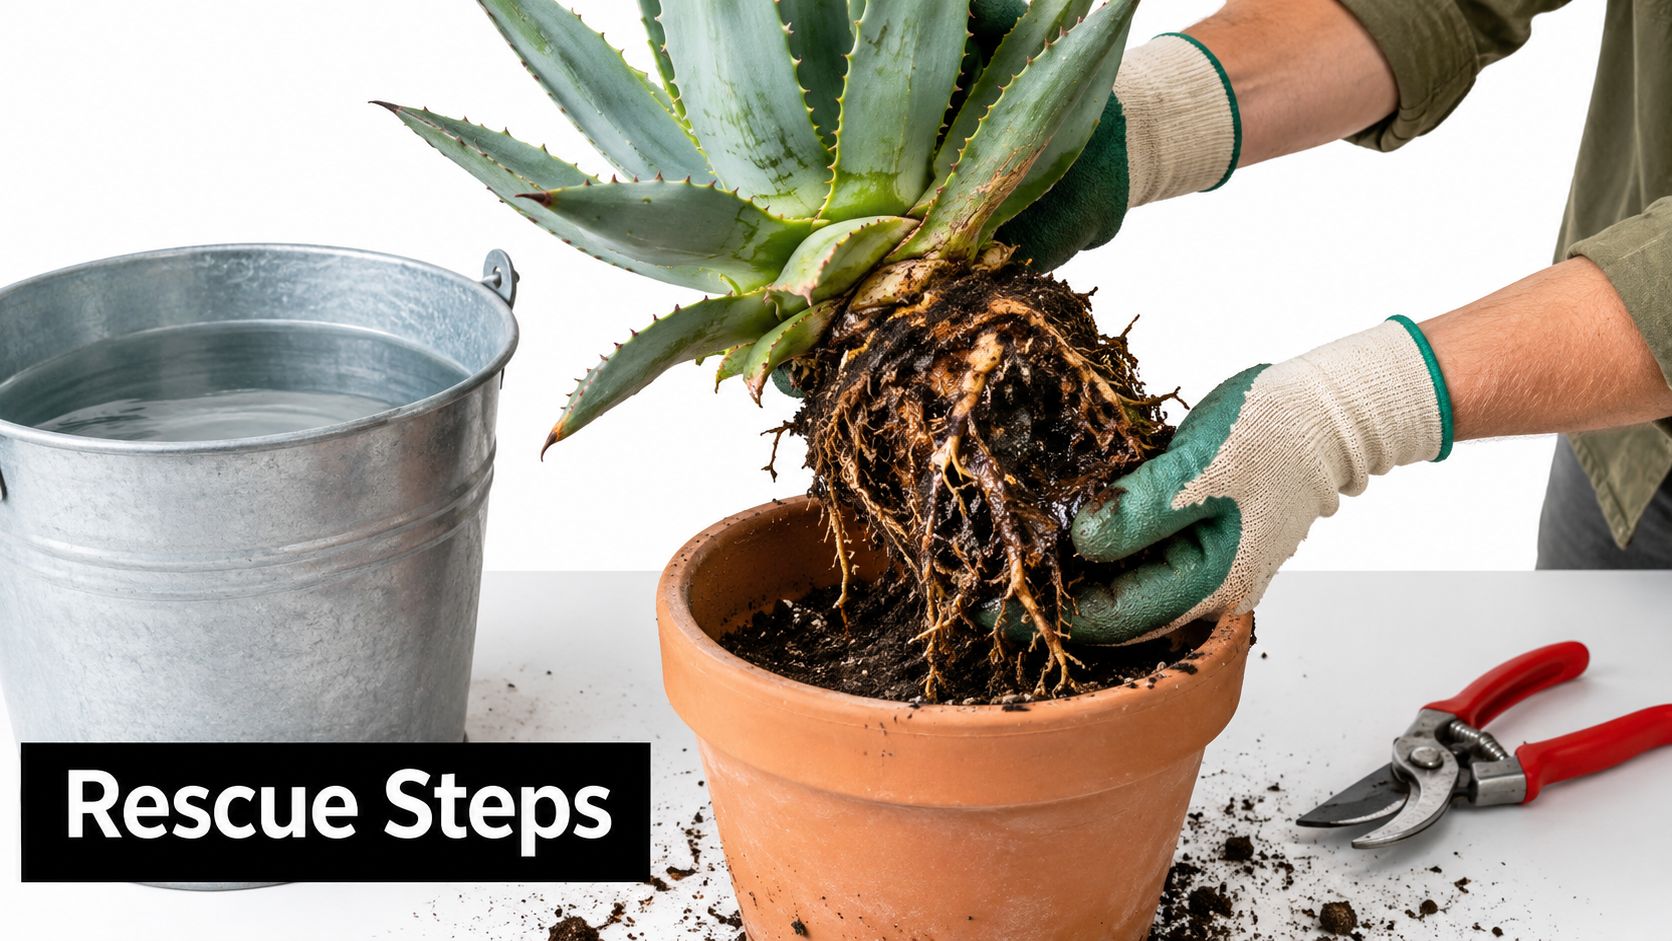
Lift the plant with as much root intact as possible. Remove enough soil to see the crown and root structure, but don't scrub away the boundaries between healthy and damaged tissue before you've examined them. If you plan to seek a diagnosis, take photos and keep separate fresh samples of symptomatic roots, crown tissue, and nearby soil for a plant-disease laboratory.
When damage is limited, remove roots that are clearly soft, collapsing, or breaking down. Use a sharp tool, and disinfect it between cuts so you don't carry contaminated material into fresh tissue. Preserve firm roots where possible. Avoid cutting based on color alone; root color varies, and a dark root isn't automatically rotten.
There's a point where pruning becomes wishful thinking. If the rot has reached the central core, or the plant has lost its healthy anchor roots and rocks freely, repeated cutting is unlikely to restore a stable plant. A soft, compromised crown is especially serious. For a premium agave, a diagnostic lab can help distinguish a recoverable problem from a systemic one; the staged sampling approach described by the plant-disease survey and diagnostic study also cautions against treating a generic “Fusarium” result as proof of cause.
Don't assume offsets attached to a sick mother plant are clean because they look firm. They may have shared the same soil and exposure. Isolate them rather than immediately planting them beside healthy agaves, and discard them if they show symptoms or you can't separate them safely.
Let wounds dry before repotting. If the plant is too far gone, remove it with contaminated media rather than trying another round of surgery in the same soil.
Repotting Into a Mix That Actually Drains
A recovering agave needs a container and mix that let excess water escape. Don't pot a reduced root system into a large volume of moisture-holding soil "so it can grow into it." The extra damp mix can remain unused around the roots. Use a container sized to the remaining root mass, with clear drainage openings, or place it in a garden location that drains rather than collecting water.
| Mix | Main components | Drainage speed | Best for |
|---|---|---|---|
| Mineral-heavy | Pumice or crushed stone with a modest organic component | Fast when ingredients and container allow free flow | Recovering plants in pots or raised beds |
| Cactus mix amended for drainage | Commercial cactus mix with added pumice or coarse material | Variable; test the finished mix | Container growers adjusting an existing mix |
| Dense, moisture-retentive soil | Fine or compacted material with little coarse structure | Slow | Poor choice for a recovering agave |
A fast mix still fails if the pot drains poorly. Unglazed terracotta can dry more readily than a glazed pot, while fabric grow bags allow airflow through the sides. A raised bed can help where the native soil holds water, but the planting area still needs an exit for excess moisture. Avoid a decorative container with blocked or ineffective drainage, and empty standing water from saucers or cachepots.
Set the crown slightly above the surrounding soil rather than burying it. A dry gravel top-dressing can help keep soil from resting against the crown, but it doesn't fix a saturated root zone. Don't add a layer of stones at the bottom of a pot and assume that solves poor drainage; the whole mix and the outlet need to work together.
Wait until cut surfaces have dried and callused before watering. The timing depends on the amount of damage and growing conditions, so don't treat a calendar as a guarantee. Once the plant is settled, use soak-and-dry watering: water at the root zone, let excess drain, then wait until the root zone has dried appropriately before watering again.
For help choosing suitable ingredients, see the guide to cactus and succulent soil mix. If you're also improving a wet planting area, this practical resource on how to stop waterlogged plants offers broader drainage ideas.
Fungicides, Biologicals, and What Actually Works
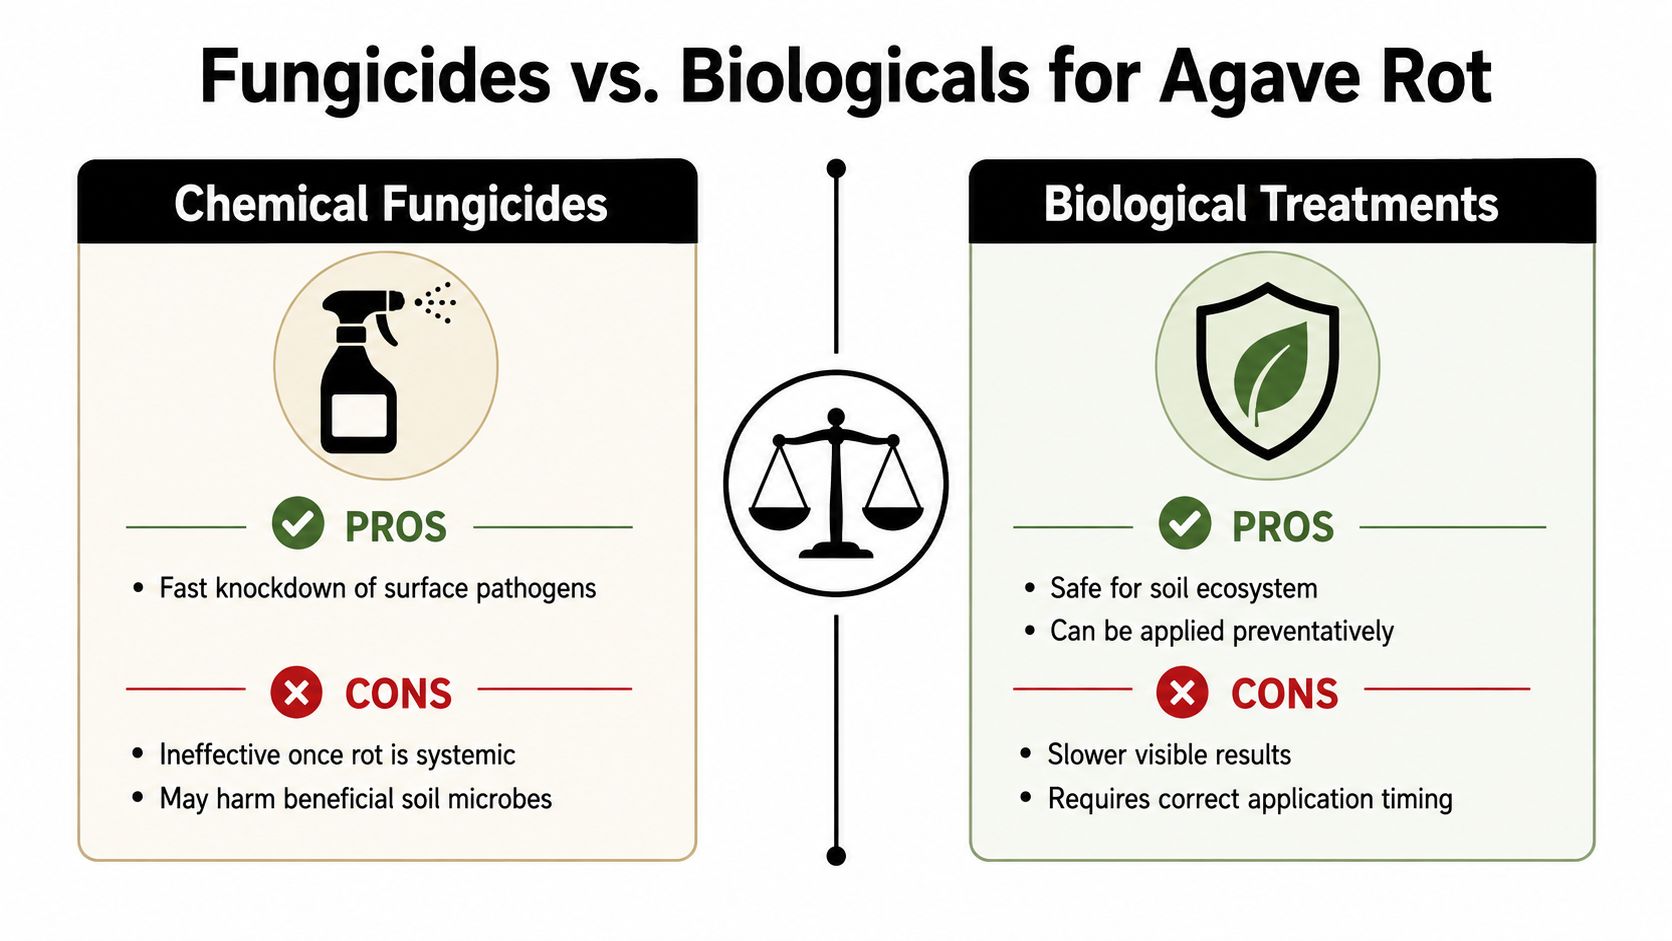
A fungicide can sound like the direct answer to fungal rot, but chemical treatment after a plant is systemically affected is generally ineffective. It can't bring dead roots back, rebuild a lost anchor, or correct soil that stays saturated. If the crown is soft and the root plate has failed, spraying the visible leaves won't reverse that damage.
| Approach | When it may help | What it won't do |
|---|---|---|
| Chemical fungicide | Only when the product is labeled for the crop and use site and a suitable use is identified | Reverse systemic decline or fix poor drainage |
| Biologicals such as Trichoderma or Bacillus | As preventive or integrated measures around seedlings or transplanting | Guarantee a cure for an established, collapsing plant |
| Cultural controls | Before and during planting, through sanitation, quarantine, drainage, and careful watering | Restore tissue that has already died |
Biological products have shown suppression potential when used preventively or as part of an integrated approach. Treat them as support, not rescue chemistry. Check the label and local rules before using any product; it must be legally registered for agave or the relevant ornamental use site.
Drainage and sanitation are the dependable foundation. Reject plants with soft crowns or unstable anchorage, keep tools clean between lots, and don't reuse contaminated potting media. The UC extension guidance on agave fungal diseases.pdf) notes that fungicides applied after disease establishment are generally ineffective and emphasizes prevention and sanitation.
If the plant is still firm and disease is limited, improving the root zone may give it a chance. If the core is compromised or the plant is collapsing, removal is usually more sensible than buying products that can't repair the damage.
Aftercare and How to Keep Root Rot From Coming Back
After pruning, don't rush the agave into full sun or a wet pot. Keep it in a protected, dry setting while wounds dry, and avoid overhead watering that leaves water sitting in the crown. Once it's repotted and shows signs of new root growth, return gradually to soak-and-dry care. Match watering to the actual drying of the soil, the season, the container, and local conditions rather than using a fixed calendar.
For a bare-root arrival, inspect the roots and base before planting, and let the plant settle into a draining mix. The Cactus Outlet ships plants bare root, so check the specimen when it arrives and keep it separate from established plants while you assess its condition. Quarantining new agaves is sensible even when they look healthy, especially before planting them beside valuable outdoor display specimens.
Site choice matters as much as the mix. Avoid compacted areas where water lingers, and don't direct irrigation over the crown. For a newly planted agave, withholding water indefinitely isn't a solution either: the plant still needs conditions that allow roots to establish while the soil drains between waterings. A drainage-first approach is more useful than a blanket instruction to water less.
Use this decision rule before investing more time in a rescue:
- Loose root plate: The plant has lost stable anchorage and needs close assessment.
- Soft crown: Decline has moved beyond a few damaged roots.
- Weevil holes: Check for infestation and remove the plant and surrounding soil if confirmed.
- Repeated decline after another rescue attempt: Don't keep returning a failing plant to the same conditions.
For ongoing species-specific care, consult the guide to Agave americana care. If the plant is beyond saving, remove it and contaminated media, then correct the site or container before planting another agave there.
The Cactus Outlet offers large agaves and other outdoor specimens for garden and container projects, shipped bare root for planting at home. Visit The Cactus Outlet to explore the available plants and choose a specimen suited to your space and growing conditions.