
If there's one secret to keeping an aloe plant happy, it's this: give it the right soil. The best potting soil for aloe is a fast-draining, gritty mix made for cacti and succulents. Using standard potting soil is the fast track to root rot, which is, without a doubt, the number one reason these tough desert plants don't make it.
Why Your Aloe Hates Regular Potting Soil
Think about where an aloe comes from. It’s a desert native, built to survive in dry, sandy, and rocky ground where rainfall is rare and disappears almost instantly. Now, picture plopping that same plant into a boggy, dense swamp. That's pretty much what you're doing when you use regular potting soil.
Most all-purpose potting mixes are designed to hold moisture for leafy, tropical plants. They’re often packed with peat moss or compost, which act like tiny sponges, soaking up water and staying damp for days. For an aloe plant, that's a death sentence.
The Dangers of Waterlogged Soil
When aloe roots are stuck in soggy soil, they can't breathe. Without access to oxygen, they start to suffocate, creating the perfect environment for fungus and bacteria to thrive. This is how the dreaded root rot begins.
It’s the silent killer of most indoor aloes. A plant can look perfectly fine one day, and the next, its leaves are turning yellow and mushy at the base. By the time you notice, the damage is often done.
An aloe plant doesn't want pampering; it wants an environment that mimics its tough, native habitat. Prioritizing excellent drainage isn't just a suggestion—it's the single most important factor for ensuring your aloe thrives for years to come.
The home gardening boom from 2020-2022 led to a huge spike in potting soil sales, but it also highlighted how mismatched many soils are for succulents. Experts agree that a good cactus mix should contain up to 60% inorganic grit, as peat-heavy soils are responsible for 35-50% of houseplant failures from overwatering. You can find more insights on aloe vera market trends in recent industry reports.
What Your Aloe Really Needs
So, what does an aloe actually want from its soil? It's simple, really. You just need to recreate the conditions of its desert home.
Here’s a quick look at the key properties that make for an ideal aloe soil mix.
| Soil Property | Why It Matters for Aloe | What to Aim For |
|---|---|---|
| Excellent Drainage | Prevents water from sitting around the roots, which is the main cause of root rot. | Water should flow through the pot quickly and easily. |
| Superior Aeration | Allows oxygen to reach the roots, keeping them healthy and strong. | A light, airy, and gritty texture with plenty of pore space. |
| Minimal Water Retention | Lets the soil dry out completely between waterings, just like in the desert. | The soil should feel dry to the touch within a few days of watering. |
Ultimately, a happy aloe is one that's sitting in soil that respects its origins. Forget the rich, dark, water-hoarding stuff. Think grit, airflow, and a home that never lets its feet stay wet for long.
The Three Pillars of a Perfect Aloe Soil Mix
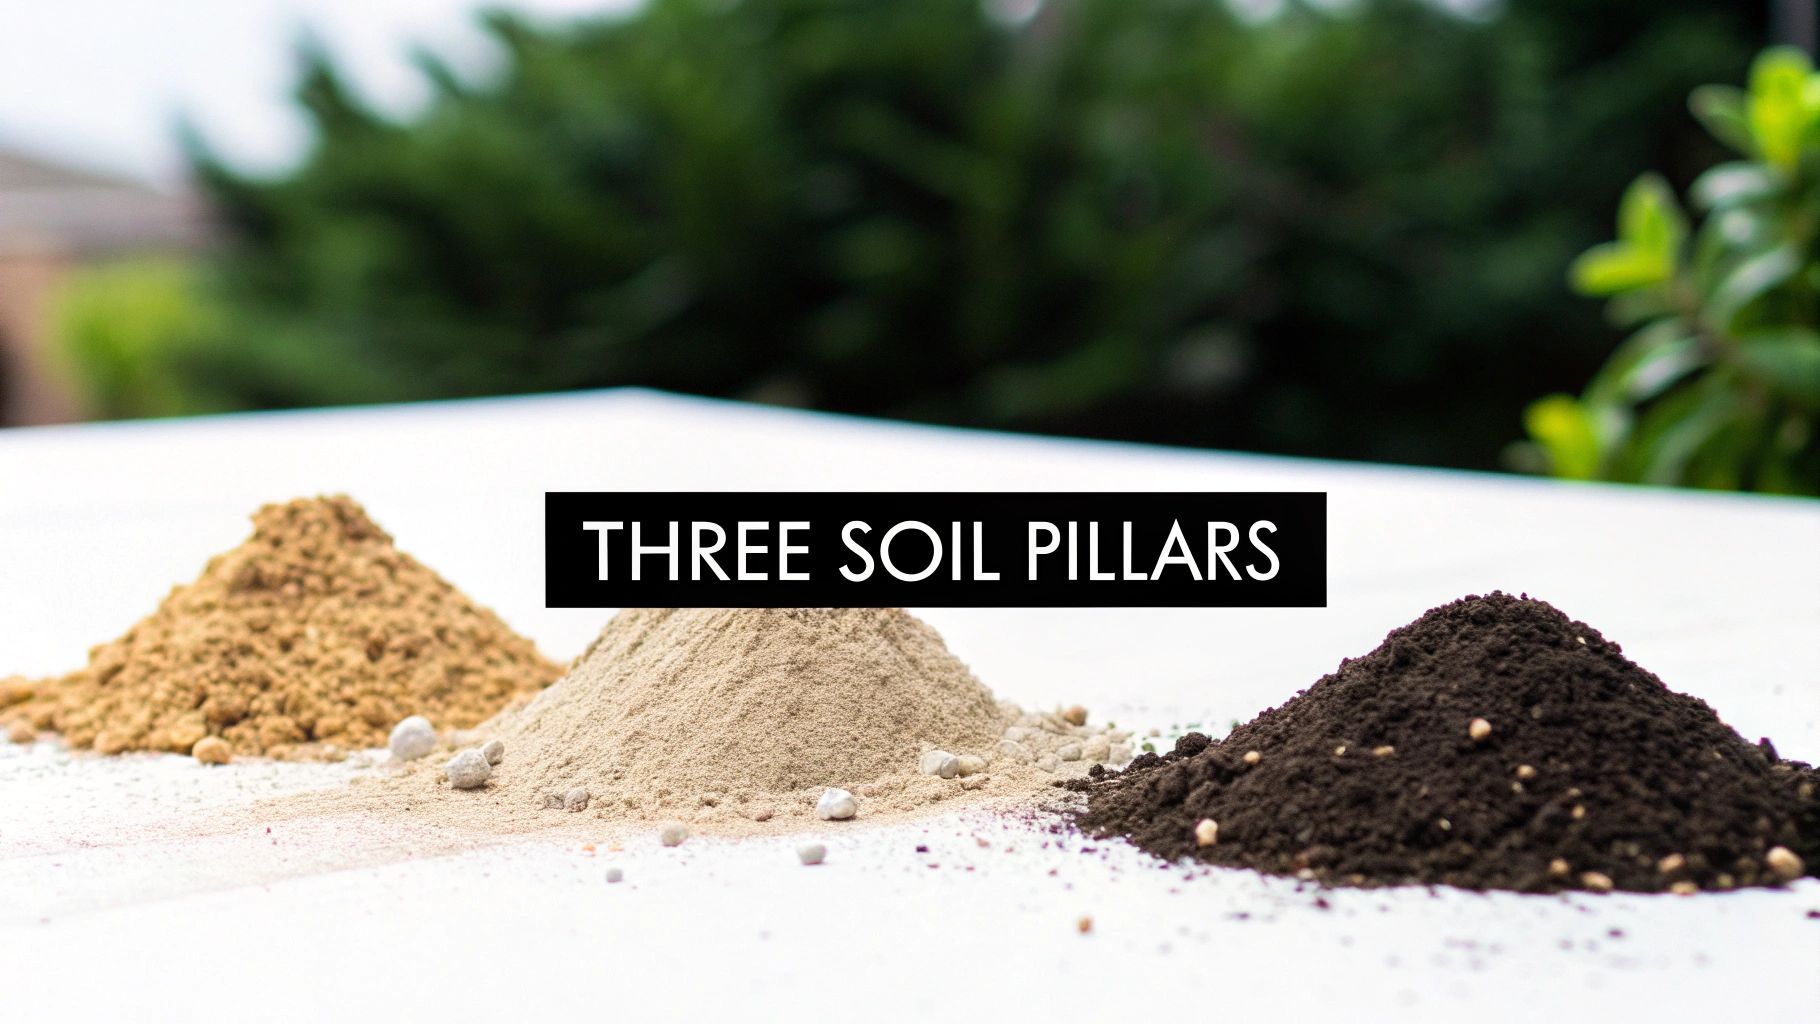
A great soil mix for your aloe isn't just one thing—it's a team of ingredients working in harmony. To create the best potting soil for aloe, you really just need to understand three core principles: drainage, aeration, and nutrient delivery. I like to think of them as the pillars holding up the entire root system.
Once you get a feel for how these three elements work together, you'll be able to spot a quality mix on the shelf or feel totally confident whipping up your own. Each pillar has a specific job to do, and together they recreate the dry, gritty environment that aloes absolutely love.
Pillar 1: Drainage
If you remember one thing, make it this: drainage is king. The absolute worst thing you can do to an aloe is give it "wet feet," which is just a term for roots sitting in soggy, stagnant soil. Excellent drainage means that when you water, the excess flows right out the bottom of the pot, never hanging around long enough to cause root rot.
This is where gritty, inorganic materials are the heroes. They create little channels and gaps in the soil so water can make a quick exit.
- Coarse Sand: We’re not talking about fine beach sand here. Horticultural sand is much grittier and creates perfect little escape routes for water.
- Pumice: This is that lightweight volcanic rock you see in many succulent mixes. It’s full of tiny holes and doesn't compact, which keeps those drainage paths open for business.
- Perlite: Another volcanic glass, perlite is super light and fluffy. It's fantastic for keeping the soil from turning into a dense brick.
This is so important that you'll see premium succulent soils formulated with 50-70% perlite or pumice. This high-grit recipe is specifically designed to combat root rot, a silent killer responsible for up to 40% of indoor aloe deaths. Getting the drainage right means the soil can hold just enough moisture without becoming a swamp, which can actually cut your watering frequency by up to 30%.
Pillar 2: Aeration
Right alongside drainage is aeration. Just like us, aloe roots need to breathe. Aeration is all about the amount of air space within the soil, which gives roots access to the oxygen they need to grow strong. Without it, the roots suffocate, weaken, and become an easy target for disease.
Materials that boost aeration are simply creating tiny air pockets throughout the mix. This prevents the soil from compacting over time.
Good aeration is like giving your aloe's roots room to stretch and breathe. Compacted, dense soil is the equivalent of putting them in a chokehold.
A well-aerated soil feels light and almost fluffy, never heavy or muddy. Ingredients like pine bark fines are perfect for creating these vital air pockets, keeping the root zone healthy and functioning. Without these air gaps, even a pot with a drainage hole can hold too much water. If you want to go deeper on this, our guide explains more about why succulents need drainage from both the pot and the soil itself.
Pillar 3: Organic Matter
Last but not least, we have organic matter. While aloes despise rich, heavy soil meant for tropical plants, they do need a small amount of organic material to thrive. This component provides a slow, gentle release of nutrients and helps retain just a tiny bit of moisture for the roots to drink up before the soil dries out again.
The trick is finding the right balance. Too much organic matter turns your soil into a sponge, and you're right back in root rot territory.
- Coco Coir: A fantastic and sustainable alternative to peat moss, coir holds a bit of moisture but resists compaction.
- Compost: A little bit of well-sifted compost goes a long way. Use it sparingly to provide a gentle nutrient boost.
The goal here is simple: include just enough organic matter to support the plant without messing up the crucial drainage and aeration from the other two pillars. Getting this balance right is what truly makes a soil mix exceptional.
Two Easy DIY Potting Soil Recipes for Aloe
Ready to mix up the perfect home for your aloe? Making your own potting soil is easier than you think. Not only does it save you a few bucks, but it also puts you in the driver's seat, letting you control exactly what your plant's roots are living in. Think of yourself as a personal chef for your aloe, blending the perfect mix to keep it happy.
I've got two simple, field-tested recipes for you. The first one is great for beginners and uses three easy-to-find ingredients. The second is more of an enthusiast's blend, tweaked for even better performance.
Simple Starter Aloe Mix
This is my go-to recommendation if you're just starting out or need to whip up a batch of reliable soil quickly. It’s built on a super simple 1:1:1 ratio, making it a breeze to remember and mix. You're essentially combining one part organic matter, one part drainage, and one part aeration.
- 1 Part Potting Soil: Grab a basic peat-free potting soil or some coco coir. This is your organic base, which holds a little moisture and offers a few nutrients.
- 1 Part Coarse Sand: This is the secret to good drainage. Make sure you get horticultural sand or builder's sand. Fine play sand is a no-go; it’ll just compact and turn your pot into a brick.
- 1 Part Perlite or Pumice: These lightweight volcanic rocks are fantastic for creating air pockets. This keeps the soil from getting too dense and suffocating the roots.
Just toss these three ingredients into a bucket and mix them up. You want an even blend. The final mix should feel much lighter and grittier than regular potting soil—and that's exactly what your aloe is looking for.
Pro Tip: I always mix my soil in a large bucket or on a tarp to contain the mess. It also helps to lightly dampen the ingredients with a spray bottle before mixing. This keeps the dust from the perlite and sand from flying everywhere.
Enthusiast’s Gritty Blend
If you're ready to level up your aloe game, this recipe is for you. It adjusts the ratios and focuses on long-term structure to create a mix that's all about maximum drainage and airflow. It’s the closest you can get to mimicking the rocky, arid soil where aloes grow naturally. This is an excellent choice if you live in a humid climate or have a tendency to overwater.
This recipe follows a 2:2:1 ratio:
- 2 Parts Pumice: Pumice is the MVP here because it provides incredible aeration and doesn't break down over time like other organic components can.
- 2 Parts Coarse Sand: We’re doubling down on the sand to create plenty of channels for water to drain away quickly. No soggy roots here.
- 1 Part Coco Coir: Just a touch of coir is all you need. It adds that little bit of organic material to the mix without turning it into a sponge.
This blend is incredibly durable and resists compaction for years, which means less repotting for you. If you really want to geek out on the science behind these ingredients, our in-depth guide to cactus and succulent soil mix has all the details. Mixing your own soil is a seriously rewarding part of being a plant person.
How to Choose the Best Store-Bought Soil Mix
While mixing your own soil gives you ultimate control, sometimes you just need to grab a bag and get the job done. I get it. The good news is, you don't have to be a soil scientist to pick a great mix for your aloe. It really just comes down to knowing what to look for on the bag.
Think of it as being a bit of a detective. Your first clue is right on the front.
What to Look for on the Bag
When you're scanning the shelves, keep an eye out for bags specifically labeled for "Cactus," "Succulent," or "Fast-Draining" plants. These are your best bet. A label like that tells you the mix was designed for plants that, like aloe, absolutely despise having "wet feet." These blends are built from the ground up to provide the excellent airflow and quick drainage that desert plants crave.
On the flip side, there are some words that should be immediate deal-breakers. If you see phrases like "Moisture Control," "Water Retaining," or "Enriched Garden Soil," walk away. These soils are made to hold water like a sponge, which is fantastic for ferns and tropicals but a death sentence for your aloe. Using one is the fastest way to invite root rot.
Decoding the Ingredient List
The real story is always on the back of the bag. A quick glance at the ingredient list will tell you everything you need to know. For an aloe-friendly mix, you want to see a roster dominated by gritty, inorganic materials.
Here’s what you want to see near the top of the list:
- Pumice, Perlite, or Lava Rock: These are non-negotiable. These volcanic rocks create the air pockets essential for healthy roots and drainage.
- Coarse Sand or Horticultural Grit: This is what helps water rush through the pot instead of lingering.
- Pine Bark Fines: These small bits of bark add a little structure without turning into a soggy mess.
This isn't just a fussy preference; it's a proven formula. In the Asia-Pacific region, which led the $2.12 billion global aloe vera market with a 39.37% share in 2024, growers have soil science down to an art. In major cultivation hubs, a common commercial mix is around 50% sand, 30% loam, and 20% organic matter. This specific blend has been shown to boost aloe gel production by up to 25%. You can dive deeper into the aloe vera cultivation insights from the global market to see just how critical the right soil is.
Navigating the store aisle can be tricky with so many options. To make it easier, let's break down the most common types of commercial soil mixes you're likely to encounter.
Comparing Commercial Soil Mixes for Aloe
| Soil Type | Common Ingredients | Drainage Performance | Ideal For |
|---|---|---|---|
| Cactus & Succulent Mix | Pumice, perlite, sand, forest products (bark), peat moss | Excellent | The best choice. Specifically formulated for the drainage and aeration aloes need. |
| All-Purpose Potting Mix | Peat moss, compost, forest products, perlite/vermiculite | Poor | Thirsty plants like tropicals and annuals. Avoid for aloes unless heavily amended. |
| Moisture Control Potting Mix | Peat moss, coir, water-retentive polymers | Very Poor | Plants in hot, dry climates or for gardeners who forget to water. A major red flag for aloe. |
| Organic Garden Soil | Compost, manure, topsoil, sand, clay | Varies (Often Poor) | In-ground garden beds. It's too dense and non-sterile for container aloes. |
As you can see, a dedicated Cactus & Succulent mix is almost always the right move. It's engineered for the exact conditions your aloe will thrive in.
Don't Be Afraid to Amend a Good Mix
Let's say you find a cactus mix that’s almost perfect, but it still feels a little heavy on the peat. Don’t write it off! It’s often much easier to tweak a decent pre-made mix than to build one from scratch.
Think of it like this: you're buying a good base soup and adding your own favorite spices. A handful of extra pumice or perlite can transform an average succulent soil into the perfect home for your aloe.
I always keep a small bag of pumice on hand for this very reason. If a store-bought mix feels a bit dense, I just stir in a scoop or two. It instantly lightens the texture, improves airflow, and gives me peace of mind that my aloe has the well-draining environment it needs to flourish.
A Step-By-Step Guide to Repotting Your Aloe
You've got the perfect gritty, well-draining soil ready to go. Now, it's time to give your aloe a fresh start. Repotting might seem like a big deal, but it's really a straightforward process that can completely rejuvenate a plant that's gotten a little too big for its britches.
So, how do you know when it’s time? Your aloe will send you some pretty clear signals. If you see roots making a break for it through the drainage holes, or if its growth has slowed to a crawl during the spring and summer, it's probably feeling cramped. Sometimes, it just plain looks top-heavy and crowded. These are all classic signs that your aloe is ready for an upgrade.
Preparing for the Move
Before you even think about pulling the plant out, get all your supplies lined up. A smooth, organized process is way less stressful for both you and your plant.
-
Choose the Right Pot: Grab a new pot that's only about 1-2 inches wider in diameter than the old one. Terracotta is fantastic because it's porous and helps the soil dry out evenly. Whatever you choose, it absolutely must have a drainage hole—that part is non-negotiable for a happy aloe.
-
Prepare the New Pot: You can place a small piece of mesh screen or even a coffee filter over the drainage hole to keep your new soil from washing straight out. Then, fill the new pot about a third of the way with your gritty aloe mix.
The Repotting Process
Alright, this is the main event. The key here is to be gentle. Remember, you're trying to give the roots a better home, not send them into shock.
-
Gently Remove the Plant: Tip the current pot on its side and give the bottom and sides a few firm taps. This should help loosen things up. Carefully slide the aloe out while holding it by the base of the leaves. If it’s being stubborn, a butter knife run around the inside edge of the pot can help persuade it.
-
Inspect the Roots: With the plant free, gently shake off the old, tired soil from the root ball. Take a good look at the roots. They should be firm and white or a light tan color. If you spot any that are black, mushy, or smell a bit funky, that's root rot. Snip those off with a pair of clean scissors.
-
Position Your Aloe: Set the plant right in the center of its new pot. You'll want the base of the plant—where the leaves start—to sit about an inch below the pot's rim.
-
Fill with New Soil: Start adding your fresh aloe soil mix around the plant, making sure to fill in all the gaps. Pat the soil down lightly to make the plant secure, but don't pack it in. You want to keep all that great aeration you worked so hard to create.
The Golden Rule of Repotting: After you’ve settled your aloe into its new home, wait at least 3-5 days before you even think about watering it. This little break is crucial. It gives any roots that might have been bruised or broken during the move a chance to heal and callus over. Watering right away is like an open invitation for bacteria to cause rot.
This flowchart is a great little cheat sheet for making sure any soil you're considering is a friend, not a foe, to your aloe.
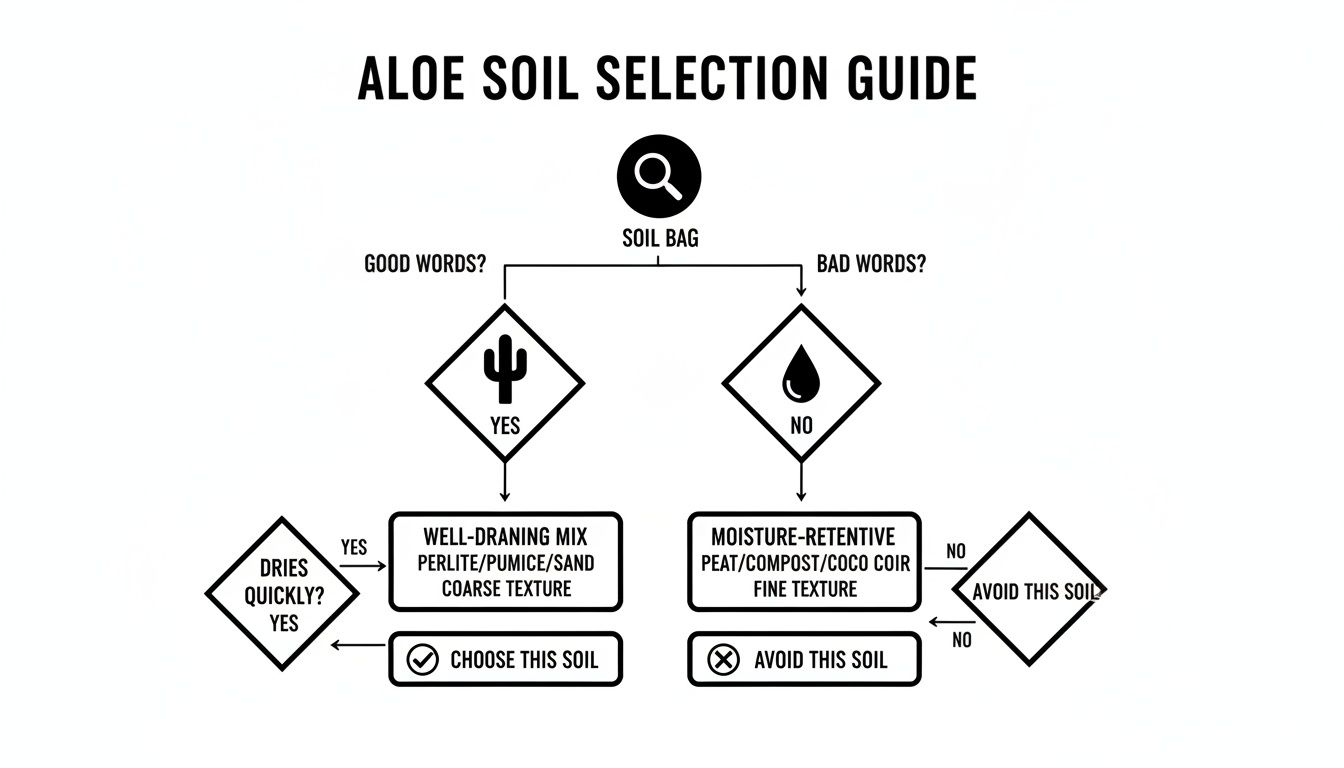
As you can see, terms like "cactus" and "fast-draining" are green lights for a healthy plant, while anything promising "moisture control" is a direct route to trouble.
When your aloe plant looks like it's having a bad day, the first place I always check is the soil. It's the usual suspect. Most of the common issues we see—from those dreaded mushy leaves to a plant that just won't grow—can be traced right back to a potting mix that's doing more harm than good.
Think of it this way: the wrong soil is a constant source of stress for your aloe. If it's too dense, too wet, or completely lacking in nutrients, the plant simply can't get what it needs to thrive. Sooner or later, it's going to show you it's unhappy.
Yellow, Mushy Leaves
This is the classic, number-one sign of overwatering, and it almost always points to soil that refuses to dry out. When the mix is heavy and waterlogged, the roots are literally drowning. They can't get any air, so they start to suffocate and decay. We call this root rot.
Once the roots are compromised, the plant can no longer pull up water and nutrients. The first thing you'll notice are those soft, yellowing leaves, usually starting at the base of the plant.
Solution: The first thing to do is stop watering immediately. Let it dry out and see if it recovers. If things look pretty bad, you'll need to pull the plant out of its pot and get it into a fresh, fast-draining cactus mix. While you have it out, take a look at the roots and trim off any that are black, slimy, or mushy. For a full walkthrough on saving your plant, our guide on identifying and treating aloe vera plant root rot has you covered.
Tall, Weak, or Leggy Growth
Is your aloe stretching for the sky with pale, flimsy leaves? While not enough light is often a factor, your soil could be making it worse. A potting mix that’s too rich—packed with heavy compost or peat—can push the plant to grow too fast.
This rapid growth spurt results in a weak, "leggy" structure that can't even support its own weight. Aloes are desert plants; they prefer a lean soil that makes them work a little, encouraging slow, strong, and compact growth.
- Symptom: The plant is getting tall and thin instead of staying full and sturdy.
- Cause: The soil is too rich, essentially force-feeding the plant.
- Solution: Time to repot. Move it into a grittier, less fertile succulent mix that provides just enough nutrition without going overboard.
No Growth or Stunted Appearance
Does it feel like your aloe has been the exact same size for months? If it’s just sitting there, especially during the spring and summer growing season, you might be dealing with compacted soil.
Over time, a low-quality mix can become hard as a brick. This physically constricts the roots, preventing them from spreading out to find moisture and nutrients. It basically puts the plant in a chokehold, and all growth comes to a screeching halt. A good aloe soil should stay loose and airy, giving roots the space they need to grow. If yours feels solid, it’s time for a fresh start in a better mix.
Common Questions About Aloe Soil
Let's tackle a few common questions that pop up when you're dialing in the perfect soil for your aloe. Getting these details right will help you feel much more confident about keeping your plant happy.
Can I Just Add Perlite to Regular Potting Soil?
It’s a tempting shortcut, but just adding perlite to a standard potting mix usually isn't enough. Think of it this way: regular potting soil is built like a sponge, designed to hold onto water for thirsty tropicals. It's often packed with peat moss, which is great for moisture retention.
Even if you mix in a lot of perlite, that base "sponge" is still there, ready to become waterlogged. A better approach is to start with a mix designed for cacti and succulents and then amend that with extra grit if your environment calls for it.
How Often Should I Replace My Aloe's Soil?
Aloes are pretty low-key and actually like being a little snug in their pots, so you don't need to repot them constantly. A good schedule to follow is every 2-3 years. You'll also know it's time when the plant starts looking top-heavy and unstable, or when you see roots making a break for it out of the drainage hole.
Why bother? Over time, any soil—no matter how good—gets compacted. Nutrients get used up, and the soil loses its airy structure. A fresh batch of soil is like a new lease on life, giving the roots room to breathe and a gentle boost of nutrients.
Does Pot Material Matter as Much as the Soil?
Absolutely! The pot and the soil are a team. The right soil provides the drainage, but the right pot helps it do its job even better.
Terracotta pots are hands-down the best choice for aloes. The clay is porous, which means it naturally wicks moisture out of the soil. This helps the entire root ball dry out more evenly and quickly, giving you a fantastic buffer against the dreaded root rot.
Ready to give your aloe the perfect home it deserves? Explore the premium selection of cacti and succulents at The Cactus Outlet and find the ideal companion for your new soil mix. Visit us today at https://www.cactusoutlet.com.