
Growing new cacti from cuttings is one of the most rewarding things you can do as a plant owner. In just a few weeks, you can turn a small piece of a parent plant into a brand-new, self-sufficient cactus. The process is straightforward: take a cutting, let it dry out, and plant it. That's it. It’s the perfect way to multiply your favorite plants or share them with friends.
Why Propagate Cacti From Cuttings
Learning to grow cacti from cuttings is about more than just getting free plants. It’s a skill that connects you to the entire life cycle of these incredible succulents. Every cutting that successfully roots is a new beginning, a way to turn one plant you love into an entire collection.
This technique is also incredibly practical. We've all been there—a favorite cactus starts to show signs of rot, or gets knocked over and damaged. Taking a healthy cutting can be a lifeline. It’s a way to save and restart the plant before it’s too late, turning a potential loss into a success story.
The Benefits of Propagating Your Own Cacti
Once you get the hang of it, you'll find all sorts of reasons to propagate your cacti. It's a surprisingly simple and cost-effective way to fill your space with unique, beautiful plants.
- Expand Your Collection: Turn that one prized specimen into a whole family of cacti without spending another dollar.
- Share with Community: There's no better gift for a fellow plant lover than a home-propagated cutting from one of your own plants.
- Rescue and Preserve: Save a piece of a damaged or dying cactus, giving it a second chance to thrive and keeping its unique genetics going.
There's something truly special about watching a simple piece of stem sprout its own roots and start pushing out new growth. It gives you a much deeper appreciation for how these plants work and makes you a better caretaker in the process.
Tapping into a Growing Trend
The love for cacti and succulents isn't just a niche hobby anymore. It's a massive global trend. In 2024, the market was valued at around USD 1.2 billion, and it's expected to hit nearly USD 2.24 billion by 2032. That incredible growth means unique and well-cared-for cacti are more popular than ever, turning a fun pastime into a potential side hustle for some. You can learn more about these exciting market trends and projections.
Whether you're snipping a piece from a friend's plant or just getting started, the process is accessible for everyone. If you're thinking about starting with a pre-cut piece, our guide on whether you should buy a cactus cutting online can help you decide. As you follow along, you'll see just how simple it is to get started.
How to Choose and Prepare the Perfect Cactus Cutting
The entire journey of growing a new cactus from a cutting starts with one critical choice: the parent plant. Your success rate is directly tied to the health and vitality of the specimen you start with. You'll want to find a cactus that's actively growing, looks vibrant, and shows zero signs of stress, disease, or pests.
A healthy parent plant will have firm, well-colored stems or pads. Steer clear of any cactus that looks weak, stretched out (a tell-tale sign of not getting enough light, called etiolation), or has any suspicious spots, blemishes, or mushy areas. Think of it like picking the best genetics for your new plant; a robust parent is far more likely to give you a robust baby. The sweet spot for a cutting is mature, but not overly old and woody, growth.
Making a Clean and Sterile Cut
Once you’ve scouted the perfect candidate, it's time to actually take the cutting. This isn't a job for tearing or twisting. You're aiming for a clean, almost surgical cut that minimizes damage to both the parent plant and your new cutting.
A sharp, sterile blade is your best friend here. A clean utility knife, a sharp pair of garden shears, or even a serrated knife for the big guys will work great. The key is to sterilize your tool with isopropyl alcohol or a diluted bleach solution before and after every single cut. This simple step is huge for preventing the spread of nasty fungal or bacterial infections. A clean cut heals faster and more effectively, which is exactly what you need for the next stage.
The Non-Negotiable Step: Callousing
Alright, this is the single most important moment in the entire process. It’s what separates successful propagations from a sad pile of rot. I'm talking about the callousing period, and it is absolutely non-negotiable. A fresh cactus cut is an open wound, and if you stick it straight into the soil, it's going to suck up too much moisture and rot. Every time.
Callousing is just the natural process of the cut end drying out and forming a hard, protective seal. This callous is a barrier, stopping bacteria and fungus in the soil from getting into the vulnerable tissue. To do it, just place your new cutting in a dry, shady spot with good air circulation. Don't put it in direct sun, which can easily scorch it.
The patience you practice during the callousing phase directly translates into the success of your propagation efforts. Rushing this step is the single most common reason new cuttings fail.
So, how long do you wait? It really depends on the size and type of your cutting. There’s no magic number, so you have to learn to read the signs.
- Small Pups or Segments: For little guys like a Mammillaria pup or a single segment of a Christmas Cactus, 3-7 days is usually plenty of time.
- Medium Stems or Pads: A medium-sized columnar cutting or a prickly pear pad (Opuntia) will probably need 1-3 weeks to be safe.
- Large, Thick Cuttings: Got a big arm off a columnar cactus? You could be waiting a month or even longer for it to fully callous over.
You’ll know it’s ready when you touch the cut end and it feels dry, firm, and maybe a little indented—almost like a piece of cork. There should be absolutely no moisture or softness. Only then is it ready to plant.
Getting this right opens up a whole world of possibilities, from just growing your own collection to sharing plants with friends or even selling them.

When you master these first few steps, you unlock all of these rewarding outcomes. It all starts with a good cut and a little bit of patience.
Getting Your Cactus Cuttings in the Soil
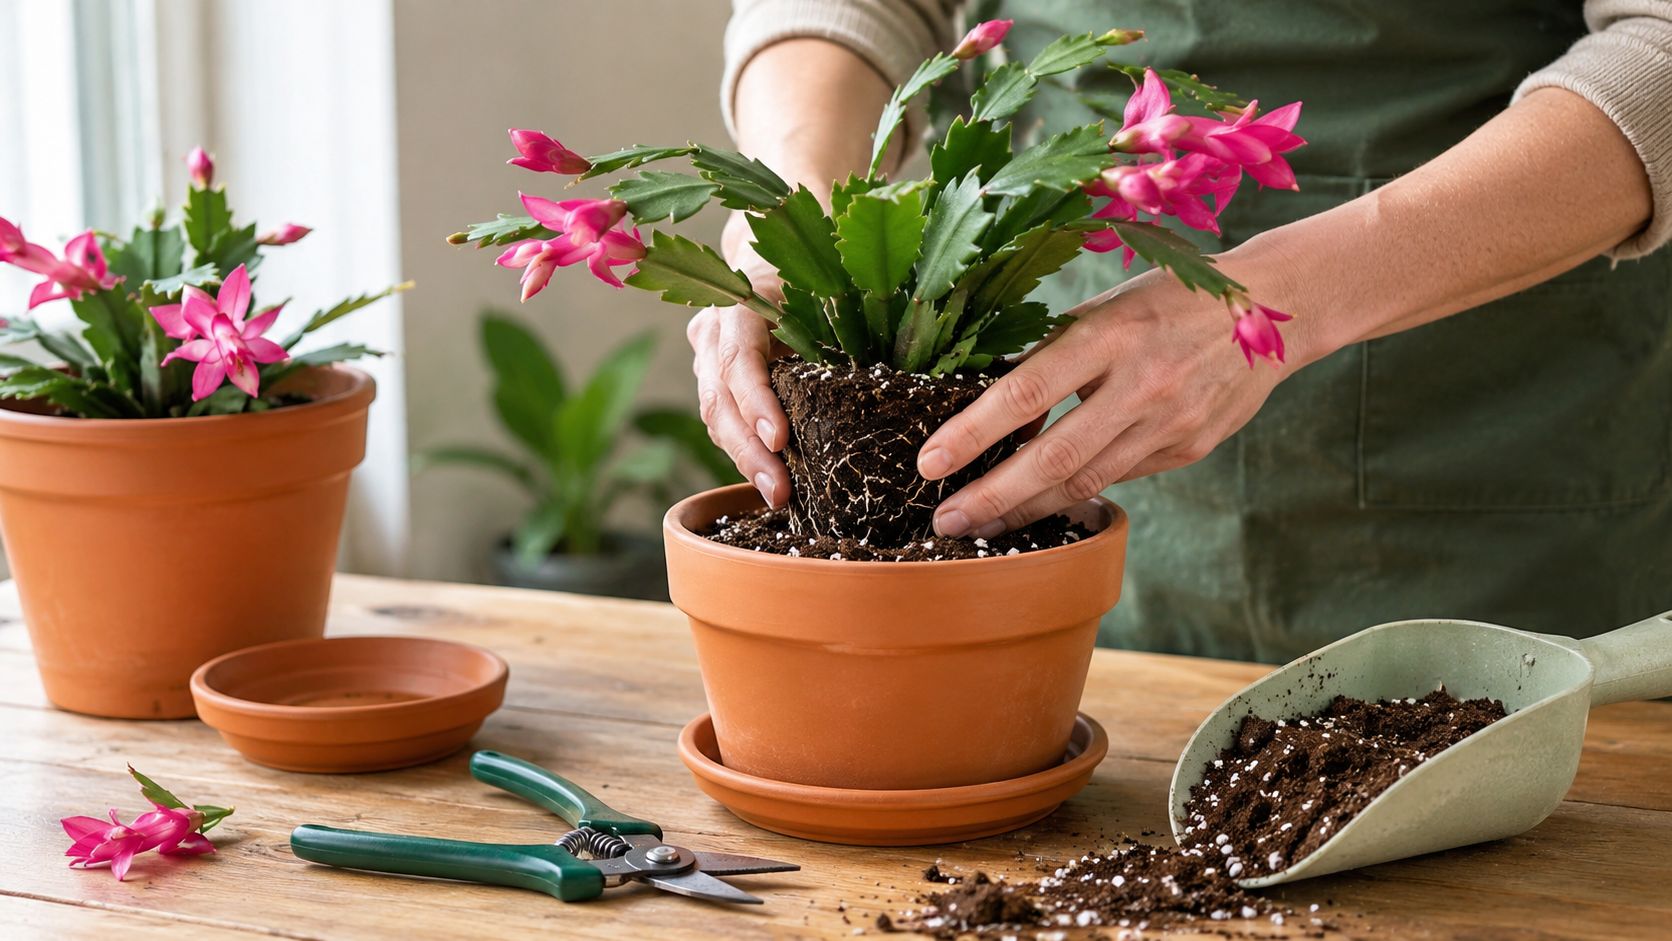
Once your cutting has a tough, dry callous, it's finally time to get it into a pot. This is the moment we've been working towards—giving that cutting a new home where it can sprout roots. The trick here is to provide a stable, dry environment that nudges it into growing, and that means resisting the powerful urge to grab the watering can.
Your choice of container really matters. If you're new to this, you can't go wrong with a classic terracotta or unglazed ceramic pot. These materials are porous, which means they breathe. Any excess moisture wicks away through the sides of the pot, which is a massive help in preventing rot—the absolute nemesis of a new cutting.
No matter what pot you choose, make sure it has at least one good-sized drainage hole. If water can't escape, it'll pool at the bottom and create a swampy mess that will rot your cutting before it has a chance. As for size, pick something just big enough to hold the cutting securely without being comically oversized.
How to Plant for Stability and Success
When you're ready, take your calloused cutting and gently nestle it into your dry potting mix. You only need to plant it deep enough so it can stand on its own without falling over. For most cuttings, this is about one to two inches deep.
- Columnar Cacti: Tall, skinny pieces, like a slice of a Peruvian Apple Cactus, might need to be planted a bit deeper just to keep them from tipping over.
- Pups and Offsets: Little round offsets from a Mammillaria or similar cactus might only need to be buried a half-inch or so.
- Pads or Segments: For Opuntia pads, burying the bottom third of the pad usually provides enough of an anchor to keep them upright.
If your cutting still feels a bit wobbly, you can prop it up with a few small rocks or some chunky gravel around the base. This keeps it from shifting around and breaking off any delicate new roots that are trying to form. And now for the hardest part: the waiting.
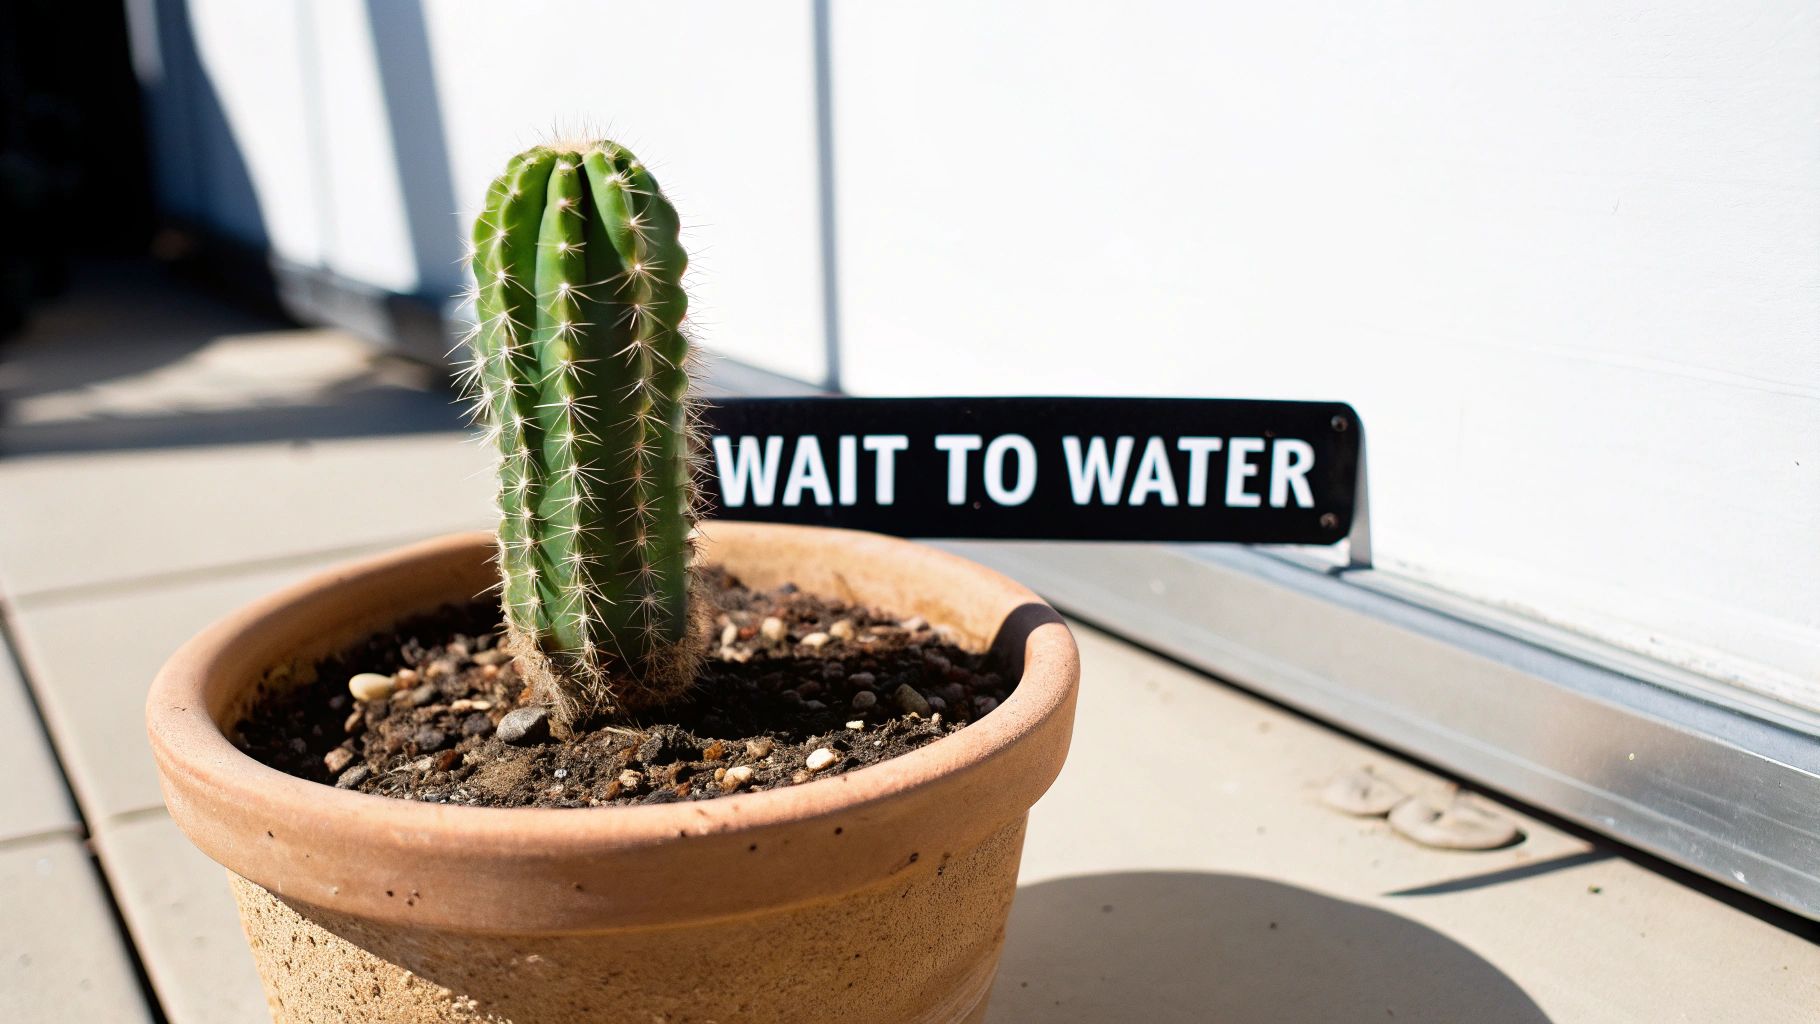
The Critical "Wait to Water" Period
This is going to feel wrong, but you absolutely must not water your freshly planted cutting. It has no roots yet, so there's nothing to soak up the water. All you'll accomplish by watering now is creating a damp environment perfect for fungus and rot to attack the vulnerable base. The cutting has plenty of stored water in its tissues to live off while it focuses its energy on producing new roots.
I know it's tempting. The cutting might even shrivel a little bit, and you'll think it's thirsty. Trust me, this is normal. Watering it now will ruin all your hard work. Patience is your best tool here.
This dry spell can last anywhere from one to four weeks. It all depends on the type of cactus, the size of the cutting, and the temperature and humidity in your home. During this time, find a spot for your potted cutting that gets bright, indirect light. Keep it out of direct sun, which can easily scorch the defenseless plant.
The good news is that this method is incredibly reliable. Horticultural data shows that for many common species, the rooting success rate is between 70–95%. Rooting usually kicks off within two to six weeks, and you’ll have a well-established plant in just a few months. It's no wonder this is a go-to technique for hobbyists and even commercial propagation operations.
After a few weeks have passed, you can do a gentle "tug test." Give the cutting a tiny, delicate nudge. If you feel a little resistance, you've got roots! That's the green light you've been waiting for. It's finally time to give your new cactus its first, careful drink of water.
Nailing the Soil Mix and Rooting Environment
Once your cactus cutting is properly calloused, it's ready for the next big step. Think of it this way: the cutting is primed and waiting, but the soil you give it will either be a launchpad for new roots or a recipe for rot. This is where so many people go wrong. Grabbing a bag of standard potting soil is the quickest way to kill a cutting; it's just too dense and holds water for far too long.
The secret is to create a rooting medium that's all about fast drainage and great aeration. We're trying to mimic the gritty, rocky soils where cacti thrive in the wild—places where water shows up and then disappears almost instantly. This means your mix needs a lot of inorganic material to create air pockets and prevent it from turning into a muddy mess.
Building Your Own Gritty Mix
Mixing your own soil gives you total control, and honestly, it’s the best way to guarantee success for your cuttings. While you can find pre-made cactus soils, I've found that most of them are still too heavy for a brand-new, rootless cutting. They’re usually better for plants that are already well-established.
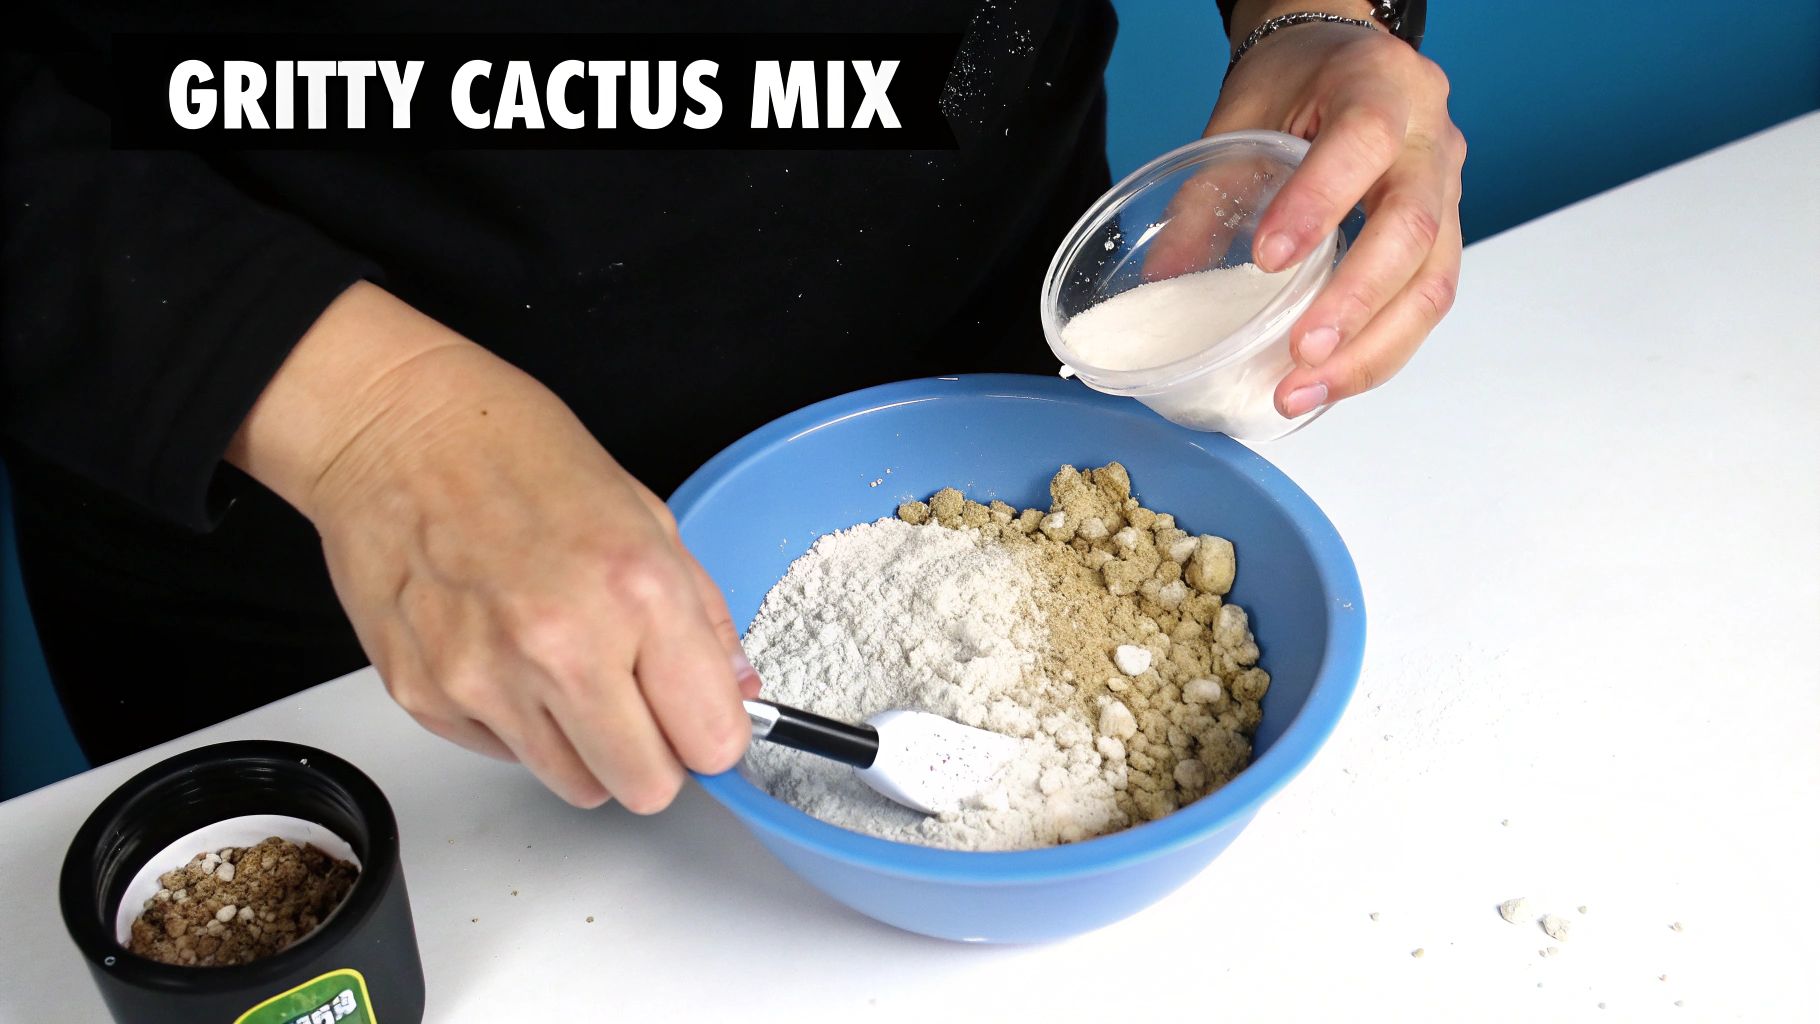
You don't need a complicated formula to get started. A simple DIY mix often works best:
- Pumice or Perlite: These are your non-negotiables for aeration. They're lightweight volcanic rocks that create permanent air pockets in the soil, which is exactly what new roots need to breathe and grow without rotting.
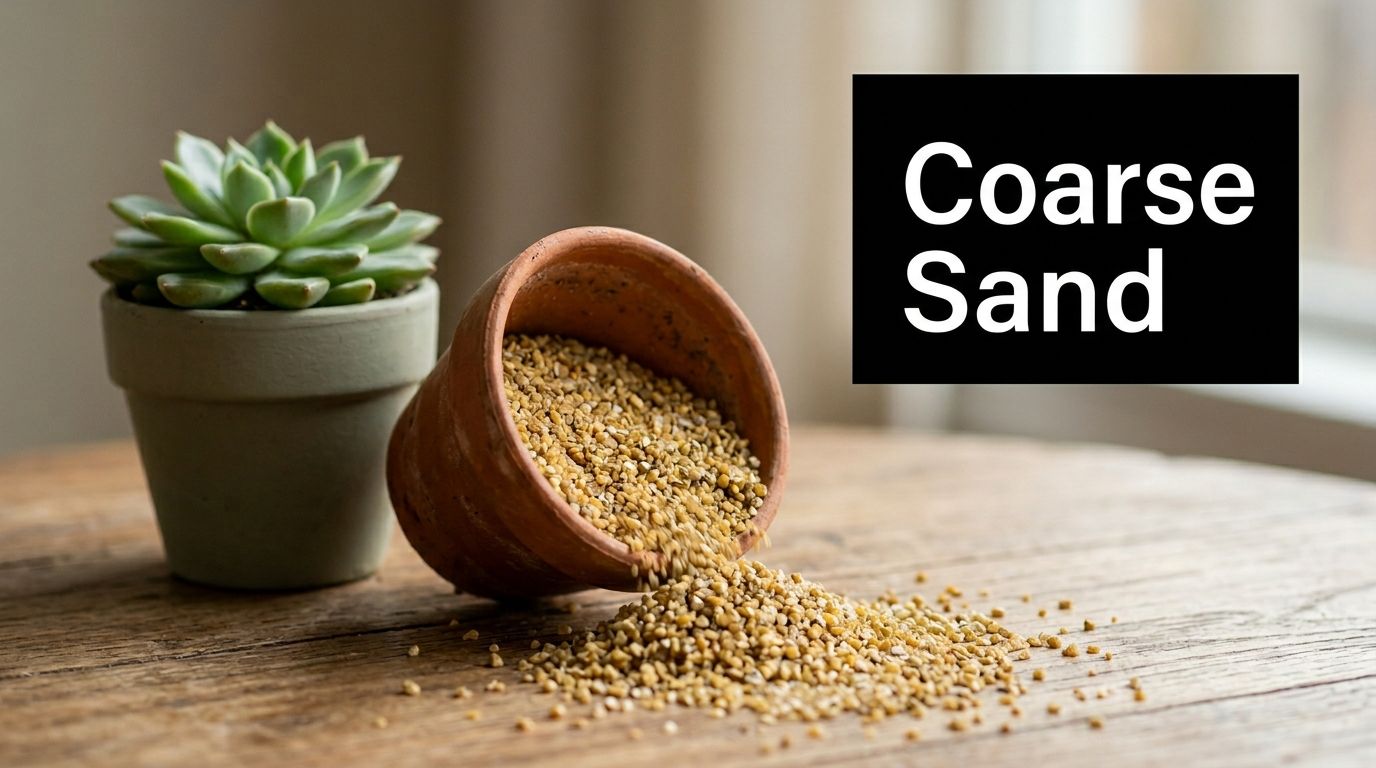
- Coarse Sand or Grit: This adds a bit of weight and structure while keeping things draining freely. Just be sure to avoid fine play sand—it can compact when wet and become hard as a rock.
- A Pinch of Organic Matter: This could be a little coco coir or a small amount of a quality potting mix. It's just there to hold a tiny bit of moisture for when the roots finally appear.
For a reliable, all-purpose mix for cuttings, I usually recommend a ratio of two parts pumice, two parts coarse sand, and one part organic matter. This blend is wonderfully gritty and airy, giving your cuttings their best shot.
Here's a quick test: a good rooting mix should feel gritty and fall apart easily when you squeeze it in your hand. If it clumps up like brownie batter, it’s holding too much water and you're heading for trouble.
Of course, not everyone wants to store big bags of soil amendments. If you'd rather use a pre-made base, you can easily beef it up. Just take a commercial cactus mix and add an equal amount of pumice or perlite to it. This one simple step dramatically improves drainage and makes it much safer for your cuttings. For a deeper dive, our guide on cactus and succulent soil mix has even more detailed recipes and tips.
The right soil mix is a game-changer. I've developed a few go-to recipes over the years, each suited for different conditions and cactus types.
Cactus Cutting Potting Mix Recipes
| Mix Type | Component A (Ratio) | Component B (Ratio) | Component C (Ratio) | Best For |
|---|---|---|---|---|
| All-Purpose Starter | Pumice or Perlite (2 parts) | Coarse Sand (2 parts) | Coco Coir (1 part) | A great, reliable starting point for most common cactus cuttings. |
| Arid Environment Mix | Pumice (3 parts) | Horticultural Grit (2 parts) | Sifted Compost (1 part) | Cuttings from desert species or for growers in very humid climates. |
| Moisture-Lover Mix | Pumice (2 parts) | Coarse Sand (1 part) | Cactus Soil (2 parts) | Jungle cacti (like Rhipsalis) or for growers in extremely dry areas. |
These recipes are just a starting point, so feel free to adjust the ratios based on your specific environment and the needs of your plant.
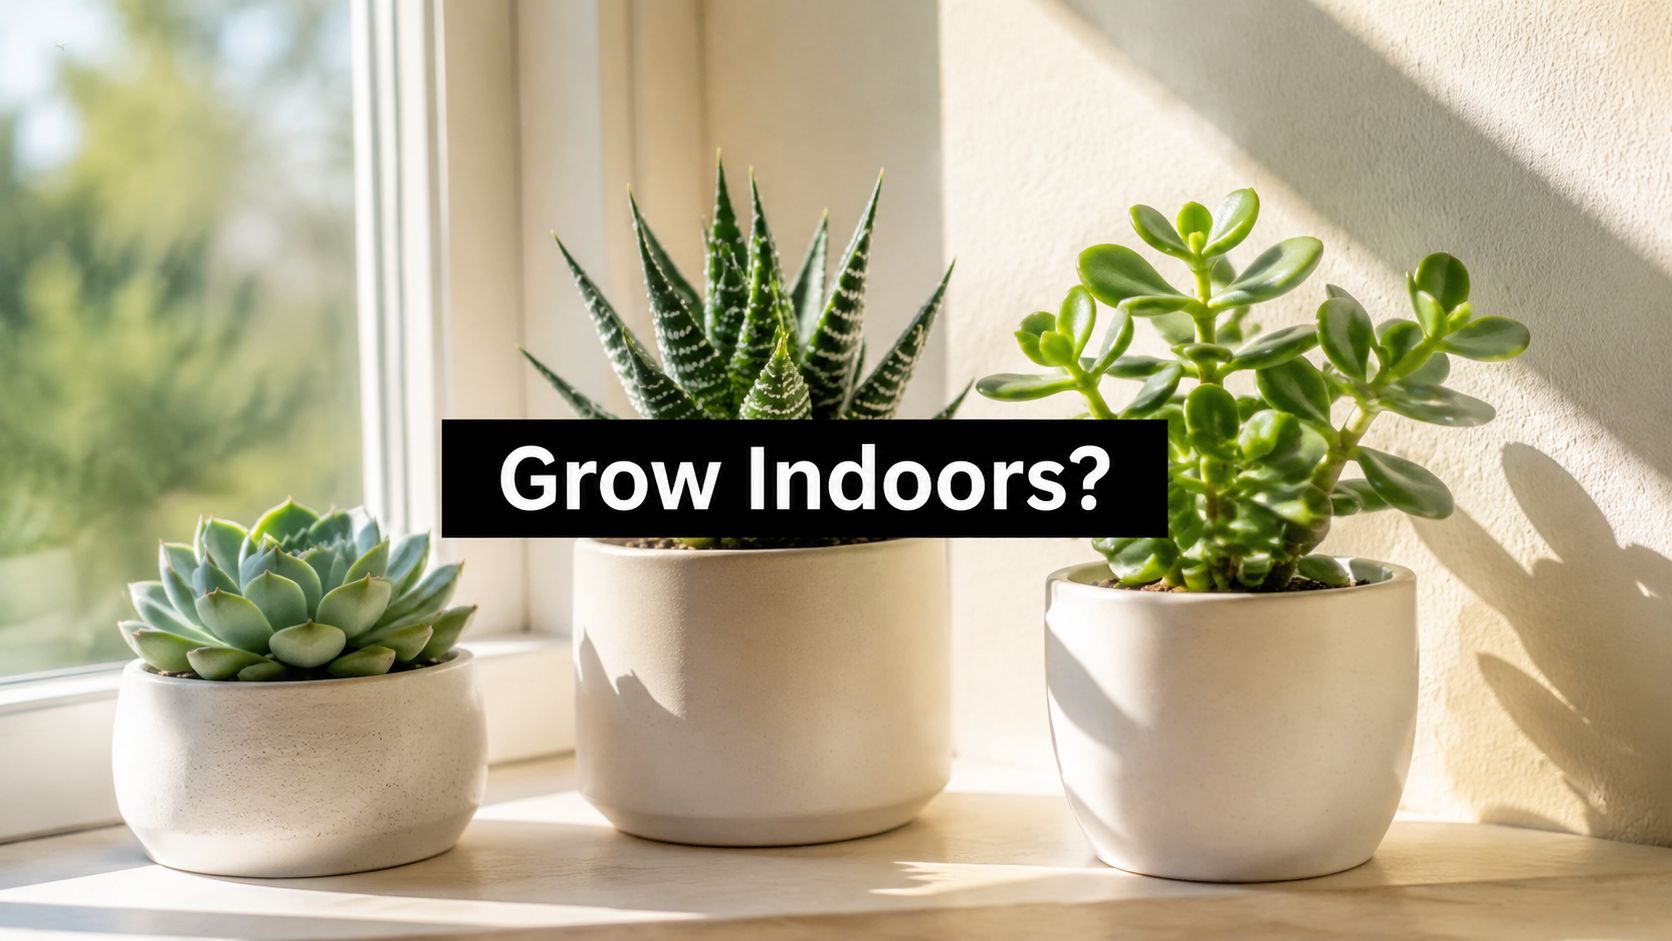
Getting the Light and Temperature Just Right
Soil is only half the battle; the environment around the cutting is just as important. A very common mistake is putting a fresh cutting in direct, blazing sun. It makes sense on the surface—cacti love sun, right? But a cutting with no roots has no way to pull up water, making it incredibly vulnerable to dehydration and sunburn.
Harsh sunlight will scorch and shrivel a new cutting long before it has a chance to root.
Instead, find a spot that gets plenty of bright, indirect light. Near an east-facing window with gentle morning sun is perfect, as is a location a few feet back from a more intense south or west-facing window. You want to give it enough light to energize the rooting process without causing any heat stress.
Finally, let's talk temperature. Warmth is the trigger that tells a cactus it's time to grow. The sweet spot for root formation is a consistent temperature between 70°F and 85°F (21°C and 29°C). If your house tends to be cool, a simple seedling heat mat placed under the pots can make a world of difference. That gentle, consistent warmth from below can significantly speed up how quickly your cuttings root.
Troubleshooting Common Problems When Rooting Cacti
Even when you follow all the steps perfectly, growing cactus cuttings can sometimes throw you a curveball. It’s disheartening when things go wrong, but don't sweat it—these moments are actually the best way to learn. By figuring out how to spot trouble early, you can step in quickly and turn a potential flop into a new thriving plant.
The number one enemy of a cactus cutting is rot. You'll know it when you see it: a soft, mushy, or discolored spot right at the base of the cutting, often turning black or dark brown. This is almost always a sign of too much moisture sitting in the soil before the cutting has any roots to drink it up.
The usual suspects are poor air circulation, a potting mix that stays wet for too long, or watering way too soon. If you catch it early and the rot is just a small spot, you might be able to save the cutting. Just pull it out of the soil, slice off all the rotted tissue with a clean knife until you see only healthy green flesh, and let it callous over again from scratch.
Differentiating Shriveling From Dehydration
It’s completely normal for your cutting to get a little wrinkled or shriveled a few weeks after you've planted it. This is actually a good sign! It means the cutting is digging into its own water reserves to get the energy it needs to push out new roots. As long as the cutting still feels firm, this is exactly what you want to see.
The trick is telling this normal process apart from a real problem. A healthy, shriveling cutting will feel firm and stay dry at its base.
I see this mistake all the time: someone sees a shriveled cutting and immediately douses it with water, thinking it's thirsty. This is the fastest way to cause rot. Remember, with no roots, the cutting can't drink. Adding water just creates a dangerous, swampy environment.
Problematic shriveling, on the other hand, usually comes with other red flags. If the cutting is super wrinkled and feels soft or looks discolored near the soil, you’re likely dealing with rot. If it's wrinkling up a lot and sitting in intense, direct sun, it could be getting scorched. In that case, the fix is easy—just move it somewhere with bright, but indirect, light.
Why Is My Cactus Cutting Not Rooting?
Patience is key, but what if weeks have turned into months and you see zero signs of roots? It’s frustrating, but the cause usually boils down to the environment.
First off, check the temperature. Cacti need warmth to get the rooting process started, ideally somewhere between 70-85°F (21-29°C). A cutting in a chilly room will just sit there, dormant. A simple seedling heat mat placed under the pot can provide the gentle, consistent bottom heat needed to wake it up.
Next, think about the light. While you want to avoid direct sun, too little light can stall everything. A cutting stuck in a dark corner just won’t have the fuel to grow. Make sure it's in a spot that gets plenty of bright, ambient light.
Finally, the problem might be the cutting itself. If it was snipped from an unhealthy plant or a very old, woody part of the cactus, it might not have the get-up-and-go to produce new roots. This is exactly why starting with a healthy, vigorous cutting is so critical.
Identifying Other Common Stress Signals
Beyond the big issues, a few other signs can tell you something isn't quite right. Keep an eye on any color changes. While a bit of a reddish or purplish tint can be a normal stress response to sun, a sudden shift to yellow is a warning sign. If you spot this, our guide on why a cactus might be turning yellow has a ton of info on what might be causing it.
Here’s a quick checklist to help you diagnose what's going on:
| Symptom | Likely Cause | Actionable Solution |
|---|---|---|
| Mushy, Black Base | Rot from excess moisture | Remove from soil, cut away rot, and re-callous the cutting. |
| Minor Wrinkling | Normal water use for rooting | Do nothing! Be patient and continue to withhold water. |
| Severe Wrinkling | Sunburn or dehydration | Move to a location with bright, indirect light. |
| No Root Growth | Incorrect temperature or light | Increase warmth with a heat mat and ensure bright, indirect light. |
| Pest Infestation | Mealybugs or spider mites | Isolate the cutting and treat with isopropyl alcohol or neem oil. |
When you run into these challenges, just stay calm and methodical. Figure out the root cause, make your adjustments, and learn from it. Every cutting you save makes you a more experienced and successful grower.
Answering Your Top Cactus Propagation Questions
Even when you've followed all the steps, a few questions always pop up while you're waiting. It’s totally normal to look at that cutting sitting there and wonder what, if anything, is actually happening under the soil. Let's tackle some of the most common questions I get asked, so you can feel confident as you finish the propagation journey.
How Do I Know if My Cactus Cutting Has Rooted?
This is the big one, isn't it? The good news is you don't have to be a mind reader to figure it out. After about four to six weeks, it's time for the "gentle wiggle test."
Give the cutting the slightest, most delicate tug. If you feel any resistance, that's it—you've got roots! Those new roots have started to anchor the cutting into the mix. An even more obvious sign is new growth. If you spot a new pad forming, a tiny pup emerging, or even just the top of the cactus looking greener and plumper, your plant is officially established.
Whatever you do, resist the urge to pull the cutting out for a peek. Those first roots are as fine as hair and incredibly delicate. Yanking it out will snap them right off, and you’ll be back to square one.
Should I Use Rooting Hormone on Cactus Cuttings?
Honestly, for most common cacti, you don't need it. Species like Opuntia or Echinopsis are practically programmed to root on their own. Just give them some warmth and a gritty potting mix, and they’ll get to work.
That said, rooting hormone can be a useful tool in your back pocket. I tend to pull it out in a few specific cases:
- For tricky species: Some slower or more finicky cacti appreciate the extra encouragement.
- To speed things up: If you're impatient (we've all been there), it can sometimes shave a week or two off the rooting time.
- As an insurance policy: When you only have one cutting of a really special plant, it can't hurt to give it every possible advantage.
If you decide to use it, just lightly dip the calloused end into the powder, tap off the excess so there's just a fine dusting, and plant it. It's helpful, but definitely not essential for success.
What Is the Best Time of Year to Take Cuttings?
Timing really does make a difference. Hands down, the best time to take cactus cuttings is during their active growing season—typically spring and summer.
During these warmer months, the parent plant is full of energy and pushing out new growth. A cutting taken at this time has all the resources it needs to callous quickly and root vigorously. The warm air and long, bright days provide the perfect conditions.
You can still take cuttings in the fall and winter, but your patience will be tested. Everything slows down. The cutting will take much longer to root, and the cool, often damp conditions significantly increase the risk of rot setting in before it has a chance to get going.
Why Is My Cactus Cutting Shriveling?
Seeing your cutting start to wrinkle can be a bit scary, but don't panic! In most cases, this is completely normal.
Think about it: the cutting has no roots, so it can't pull any moisture from the soil. To fuel the energy-intensive job of growing new roots, it taps into the water stored in its own tissue. A little bit of wrinkling is just a sign that the cutting is using its reserves to do its job.
However, if it looks seriously dehydrated, it's time to play detective.
First, check the base. Is it still firm? If so, the problem is likely too much direct sun. Intense heat is causing it to lose water too fast. Move it to a spot with bright but indirect light. If the base feels soft, mushy, or looks discolored, you’ve got rot. In that case, adding water is the worst thing you can do.
Ready to expand your collection with healthy, beautiful plants? At The Cactus Outlet, we offer a stunning variety of cacti perfect for your home or garden. Shop our collection of vibrant cacti and succulents today!