

Your front yard might already be telling you what to do. The lawn has thin spots, the sprinkler coverage is uneven, and the areas near the walk or driveway bake all afternoon. You're tired of paying for a look that never quite fits a dry climate.
That's where blue agave design earns its place. Done well, it replaces needy turf with structure, rhythm, and a plant that reads like sculpture from the street. Done badly, it turns into a collection of crowded rosettes, buried crowns, and awkward gaps a few years later.
Most guides stop at the inspiration photo. That's the easy part. The harder part is building a layout that still works after the plants mature, preparing for the day an agave blooms and dies, and keeping roots and heavy rosettes from creating problems near paving and foundations.
Envisioning Your Agave Oasis
You walk up to a front yard in August. The gravel is clean, the path is clear, and one blue agave holds the whole composition together from the street. Five years later, that same yard should still read that clearly. That is the standard.

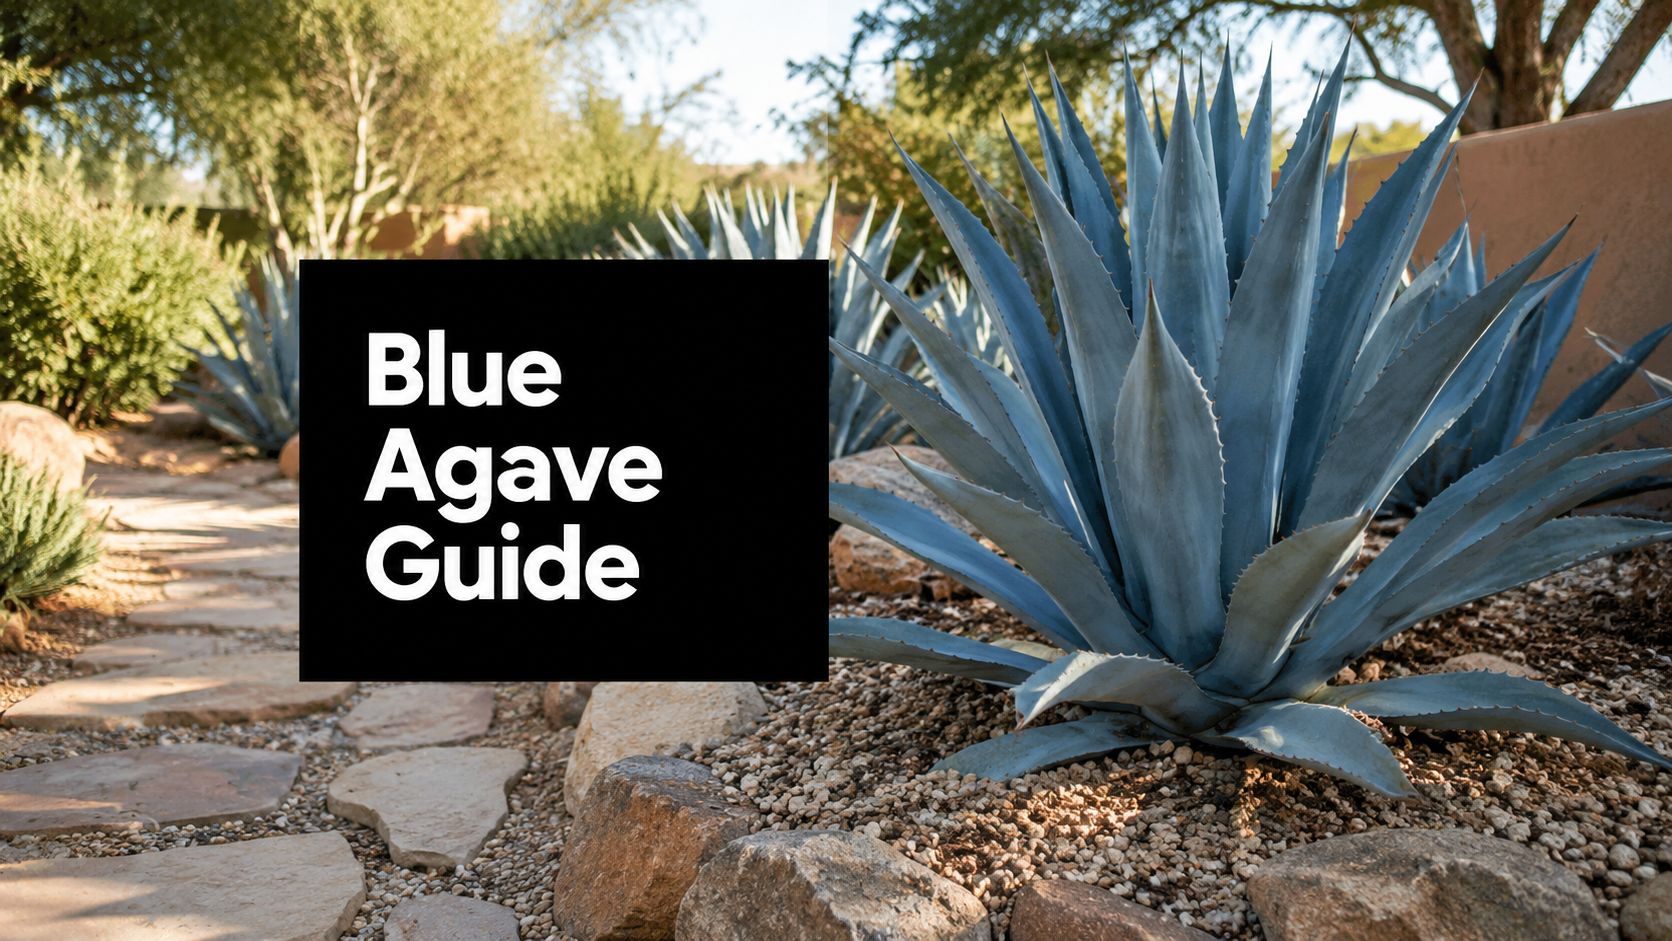
Blue agave works best as structure, not filler. The rosettes set the pace. Gravel, pots, boulders, and path edges should support that structure instead of competing with it. The strongest yards use fewer moves and repeat them well.
Pretty photos miss the hard part. A blue agave planting has to survive maturity, allow for the plant's eventual bloom and death, and stay far enough off paving that roots and expanding rosettes do not create repair work later. If the design does not answer those three issues at the start, it is decoration, not planning.
What a strong agave composition should feel like
The best agave gardens feel edited and calm. Form comes first. Texture comes second. Light finishes the job.
That last part gets overlooked. Blue agave has real presence at dusk if the placement is right and the lighting is deliberate. If your design includes a walk, entry, or sitting area, study examples of expert pathway and accent lighting so the plants keep their shape and shadow after sunset instead of flattening into the dark.
Restraint does more work than plant count.
I often see homeowners crowd three or four specimen plants into a bed that only needs one. It looks full on install day, then cramped within a few seasons. The fix is simple. Give the primary agaves room to mature, leave open gravel around them, and let negative space carry some of the design.
Make three decisions before you buy plants
Set the focal view first. Decide whether the main grouping is meant to read from the street, the front door, or an outdoor seating area. One yard can support more than one focal point, but only one should dominate.
Set your tolerance for maintenance next. A tight mix of agaves, grasses, cacti, and flowering perennials can look good, but it asks for more grooming and more judgment over time. If you want a cleaner, lower-work result, use a shorter plant palette and larger fields of mineral mulch.
Then choose the mood. Architectural and formal looks different from desert-natural. Both can be excellent. Problems start when the geometry of one style gets mixed with the planting habits of the other.
If winter cold is part of your design problem, build around species that can take it. A good starting point is this guide to cold-hardy agaves for challenging climates.
A well-planned agave yard usually looks sparse at first. That is not a flaw. It is what keeps the composition clear once the plants gain size and weight.
Site Analysis and Climate Considerations
A blue agave can look perfect for two years, then fail because the crown stayed wet through one cold spell or the roots were set too close to paving. That is why site work comes before plant buying. Pretty photos do not show the expensive part. The expensive part is correcting a bad location after the agave has size, weight, and sharp margins.
Start with climate fit. Blue agave handles heat, sun, and dry air well, but it is not a universal choice for every yard. In colder or wetter regions, use it only in protected spots or skip it and choose tougher species instead. If freeze damage is part of your reality, review these cold-hardy agaves for colder gardens before you commit the main focal planting to blue agave.
Sun matters, but heat reflection matters too. A west-facing wall can push growth hard and improve color, yet it can also scorch softer companion plants and increase glare near entries or seating. Check the site in morning, midafternoon, and late day. One side of a property may get clean all-day sun, while another bakes from reflected heat off stucco, stone, or concrete.
Soil usually decides whether the planting will last.
“Well-draining soil” is not a style phrase. It means water moves through the root zone fast enough that the crown does not stay damp after rain or irrigation. Sandy ground often gives you that for free. Compacted clay does not. The common mistake is digging a neat round hole in heavy soil, dropping the agave in low, and backfilling rich mix around it. That creates a sump. Water collects, roots stall, and rot starts at the base.
Check these conditions before installation:
- Drainage after watering: If water sits for hours, correct the grade or raise the planting area.
- Compaction near construction: Builder fill is often dense and sealed over from equipment traffic.
- Runoff paths: Avoid downspouts, swales, and any low point that collects stormwater.
- Distance from hardscape: Keep large agaves far enough from walks, walls, and drive edges that mature leaves and surface roots will not force a redesign later.
Root pressure is often overlooked in agave design. Blue agave is not a tree, but mature plants still occupy real horizontal space, especially in tight beds bordered by pavers or shallow footings. If you cram one against a path because it looks tidy on planting day, the leaves will eventually overhang the edge and the base can make maintenance awkward. Give the plant room now. It is cheaper than cutting back hardscape or removing a heavy specimen later.
Microclimates change the equation again. A courtyard may protect against frost but trap runoff. A side yard may stay colder because air settles there overnight. A gravel island by the driveway may be the hottest spot on the property and still be the right place for blue agave if drainage is sharp and pedestrian traffic is low.
Use a simple working map before finalizing the design:
| Site factor | Good for blue agave | Problem condition |
|---|---|---|
| Sun | Open, direct exposure | Long daily shade |
| Soil | Rocky, sandy, fast draining | Heavy, compacted, slow draining |
| Grade | Slight fall away from crown | Depressions that collect water |
| Placement | Open bed with airflow and clearance | Tight pocket near paving or wet foundation zones |
This section is where long-term success starts. It also sets up the two problems many guides ignore. Mature agaves need enough clearance that roots and leaves do not interfere with paving, and every specimen needs a replacement plan because one day it will bloom, decline, and come out. If the site cannot handle those realities, adjust the design before you plant.
Choosing Your Agaves and Companion Plants
A planting can look sharp on install day and still be headed for trouble if the plant mix has no discipline. I see this often with blue agave. One strong specimen goes in, then a few impulse buys follow, and the whole composition starts pulling in three directions.
Start by deciding what the agave is supposed to do. Anchor the front walk. Hold the corner of a gravel bed. Carry a container near the entry. Once that role is clear, choosing the right species and companions gets much easier, and it also forces a practical question many style-first guides skip. What will replace this plant after it blooms and dies?
Build a plant palette with a replacement plan
Blue agaves have presence already. They do not need a crowd around them.
Use a short plant list with repeated forms and clear contrast. In practice, that usually means one primary agave, one or two secondary structural plants, and one softer companion to break up all the hard edges. If every plant is bold, spiny, and silver-blue, the design gets monotonous. If every companion is lush, thirsty, and fast-growing, the agave starts looking stranded and the irrigation becomes a problem.

Repetition matters more than variety here. A restrained palette reads as intentional, holds up better over time, and makes replacement after bloom much easier because the design already has a logic you can repeat. If you need a broader short list of dry-climate companions, this guide to drought-tolerant plants for low-water gardens is a useful place to start.
Match the agave to the job
Blue agave is not one-size-fits-all. Large forms need open ground and real clearance. Smaller or less aggressive types fit foreground beds, pots, and tighter spaces where people pass close by.
| Plant role | What works | What usually fails |
|---|---|---|
| Main focal point | A large blue agave with open gravel and visual breathing room | Several specimen plants of similar size competing for attention |
| Secondary accent | A smaller agave or softer-edged form near an entry court | Spiny rosettes shoved close to doors, steps, or narrow walks |
| Texture contrast | Fine grasses, airy desert shrubs, and loose mounding perennials | Tropical foliage plants that want richer soil and frequent water |
| Pot planting | One strong rosette in a properly scaled terracotta or concrete pot | Mixed succulent bowls with weak structure and no long-term scale |
That last point gets ignored all the time. A pot can solve spacing problems near paving, but only if the container is large enough to look deliberate and heavy enough to stay stable.
Companion plants that make agaves read clearly
Good companions do one of three jobs. They soften the blade structure, add vertical contrast, or bridge the visual gap between gravel and a broad rosette.
- Soft-textured companions: Mexican feather grass, damianita, or other fine-textured dry-garden plants help the agave stand out without crowding it.
- Vertical accents: Ocotillo, hesperaloe, or upright cacti can give the composition height and keep a low rosette from feeling squat.
- Mounding forms: Compact shrubs and rounded perennials help tie the planting together, especially around larger specimens.
The common mistake is mixing agaves with plants that need wood mulch piled at the crown, richer soil, or regular summer irrigation. That is how rot, weak form, and awkward maintenance get introduced into an otherwise clean design.
Hard materials matter here too. If the agave sits near a sitting area or deck edge, plant selection should account for mature spread and safe access. The same planning logic used for decking designs for your garden applies to spiny plants. Leave enough room that leaves do not intrude into foot traffic once the rosette reaches size.
Choose species with the long term in mind
Some agaves offset freely and let you keep the composition going after the mother plant flowers. Others leave a cleaner architectural statement for years, then exit all at once. Neither is wrong, but the choice should be deliberate.
For projects that need continuity, I usually favor types that pup reliably or I place a second younger specimen nearby so the bed does not collapse visually after bloom. For tighter designs near paving, I avoid planting an oversized agave just because it looks dramatic in a nursery pot. That shortcut creates removal headaches later, and it can put pressure on adjacent hard surfaces if the base is too close.
A practical nursery-side note
When clients need a specimen-sized succulent for a dry garden, The Cactus Outlet is one source that carries agaves and other large-form plants suitable for rock gardens and container-focused layouts. That helps when the design needs mature presence from the start instead of waiting years for a small plant to fill its role.
Layout Templates for Popular Landscape Styles
You install a blue agave two feet off a walk because it looks tidy on day one. Three years later, the rosette is in the path, the points catch pant legs, and removal will involve cutting back a mature plant beside finished paving. Good layouts prevent that kind of expensive correction.
A strong planting plan has to read well now and still hold together after the agaves reach size, throw pups, or leave a gap after bloom. Pretty photos rarely deal with that second part. Good design does.
Analysts at Laidback Gardener's summary of design benchmarks recommend spacing major plants by mature size rather than container size, with about 1.5 times the mature diameter as a working rule. I treat that as a starting point, then adjust for blade length, foot traffic, and how difficult the plant will be to remove once established.

Modern minimalist
This style succeeds or fails on restraint.
Use one specimen agave as the focal point, then repeat one or two supporting forms only. Open gravel, strong geometry, and a short plant palette keep the rosette readable from a distance. If every corner gets a pot, boulder, accent grass, and smaller succulent, the whole composition starts to look nervous.
I also leave a clear replacement zone in this template. If the main agave flowers and dies, the design needs room for a pup or successor plant without tearing apart the whole bed.
Natural xeriscape
This template is looser, but it still needs control. The goal is clustered placement that feels settled, not random scattering.
Set agaves in small groups with shrubs, grasses, and rock so each rosette still shows its outline. Companion plants should soften the edges, not swallow the agave. For that reason, I avoid stuffing fast growers too close to the crown just to make a new bed look full.
Material choice matters here too. Keep gravel, stone, edging, and paving to a tight palette. Too many surface changes make a dry garden look pieced together and usually add maintenance.
Desert courtyard
Courtyard work is about views and movement. Place the agaves where people pause, turn, or look out from a seat, not just where there is empty soil.
One agave near the entry and one visible from a chair or window is usually enough. Lower companions should frame the rosette rather than compete with it. If the space includes a platform, threshold, or low deck, reviewing decking designs for your garden helps when you are working out how paving and planting meet without creating awkward leftover strips.
Roots need planning in enclosed spaces. Agave roots are not the same threat as a large tree, but planting too close to edging, shallow walls, or tightly jointed paving can still create pressure points and make future removal much harder than clients expect.
Southwestern charm
This approach allows more warmth and texture. Terracotta, decomposed granite, weathered stone, and broader plant mixes all fit comfortably.
Blue agave still gives the composition its backbone, but the mood is softer than strict modern work. Clay tones and rustic paving pull out the blue-gray foliage well. I keep the agave count lower than clients usually request. One or two well-placed rosettes read better than five medium plants fighting for attention.
A field-ready spacing guide
Use these rules when staking out the bed before anyone digs:
- Main specimens: Measure spacing from mature width, not the nursery pot.
- Plants near walks or seating: Set the crown back far enough that full-size leaves will not intrude into circulation.
- Grouped agaves: Leave enough room for each rosette to read as its own form after expansion or pupping.
- Beds against paving or walls: Leave access for pruning, cleanup, and eventual removal after bloom.
- Fast-draining zones: Keep agaves in the sharpest-draining part of the bed, and use a cactus and succulent soil mix suited to agaves where native soil stays heavy.
If the plan feels slightly spare at install, that is often a sign the spacing is correct. Agaves reward patience. Crowded designs punish it.
Installation Hardscape Soil and Planting
A blue agave can look perfect on install day and still fail within a year if it is set too low, boxed in by paving, or dropped into rich soil that stays wet. I see that combination often. The plant is healthy at purchase, then the install creates the problem.

Plant high or expect trouble
Blue agaves need the crown set above surrounding grade so water sheds away from the base instead of collecting around it. In heavy soil, I often leave a large portion of the upper root ball exposed and taper gravel or mineral soil up to it. The goal is simple. Keep the crown dry and the roots oxygenated.
Burying the plant for a cleaner finished look is a common contractor mistake. So is packing mulch or gravel tight against the base. Both choices increase rot risk, especially after a wet spell or with automatic irrigation nearby.
A practical installation sequence
Good agave installation is straightforward, but it rewards precision.
- Stage the plants before digging. Check the composition from the approach, from inside the house, and from any seating area that matters.
- Build the grade first. Agaves should sit on a slight rise, shoulder, or berm, not in a low pocket.
- Dig wider than the root ball, not deeper. Depth mistakes are harder to fix once the plant is set.
- Set the plant high. The crown should finish proud of grade, with runoff moving away from it.
- Backfill with a fast-draining mineral blend where native soil stays heavy. A practical reference for that is this guide to cactus and succulent soil mix for drainage-sensitive plants.
- Firm the soil enough to support the plant. Do not ram it so hard that drainage drops off.
- Top-dress with gravel carefully. Keep the crown clear.
- Water once to settle the root zone. Then let the soil dry down between irrigations.
One trade-off matters here. Rich amended soil can speed early growth, but it often holds more moisture than agaves want. In clay ground, I would rather improve drainage and accept slower establishment than push soft growth and fight rot later.
Hardscape choices that support the planting
The paving and edging around agaves matter almost as much as the soil. Dry-looking materials usually perform best because they suit both the plant and the maintenance reality. Decomposed granite, angular gravel, steel edging, stone, terracotta, and simple concrete all pair well with blue agave.
Leave physical access around major specimens. That is not just about appearance. It is about removal, cleanup, and replacement when the plant eventually blooms out and dies. Many guides stop at the install photo. Good agave work plans for year twelve, not just week two.
If the job also includes fencing, patio edges, or a rebuilt yard, broad planning resources like this 2026 guide for Ottawa backyard projects can help with work sequencing before planting begins.
The root question most guides skip
Blue agave roots are not usually the kind of aggressive roots that crack a sound foundation from several feet away, but they can create real problems when they are planted too close to paving edges, drain boxes, irrigation valves, or tightly jointed stone. The bigger issue is service access. Once the rosette matures, even a routine removal becomes awkward if the plant is trapped between hard surfaces.
I handle that conservatively. Keep large specimens out of narrow side yards, avoid setting them directly over irrigation hardware, and do not wedge them against steps, walls, or path edges that will need to stay intact. If a mature agave blooms and dies in a tight slot, the replacement cost is not just the plant. It is the labor to cut it apart and protect everything around it.
That long-term thinking is what separates a pretty install from one that still works years later.
Long-Term Care and Post-Bloom Strategy
The biggest long-term mistake in blue agave garden design is treating the installed garden like a static composition. It isn't. Every agave garden is a timed composition.
Routine care stays fairly straightforward. Keep irrigation aligned with a dry-climate planting approach, remove damaged lower leaves cleanly, and inspect plants often enough that pests or mechanical damage don't go unnoticed. The harder part is planning for the agave's life cycle before it forces the issue.
Plan for the bloom from the beginning
There's a major guidance gap on post-bloom replacement, even though agaves are monocarpic and die after flowering, which leaves homeowners without actionable advice for 10 to 25 year lifecycles according to the gap identified in this discussion of bloom management in designed landscapes.
That should change how you design from day one.
If a specimen agave is the anchor of the whole front yard, ask yourself what happens when it blooms. Can you remove it without tearing up nearby paving? Is there visual backup nearby so the composition doesn't collapse overnight? Have you left enough room to replant the same form, or would a successor species fit better by that point?
A post-bloom response that works
When a mature agave sends up its bloom stalk, don't treat it as a surprise failure. Treat it as a scheduled transition.
Use this sequence:
- Protect access first: Make sure crews can reach the plant without crushing companions or damaging edging.
- Decide whether the stalk has design value: In some settings, the bloom stalk reads as a temporary architectural feature.
- Remove the spent plant cleanly: Once decline is clear, extract the rosette without widening the original bed unnecessarily.
- Evaluate the offsets: If the plant produced pups, select only the strongest and best-positioned offsets for reuse.
- Reset the composition: Replace like-for-like if the design depends on that exact form. Change species if the site has changed or the original placement proved awkward.
Keep the design intact over time
The best agave plantings include some redundancy. That doesn't mean copying the same specimen everywhere. It means the garden can absorb one major plant loss without looking unfinished.
A practical approach is to pair one dominant agave with a secondary structure layer. That might be repeated smaller agaves, upright desert forms, or a hardscape focal point such as a pot or boulder grouping. Then, when the primary plant exits, the whole yard doesn't lose its center of gravity.
Blue agave design succeeds when you think like a designer and a maintenance crew at the same time. The installation gets the attention, but the future removal is what separates a pretty project from a durable one.
If you're building or refreshing a dry garden and need specimen agaves, companion succulents, or planting guidance that fits a real-world garden design, The Cactus Outlet is a practical place to compare plant options and care information before you buy.